Download PDF
Download page Creating a Contact Import Job.
Creating a Contact Import Job
A contact import job helps you to automate the process of importing the contact records from a file into Contact Manager on the LiveVox Portal (LVP).
Before You Begin
Ensure the following:
- An appropriate contact input filter is created. For more information, see Managing an Input Filter.
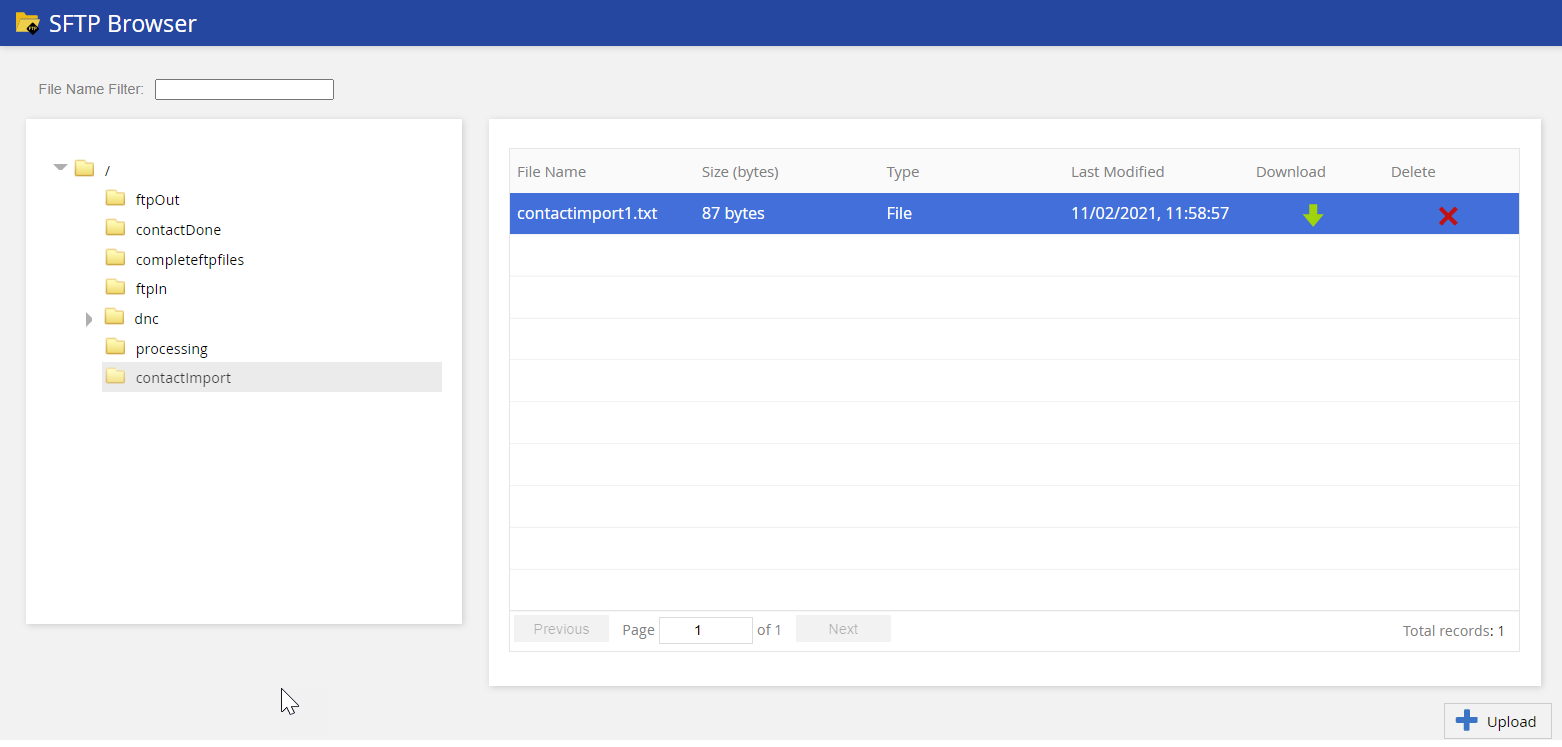
- The contact file you want to import is uploaded to the contactImport folder of the LiveVox SFTP site. For more information, see Uploading Files Using SFTP Browser.
To create a contact import job:
- On the Configure tab of LVP, click Contacts > Contacts.
The Contacts window appears. - On the Import/Export Jobs tab, click Add.
The Jobs window appears. - In the Job Type field, select Contact Import.
On the General tab, specify values in the following fields.
Field Description File Name Enter the pattern of the name of the file containing the contacts that you want to import. Ensure that the pattern is unique and that the name of your file contains the same pattern.

- While you can also enter the exact name of your file (including the file extension), entering the filename pattern instead can minimize the number of import jobs that are required to import contacts from multiple files that may use the same data format but different file naming conventions.
- The File Name field is not case sensitive and it accepts wildcards. For example, if the actual name of a file is ContactImport2020.txt, some of the values you can enter in the field for filename patterns are:
- *2020.txt
- Contactimport*
- *import*
Enabled Enable the checkbox to activate the job. Notification Email List Enter the email addresses to which you want to send a success or failure notification for each import attempt.
Separate multiple email addresses with a comma (,).
File Format Select the appropriate contact input filter.
This field contains the contact input filters created in the Input window. For more information, see Input Filter.
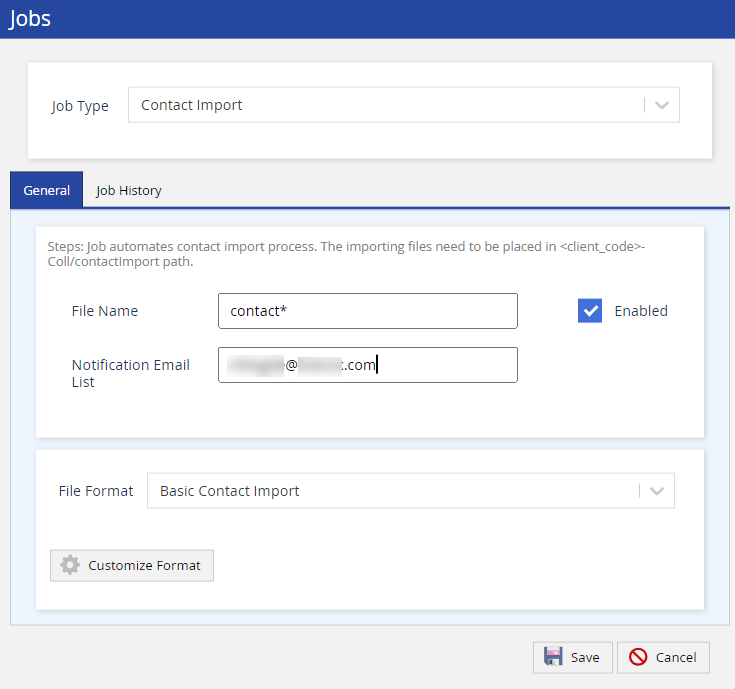
If you want to customize the file format, use Customize Format.
For more information, see Importing Contacts.
After you customize the format, the Data Format section appears on the General tab. This section displays the fields that will be imported.
- In the Jobs window, click OK.
The contact import job appears on the Import/Export Jobs tab. - Click Save.
A message stating that the contact import job is created appears. - After five minutes, refresh the window.
All the contacts in your file are imported to LVP, and they appear on the Contacts tab of Contact Manager.
- You can create a maximum of six contact import jobs.
- Contact import jobs are run automatically every four minutes.
More on File Name Patterns
- An asterisk ( * ) in the pattern indicates a wildcard at the beginning or end of the pattern. For example, the pattern *contacts indicates that the file name ends with contacts.
- A question mark ( ? ) in the pattern indicates a character placeholder, regardless of the type of character and its casing (that is, lowercase or uppercase). For example, the pattern ????_* indicates that the file name begins with four characters that are followed by an underscore ( _ ).
- A pipe ( | ) in the pattern indicates an OR logical separator. For example, the pattern email*|sms*|*voice indicates one of the following:
- The file name begins with email.
- The file name begins with sms.
- The file name ends with voice.
Managing a Contact Import Job
On the Import/Export Jobs tab:
- You can modify an import job by double-clicking the row displaying the job.
- You can view the history of an import job by double-clicking the row displaying the job and then clicking the Job History tab, which displays the following columns:
- Start Time: The time when the job started.
- End Time: The time when the job ended.
- Duration (in secs): The time taken to complete the job, in seconds.
- Status: The status of the job (that is, Success or Failure).
- Message: More information about the status of the job (for example, Total records exported: 1 or Job Failed).
- You can delete an import job by hovering over the row displaying the job and then clicking the close icon
 .
. - After you create, modify, or delete an import job, click Save.