Download PDF
Download page Managing Customer Profiles.
Managing Customer Profiles
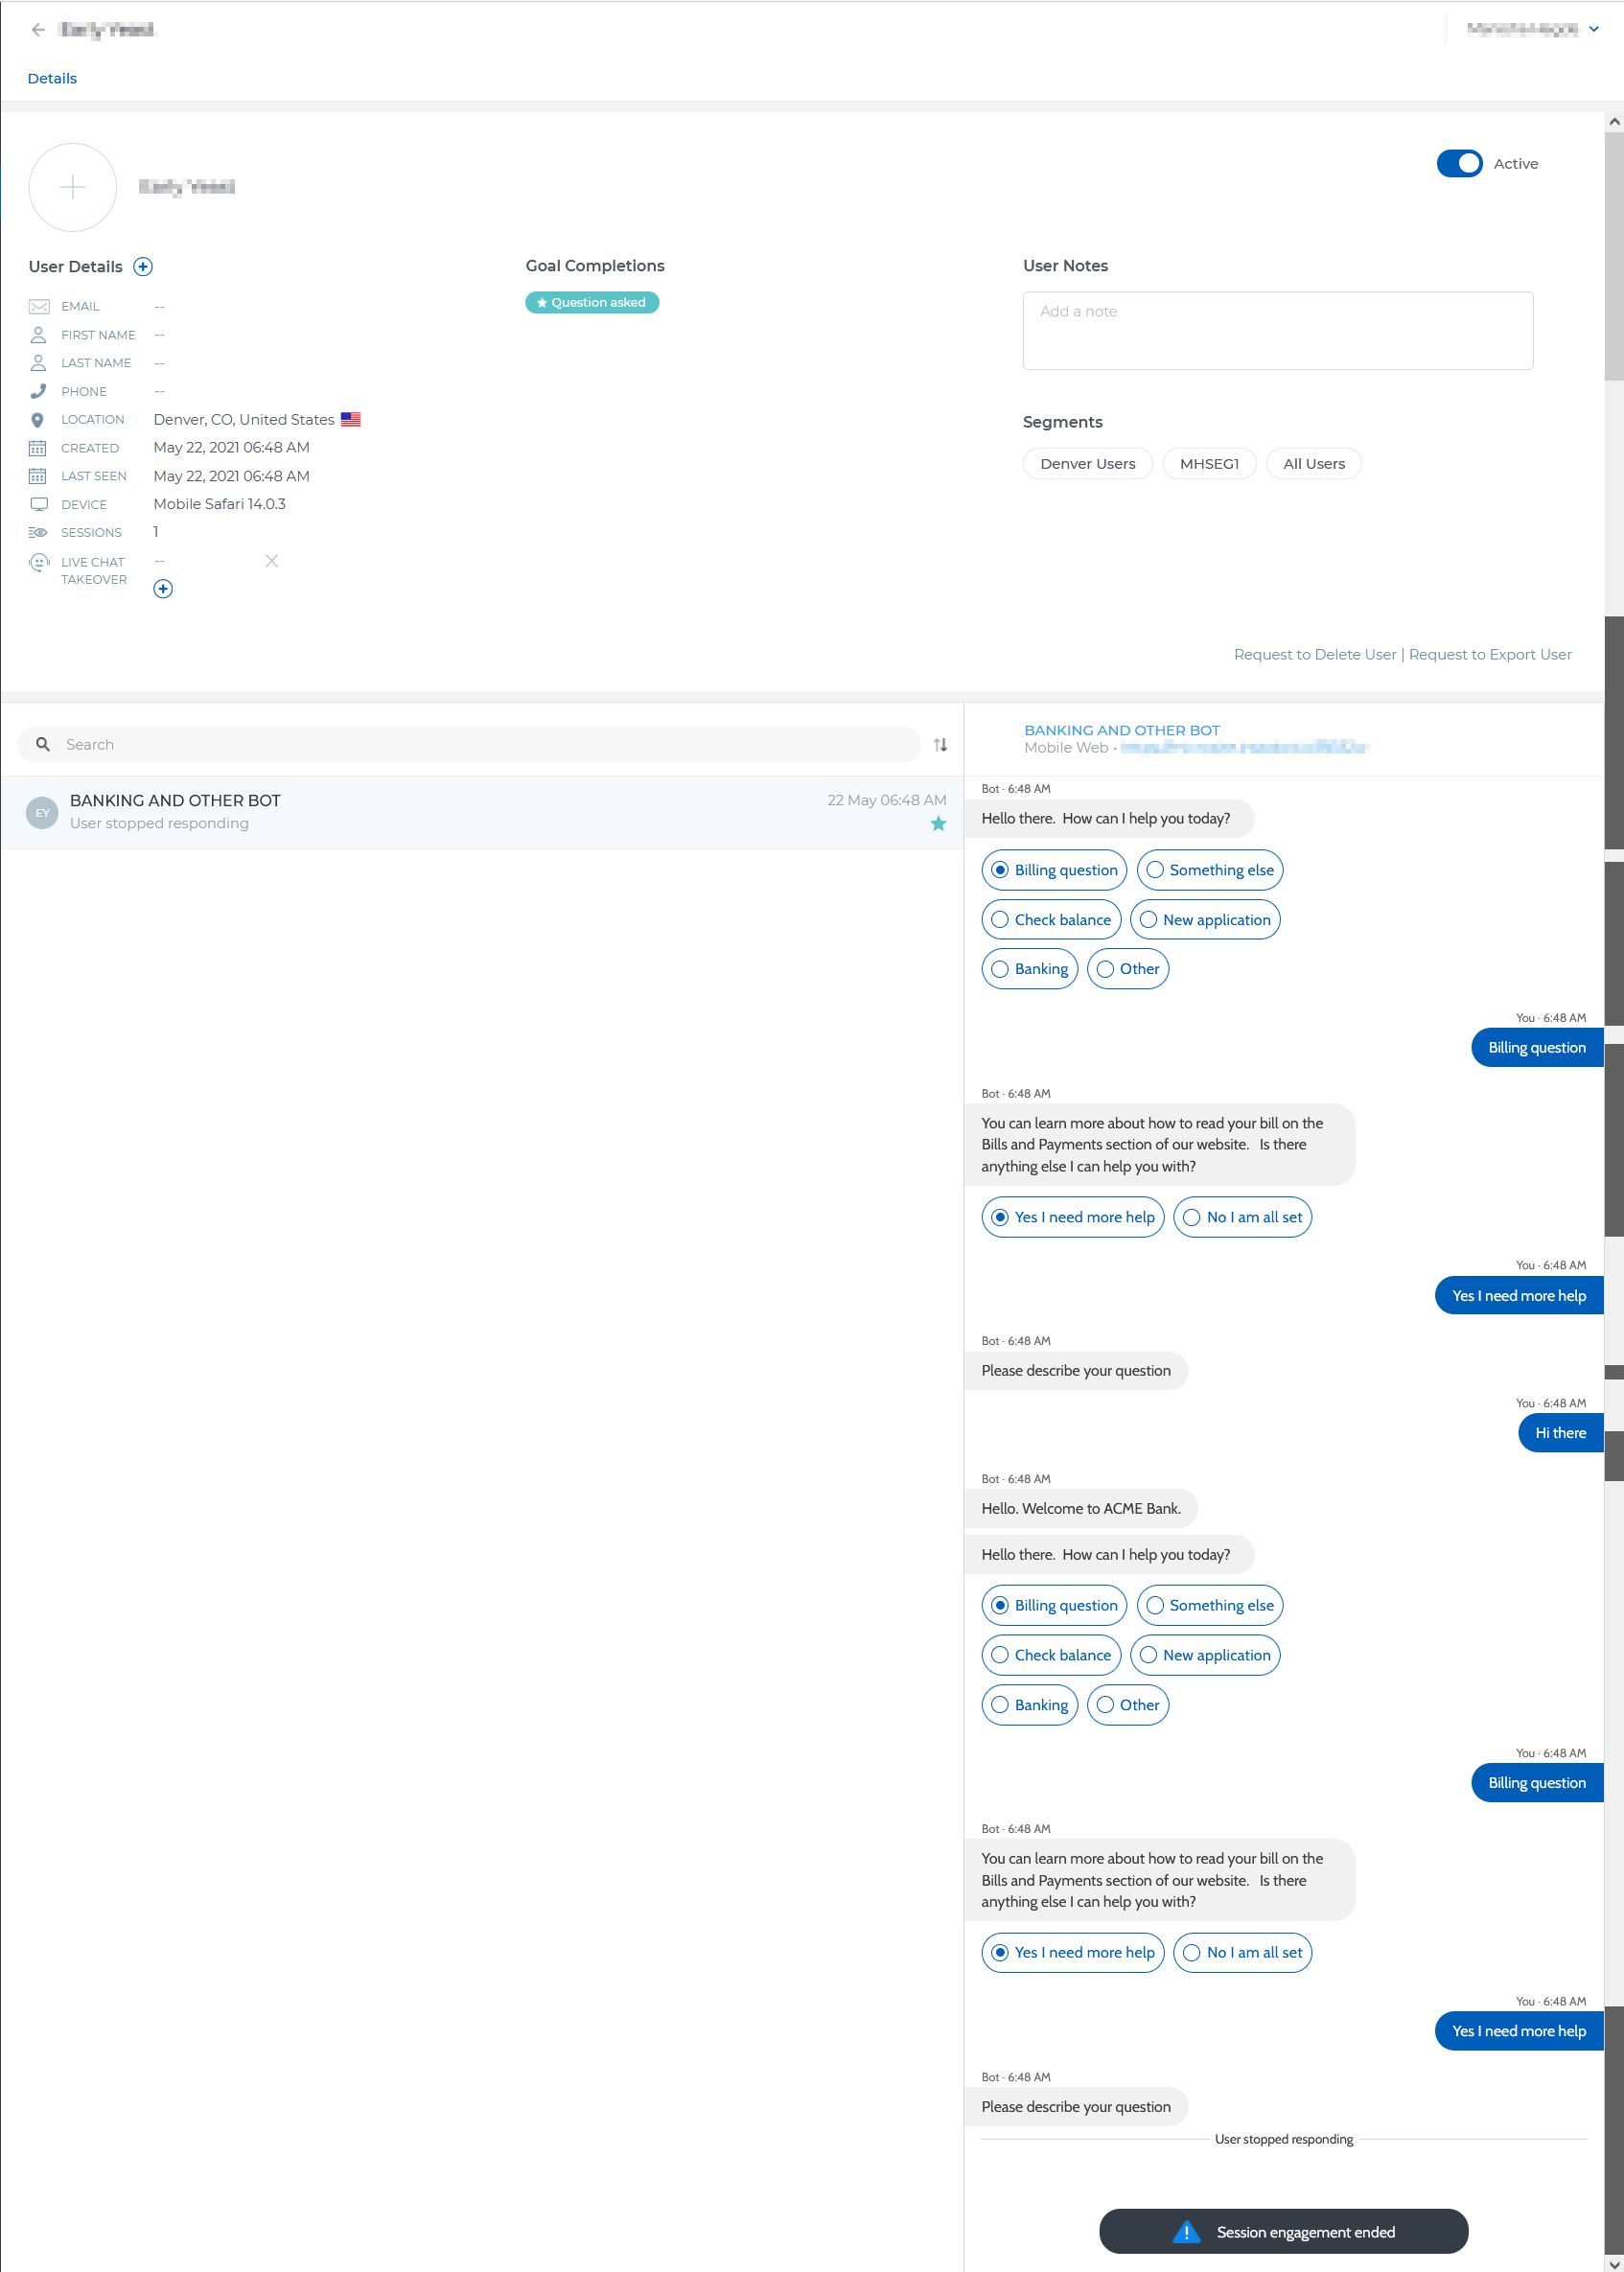
Viewing a Customer Profile
To view the profile of a customer:
In the left pane, hover over Users, and then click Users.
The Users window displaying the All users tab appears.For information about the All users tab, see All Users Tab.
- In the table, in the Username column, select the name of the customer whose profile you want to view.
The Details window appears.
- You can activate or deactivate the profile by using the Active option. You can view a deactivated profile by using the Archived option on the Status filter menu of the All users tab.
- You can add a picture to the profile by clicking the circle next to the name of the customer.
- You can add or modify the information by clicking the pencil icon
 , which appears when you hover certain fields. If you want to add information to a field that is not displayed:
- Next to the User Details label, click the Add a property icon
 .
.
The Select a property drop-down list box appears. - In the Select a property box, select the field in the Select a property box.
If the field that you want to select does not exist, you can create it by using the Create a new property option in the Select a property box. For more information, see Properties.
- Next to the User Details label, click the Add a property icon
- You can request the profile to be exported by clicking Request to Export User. This action enables you to send an email to export the profile.
- You can request the profile to be deleted by clicking Request to Delete User. This action enables you to send an email to delete the profile.
- After you modify the profile, click Save.
Customer Details
The following table describes the fields and sections that appear in the Details window (when viewing a customer profile).
Some sections that are specified in the following table (for example, Goal Completions or bot sessions) do not appear if they are unavailable.
| Field | Description |
|---|---|
| User Details | |
| Email address of the customer. | |
| FIRST NAME | First name of the customer. |
| LAST NAME | Last name of the customer. |
| PHONE | Phone number of the customer. |
| LOCATION | Location of the customer. |
| CREATED | Date and time when the customer's profile was created, represented in the time zone specified on your profile. For information bout how to modify your profile, see Managing User Profiles. |
| LAST SEEN | Date and time of when the customer last engaged with a bot, represented in the time zone specified on your profile. |
| DEVICE | Browsers or services that the customer used to engage with bots (for example, Firefox 89.0 or WhatsApp). |
| SESSIONS | Number of bot sessions in which the customer engaged. |
| LIVE CHAT TAKEOVER | Indicates if a live agent handled any bot session. |
| Section | Description |
| Goal Completions | Bot goals that the customer completed. For more information, see Goals. |
| User Notes | Notes about the customer. You can add a note in the Add a note box. |
| Segments | Segments to which the customer belongs. You can view a segment by clicking it. For more information, see Segments. |
| Bot sessions | List of bot sessions in which the customer engaged, along with their end time stamps represented in the time zone specified on your profile.
|
| Bot conversation | Entire conversation for the bot session you select in the previous section. This section also contains the name of the associated bot and the platform they used (for example, Desktop or Mobile Web). |
Managing Multiple Customer Profiles
You can simultaneously activate, deactivate, group, or delete the profiles of multiple customers. To do so:
- In the left pane, hover over Users, and then click Users.
The Users window displaying the All users tab appears. - In the table, select the checkboxes next to the names of the customers whom you want to manage.
The following buttons appear:- Create segment
- Active
- Archive
- Delete
As required, click one of the buttons.
If you have clicked Active or Archive, the changes are reflected after at least five minutes.
- If you have clicked Create segment, in the Create segment window, specify values in the following fields, and then click Confirm:
- Enter segment name: Name to identify the segment.
- Segment description: Description of the segment.