Download PDF
Download page All Users Tab.
All Users Tab
You can view the list of customers who have interacted with bots (that is, bot users) and their profiles on the All users tab of the Users window. The Total subtab on the All users tab contains a list of all bot users. The All users tab also contains subtabs that represent bot goals (for example, Email Collected) to enable you to view a list of users who have completed those bot goals.
- Some of the columns that appear in the table represent the user properties. For information about user properties, see Properties.
- For information about bot goals, see Goals.
- The Last Seen column in the table displays when the customers were last seen, how many bot sessions they had, and the browser or mode they used to interact with bots.
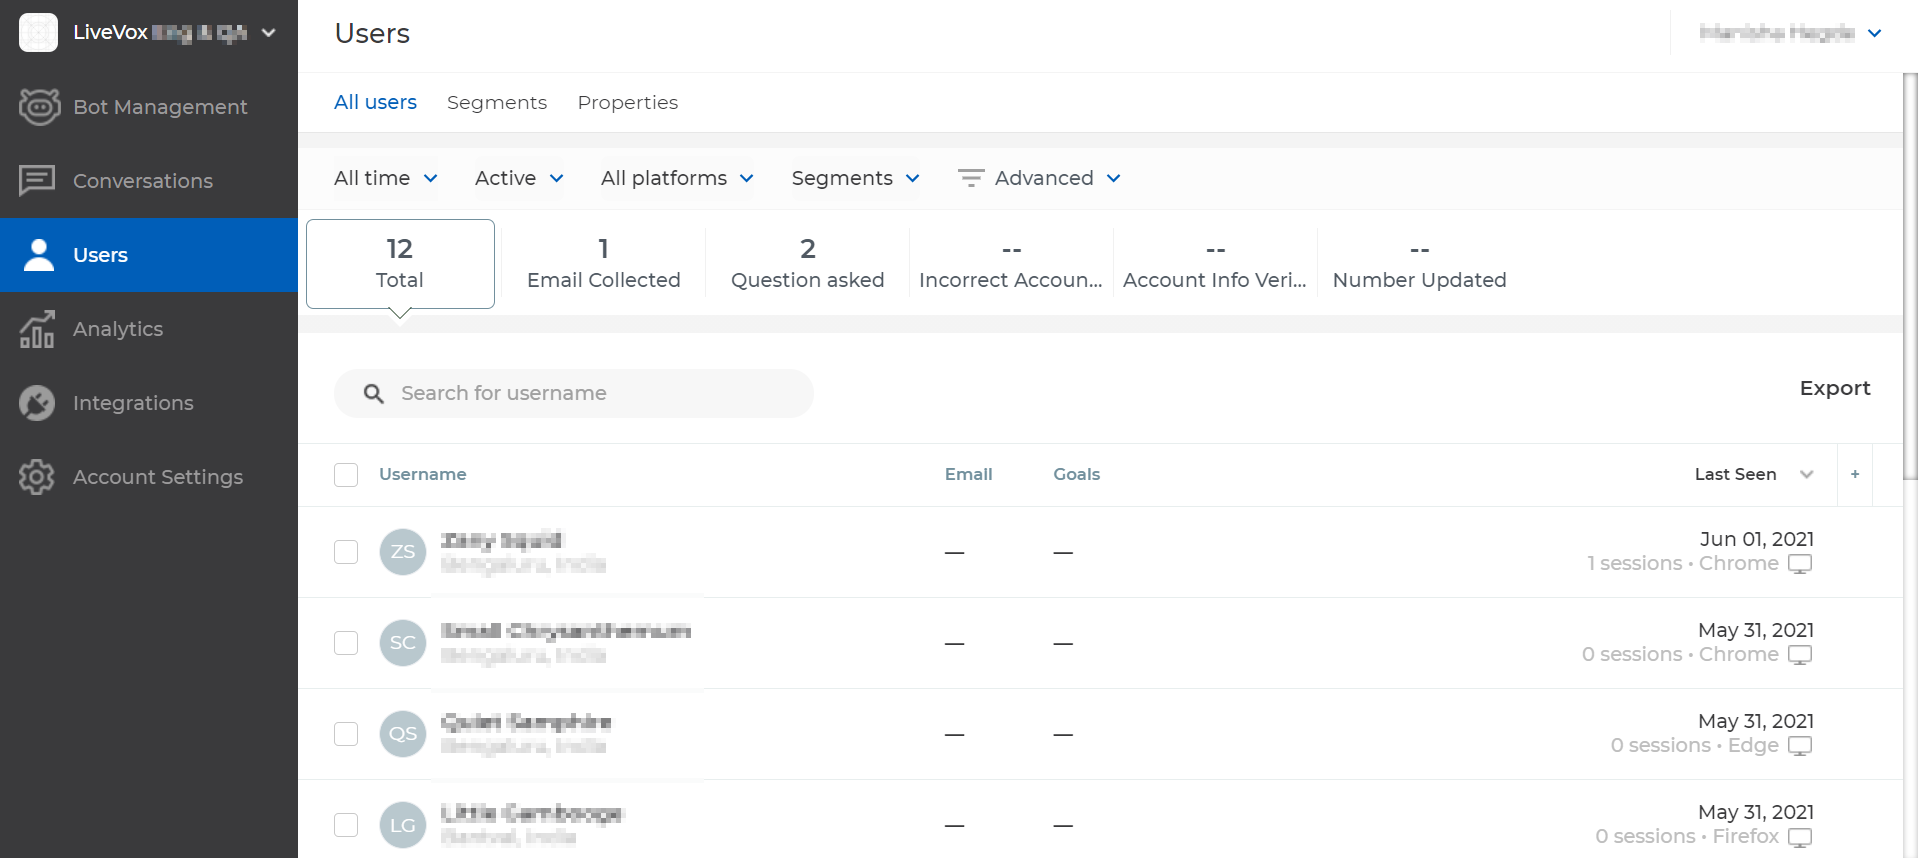
You can search for a customer in the table by entering their partial or full name in the Search for username box and then pressing Enter.
Filter Menus
The following table describes the menus that you can use to filter the customers on the All users tab.
The name that appears when you open a menu on the All users tab has been used in the following table to identify a filter menu (for example, Created).
| Filter Menu | Description |
|---|---|
| Created | Filters customers based on when they interacted with the bots. On the Created menu, click one of the following options:
|
| Status | Filters customers based on their status. On the Status menu, click one of the following options, and then click Update:
|
| Platforms | Filters customers based on the platforms they used. On the Platforms menu, select the All platforms checkbox, the Web checkbox, or both, and then click Update. |
| Segments | Filters customers based on segments. For more information, see Segments. On the Segments menu, select the All segments checkbox or the checkboxes next to the required segments, and then click Update. |
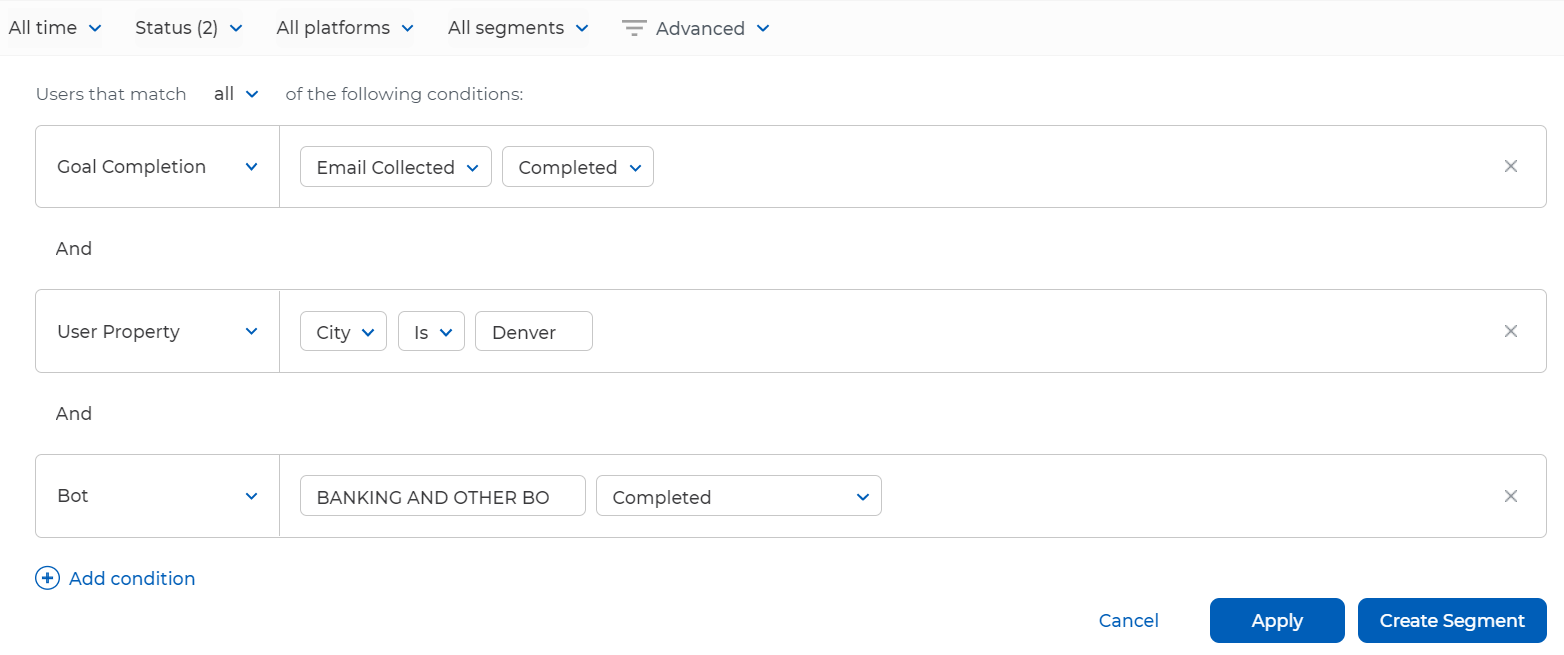
| Advanced | Filters customers based on whether they completed bot goals, their user properties, or how they engaged with bots. When you click the Advanced menu, a section appears to enable you to add conditions. To add a condition:
|
Customizing the All Users Table
You can customize the table on the All users tab to display only the columns you want.
To customize the table:
- If you want a column to appear in the table:
Click the plus icon
 .
.
A list of column names appears.You can search for a column name by entering its partial or full name in the search box.
- Select the name of the column that you want to be displayed in the table.
- If you do not want a column to appear in the table, hover over the name of the column, and then click the close icon
 .
. - If you want a column in the table to be replaced with a different column, hover over the name of the column, click the pencil icon
 , and then select the column that you want.
You can sort the values in a column in ascending or descending order by clicking the name of the column.