Filtering Contacts
Performing a Basic Search
You can filter the contacts in Contact Manager based on the system and custom fields of a contact record.
- On the Config tab of the SmartReach portal, click Contacts > Contacts.
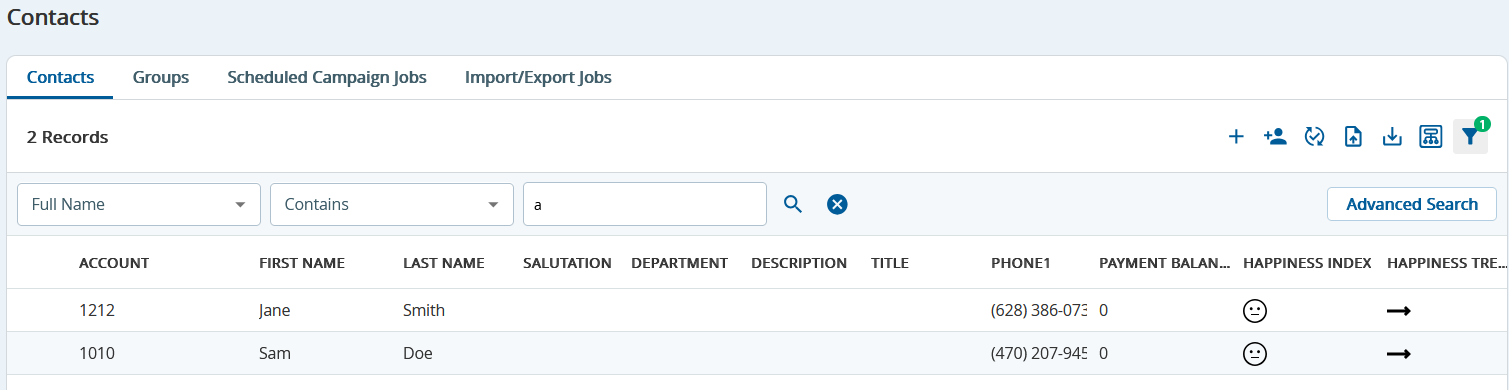
The Contacts window appears. - On the Contacts tab, in the Search field, select the field by which you want to filter the contacts.
In the box next to the Search field, select the search condition.
If applicable, in the box next to the Search field, specify the search condition or value.

For certain search conditions (for example, Agent Not In), the ellipsis icon
 appears next to the box to enable you to specify the criteria.
Press Enter or click the magnifying glass icon to run the search
 .
The contacts that meet the specified filter criteria appear on the Contacts tab.

Starting from LV19, you can search and filter contacts based on the Happiness Index values to create campaigns. You can also identify, segment, or branch contacts for special outreach campaigns or route them to specialty agents.
Demo
For more information, see the Search for a Contact in Contact Manager demo:
Advanced Search
You can filter the contacts in Contact Manager by creating an advanced filter that uses conditions and logical operators to develop the filter criteria. An advanced filter can be used to fetch the contacts that you want to export or the contacts that you want to include in a campaign.
You can also select a segment that you have created. For information about creating segments, see Segmentation.
Example
Suppose that you want a list of contacts that meet the following conditions:
- The primary phone number of the contacts starts with 317,
and - The agent team assigned to the contacts has the ID 16101,
and - Either the payment balance of the contacts is more than $30 or the account due date of the contacts is today.
You can create an advanced filter with these conditions and run the filter to obtain the list of contacts that meet the conditions.
Using Advanced Search Filter
You can add rules in Advanced Search by defining search parameters manually or by using the Visual Builder.
Option: 1
The following steps explain how to add rules without using the Visual Builder:
- On the Config tab, click Contacts > Contacts.
The Contacts window appears. - On the Contacts tab, click the Advanced Search option.
The Advanced Search window displaying the General and Sort Output tabs appears. On the General tab, click Add Rule.
Select the criteria for your rule. For example, First Name Contains John.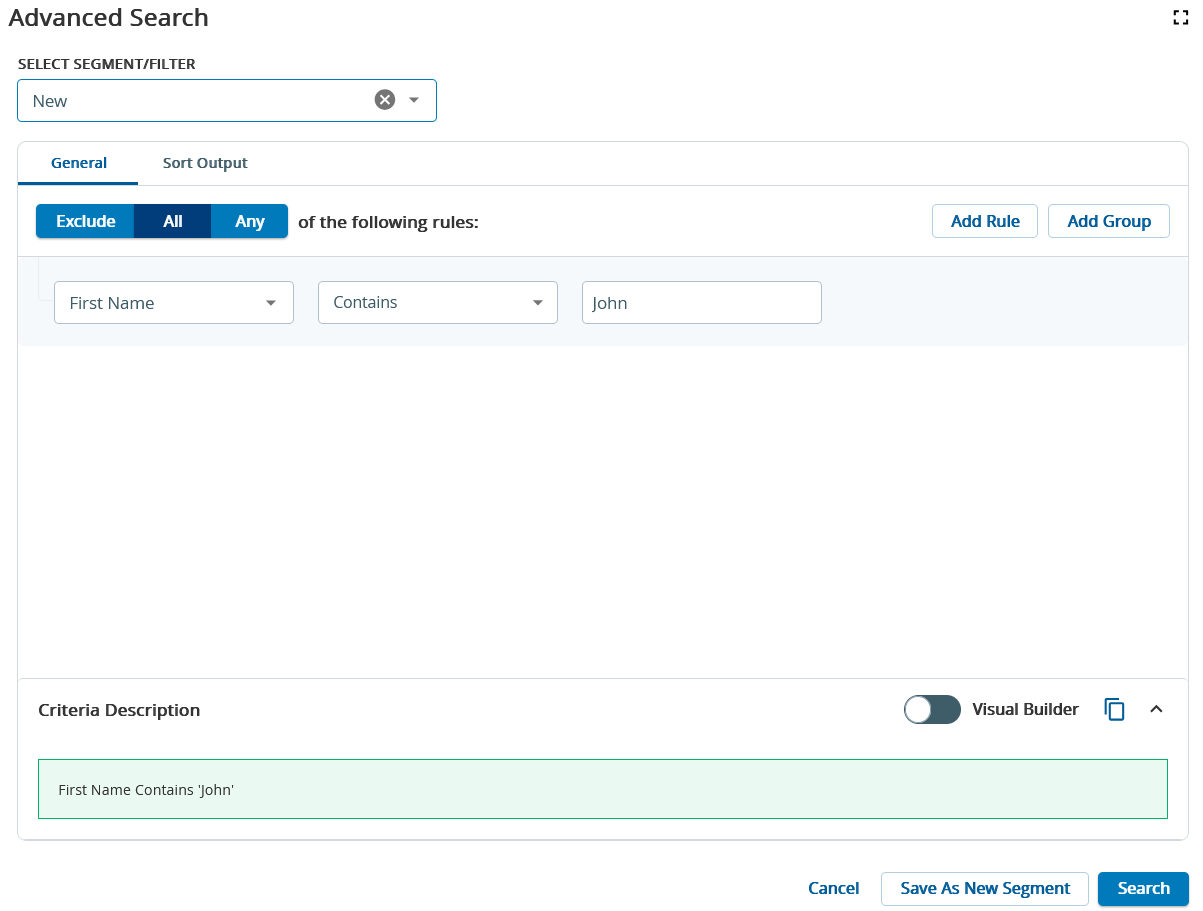
If you enable the Visual Builder toggle, the selected criteria appear in Visual Builder.
- After you have specified the required number of conditions, you can choose one of the following:
- Click the Search button to run the search.
The search results appear based on the criteria you defined.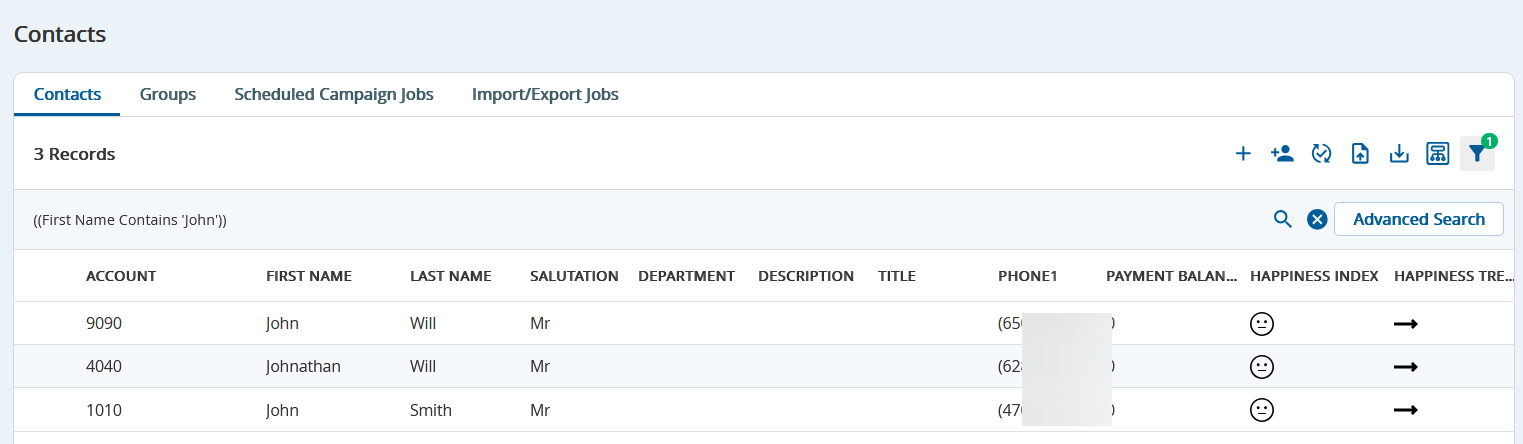
Important
Filters cannot be saved.
- Click Save As New Segment.
The Save New Segment window appears.
- Click the Search button to run the search.
In the Name field, enter a name to identify the segment, and then click Save.
The segment is created. It appears as an option in the Segmentation window. For more information, see Segmentation.
Option: 2
The following steps explain how to add rules by using the Visual Builder:
- On the Config tab, click Contacts > Contacts.
The Contacts window appears. - On the Contacts tab, click the Advanced Search option.
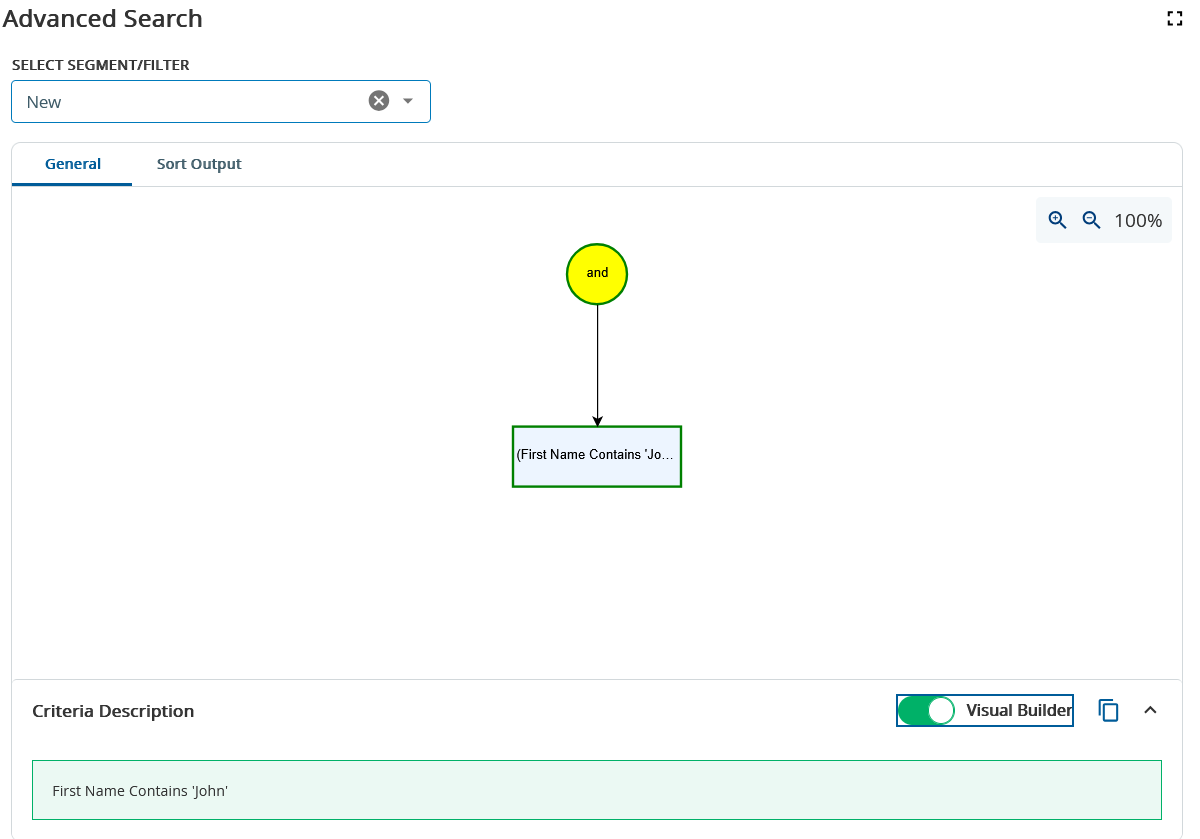
The Advanced Search window displaying the General and Sort Output tabs appears. - Enable the Visual Builder toggle to view the visual representation of your search criteria.
- Point to your mouse to the center of the circle.
An arrow appears inside the circle.
- Drag the arrow.
The Add Rule window appears.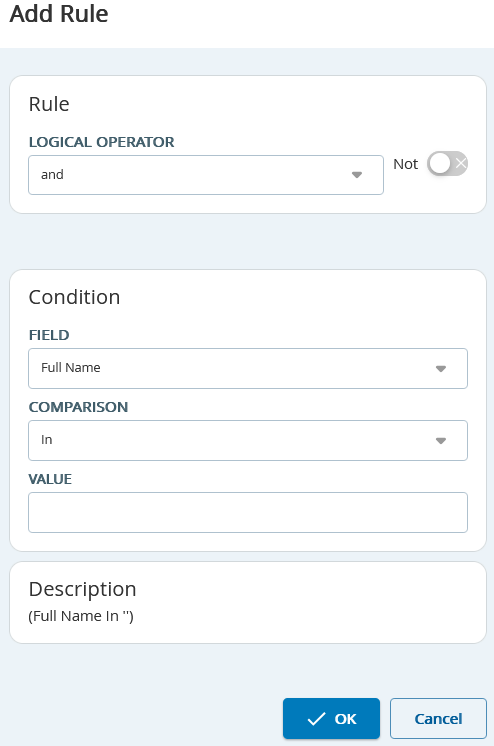
- Specify the conditions for the filter:
- If required, in the Logical Operator field, select an operator for the condition.
- In the Field drop-down list, select a field for the condition. For example, First Name.
In the Comparison field, select a condition. For example, Contains.
Depending on the field you selected for the condition, the Comparison field provides a Regex operator option that you can use to find information through pattern match. A regular expression finds information by searching for a match of a specific pattern.
If applicable, in the Value field, enter a value for the condition. For example, John.
For certain search conditions, the ellipsis icon appears (in place of the Value field) to enable you to specify the criteria.
Click Ok.
The filter appears as a graph on the General tab.
On the General tab, logical operators are represented by a circle, and conditions are represented by a rectangle.
- Click Search.
The search results appear based on the criteria you defined.
Important
Filters cannot be saved.
(Optional). Hover over the circle, drag the arrow to where you want it on the General tab, and then specify another condition for the filter as described earlier.

- You can specify more conditions for the filter.
- You can modify an operator or a condition by double-clicking the respective circle or rectangle.
- You can minimize or maximize the graph by clicking the magnifying glass icons (
 or
 ).
- You can delete an operator or a condition by hovering over the respective circle or rectangle and clicking the close icon
 .
- You can specify more conditions for the filter.
If you want to define the sorting of the column values for the filter:

Ensure that the Filter Name field displays the name of the filter for which you want to define the sorting.
- On the Sort Output tab, click the + icon.
The Add Field window appears.
- In the Field field, select the name of the column for whose values you want to define the sorting.
- Select one of the following options:
- ASC: Sorts the values in the column in ascending order
- DESC: Sorts the values in the column in descending order
Click OK.
The name of the column appears in the Sort By column on the Sort Output tab.
You can define the sorting for more columns by using Add.
- On the Sort Output tab, click the + icon.
- After you have specified the required number of conditions, you can choose one of the following:
- Click the Search button to run the search.
The search results appear based on the criteria you defined. - Click Save As New Segment.
The Save New Segment window appears.
- Click the Search button to run the search.
In the Name field, enter a name to identify the segment, and then click Save.
The segment is created. It appears as an option in the Segmentation window. For more information, see Segmentation.