Creating Campaigns Using Segmentation
The Segmentation feature helps you filter your customers based on specific criteria and design targeted campaigns for customer groups. You can create a campaign or schedule campaigns using segments and an Advanced Segmentation template. This enables you to use Segmentation to filter your contacts and then apply an Advanced Segmentation template to the campaign. A Segment is a group of contacts that meet the defined criteria. The Advanced Segmentation feature enables you to separate all the contact records into multiple groups based on the defined criteria. 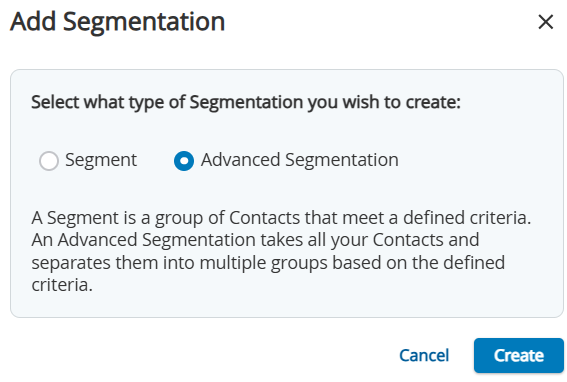
- A segment is a group of customers who match criteria that you define, for example, you can contact customers whose payment due dates are approaching.

To create a segment, you must use the data that is stored in Contact Manager. If the information is not in Contact Manager, you cannot use it in a segment.
- An Advanced Segmentation template automatically divides your entire customer base into multiple segments based on your specified criteria. Advanced Segmentation supports both Contact Manager data and uploaded campaign files.
- Criteria/Rules contain parameters through which contact records are filtered into a segment.
To use the Segmentation tool, select Configure > Campaigns > Segmentation from the navigation panel.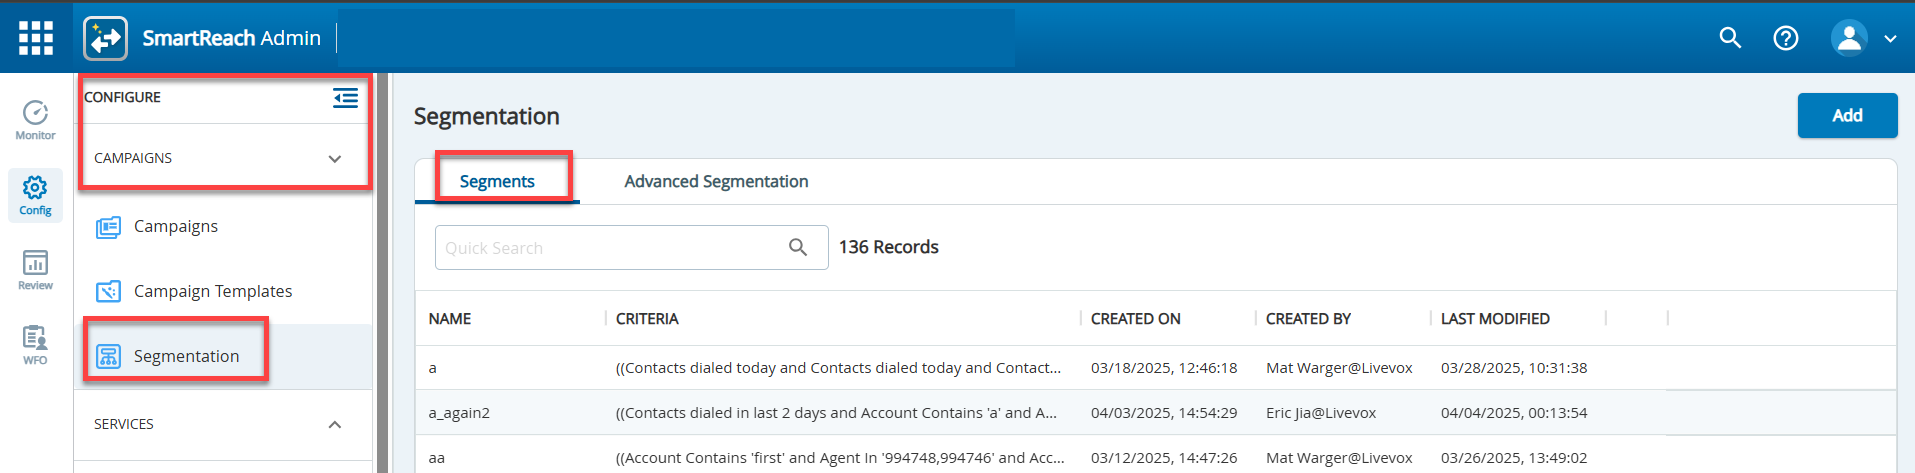
Creating a Segment
To create a segment, complete the following steps:
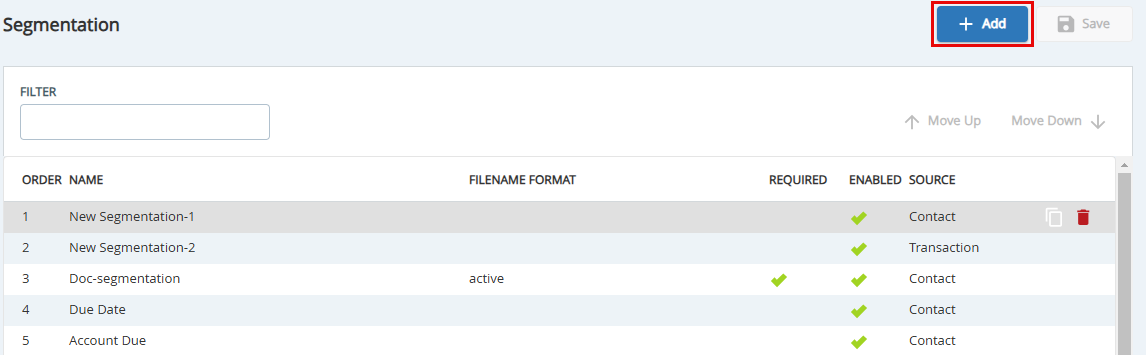
- Click Add in the Segmentation screen and select Segment in the Add Segmentation screen.
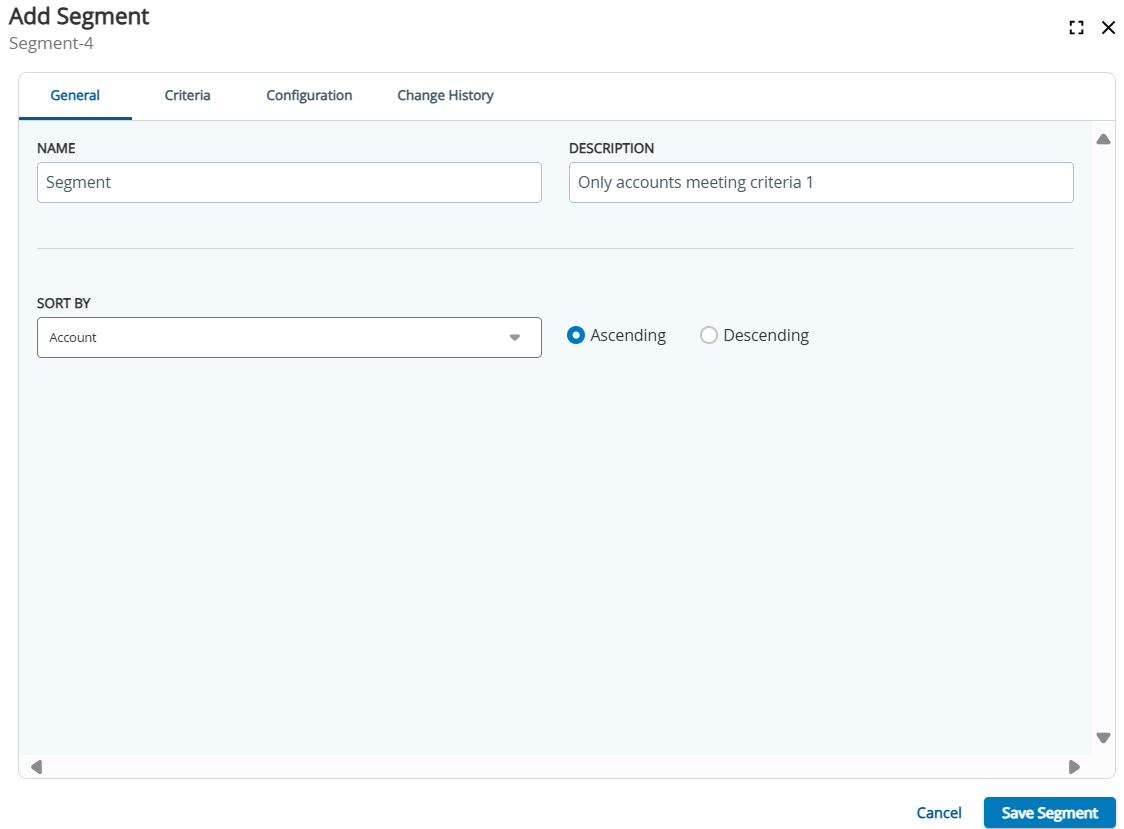
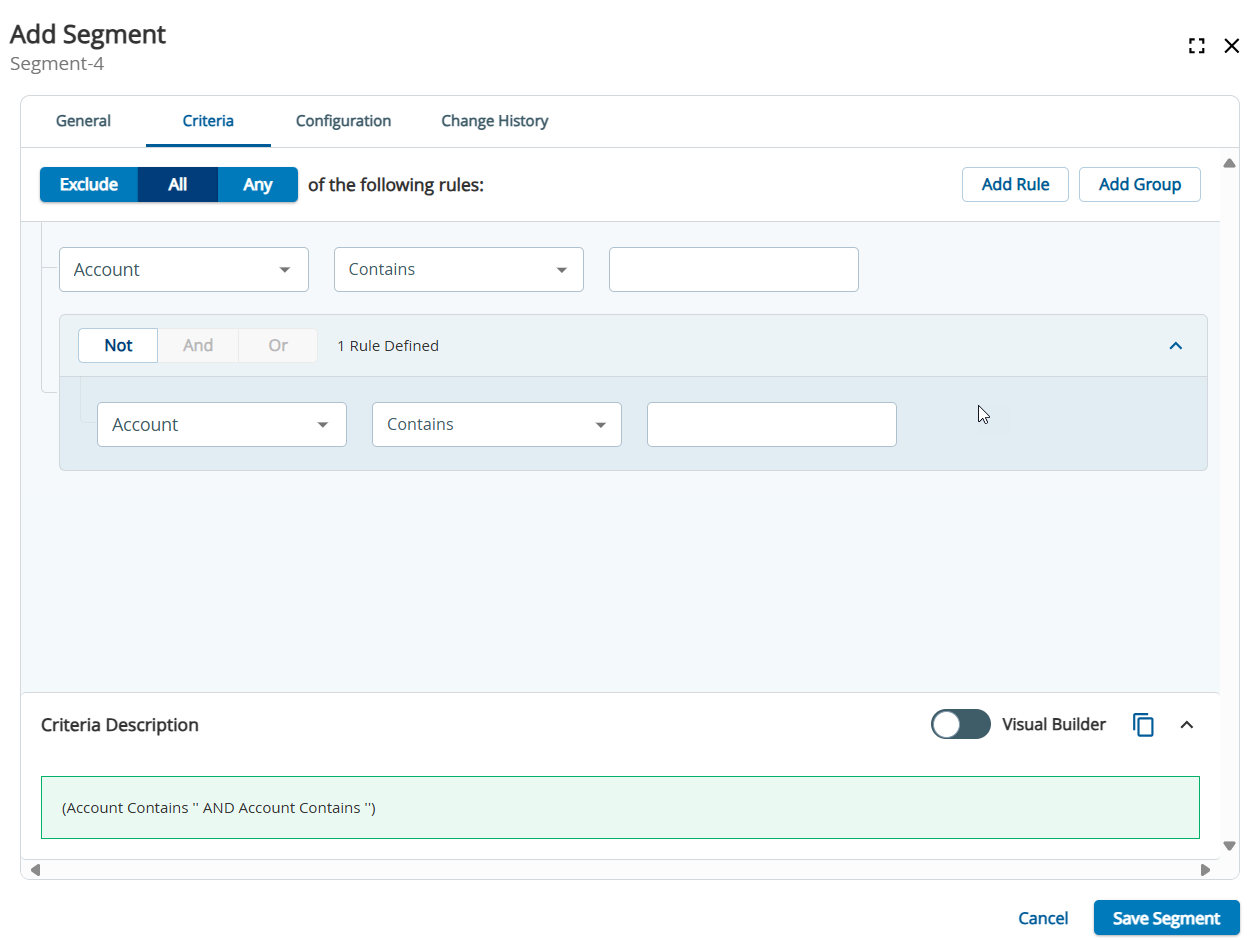
The Add Segment screen appears. - Complete the Name and Description fields for the segment under the General tab.
You can use the following variables in the segment name:
- [YYYY] – 4-digit year, for example 2021
- [YY] – 2-digit year, for example, 23
- [MM] – 2-digit month, for example, 07
- [DD] – 2-digit day, for example, 09
For example, entries in the format [YYYY]_MyCampaign could look like: 2021_MyCampaign_DailyUpload.txt
- Select a parameter to sort the contact records under the Sort By drop-down list. For example, you can sort by Account number. You can specify ascending or descending order for the sorted records.
- To create a segment to match certain criteria, click the Criteria tab.
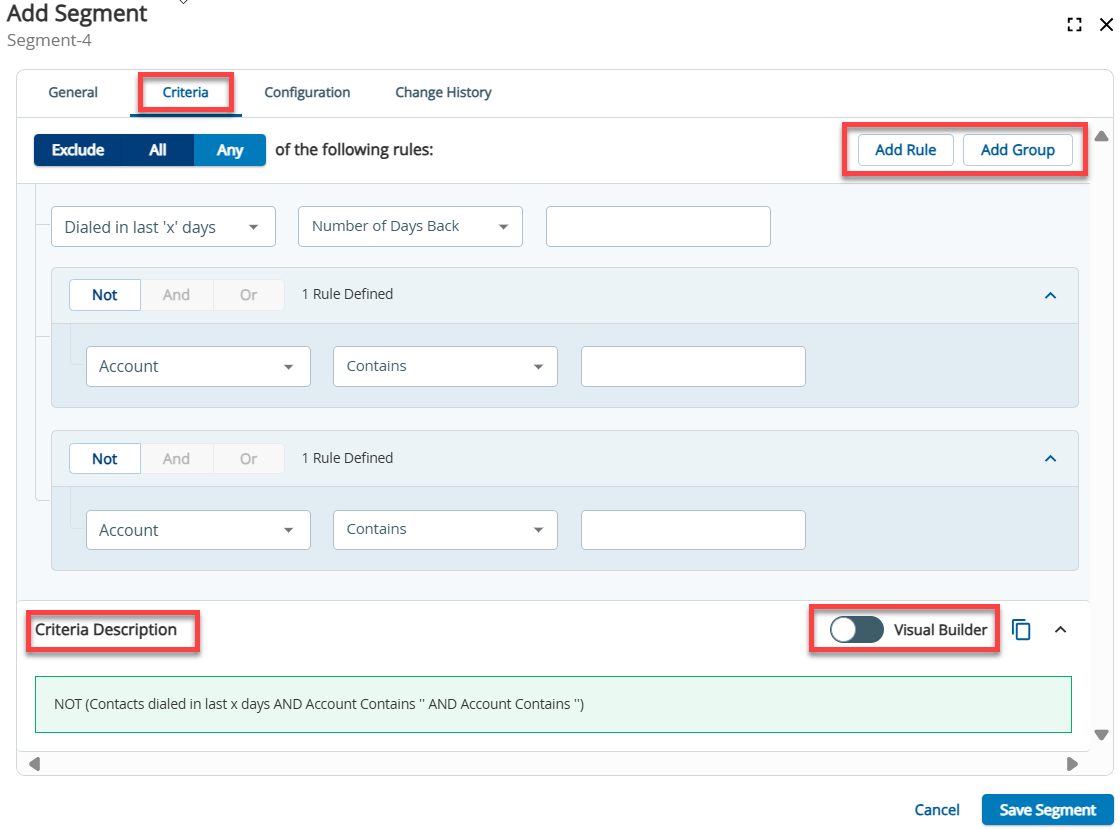
- Click Add Rule to add rules individually. Alternatively, click Add Group to add a set of rules. You can define the rules under the Exclude, All, or Any tabs.
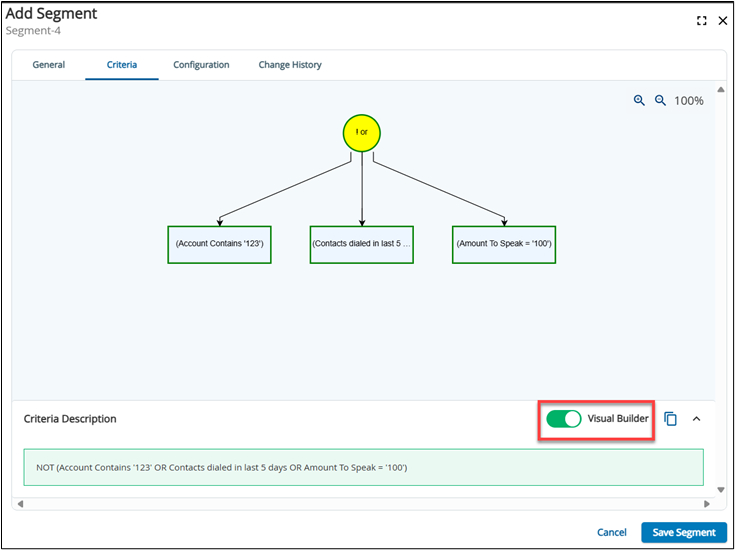
Exclude: Contact records meeting the defined rules are excluded from the segment. For example, if you add rules under the Exclude tab, the Criteria Description can be "NOT (Account Contains '123' OR Contacts dialed in last 5 days OR Amount To Speak = '100')". 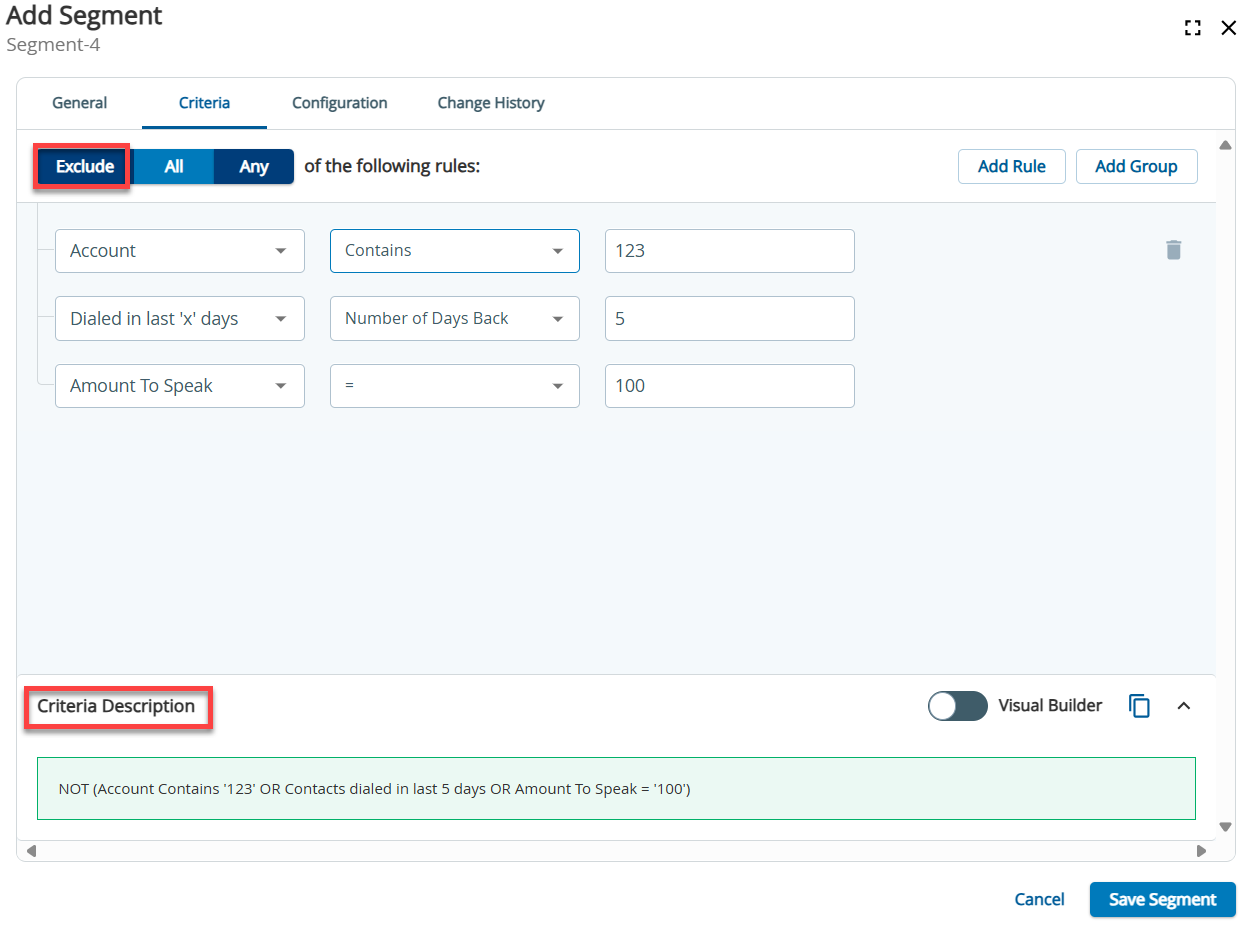
All: Contact records meeting all the defined rules are included in the segment. For example, if you add rules under the All tab, the Criteria Description can be "(Account Contains '123' AND Contacts dialed in last 5 days AND Amount To Speak = '100')".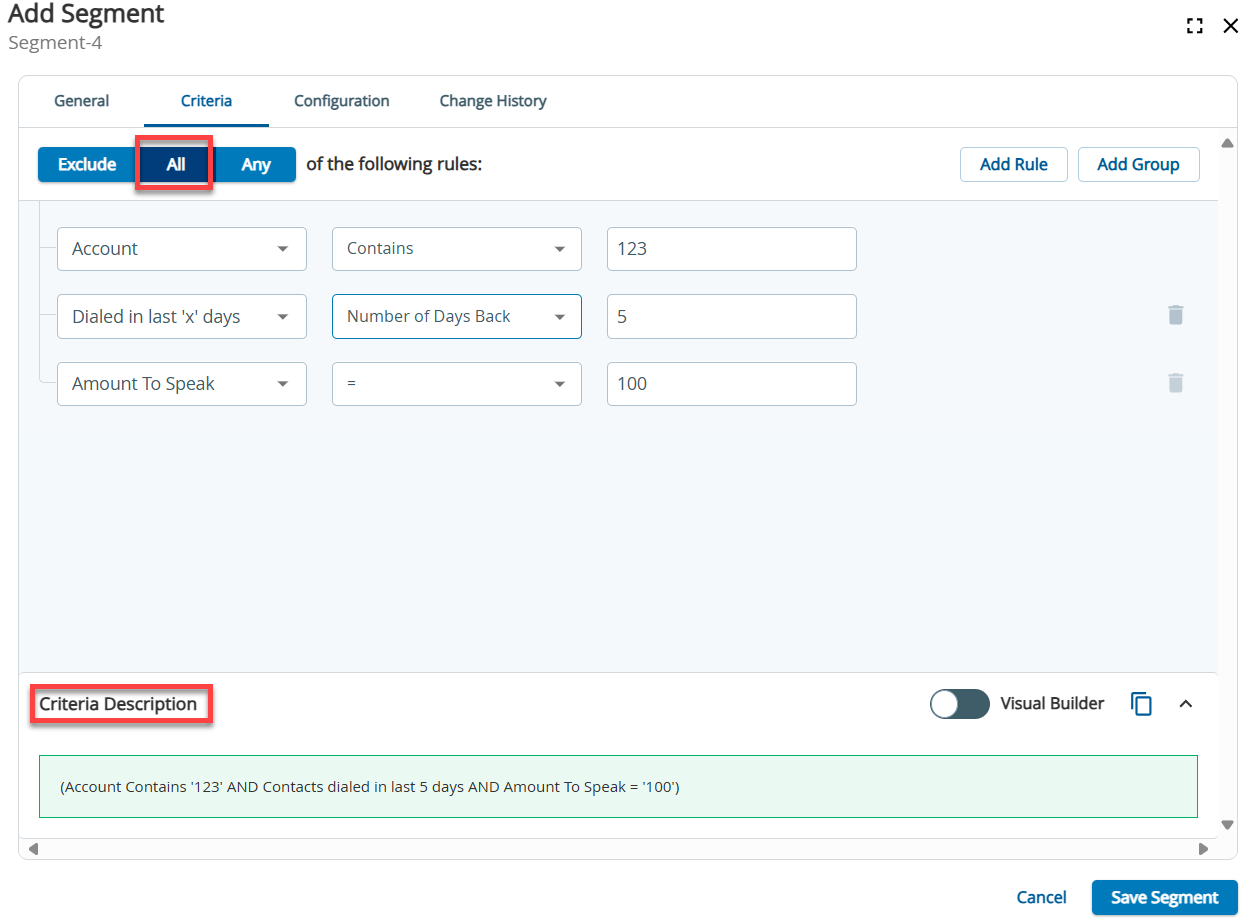
Any: Contact records meeting any of the defined rules are included in the segment. For example, if you add rules under the Any tab, the Criteria Description can be "(Account Contains '123' OR Contacts dialed in last 5 days OR Amount To Speak = '100')"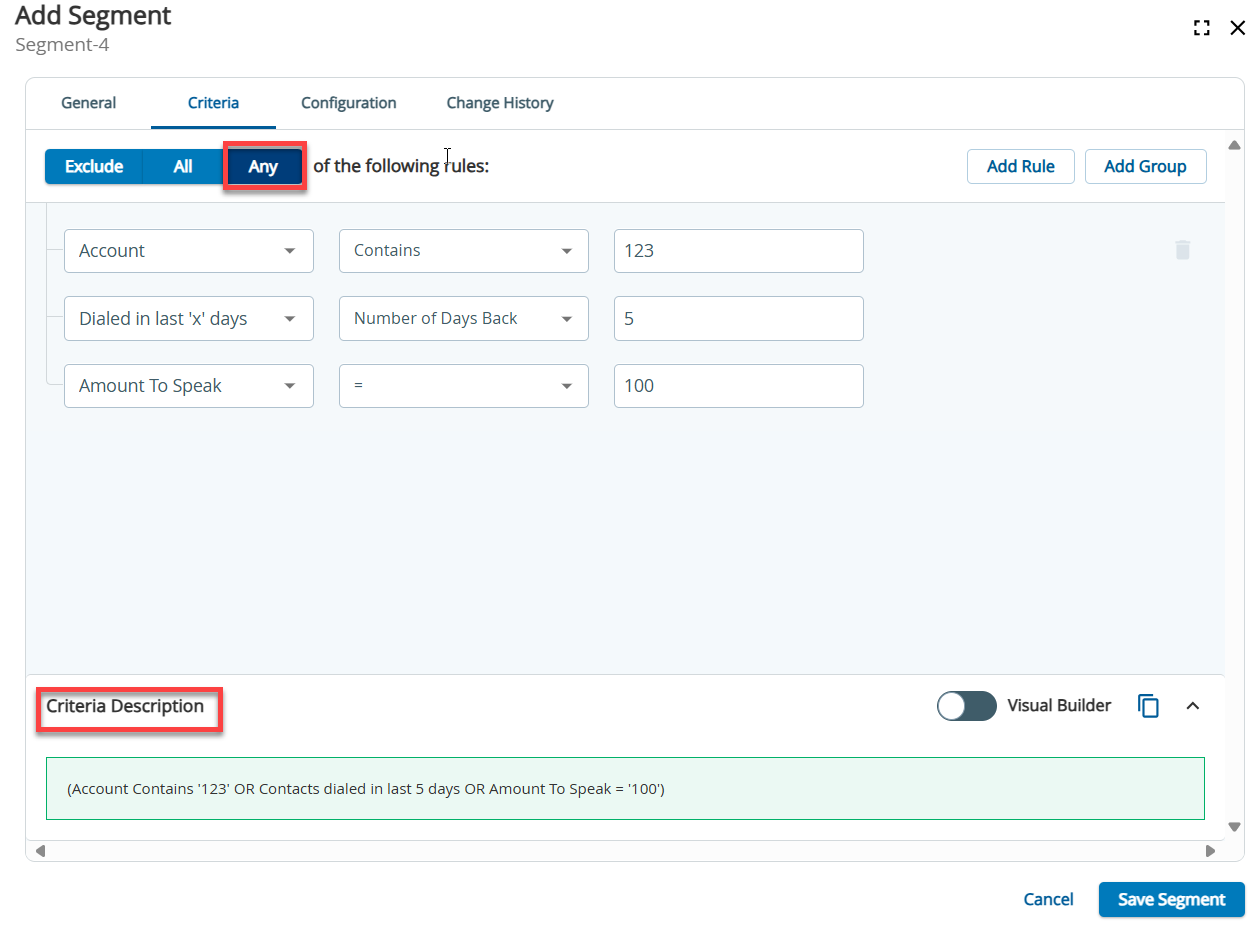
Click Visual Builder to view the visual representation of the rules. Click  to copy the criteria.
6. Under the Configuration tab, specify the following fields:
- Campaign Type: The type of campaign (for example, Email, Messaging, Outbound, or SMS).
- Operator Phone: The number first dialed by SmartReach when extension-based agents are called by SmartReach to tether into the system.
- Callback Phone: The number left on answering machines or live person messages by the SmartReach system.
- Dial Strategy: The strategy that you want to be used for contacting the customers.
- AM Option: The Answering Machine Option, such as Leave Messages.
- Service: The service on which you want the campaign to run.
- Caller ID: You can select the caller ID from the drop-down list. If the Local Caller ID feature is enabled, the [Local, rotated] option is the default option.
- Voice: The Voice field contains the voices that are selected on the Voice Pool tab of the client associated with the selected service.
- Scrub: The type of phone numbers that are scrubbed (removed).
- Allow Append: To allow the campaign to be appended to an active campaign, select this checkbox.
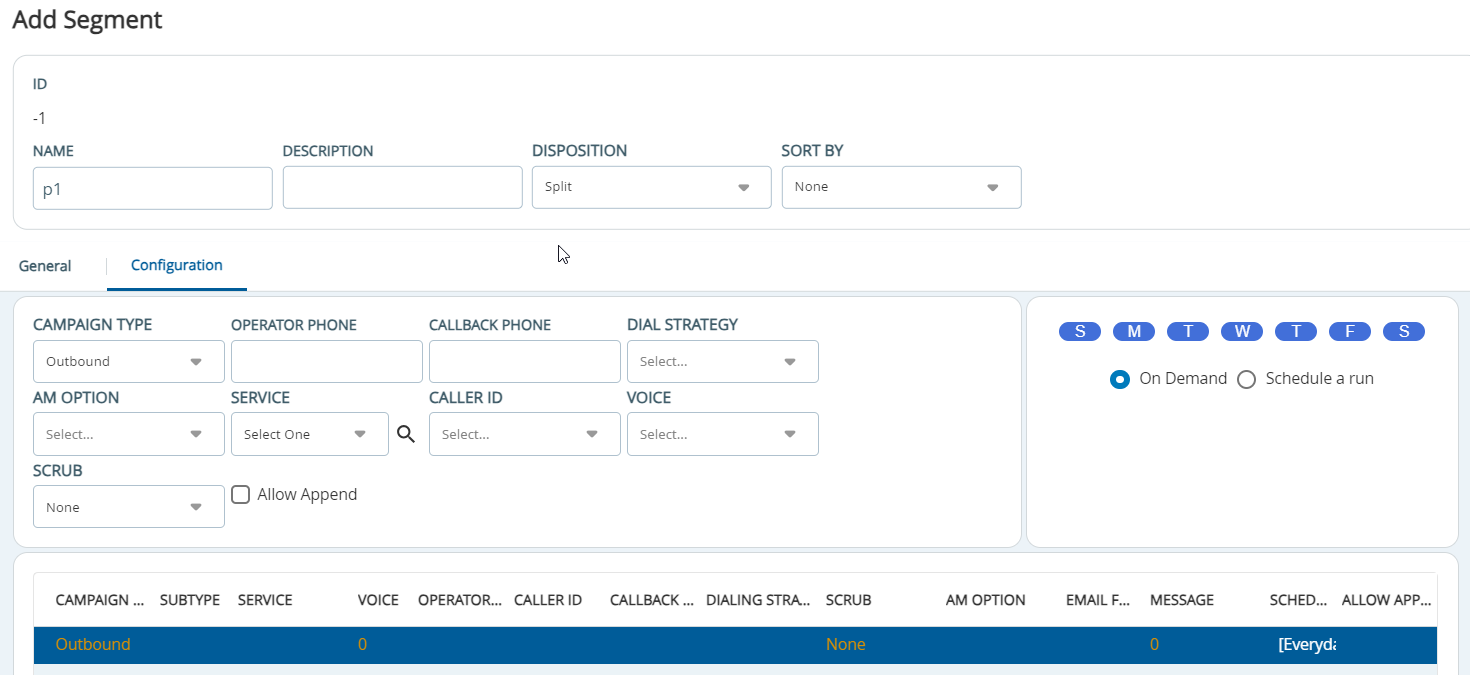
7. Click the On Demand radio button to run the campaign any time or click Schedule a Run to schedule the campaign. After specifying the options, click Add Config.
The functionality of the Configuration tab closely mirrors that of Campaign Templates. For scheduling instructions, refer to Campaign Templates.
Support for International Numbers
Segmentation fields, such as Phone, Phone 1, Phone 2, (through Phone 10), SMS, and other custom fields support the E.164 format, which defines a general format for international telephone numbers.
8. Click Save Segment. You now can assign a segment to a campaign.
Previewing a Segment
To see the number of records that match the segment's criteria, complete the following steps:
- Select the segment and click the three vertical dots on the right.
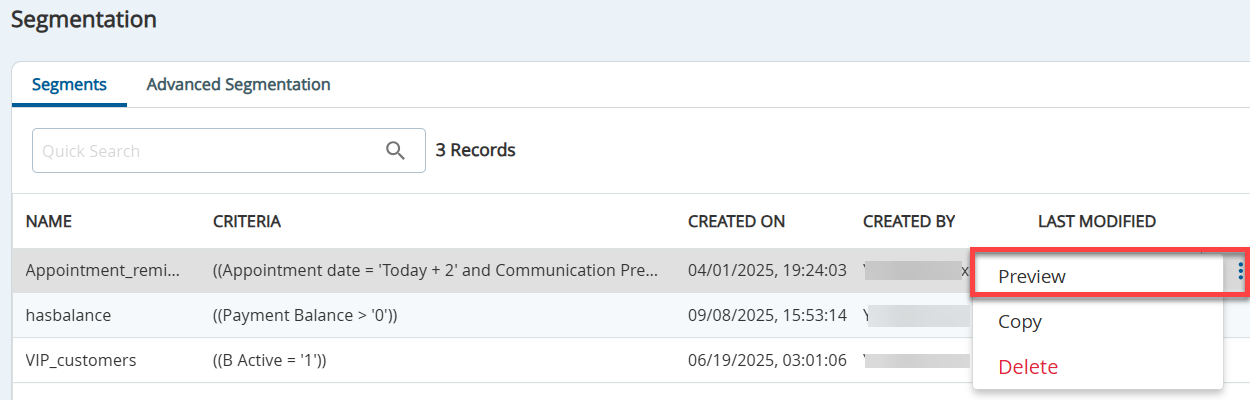
- Click Preview. The Preview Segment(s) displays the number of records that match the criteria.
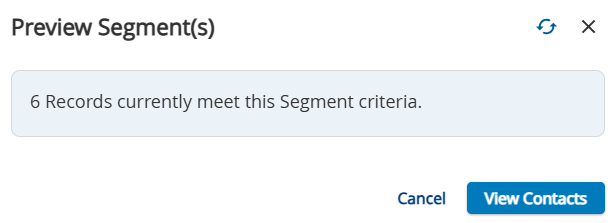
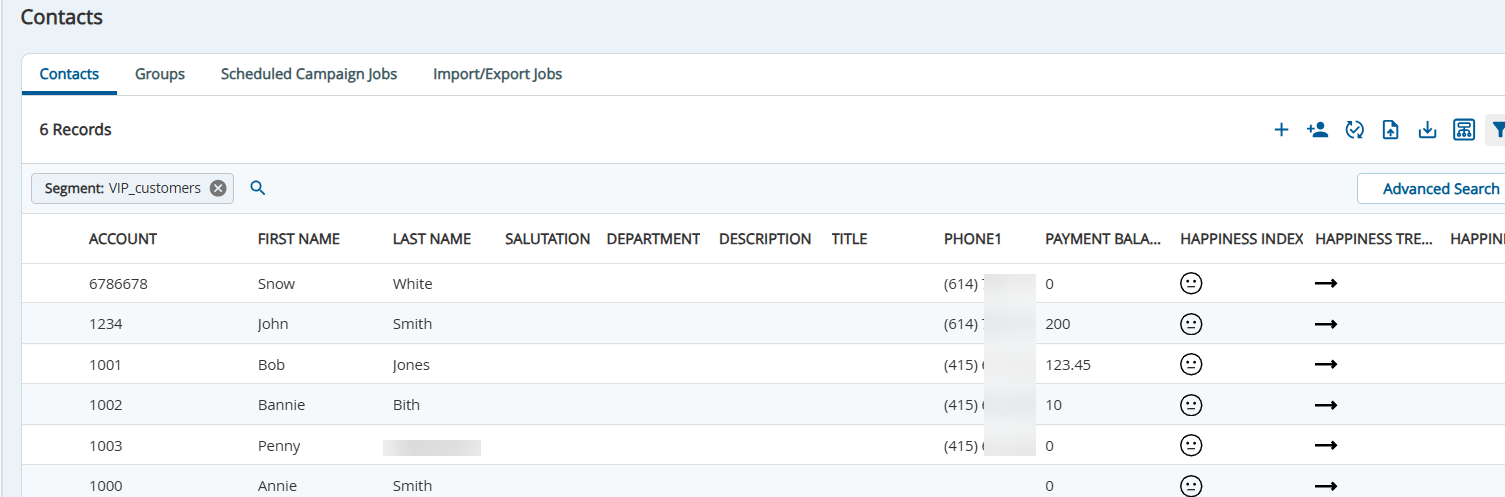
- Click View Contacts to view the details of the contacts.
Creating an Advanced Segmentation
You can create advanced segmentation to run campaigns from Contact Manager and file-based campaigns. To set up an advanced segmentation, complete the following steps:
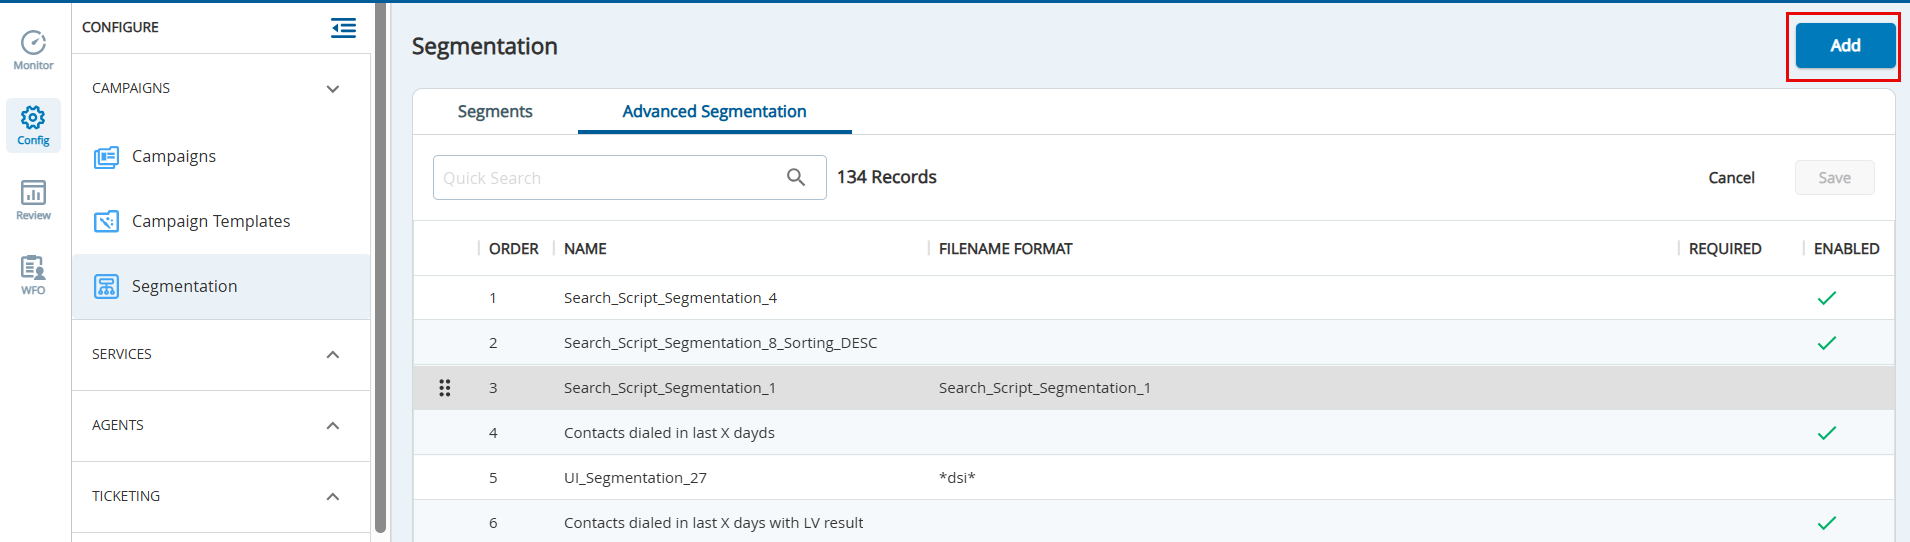
- Click Add in the top right corner of the Segmentation panel. The Add Segmentation screen appears.
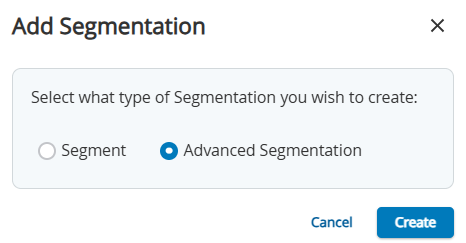
- Select Advanced Segmentation in the Add Segmentation screen.
In the General tab, the Source field includes the values Contact and Transaction.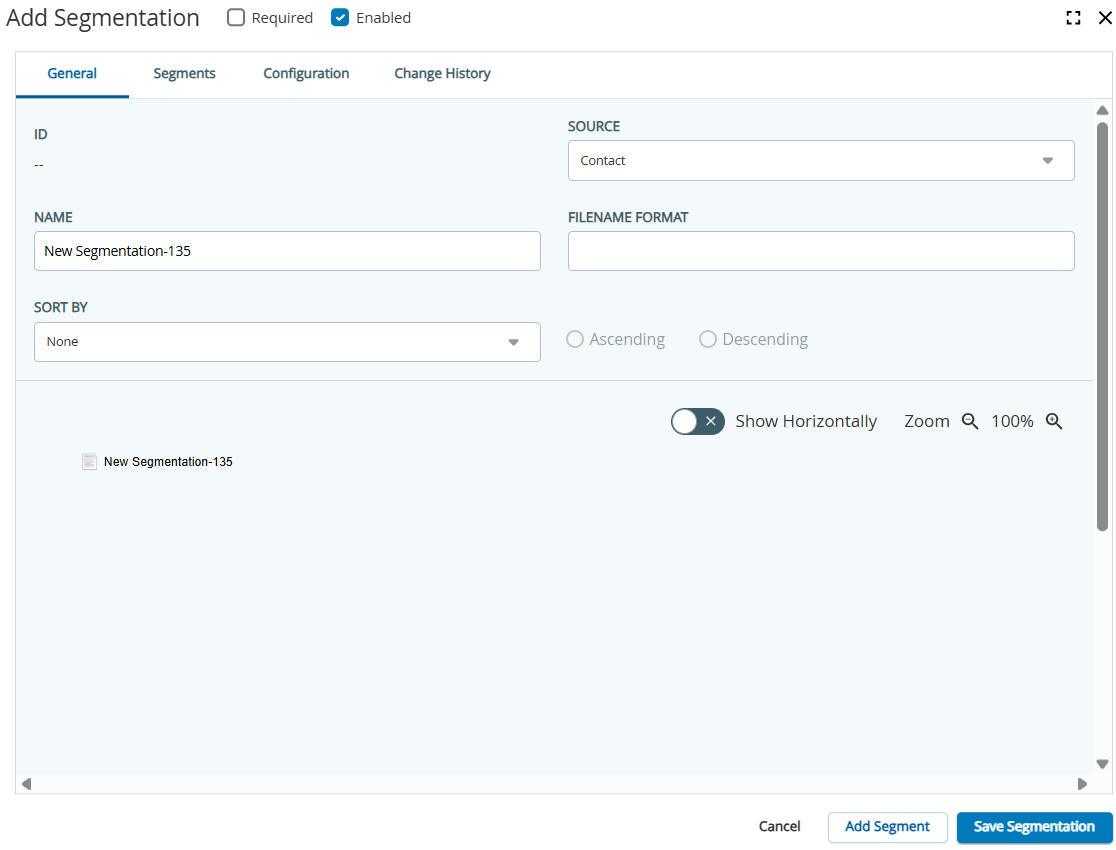
- Select Contact if you are building a campaign from Contact Manager.
- Select Transaction for file-based campaigns.
- Specify a Segmentation name in the Name field.
- Specify the filename to apply the Segmentation to a specific file in the Filename Format field. The asterisk character acts as a wildcard for a filename.
- For example, a filename format set as active* applies to any file uploaded with active at the beginning of the campaign's filename. During the upload process, you are notified if the campaign filename matches the Filename Format field and the Segmentation is automatically selected.

- For example, a filename format set as active* applies to any file uploaded with active at the beginning of the campaign's filename. During the upload process, you are notified if the campaign filename matches the Filename Format field and the Segmentation is automatically selected.
Click the Required checkbox to define whether the filename convention is required.

- If checked, the segmentation only applies to campaigns uploaded with the matching filename format.
If unchecked, the segmentation can be applied to any uploaded campaign.

The Contact source type allows you to sort the segmentation or segment records in ascending or descending order.
- Select the required value in the Sort By drop-down list.

- Select the Asc checkbox to sort records in ascending order.
- Clear the Asc checkbox to sort records in descending order.
The records appear in ascending or descending order based on the selection.
- Select the required value in the Sort By drop-down list.
- Click the Enabled checkbox to define if the segmentation rule is applicable to a campaign.

Click the Add Segment
 button at the bottom left of the Add Segmentation screen to create a segment.
An Advanced Segmentation template automatically divides your entire customer base into multiple segments based on your specified criteria.
The Add Segment screen appears. Follow the steps in the section Creating a Segment on this page.
- After all the segments are set up, click the Save button from the Segmentation tool to save the segmentation.
Editing and Managing Individual Segments
Segments are prioritized by the order in which they are listed. You can change this order by selecting a row and using the vertical arrow buttons on the right side to move a specific segmentation up or down in the list. Click the Save button when the correct order is set.
- To edit an existing segment, double click the segment to bring the Edit Segment window.
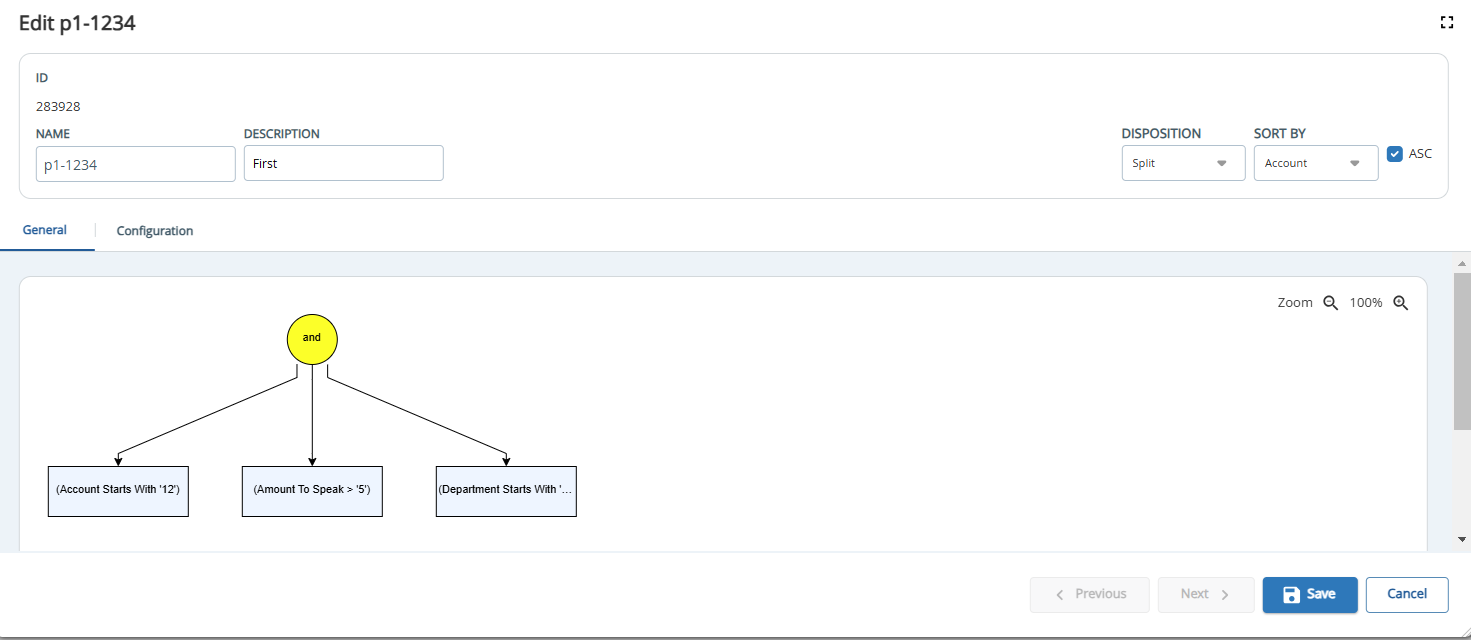
- Make the required changes under the General, Criteria, and Configuration tabs.
- Click Save Segment.
Editing and Managing Segmentation
Segmentations are prioritized by the way in which they are listed. You can change this order by selecting a row and using the vertical arrow buttons on the right side to move a specific segmentation up or down in the list. Click the Save button when the correct order is set.
After you add a new segmentation, you can update it by adding, deleting, or copying segments.
- To edit an existing segmentation, double-click the segment row within the Segmentation tool to bring up the Edit Segmentation window. You can make changes to the fields under the General tab.
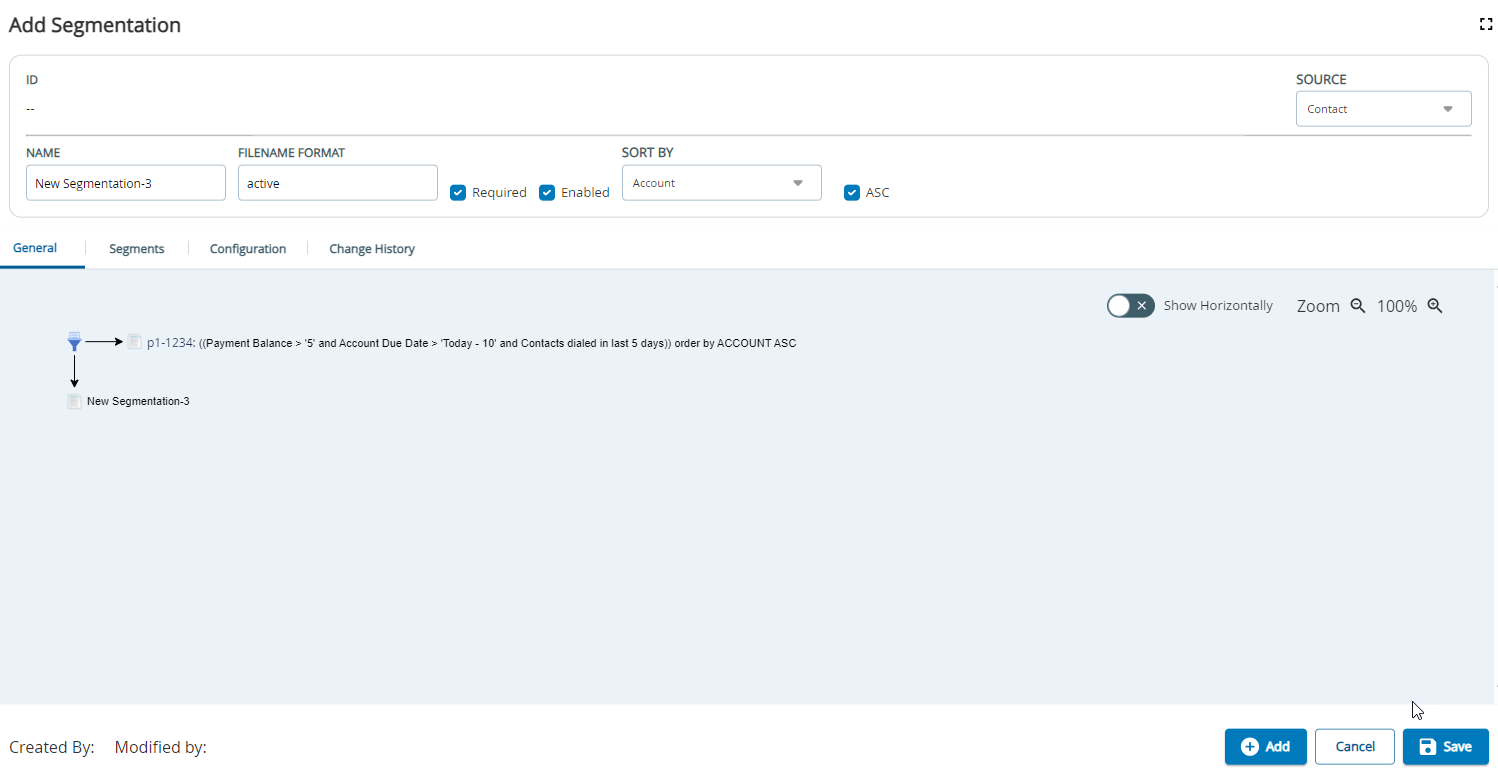
- To view the list of segments within the segmentation, their description, and applied rules, click the Segments tab.
The Segments tab also allows you to search for specific segments by name and by apply filters of Criteria, Voice, AM Option, Schedule or Scrub options.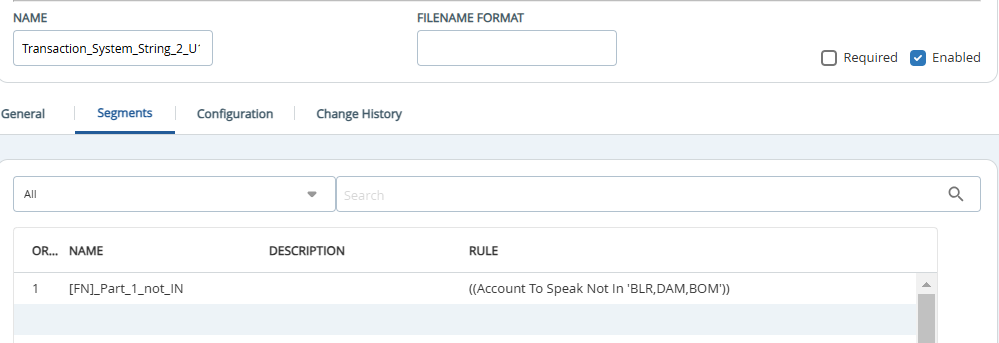
- Double-click a segment row to access the Segment editor.
- To add a rule, click and drag the operator icon for the Add Rule screen.
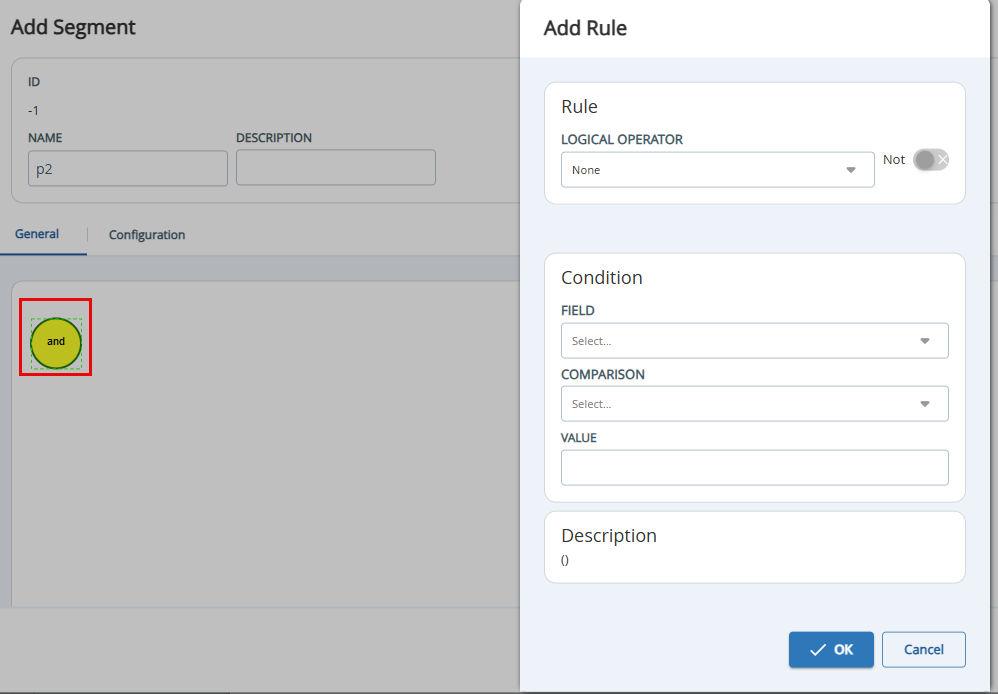
To edit a rule, double-click a node for the Edit Rule window.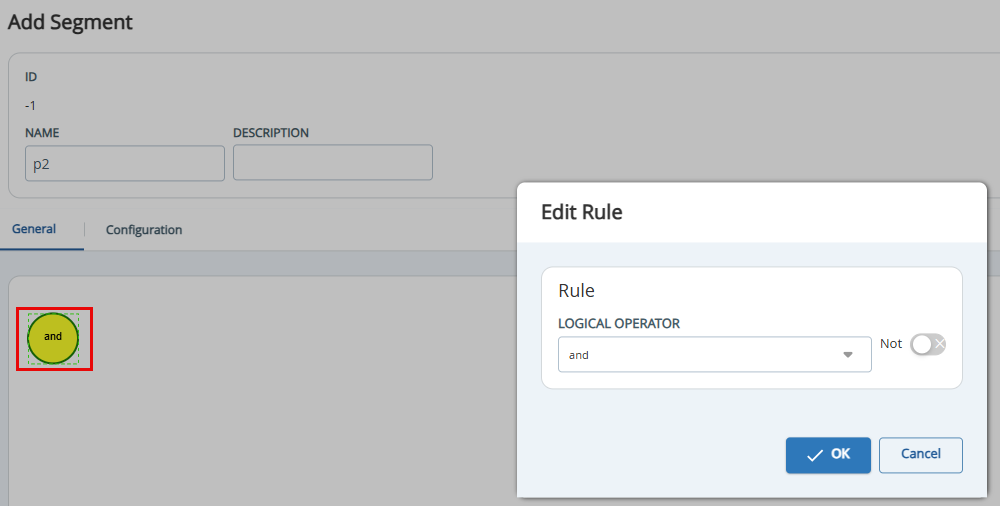
- Navigate to the Configuration tab of the Segments window to view the configured campaign elements.
Copying Segmentations and Segments
- To copy a segmentation, select the Segmentation row and click on the 3 vertical dots icon on the right side of the row. Then click Copy.
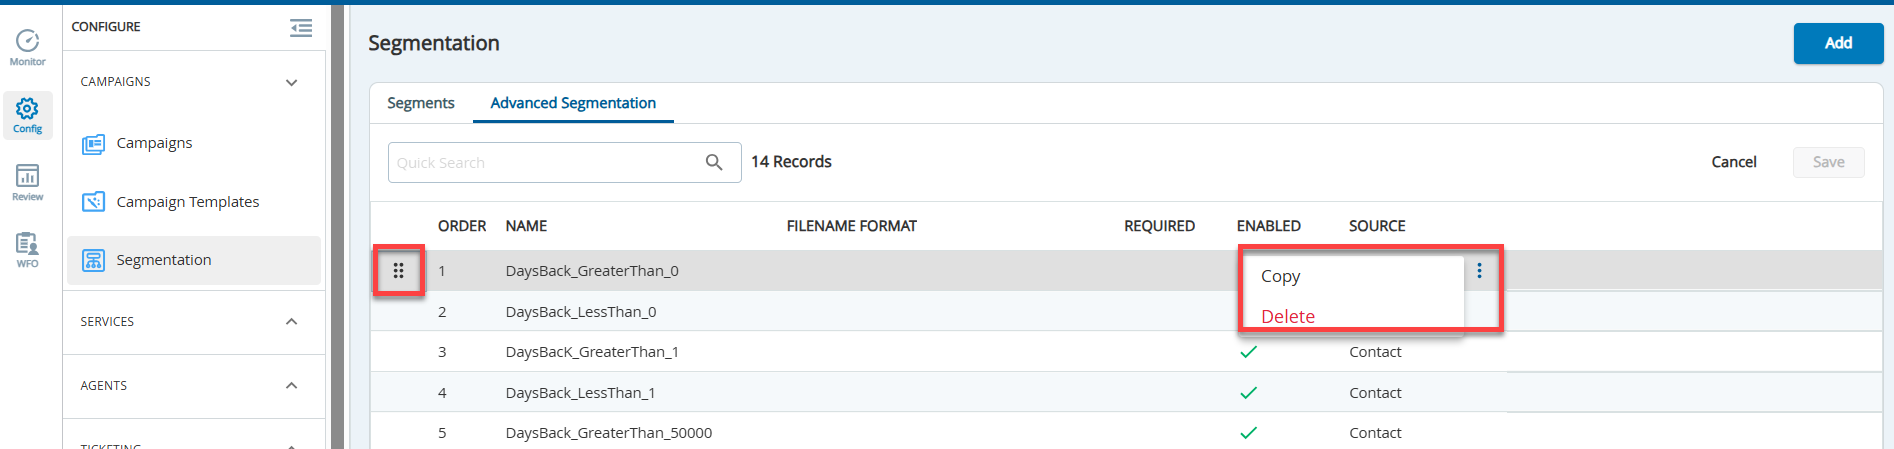
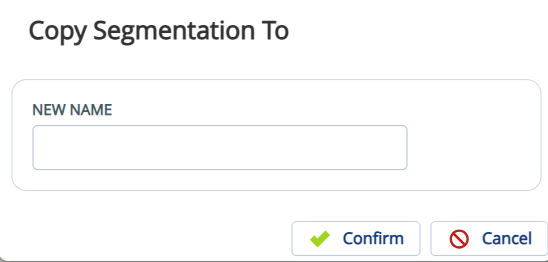
- In the Copy Segmentation To window that appears, enter a name for the new segmentation and click Confirm.
- To copy segments within a segmentation, navigate to the Segments tab in the Segmentation tool, and click the
 Copy icon on the Segment row. In the Copy Segment To window that appears, enter the new segment name and click Confirm.
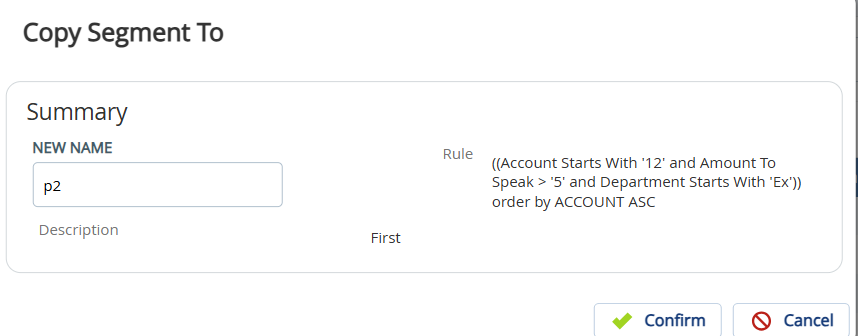
All the rules within the segment are copied. This tool is useful when repeating similar segments within a segmentation.
Deleting a Segment/Segmentation
To delete a segment or a segmentation, select the row containing the segment or segmentation and click on the three vertical dots on the right. Click Delete.