Managing Tickets
Managing a ticket involves creating, modifying, and viewing a ticket. The Tickets subsection of the TICKETING section enables you to manage tickets, as well as accounts and contacts.
Viewing Tickets
To view a list of all tickets, on the Config tab, go to TICKETING > Tickets. You can view the tickets by using a ticket filter option or modifying the ticket list table.
Ticket Filter
You can create, modify, or clear the ticket filters.
- Create a new search view.
- Modify the search view.
- Clear the current search view.
- Open the required search view.
- Creates a new ticket.
- Export tickets from the SmartReach portal to a CSV file.
- Import tickets that are created outside the SmartReach portal into SmartReach.
- Modify the selected tickets all at once.
- Delete the selected tickets at once.
- Use the advanced filter options to search for the ticket.
For more information on the types of ticket views, see Ticket Views.
Modifying the Tickets List Table
You can sort the tickets based on the following priorities: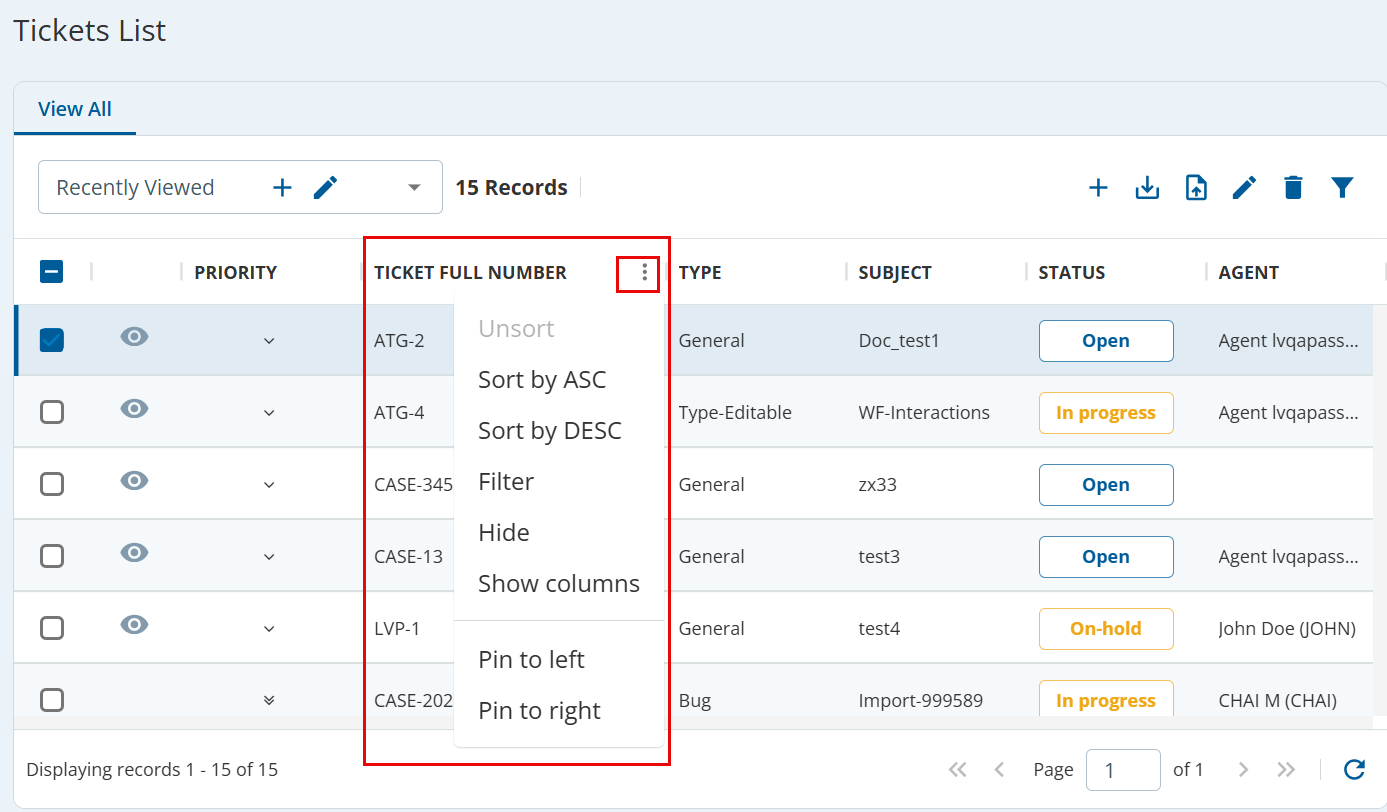
- To sort the ticket values in a column in ascending or descending order, click the column heading once or twice as required. Alternatively, you can click three dots in the column heading and select Sort by ASC or Sort by DESC.
- To display only certain columns, click the three dots in the column heading, click Show columns, and then enable or disable the columns by clicking on the column names as per your requirement.
- To display the column on the left or right, you can pin that column using respective options.
Creating a Ticket
You create a ticket to track a request or an issue.
To create a ticket:
- On the Config tab, go to TICKETING > Tickets.
The Tickets List tab appears.
Alternatively, on the Tickets menu, you can click New Ticket. On the Tickets List tab, click New.
The New Ticket window appears.Specify values in fields as required. For information about the fields, see Ticket Field.
- Click Create.
A message stating that the ticket has been created appears. You can view the ticket details by double-clicking the ticket in the Tickets List tab.

When you create a ticket, the system generates an external URL to the ticket, which you can include in the auto email message so that external users can view a ticket without logging on to LVP using a ticket link.

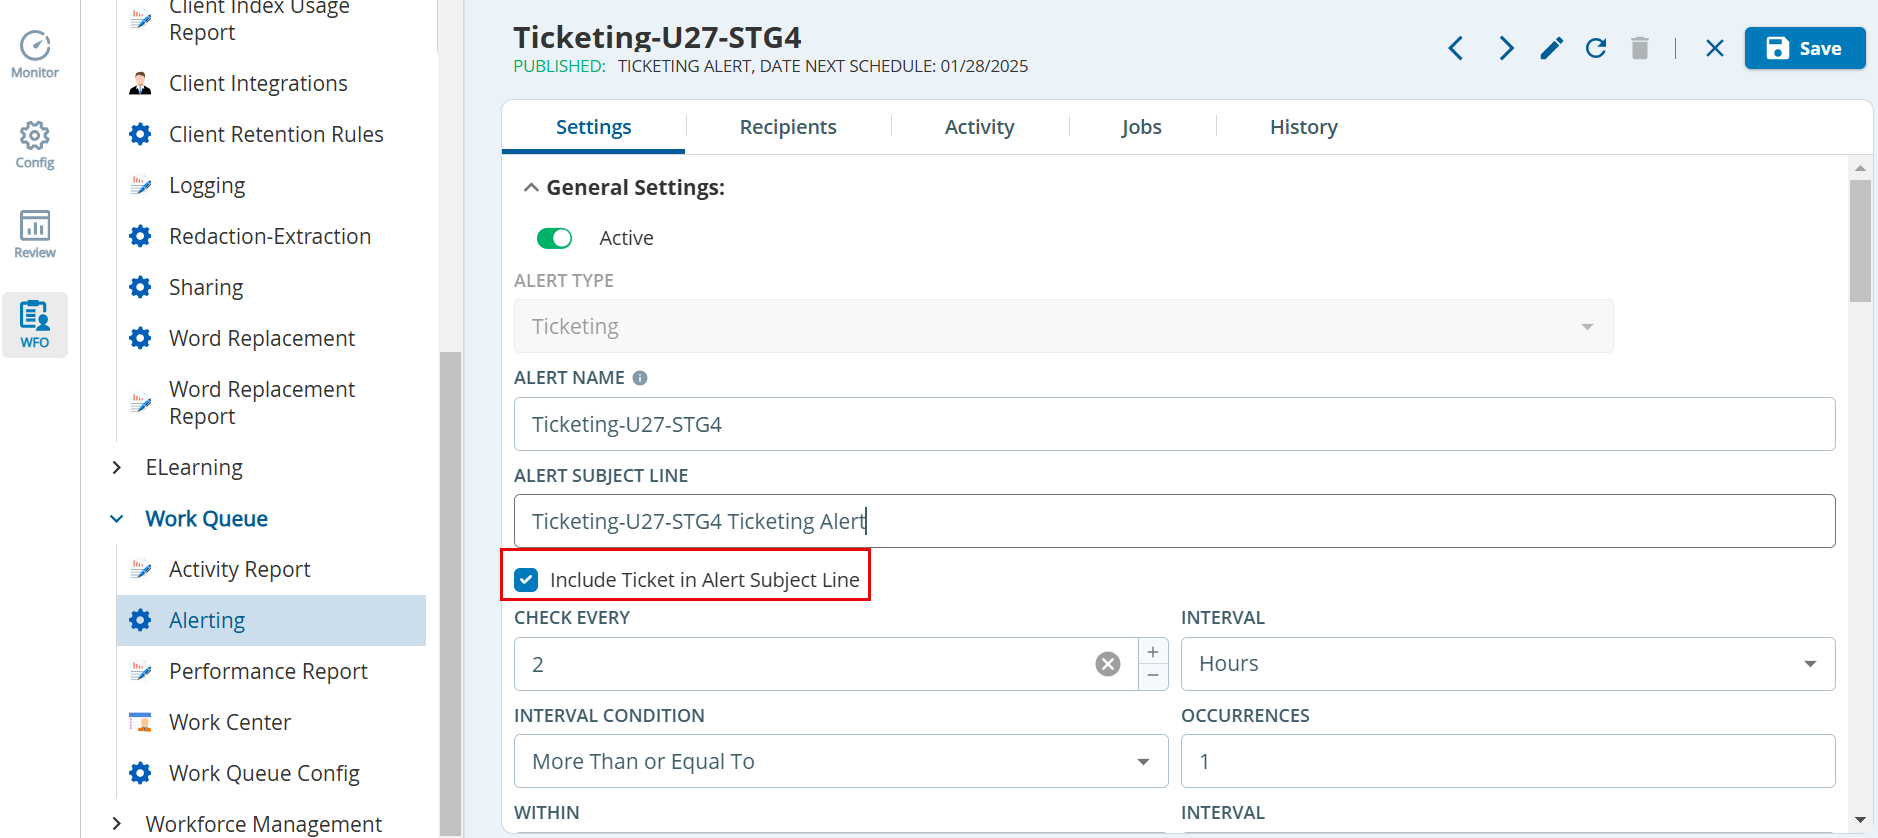
You can set alerts in the WFO>Alerting section for a ticket. The alert can be set for a specific time period so that they are triggered, and an alert is created for an agent to perform a designated task. The alerts can be sent as an email, SMS, or as a work queue alert.
Viewing the Ticket Details
After you create a ticket, to see the details of another ticket, select Tickets Lists. A list of all the tickets appears. Double-click the required ticket to view the details.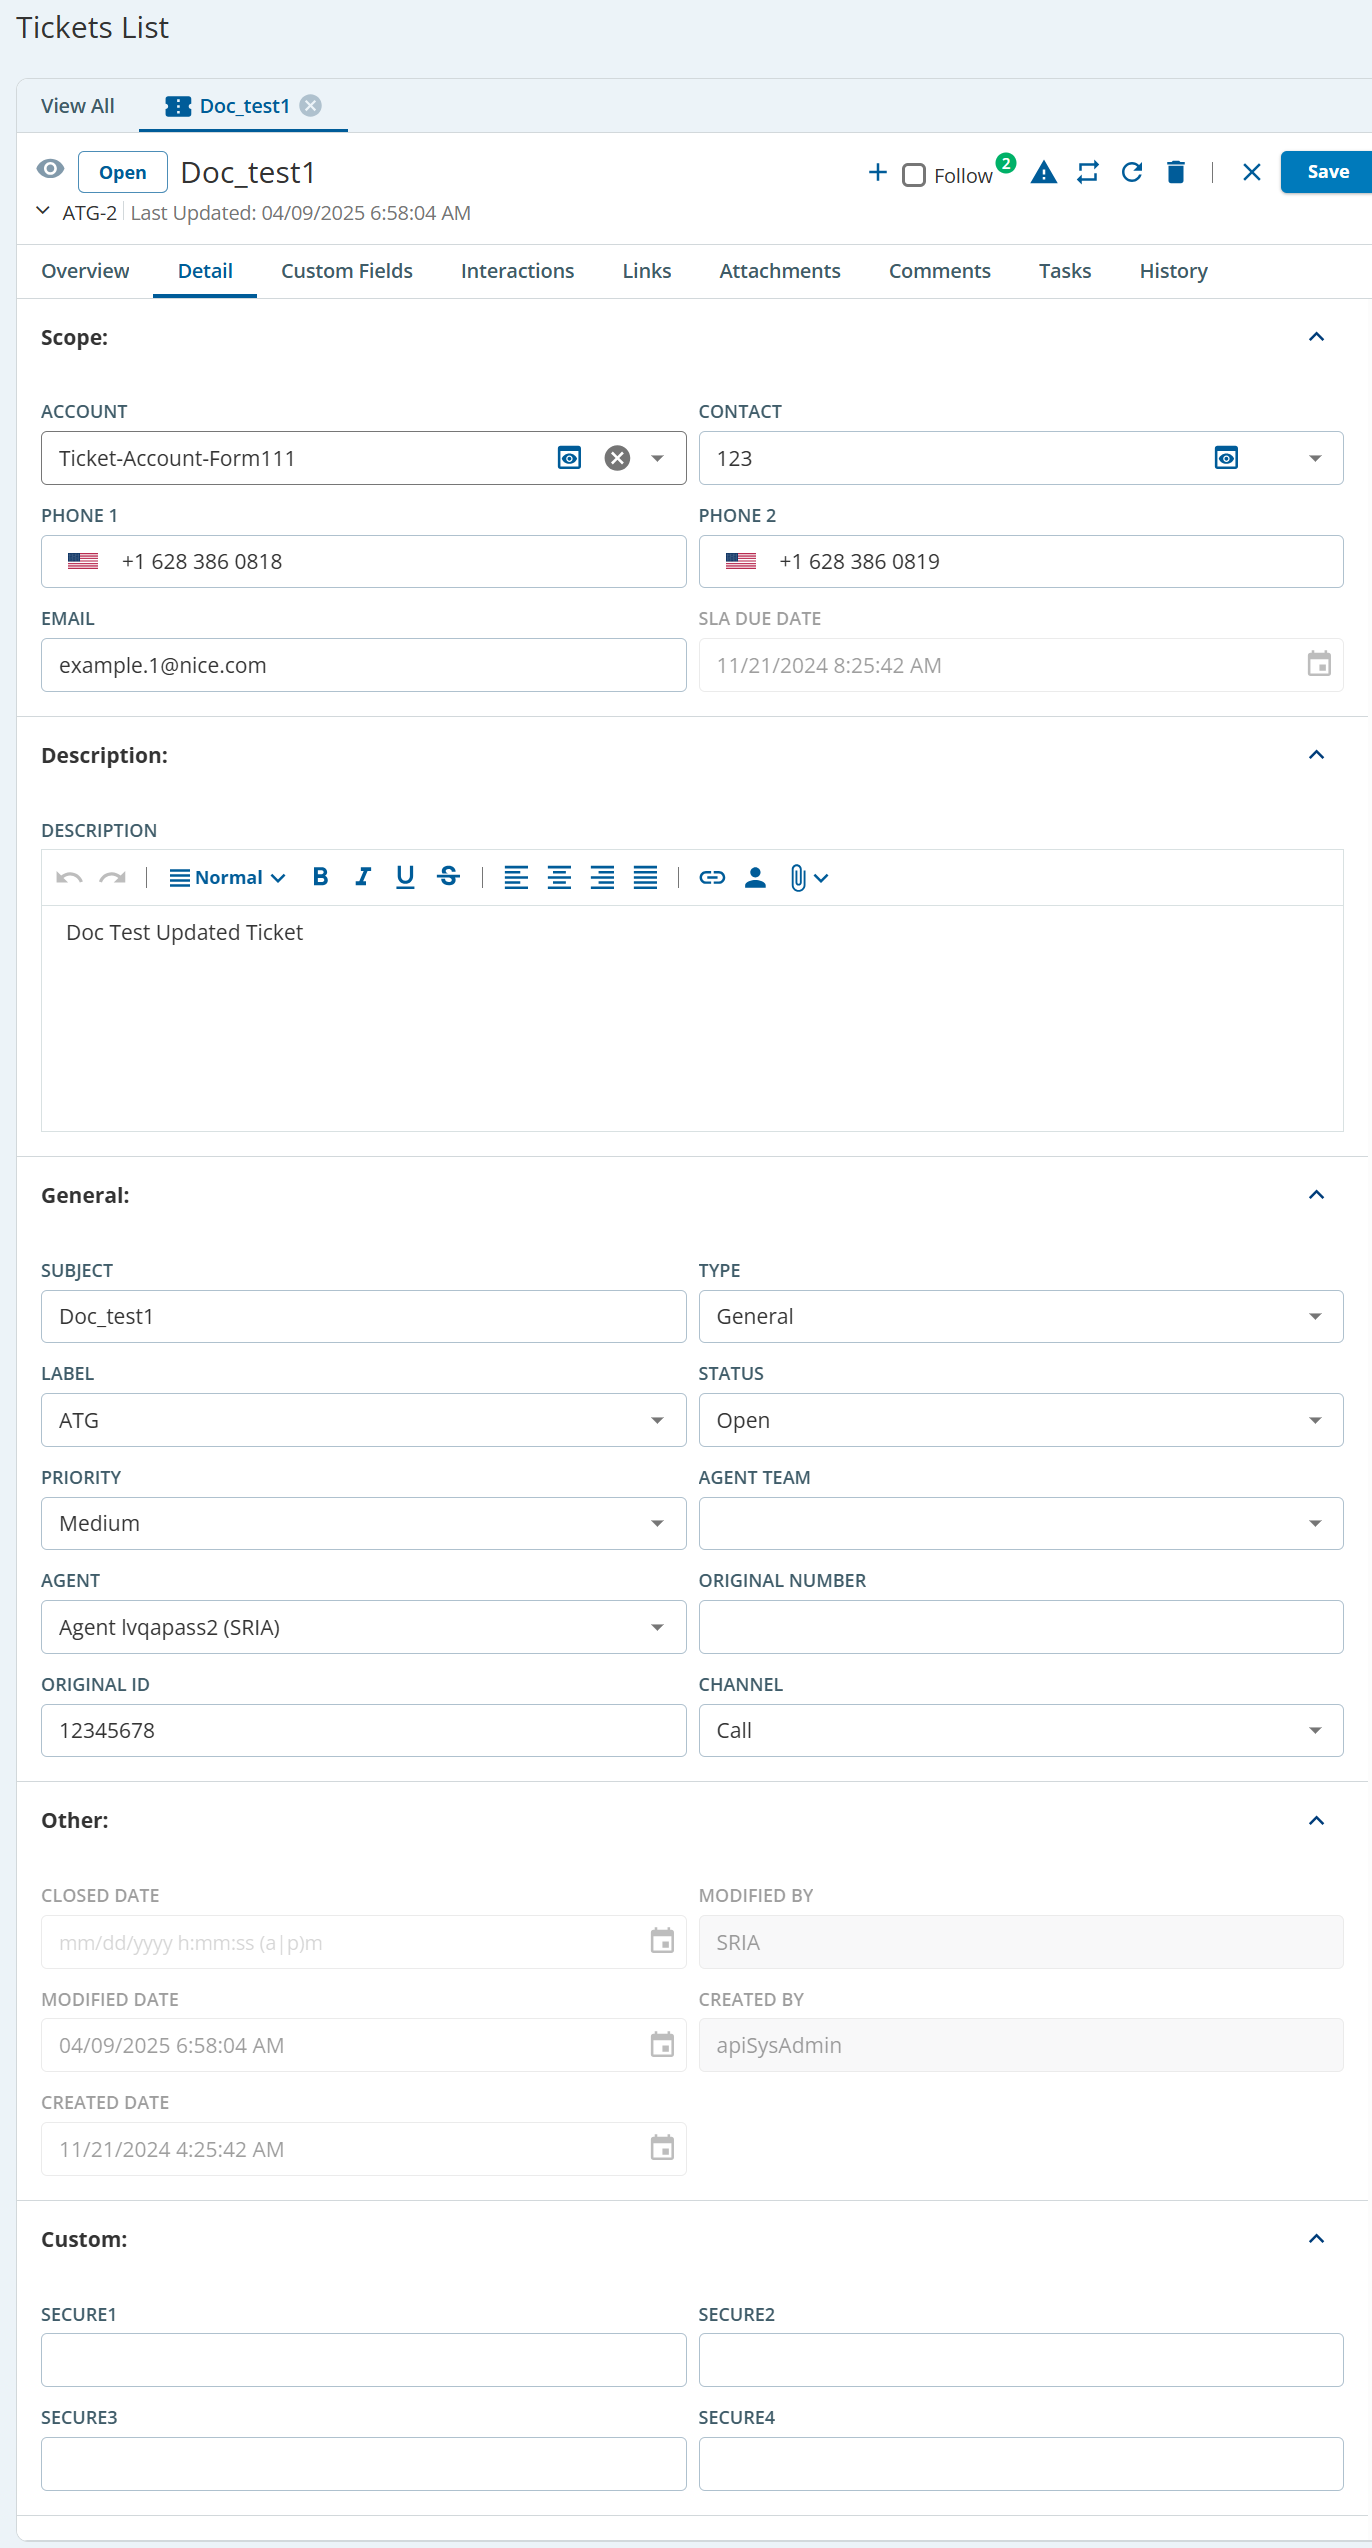
You can perform the following steps on the ticket details page:
- You can create another ticket by using the Add button.
- You can create an alert.
- You can follow or unfollow a ticket.
- You can modify the workflow status of the ticket.
- You can refresh the ticket screen.
- You can remove a ticket from the system.
- To view the list of tickets, click the Close icon (
 ).
A ticket is attached to a workflow. Depending on the ticket, you can configure the workflow for a ticket. For more information, see the Ticket Workflows section.
You can set one of the following actions when a ticket is created or updated, or when a nightly run is initiated:
- An email is sent to the customer.
- An SMS is sent to the customer.
- A work queue task is created.
- A field in the ticket is modified.
- An API function is called.
Modifying a Ticket
You can modify the fields in a ticket at a later stage,
To modify a ticket:
On the Config tab, go to TICKETING > Tickets list. This displays a list of tickets that you recently viewed.
- To view all tickets, click the Clear icon (
 ) in the search box.
- If customized ticket views (ticket filters) are created for you, you can use them to segment, track, prioritize, or manage tickets. Ticket filters are available next to the search box.
- If the search box displays All Tickets, all tickets appear in the Tickets List.
- If, after having selected a ticket filter in the search box, you want to view all tickets, click the Clear icon (
 ).
- To view all tickets, click the Clear icon (
Double-click the row containing the ticket that you want to modify.
The ticket window appears, displaying the main section. The main section displays the fields that are selected in the Ticket Highlight subtab on the Screen Configuration tab of the Ticketing Config window for the same ticket type (that is, the value in the Type field of the ticket). In addition, the window displays the following tabs.
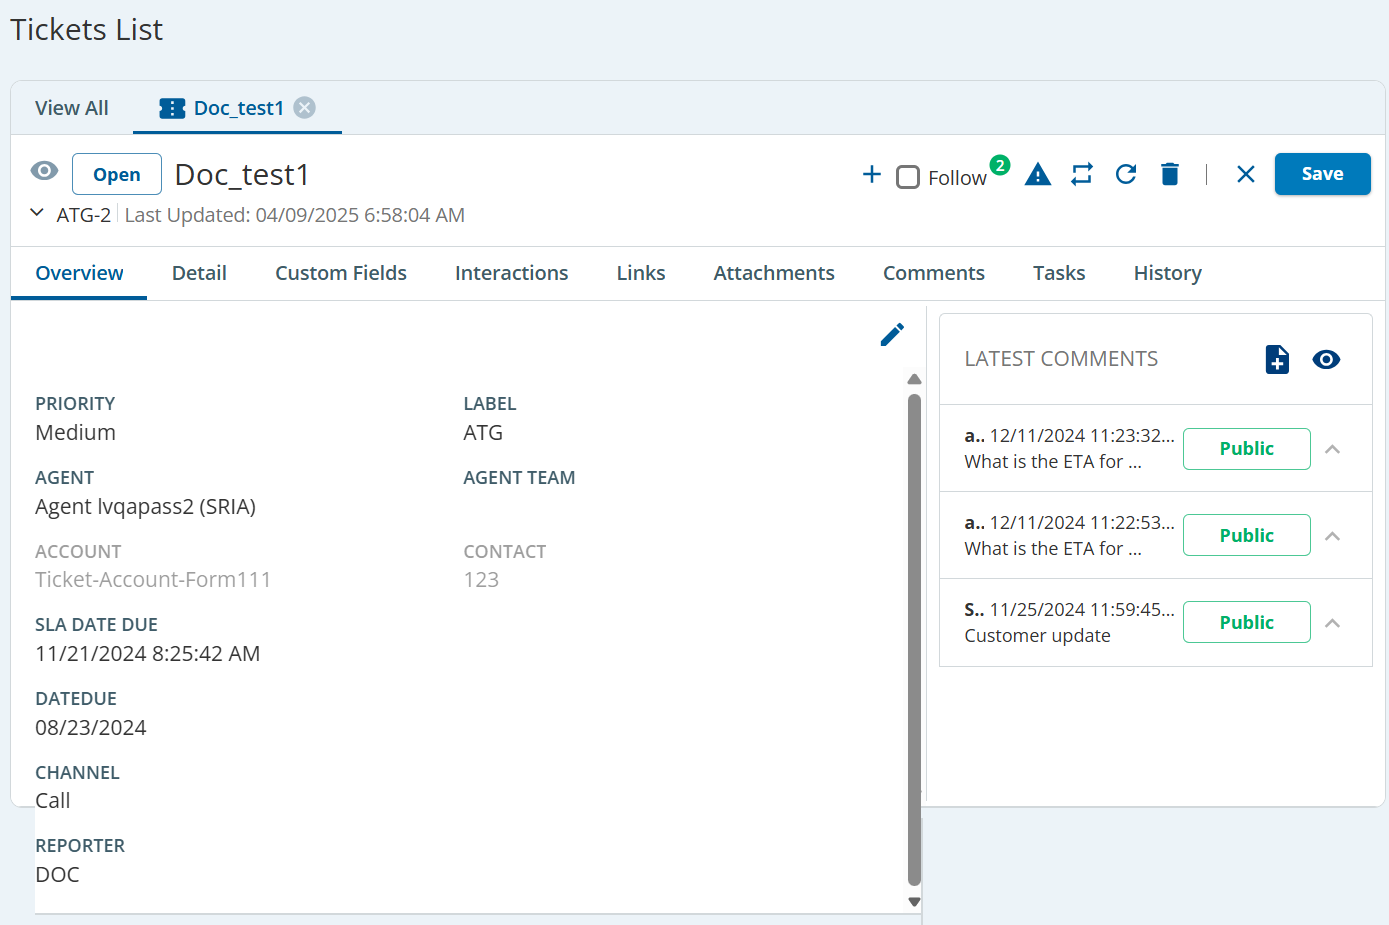
Tab Description Overview Displays the overview of the ticket with comments.
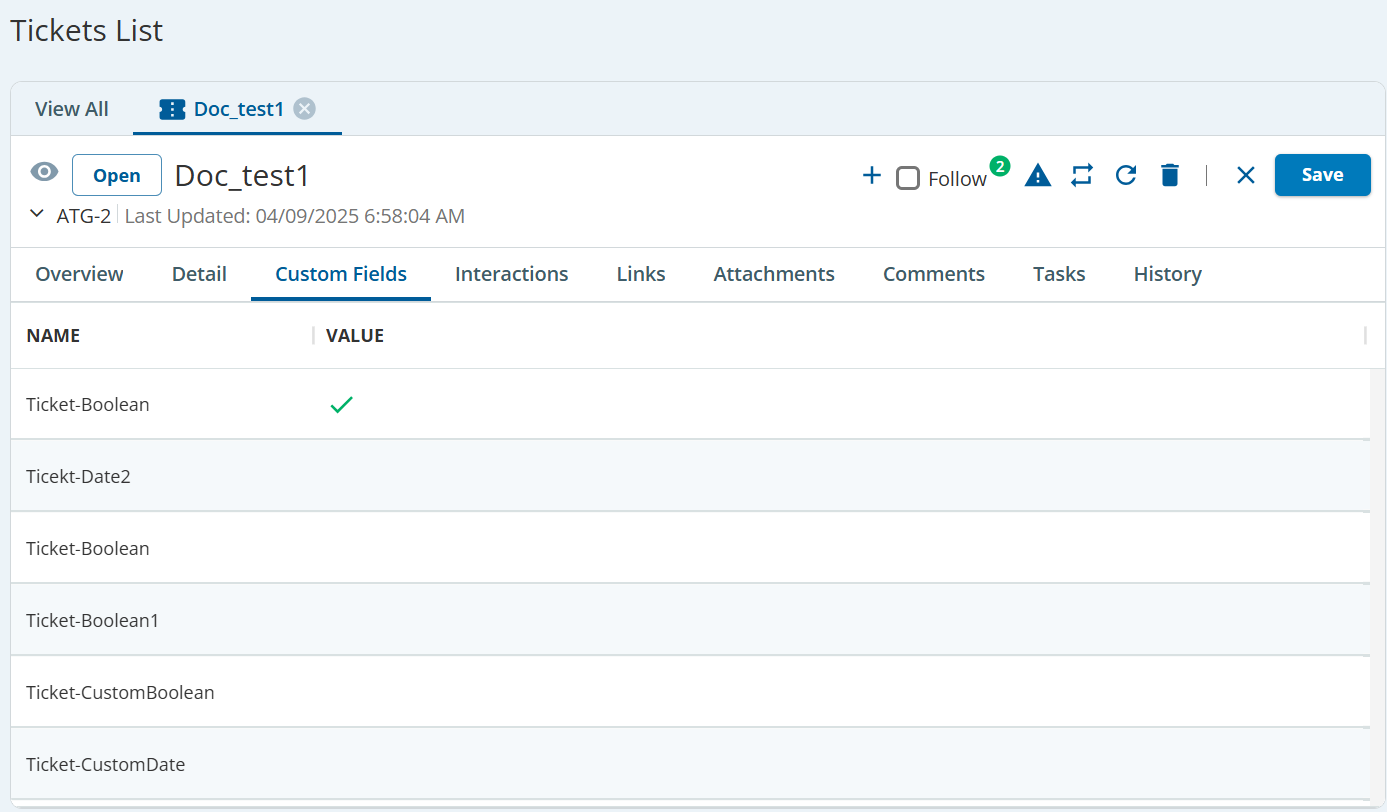
Detail Displays fields that are selected in the Ticket Detail subtab on the Screen Configuration tab of the Ticketing Config window for the same ticket type. Please refer to the Viewing the Ticket Details section above. Custom Fields Displays fields that are selected for the ticket entity in the Field window.
Interactions Displays a table with interactions associated with the ticket.
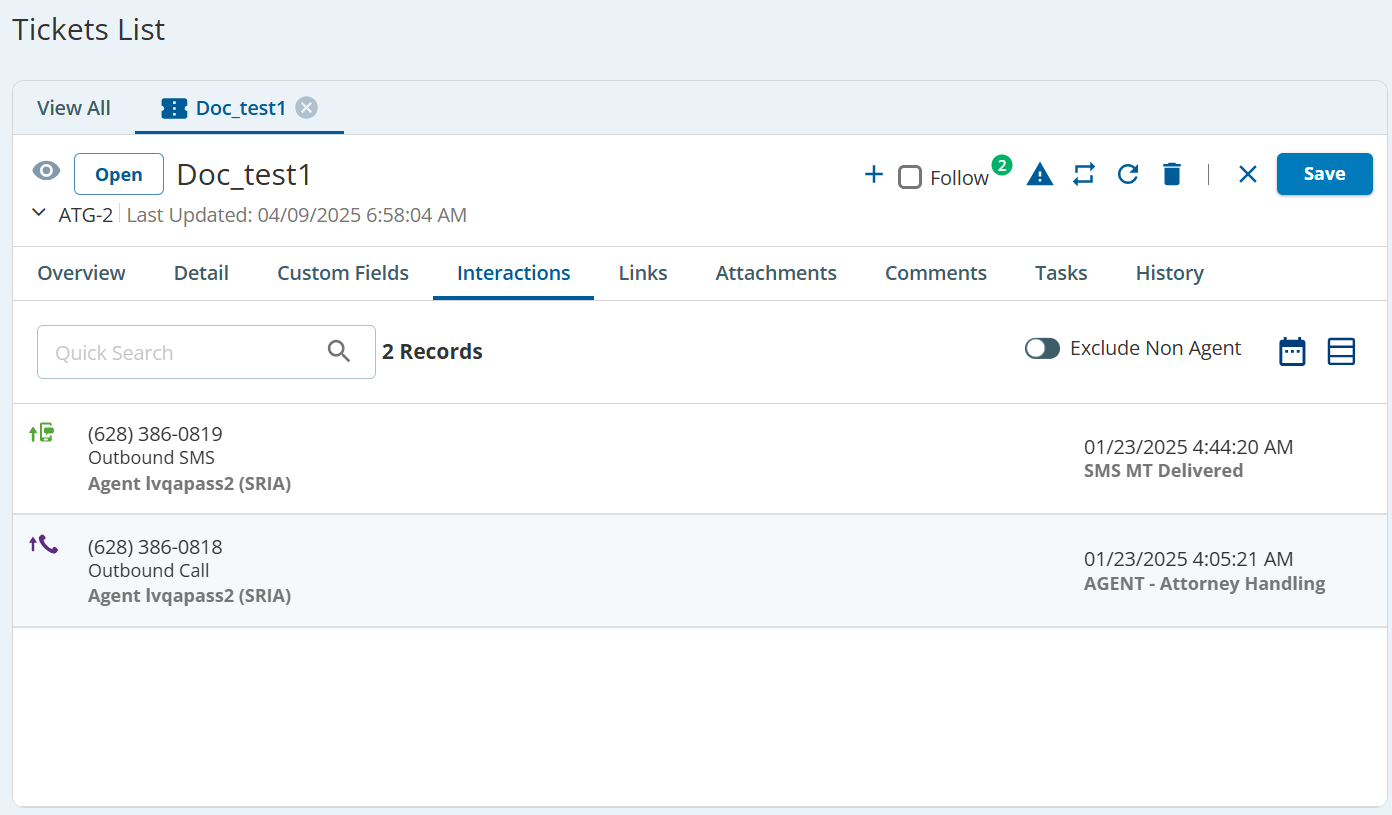
Double-click on the required interaction to see the details.
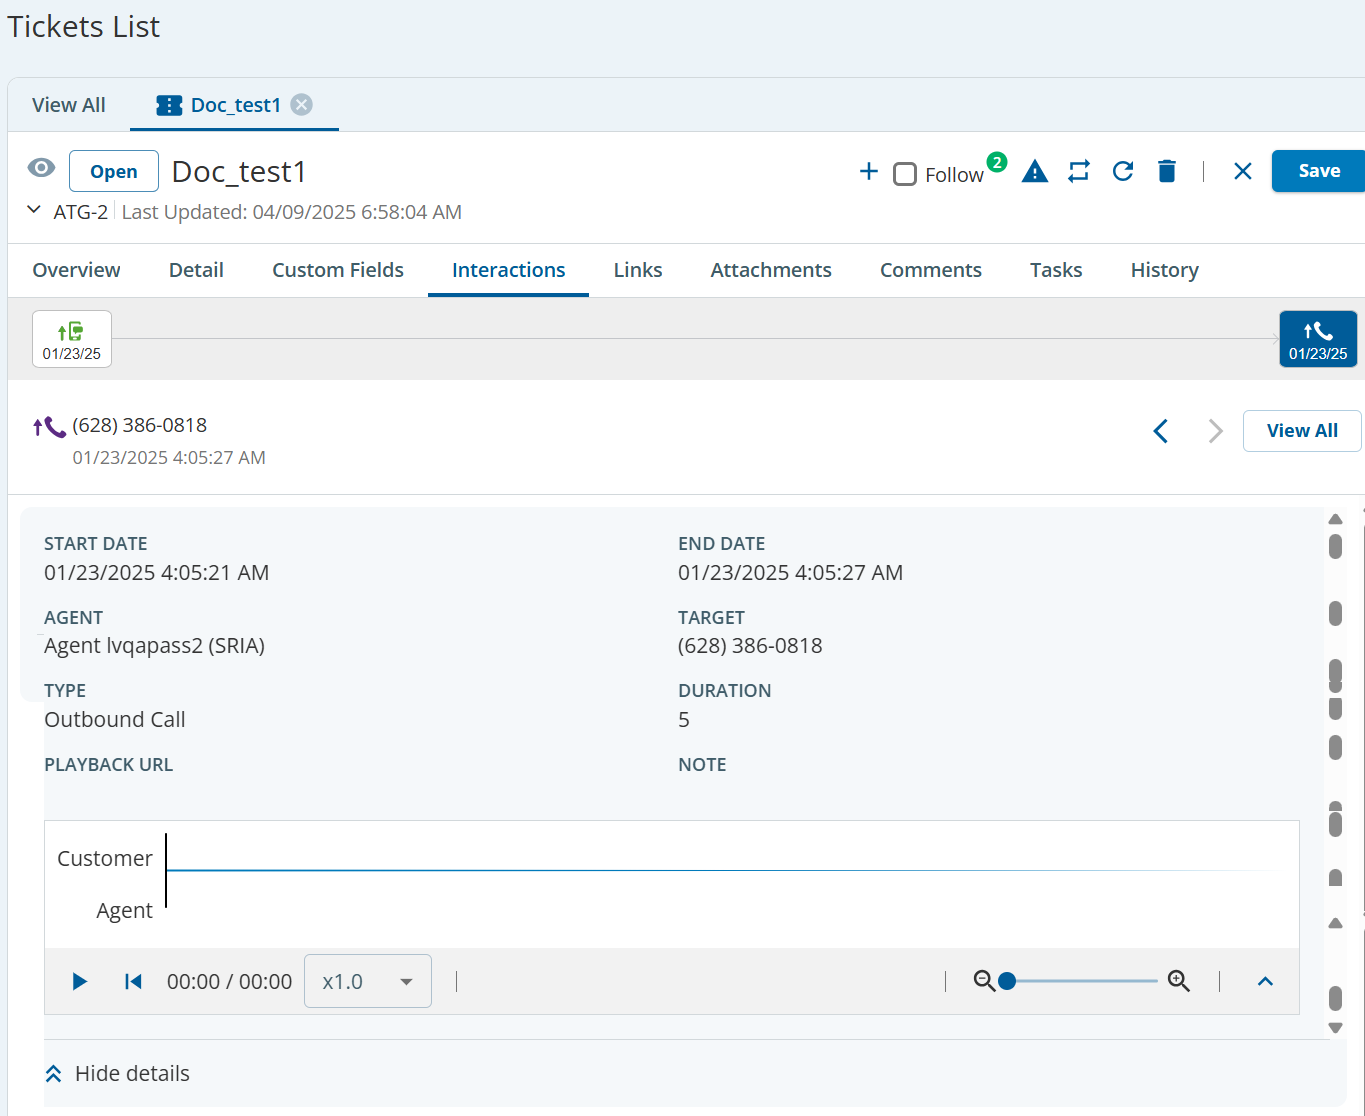
The interaction details displays the following fields:
- START DATE
- END DATE
- AGENT
- TARGET
- TYPE
- DURATION
- PLAYBACK URL
- NOTE
- Audio section
Before you can listen to an interaction on this tab, ensure that the Allow Playing Audio Recording checkbox is selected for the ticket page on the Desktops tab of the Designer window.
To listen to the interaction, double-click the row containing the interaction, and then, in the Call Detail window, click play (
 ).
Links Displays the list of tickets and URLs that are linked with the ticket.
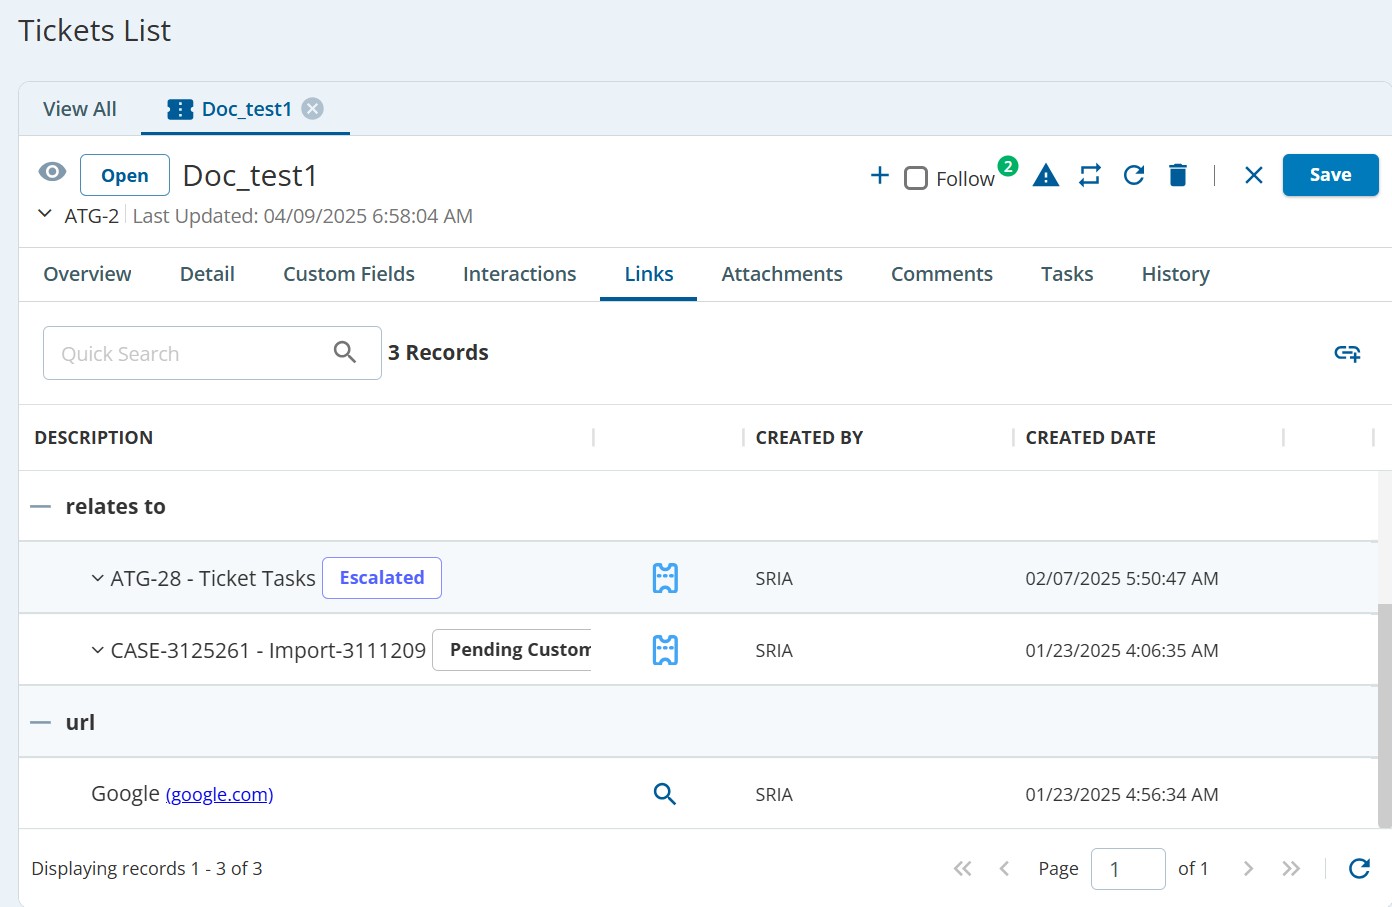
To add link:
- Click the Link (
 ) button.
- Select the link type from the drop-down list.
The available option are: Ticket and URL - Select the required option from the drop-down list.
- Ticket: Specify THIS TICKET and TICKETS.
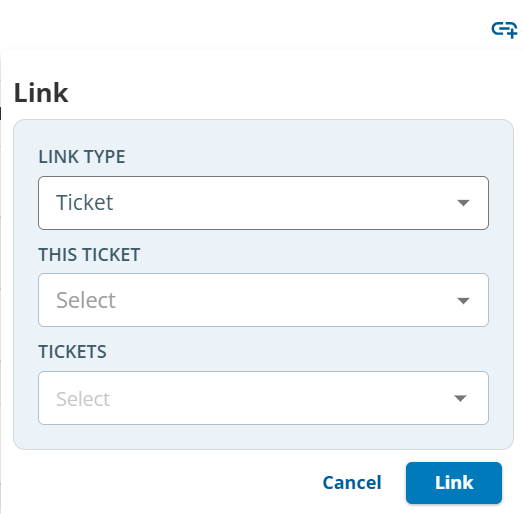
- URL: Specify URL and LINK TEXT.
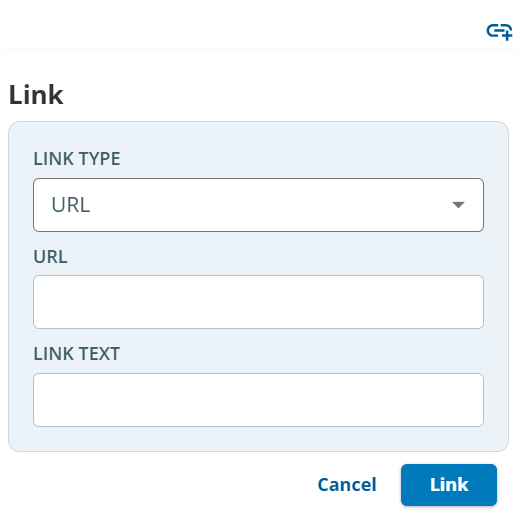
- Ticket: Specify THIS TICKET and TICKETS.
- Click Link.
The link is added, and it appears on the Links tab.
Attachments Displays attachments associated with the ticket.
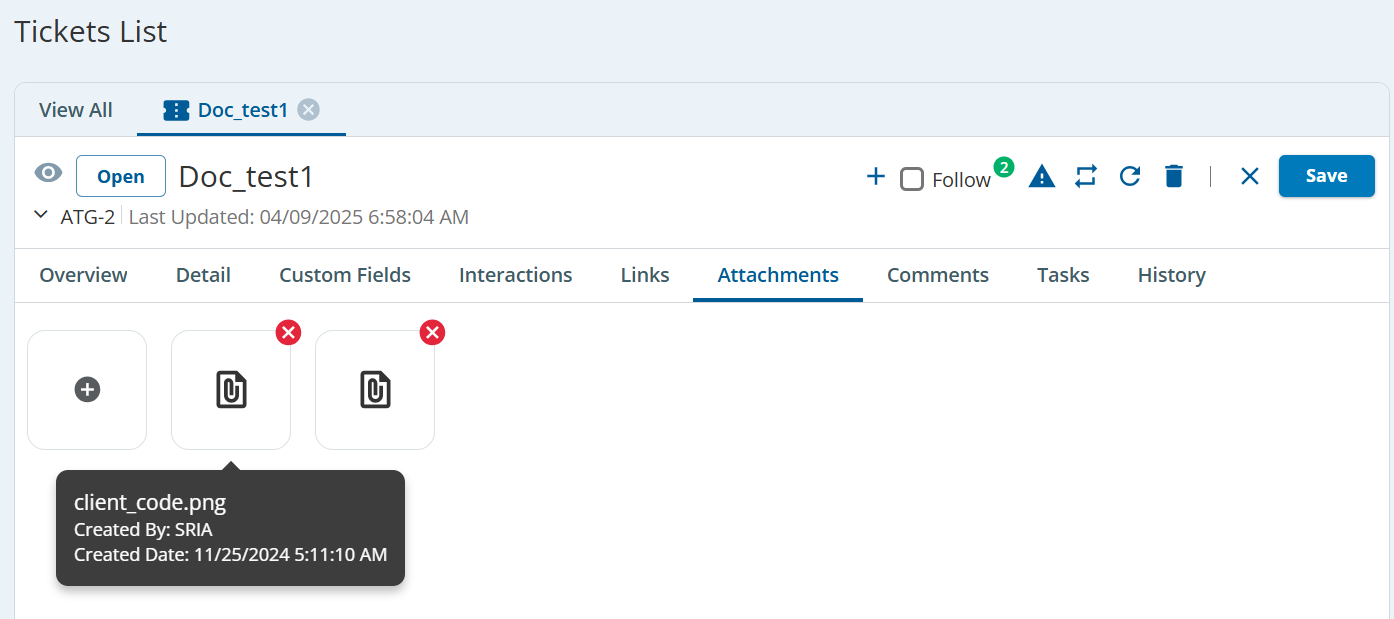
- You can add an attachment by using the Upload (
 ) button.
- You can download an attachment by clicking the attachment.
- You can delete an attachment by using
 next to the attachment.
Comments Displays comments associated with the ticket.
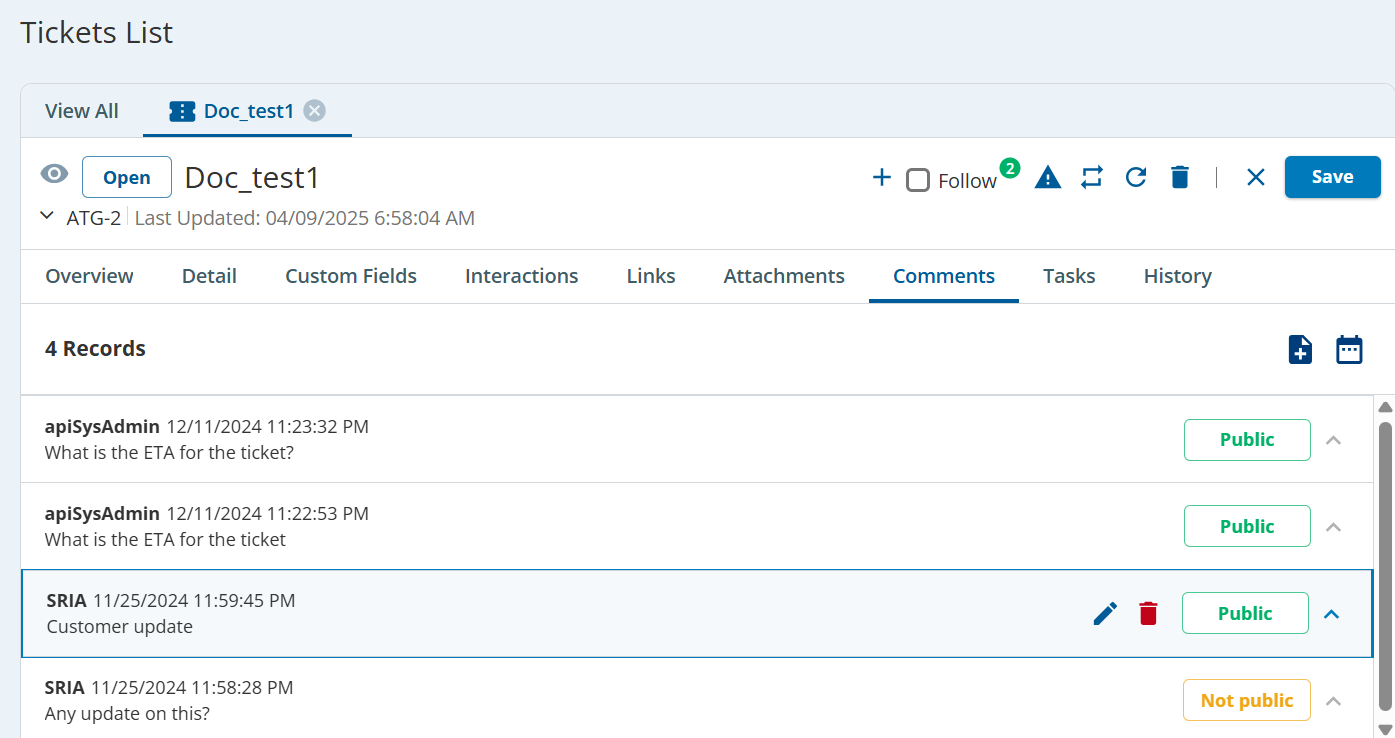
To add a comment:
- Click the Create Comment button in the upper-right corner.
The Create Comment window appears.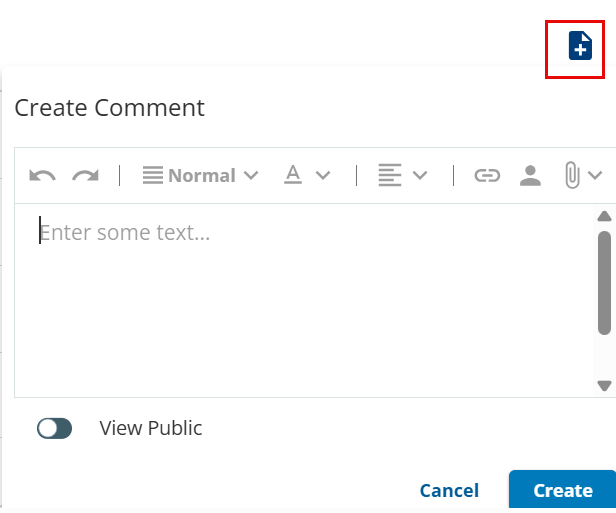
- Specify your comment in the text box, format the comment as required, and then click Create.
- Click View Public, to make the comments viewable to the public.
The comment is added and it appears on the Comments tab, along with your name and time stamp.
- You can modify a comment by using the Edit icon (
 ) next to the comment.
- You can delete a comment by using the Delete icon (
 ) next to the comment.
Tasks Displays all the tasks created for the ticket.
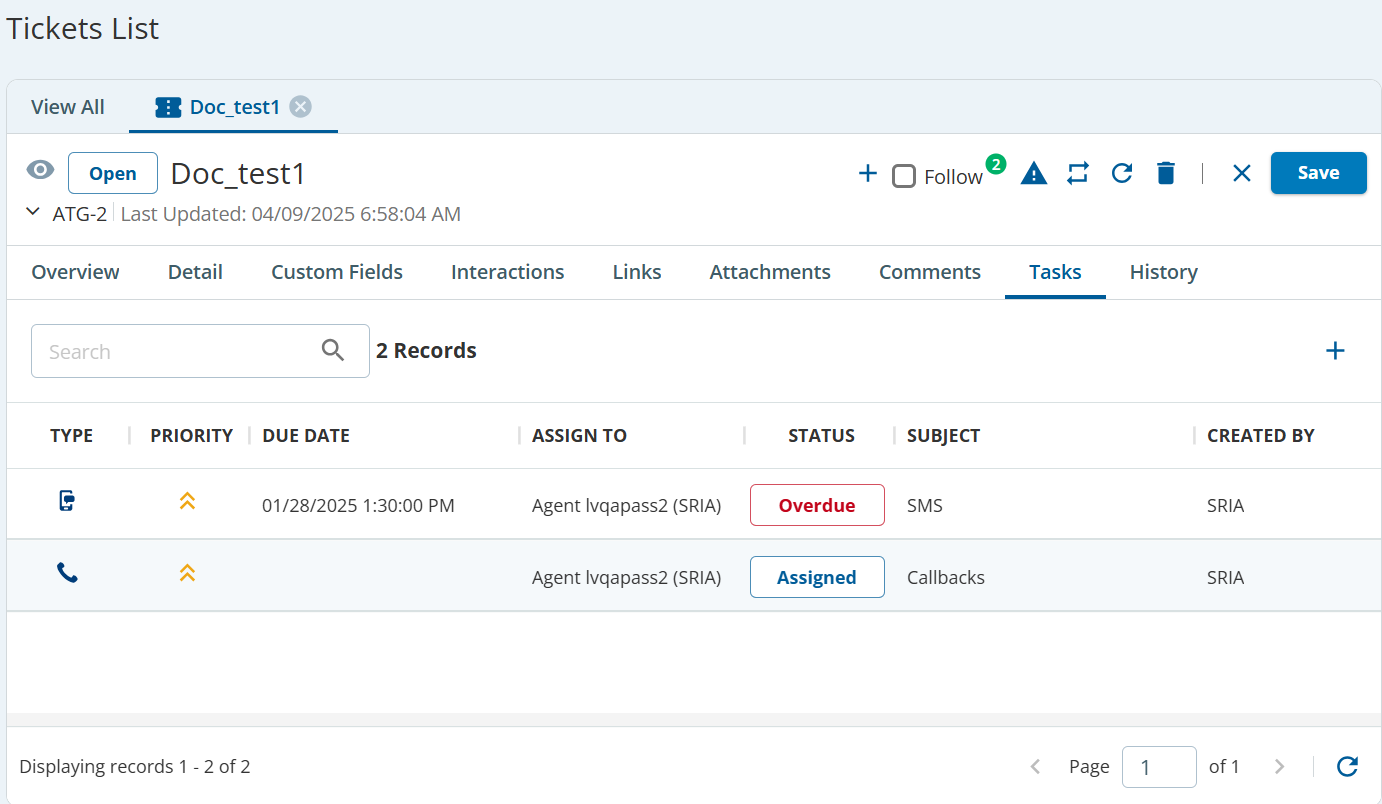
To add a new task:
- Click the New Task (
 ) button.
The New Task window appears.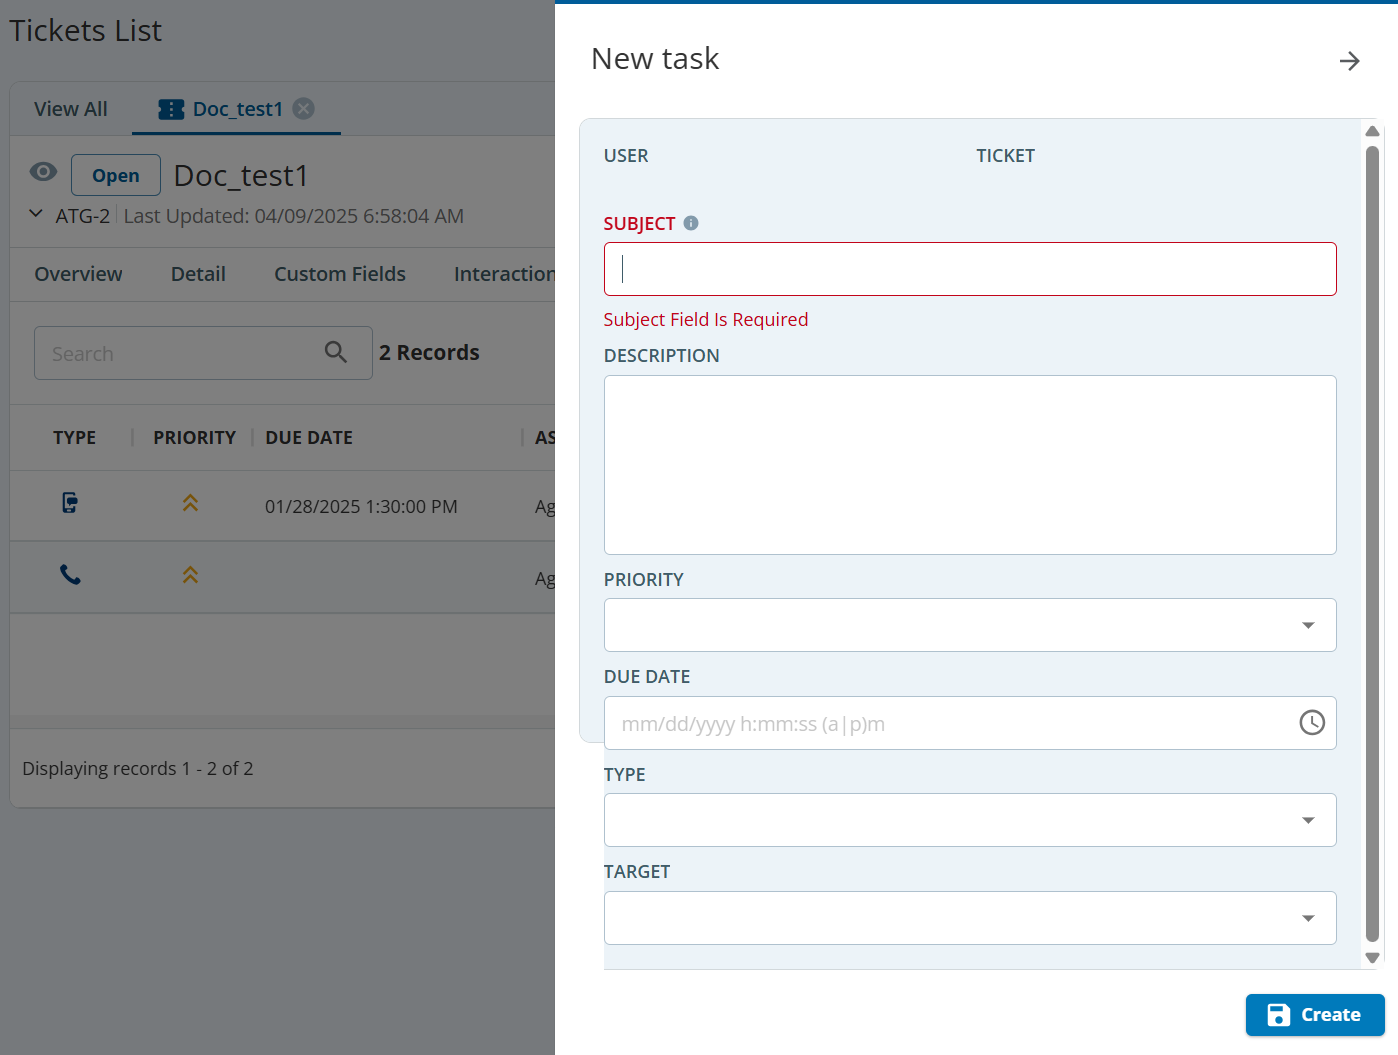
- Specify fields, and then click Create.
The task is added and it appears on the Task tab.
History Displays a table with all changes made to the ticket.
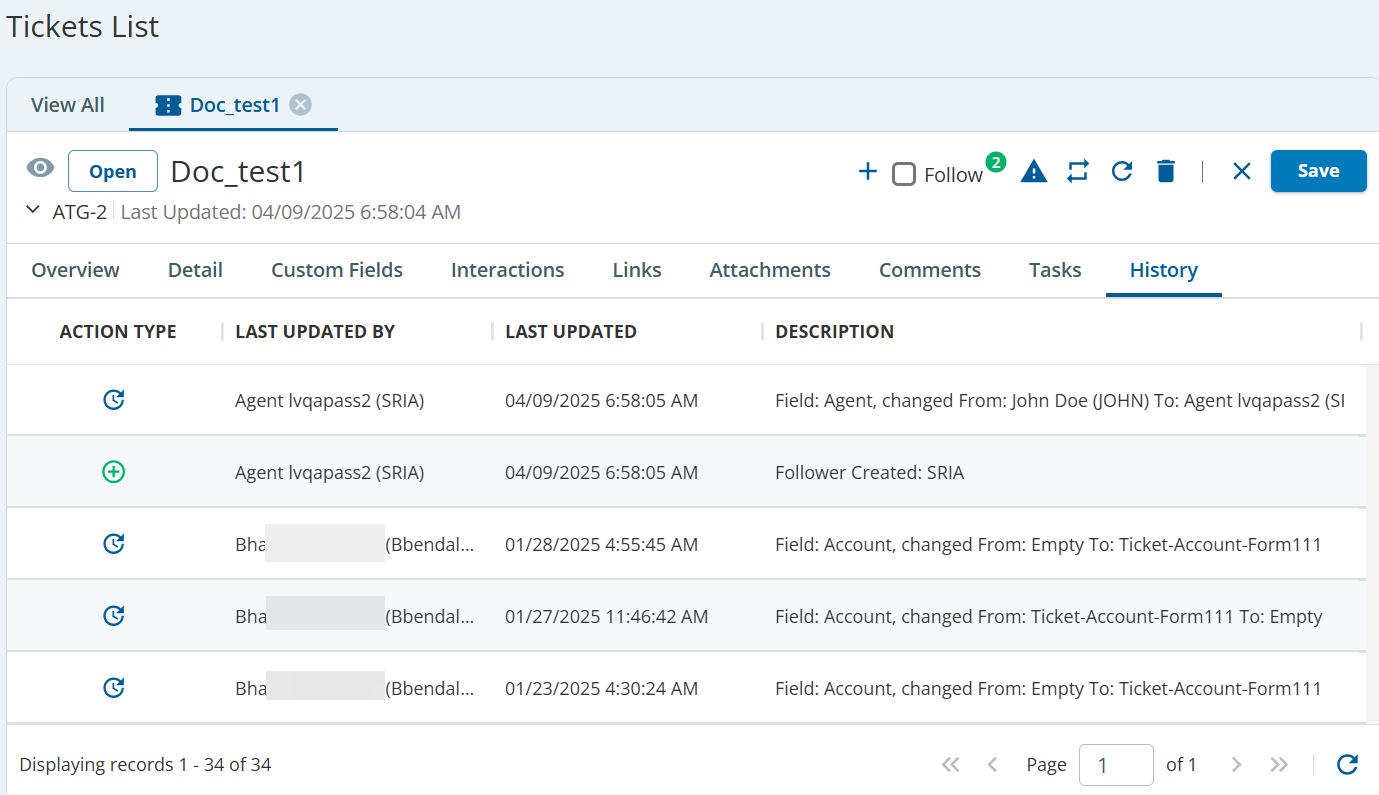
The table displays the following columns:
- ACTION TYPE
- LAST UPDATED BY
- LAST UPDATED
- DESCRIPTION
Modify the values in the fields as required.
- Click Save.
The ticket is updated.
To view the Tickets List, click the Close icon ().
Modifying Tickets in Bulk
To modify tickets containing similar fields all at once, you can use the bulk modify option. The custom fields are available when you modify multiple tickets together.
To modify multiple tickets at once:
On the Configure tab, go to TICKETING > Tickets List.
The Tickets List tab appears, displaying rows with tickets that you recently viewed.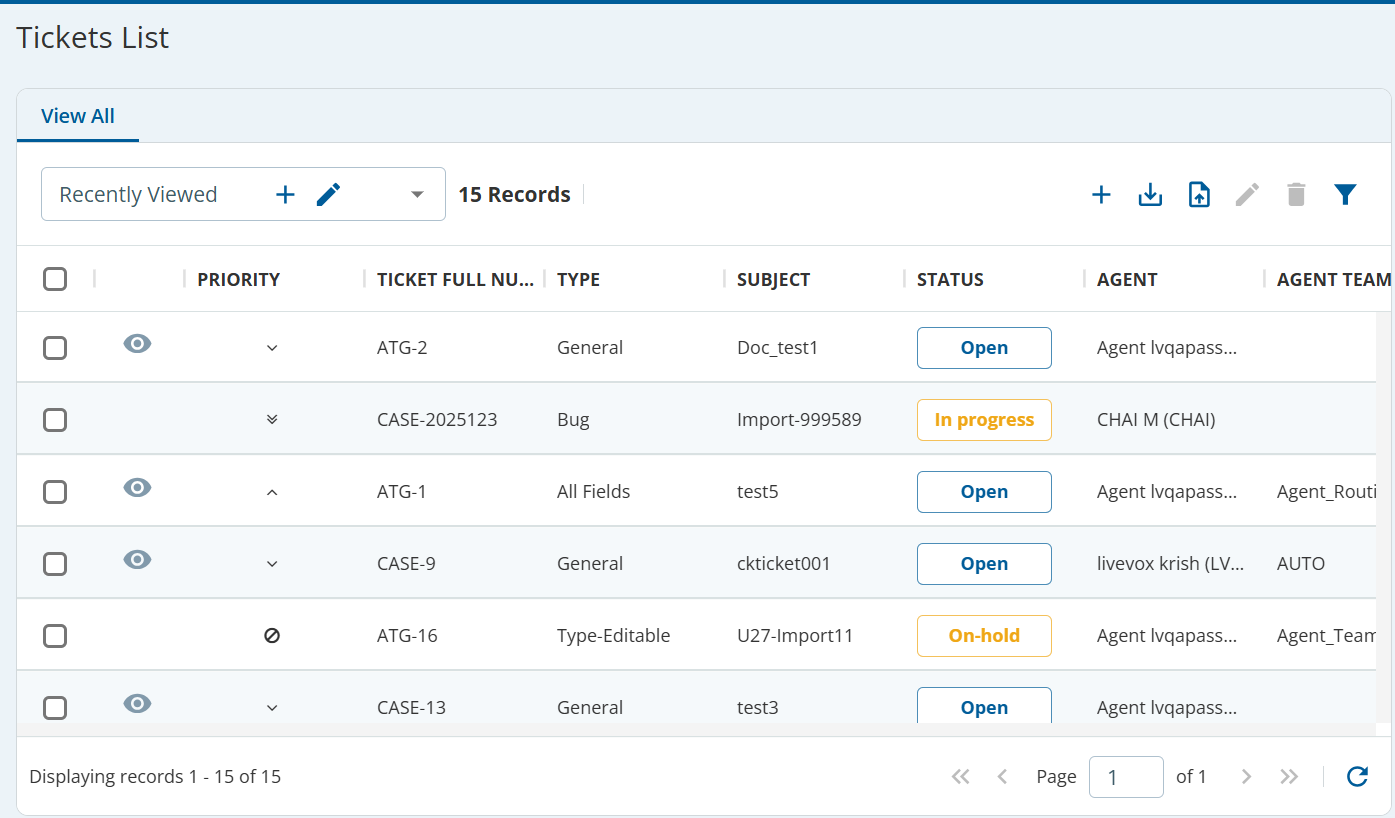
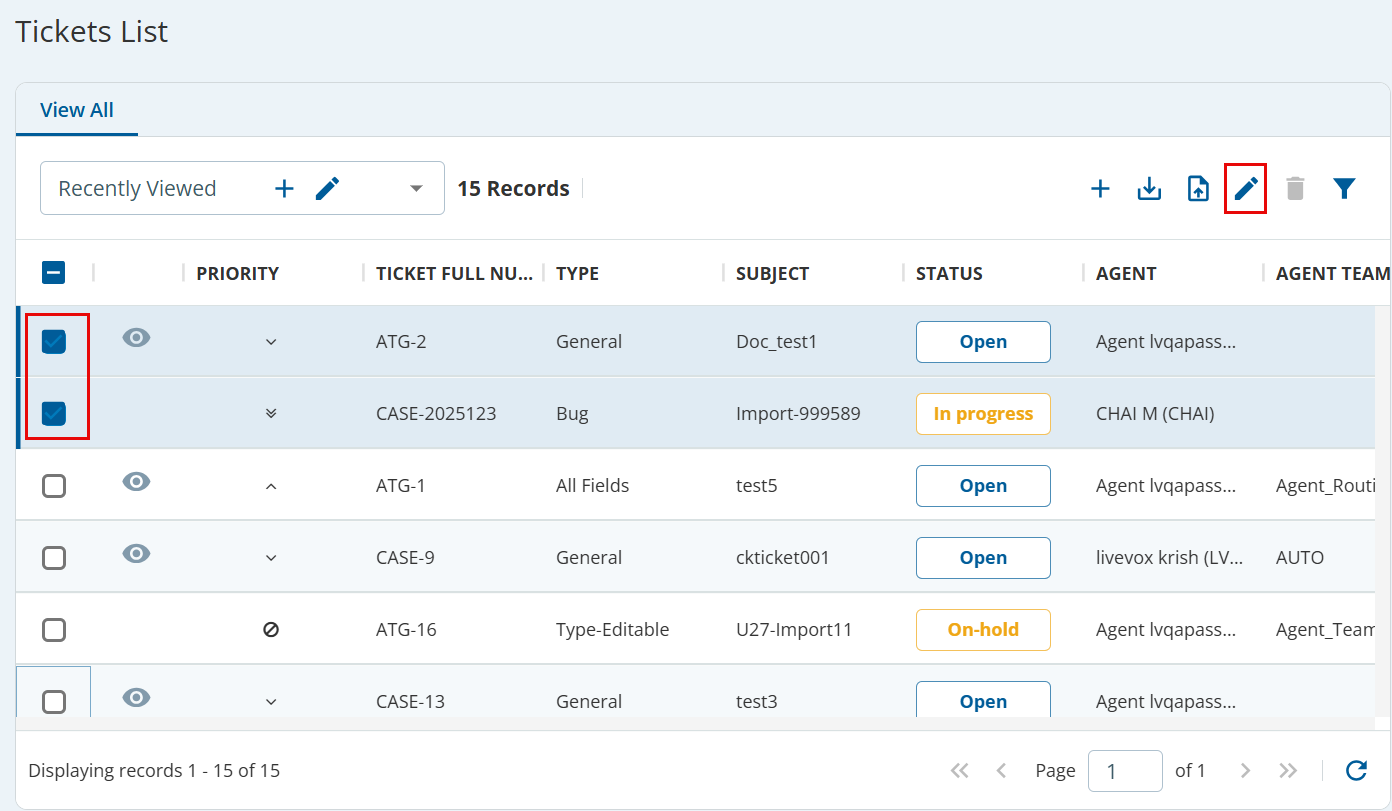
Select the checkbox next to each ticket that you want to modify, and then click Edit.
The Edit Tickets window appears.
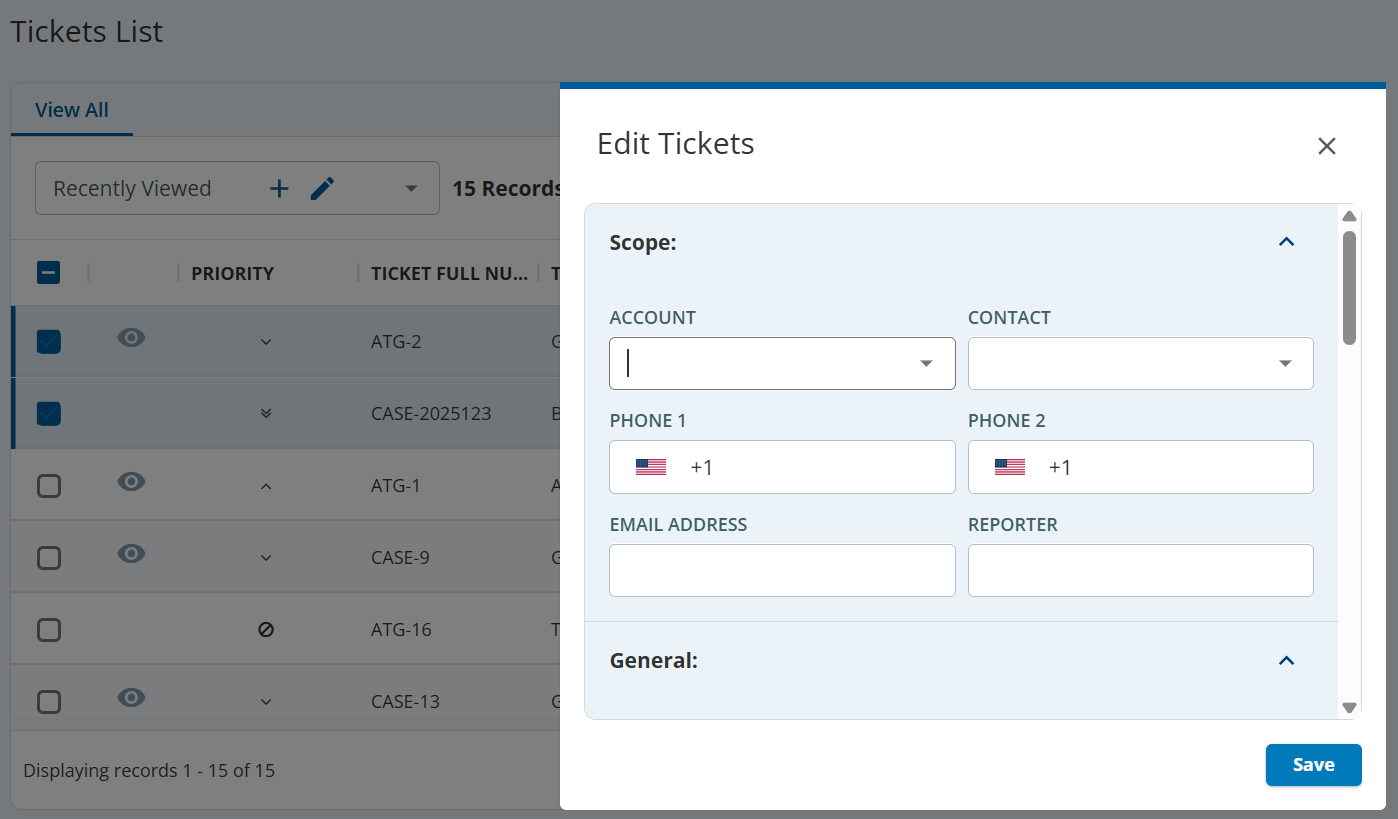
Modify the values in the fields as required, and then click Save.
The tickets are updated.
Importing Tickets
You can import a ticket that is created outside the SmartReach portal into SmartReach. To import the file, the file must be in a CSV (comma-separated values) format containing the ticket field values you want to add to the ticketing dashboard.
Before you begin, ensure the following:
- Each ticket record in the file you want to import contains a subject for the ticket.
- The file size must not be more than 15 MB.
To import the tickets:
- On the Config tab, go to TICKETING > Tickets List.
The Tickets List tab appears. - Click the Import icon.
The Import Tickets window appears.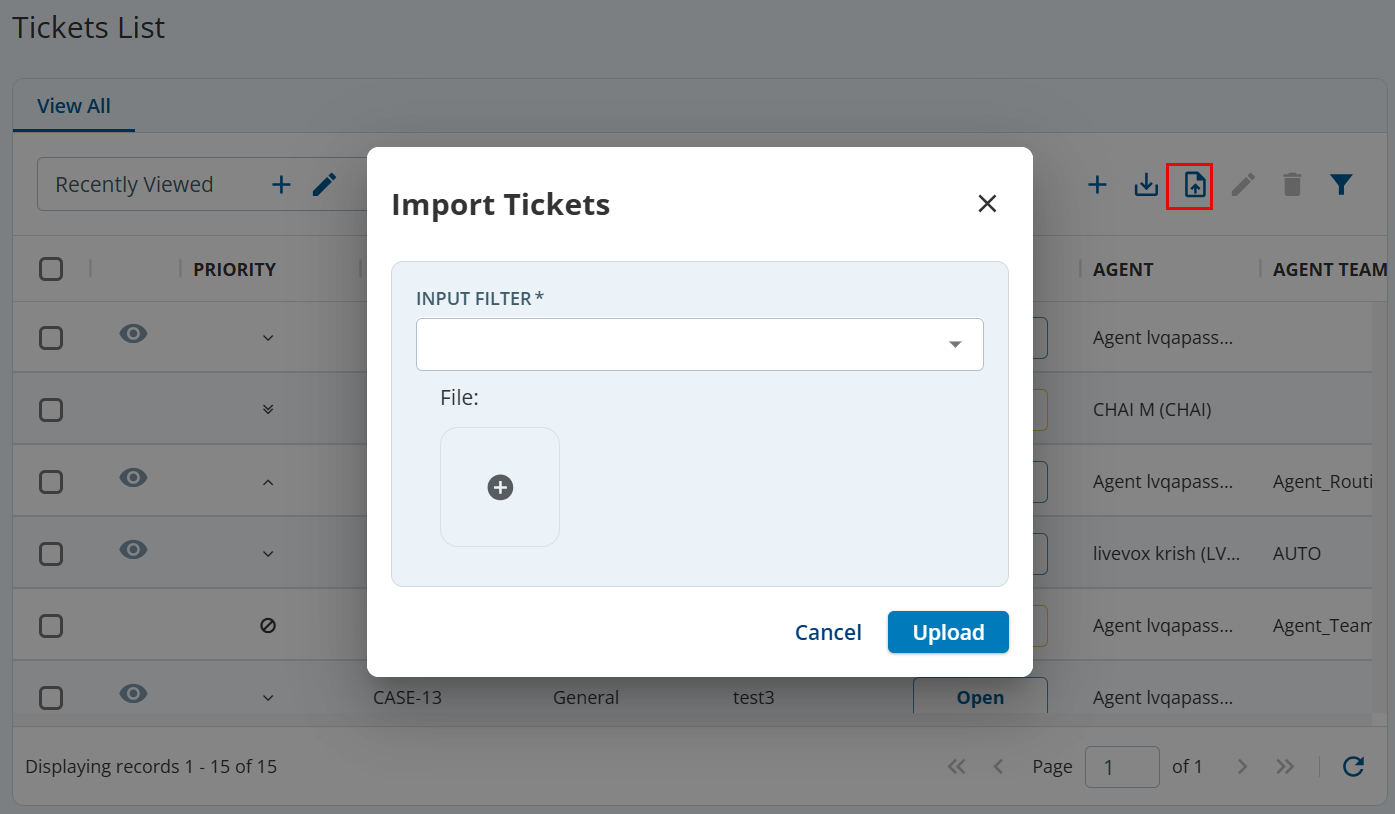
- Specify values in the following fields:
Input Filter: Select an Input Filter (a predefined format to import the data in the file).
- Ensure that the format of the file that you select in the File field corresponds to the format of the selected Input Filter.
- Only the Input Filters whose target is Ticketing are available in the Input Filter field
File: Click and then select the file containing the ticket data that you want to import.
Click Upload.
You can view details such as the status of the import or the date and time when the import started or ended in the User Tasks window. This window appears when you go to
 > User Tasks. In the window, the ticket import task is identified by the value TICKETING_IMPORT in the Operation column.
A message stating the data was imported appears. The tickets from the file appear in the table on the Tickets tab.
Exporting Tickets
To share the ticketing information in a file format for verification, you can export tickets from the LiveVox Portal (LVP) to a CSV file.
To export tickets:
On the Config tab, go to TICKETING > Tickets List.
The Tickets List tab appears, displaying rows with tickets.
- The tickets that are exported depend on the view that you have selected.
- If the search box displays the name Select a predefined view, all tickets appear in the table.
- If you want to export the tickets associated with a specific account view (filer), in the search box, select the required view.
- If you want to export all tickets, in the search box, click the Clear Ticket View icon.
- Click the Export icon.
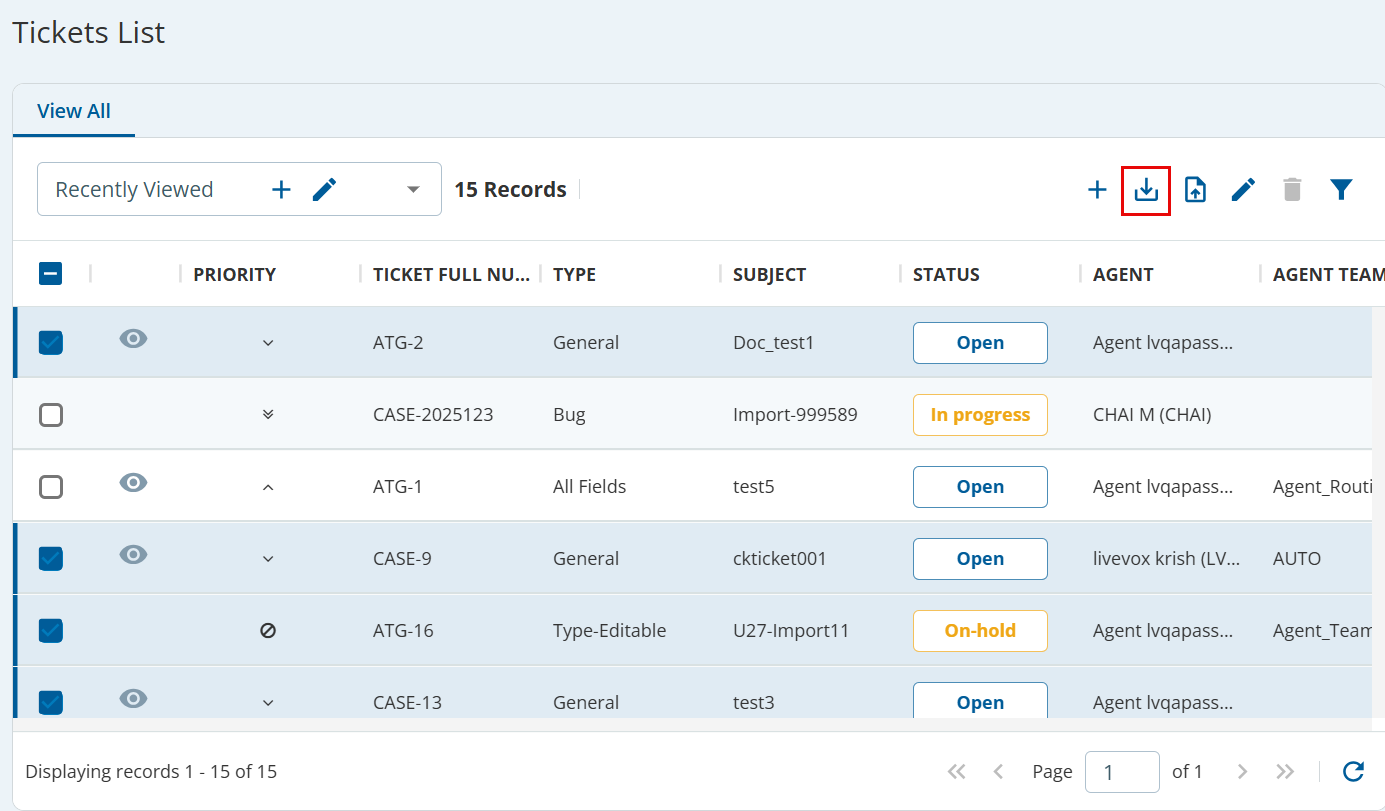
A CSV file containing the tickets from the LVP (depending on the selected view) is downloaded.
Additional Features
For additional features related to Ticketing, see the Tickets List and Ticketing section.