Download PDF
Download page Procuring the Inbound Phone Numbers.
Procuring the Inbound Phone Numbers
To configure an inbound service, you will need phone numbers. Contact LiveVox to provide you with phone numbers, as per your requirement.
For the LiveVox Customer Care Team to effectively process inbound number requests, you must include the following requirements:
o Specify the number of inbound phone numbers you require.
o Specify if you require a toll-free number or a local number.
o Provide the area code or city and state from which the local number should originate.
o Specify the service with which the number(s) must be associated.
View the assigned phone numbers in the Phone Numbers Editor under the Voice menu. The Phone Numbers Editor is described below:
The Phone Numbers editor allows you to view all phone numbers within the LiveVox Portal and easily identify, assign, modify, and disassociate phone numbers from one service to another. The Phone Numbers editor compiles all client-assigned phone numbers (Agent Dial-In numbers, Extensions, Agent Direct Lines, Inbound numbers, Caller ID numbers, and so on) within the tool.
In addition, the Phone Numbers editor now supports the E.164 format for internationally provisioned phone numbers.
The E.164 format is as follows: +<Country-Code> followed by the remaining digits.
For example, a London UK number in E.164 format is stored as +44 123 456 789.
- For provisioning and populating phone numbers within the Phone Numbers editor (except for extensions), contact the LiveVox Customer Care Team.
- You can create extensions when adding or updating agents (Configure > Agents > Agents).
For information about the roles and permissions associated with the Phone Number editor, see the User Roles and Permissions section in the Product Documentation Library.
Accessing the Phone Numbers Editor
To access the Phone Numbers editor, select Configure > Voice > Phone Numbers from the Navigation Panel.
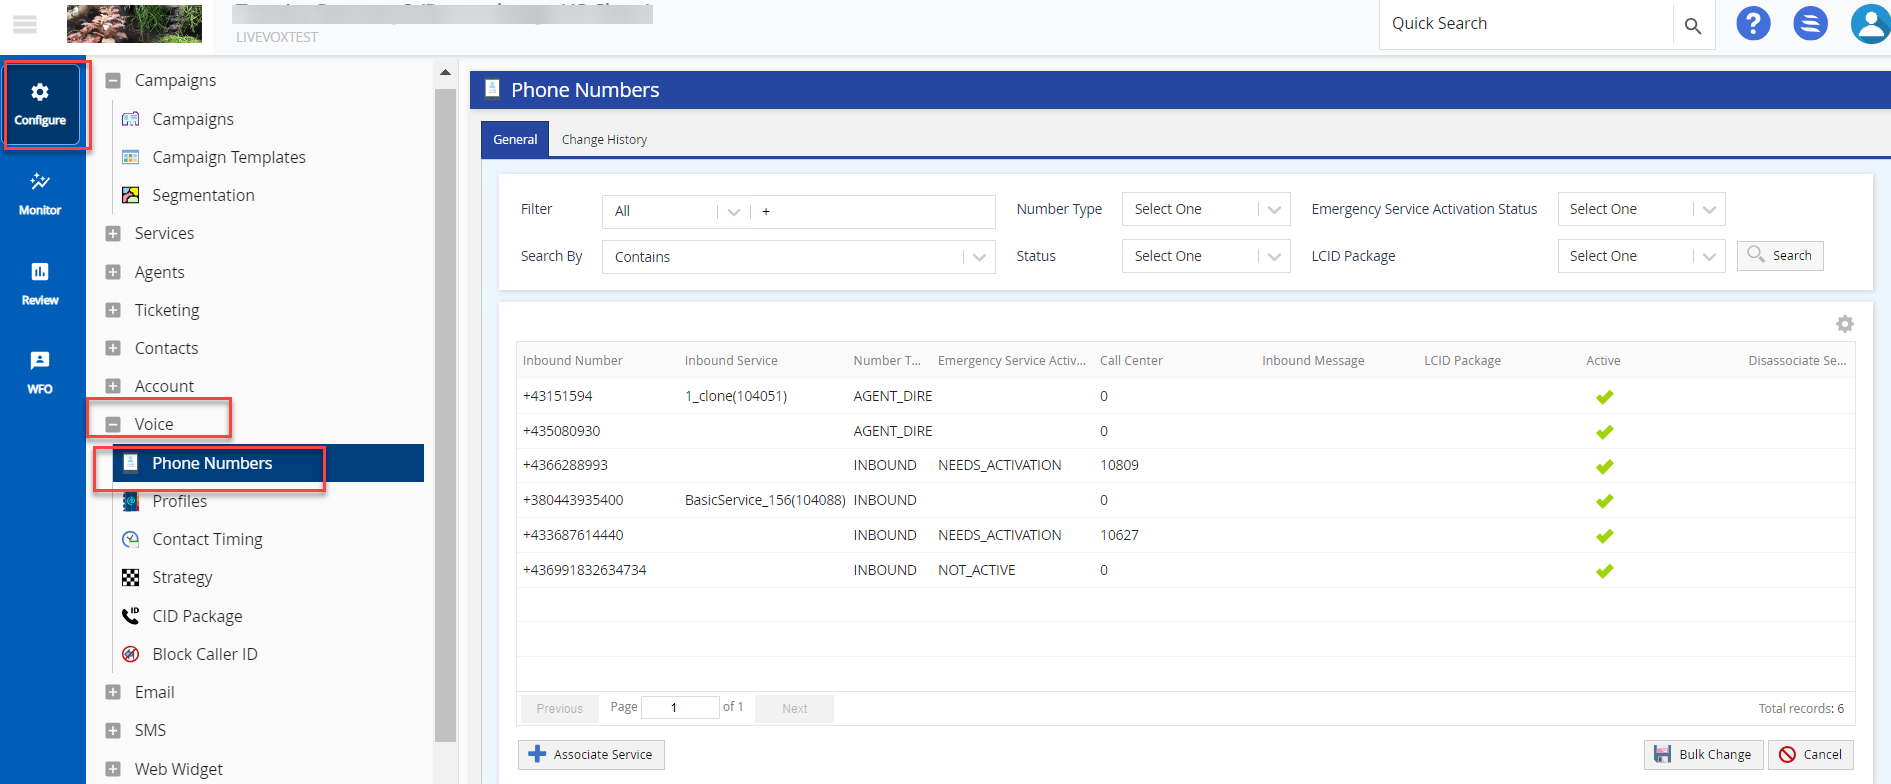
The Phone Numbers editor offers the following tabs and buttons:
Tabs
- General: Displays a list of provisioned phone numbers within the LiveVox Portal. For more information on viewing and editing inbound phone numbers and their mappings, see the Managing Phone Number Records section.
- Change History: Tracks and displays the changes made to the Phone Numbers editor.
Buttons
- Associate Service: Allows you to assign a phone number to a service. For more information, see the Associate/Disassociate Services section.
- Bulk Change: Updates the required field(s) to all phone records. For more information, see Managing Phone Number Records section.
- Cancel: Discards the changes.
The below sections describe how to easily identify, assign, modify, associate, and disassociate a phone number from one service to another.
On the Configure > Services > Phone Numbers tab, you can view the assigned phone numbers (Agent Dial-In numbers, Extensions, Agent Direct Lines, Inbound numbers, and Caller ID numbers, and so on).
The Phone Numbers tab displays all phone numbers within the client portal and allows you to identify, assign, modify, and disassociate phone numbers from one service to another. This tool compiles all assigned phone numbers (Agent Dial-In numbers, Extensions, Agent Direct Lines, LCID, Inbound numbers, and caller ID numbers) in a single view for easier management.
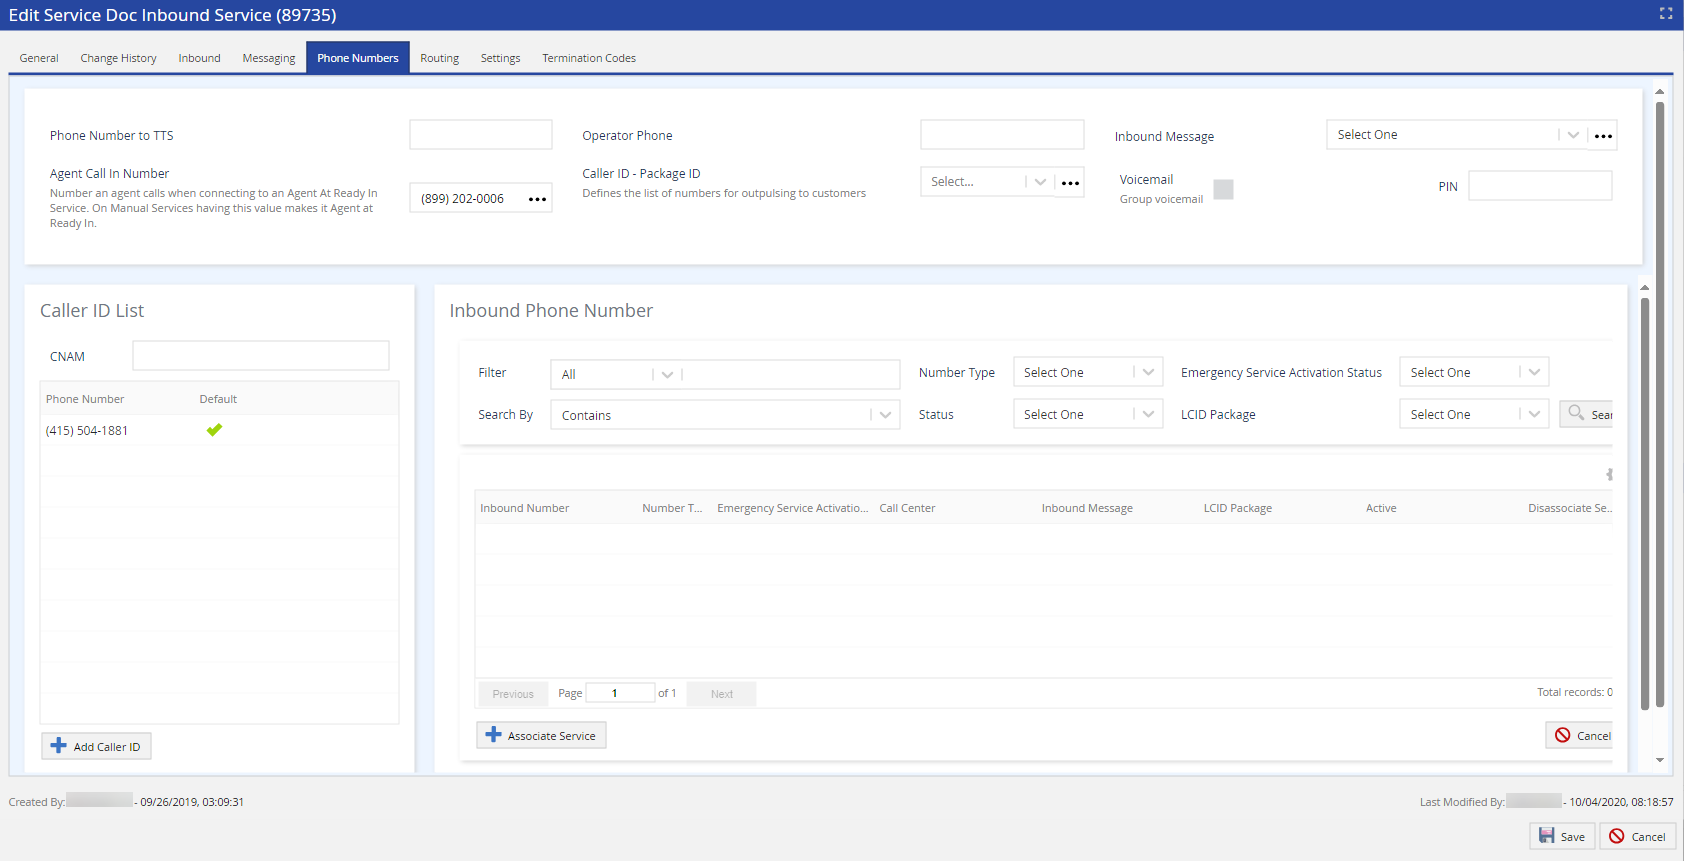
Phone Numbers
All the phone fields available on the Phone Number tab in the Service editor (Caller ID, Phone Number to TTS, Operator Phone, and Agent Call In Number fields) must be stored in the E.164 format. The E.164 format is as follows: +<Country-Code> followed by the remaining digits. For example, a London UK number in E.164 format is stored as +44 123 456 789. The LiveVox Portal (LVP) validates the phone numbers using the E.164 format. Phone numbers without a country code are validated using the Dialing Country of Origin field in the Client editor and are treated as non-international numbers.
- Phone Number to TTS: The number used in answering machine messages for text-to-speech (TTS).
- Operator Phone: The number used when dialing using extensions rather than Direct Inward Dialing (DID). For manual services, the Operator Phone acts as the Caller ID.
- Inbound Message: You can select the message associated with the inbound service.
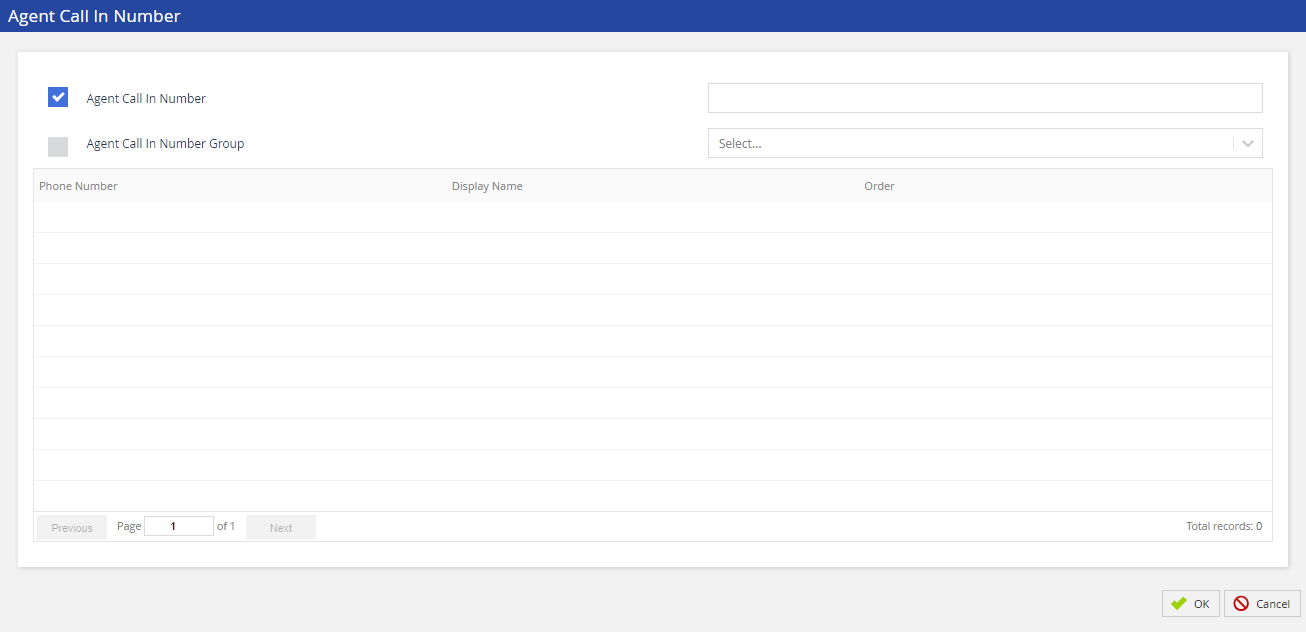
- Agent Call In Number: The number that agents are prompted to dial when using Agent at Ready ACD mode to establish their audio pathway to LiveVox. An 899 indicates VoIP. On a manual service, a blank Agent Call In Number results in LiveVox calling agents; if populated, agents call into LiveVox. Clicking on the link to the right of the Agent Call In Number field displays the configuration screen. If Agent Call In Number Group is selected from the drop-down list, the agent is presented with the list of predefined numbers to dial into the agent desktop.
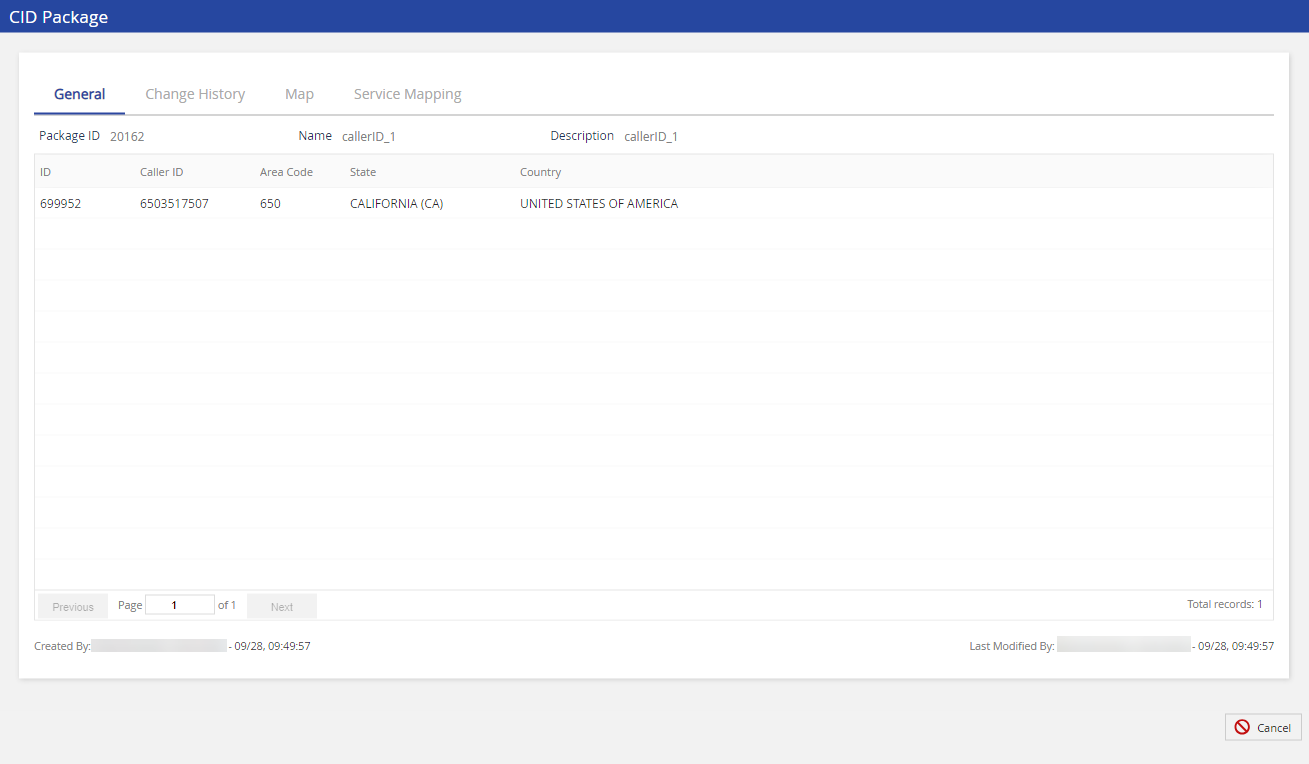
- Caller ID - Package ID: The list of Caller ID (CID) packages that contains Local Caller ID numbers (depending on geography), toll-free numbers, or a combination of both. These numbers can be displayed on the call recipient's caller ID. The options for selection are assigned to your site and can be reviewed in more detail from the CID tool. Clicking on the link to the right of the Caller ID - Package ID field takes you to the CID Package screen. This screen displays a list of CID numbers for the selected package. For more information, view the CID Package section of this User Guide.
- Voicemail: When checked, it allows callers to leave a voicemail to the agent. You can access voicemails through the LiveVox Portal by navigating to Review > Agent Reports > Voicemail Recording Report. For more information about the Voicemail Recording Report, see the Voicemail Recording Report.
Agents and Administrative users can receive real-time voicemail (VM) notifications through email. You can check an email as an alternative to playing the voicemail on the agent desktop. The system supports voicemail notifications with the following options:
- Email Only
- Email with Audio file
- Email with transcription text
- Email with both Audio file and transcription text

- Contact the LiveVox Customer Care Team to enable this functionality.
- You can enable email notifications at the service level (Inbound and Basic services that support inbound calls and voicemail) and at the agent level. The corresponding service or agent must have a valid email address to receive an email VM transcription.
- Voicemail is received in both the Agent Desktop and Email inboxes. Inbox management is independent of each other.
PIN: A personal identification number (PIN) is required to access group voicemail (digits only).
A group voicemail PIN is not required with Voicemail 2.0.
Caller ID List
The list of phone numbers that can be set (default option) to appear on the call recipient's caller ID display.
CNAM: Outbound calls can be configured with customized Caller NAMe (CNAM) information (the alphanumeric description displayed on the caller ID interface for consumers or businesses). This field supports 15 printable ASCII characters (A-Z, 0-9).

Campaigns using a CID Package or File-Based caller ID do not use this number.
- To add a new entry using the Add Caller ID button:
- Click the Add Caller ID button.
Type the new number and click Save or Cancel to discard the changes.
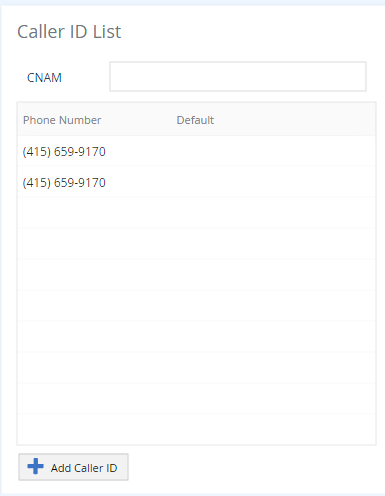

The phone number must have a numeric value and cannot exceed 10 digits.
- To add a new entry using the Add Caller ID button:
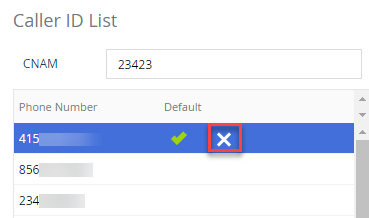
- To remove an existing entry using the Delete Caller ID:
- Select the phone number you want to remove.
- Click the Delete Caller ID button. The phone number selected is highlighted in red.
- Click Save to update or Cancel to discard the changes.
- To remove an existing entry using the Delete Caller ID:
Inbound Phone Number
The Inbound Phone Number section is displayed only if the inbound service is selected from the Services drop-down list. This section allows you to search for and view inbound phone numbers and their mappings.
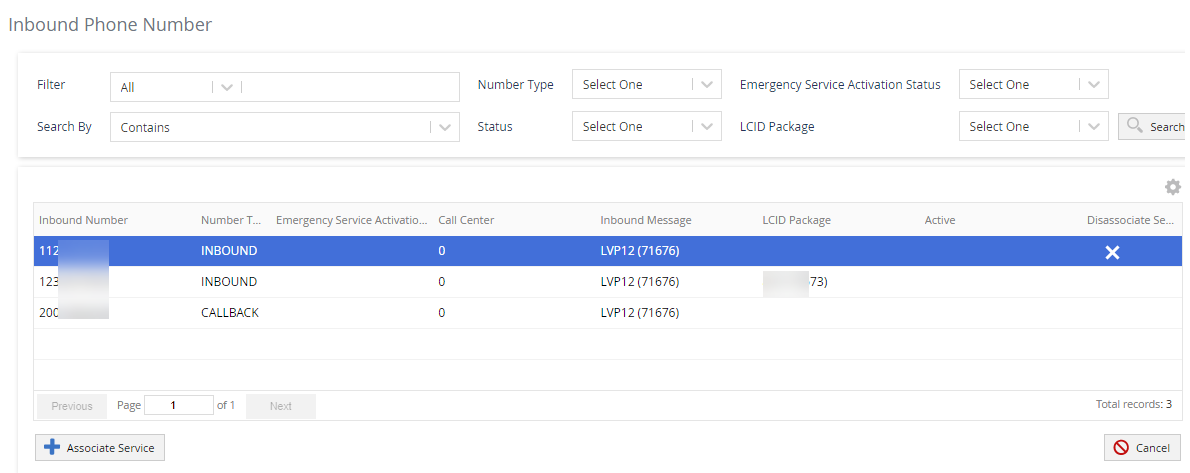
The inbound phone numbers can be filtered by:
- Filter: Filters the search result by City, Inbound Number, or State.
- Search By: Select the following options: Starts With, Contains, Ends With, and Regex.
- Number Type: Filters the search result by Agent at ready in, Agent direct line, Callback, Caller ID, Extension, Group voice mail, Inbound, Other, and Personal voice mail.
- LCID Package: Allows users to select a Local Caller ID (LCID) package from the drop-down list. The package contains a list of local caller ID numbers, any one of which (depending on geography) is designed to be displayed on a call recipient’s caller ID.
- Status: Select between Active and Inactive Status.
- Emergency Service Activation Status: Allows you to search the phone numbers based on their emergency service activation status. Select a status from the drop-down list and click the search icon.
Double-clicking on the inbound phone number row opens the Edit Phone Number screen, which allows you to update the Description, Direct Line for Agent, Number Usage, State, City, and Status of the inbound phone number. The Edit Phone Number screen also shows the associated entities with the package. Use the filter option to specify the search according to Agent (Audio Path), Agent Call In Group, Agent Phonebook, LCID Package, Message, or Service (Caller ID Pool).
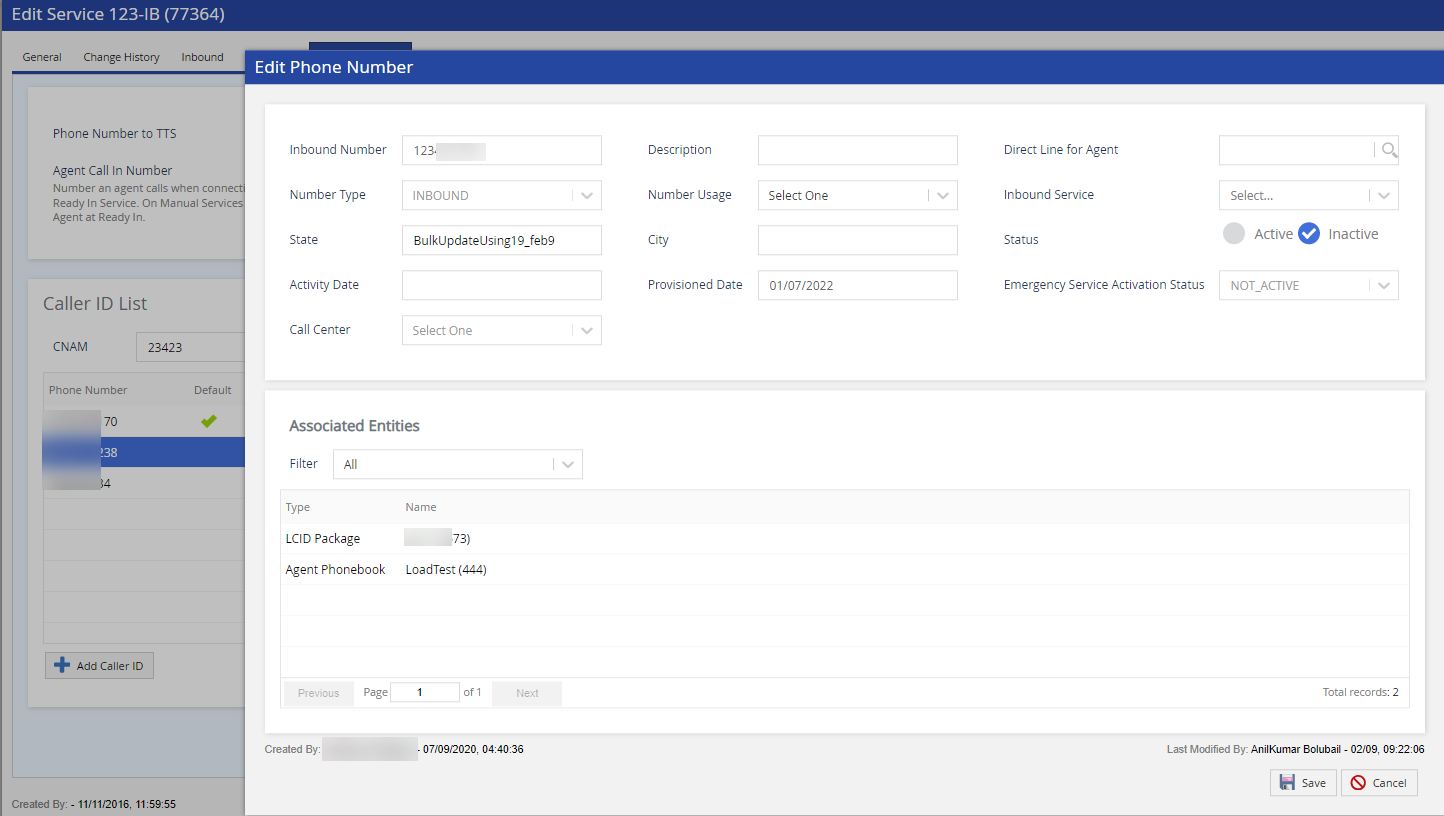
Adding an Inbound Phone Number to the Selected Service
- Select the Associate Service button. This opens the Associate Service screen.
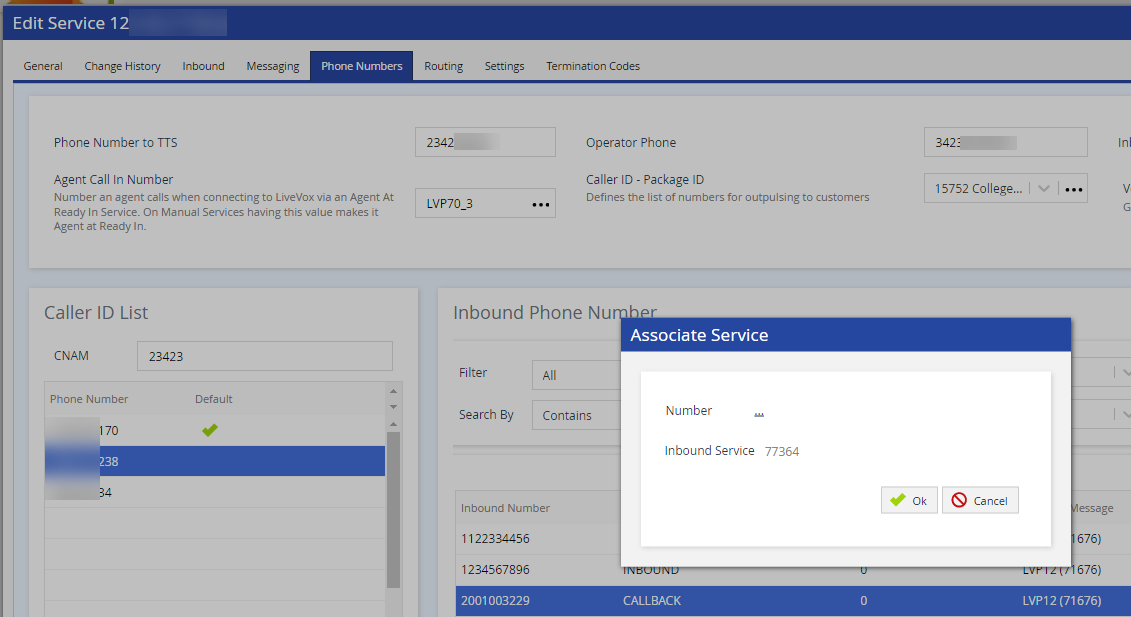
- Click the link next to the Number field from the Associate Service pop-up (screenshot above). The Select Numbers window appears.
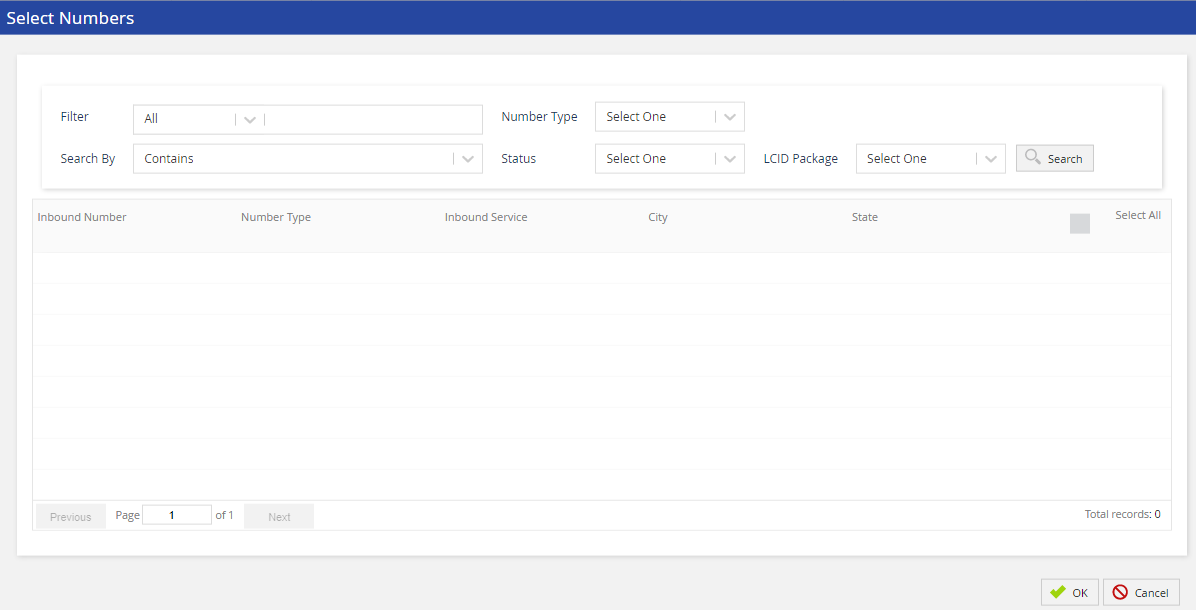
Select the number to be assigned and click OK.
Once the number is assigned, you cannot change that number.
Removing an Inbound Phone Number from the Selected Service
- Click on the record you want to remove.
- Click the Disassociate Service button. The selected record is highlighted in green.

- Click Save to remove the record.