Download PDF
Download page Tickets List.
Tickets List
A ticket is a record of a customer issue or request. Ticket List and Ticketing are components of the Ticket feature that display a table of tickets and enable you to create, modify, and track tickets, regardless of the communication channel from which the tickets originate. You can create a ticket any time, including when interacting with a customer.
Depending on the configuration of the Ticket List and Ticketing components, you can:
- Update multiple tickets together.
- Delete, export, and import tickets.
- Play an audio recording.
- Call a function through a function button. For example, you can create, update, or delete a ticket in an external application, such as Salesforce, or return data from an external application and display that data in a field on the LiveVox platform.
Based on the web widget configuration, a ticket can be created automatically when a customer using the web widget submits a ticket.
In addition to the listed options, you can Manually Link Interactions to Contacts or Tickets and Create Manual Alerts.
The Ticketing component additionally enables you to:
View the Ticket Dashboard. For more information, see Tickets Dashboard.
View, create, modify, delete, export, and import accounts, and view the Account Dashboard through the Accounts tab. For more information, see Account List.
View, create, modify, and delete contacts through the Contacts tab. For more information, see Contact List.
- For information about how to filter the tickets, see Filtering Accounts, Contacts, and Tickets.
- For information about how to customize the Ticket table, see Customizing Account, Contact, and Ticket Tables.
You can use ticket filters to sort and search the tickets. The managers create the filters. To use the filters, click the filter list and select the required filter to search the ticket. 
To create a ticket:
In the Ticket List section, click New.
On the Tickets tab, click New Ticket.
The New Ticket window appears.If the Select Form window appears instead of the New Ticket window, select the web form that is applicable to the ticket you want to create.
The New Ticket window appears.
Specify values in the fields.
- For information about the Ticket fields, see Ticket Fields.
- You can create an account and a contact for the ticket by clicking the plus icon
 in the Account and Contact fields.
 - For information about the Account and Contact fields, see Account Fields and Contact Fields, respectively.
Click Save.
A message stating the ticket has been created and the new ticket details are displayed.
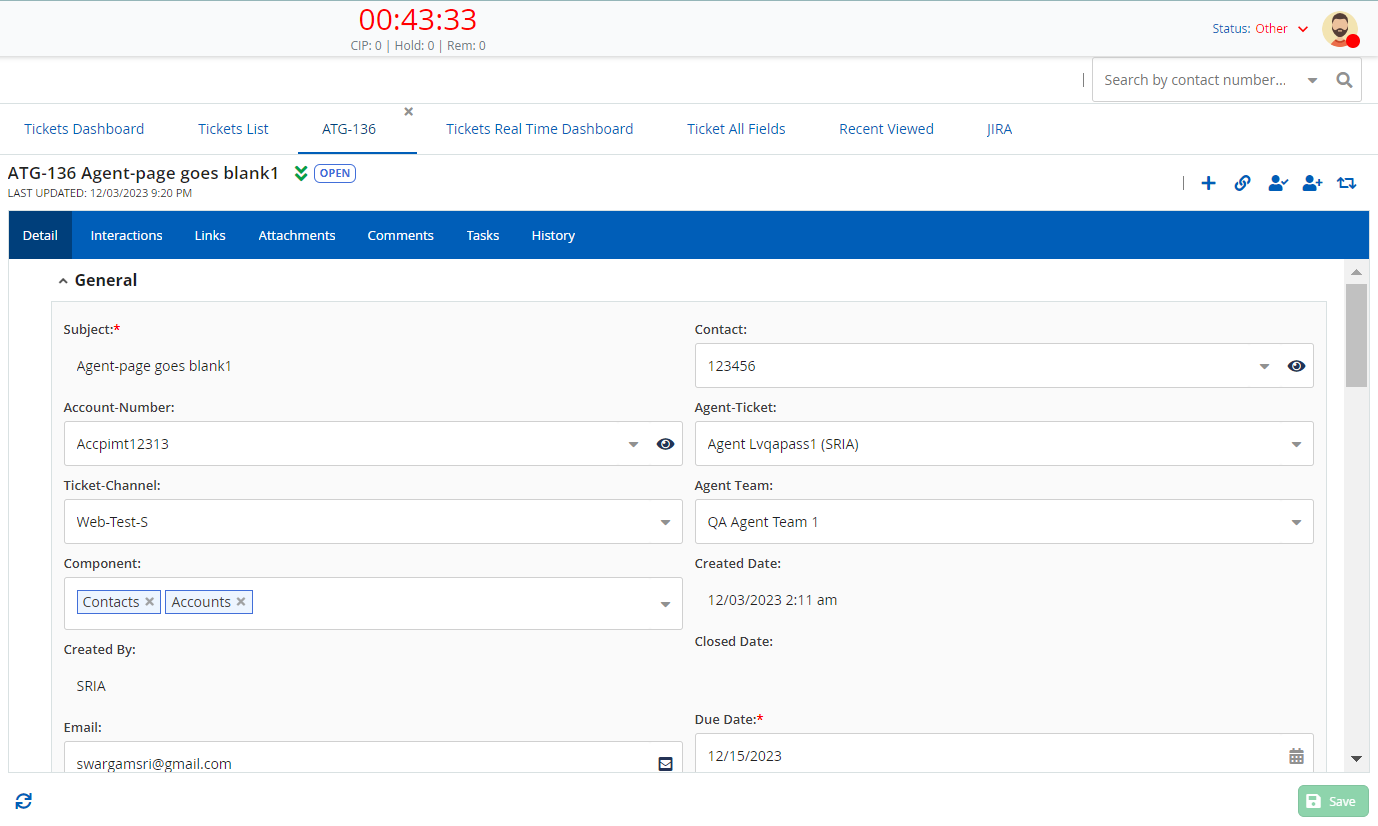
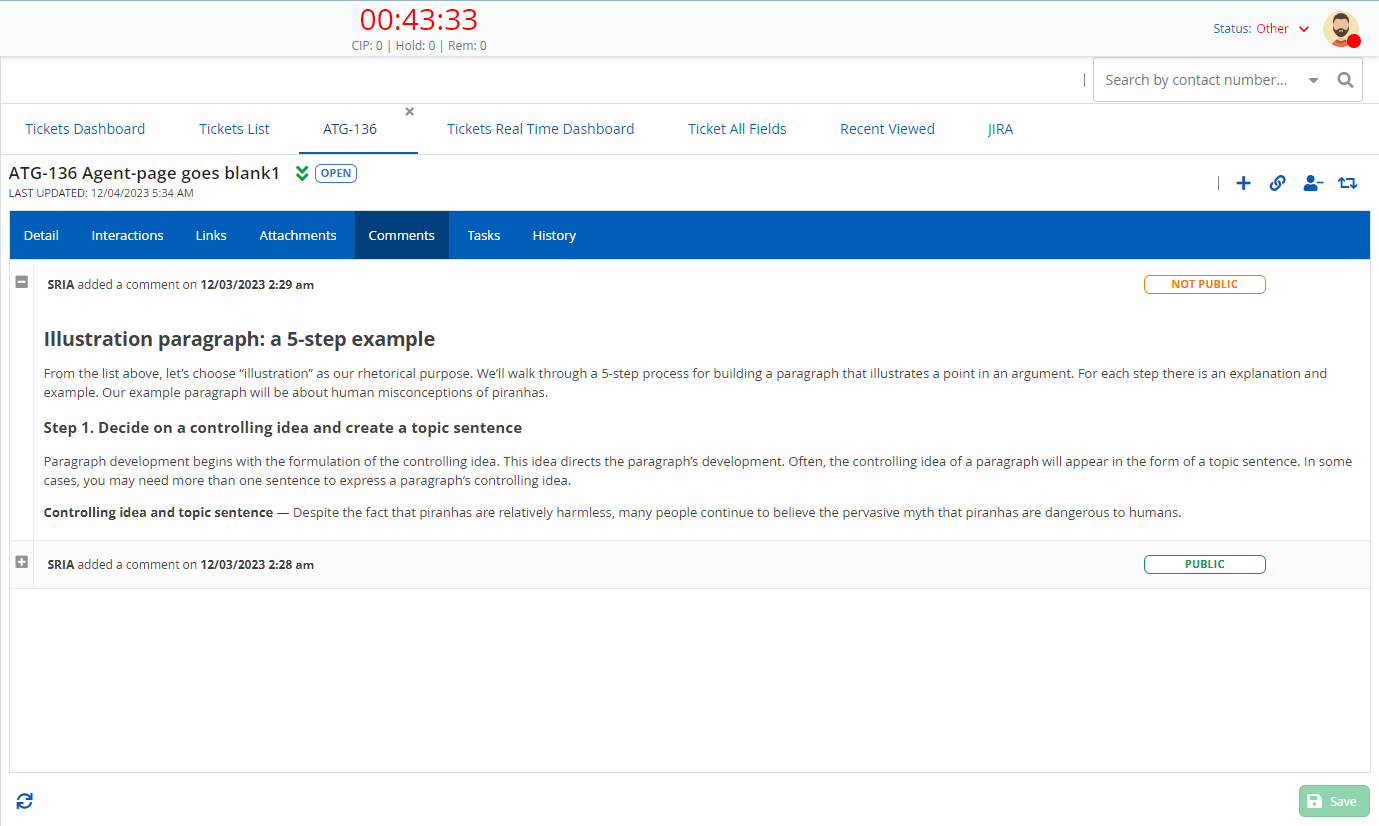
To access a Ticket from the table in the Ticket List or Ticketing section, double-click the row displaying the Ticket. The ticket is opened in a separate tab with the Details, Interactions, Links, Attachments, Comments, Tasks, and History.
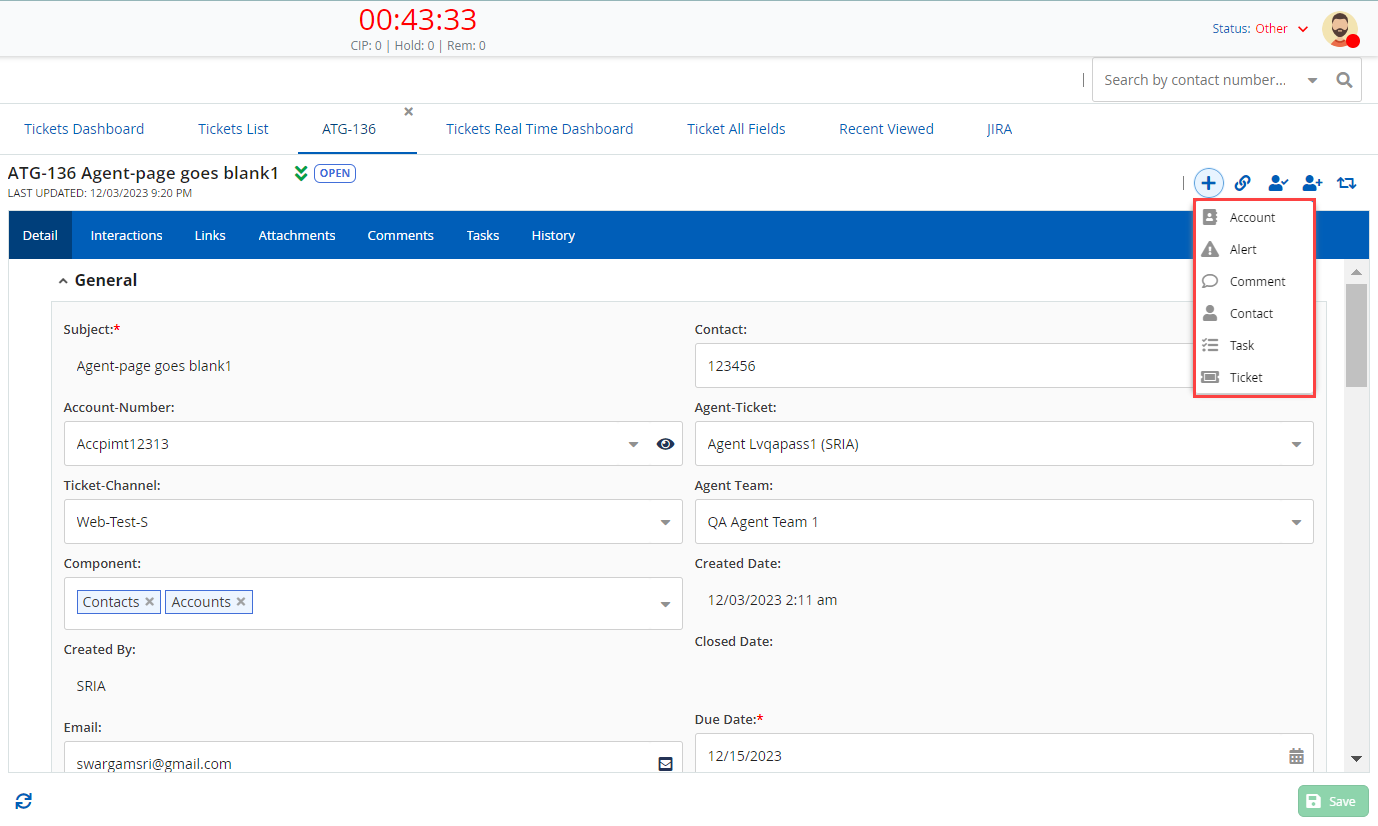
When you open a ticket, you can perform the following tasks for a ticket:

- Add: Perform the following tasks using this option:
- Generate an account.
- Set up an alert.
- Add a comment.
- Include a contact.
- Create a task.
- Establish a link to another ticket.
- Link: Perform the following tasks using this option:
- Connect an account.
- Associate with a contact.
- Link to knowledge base articles.
- Establish connections with other tickets.
- Create a hyperlink to a URL.
- Follow or unfollow a ticket: Receive notifications for all updates by following a ticket.
- Workflow: Modify the workflow status of the ticket.
- Delete: Remove a ticket from the system.
The Interactions tab of a ticket displays the interactions associated with all the contacts linked to the ticket. By default, only the interactions that are connected to an agent appear. Clear the Exclude Non-Agent checkbox on the Interactions tab to view the interactions not connected to an agent.
To modify the value in the Status field of a ticket, access the ticket, and then, on the Workflow ![]() icon, select the required status.
icon, select the required status.
You can modify the workflow status of the ticket. The following are the workflow states:
- Cancelled
- Closed
- Duplicate
- Escalate
- In-Progress
- On-Hold
- Open
- Pending Customer
You can create an account, contact, task, or sub-ticket. Access the ticket and click the corresponding option on the New menu.
The task you create for a ticket appears on the Tasks tab of the ticket.
To link a ticket to an account, contact, Knowledge Base (KB) article, another ticket, or a web address, access the ticket, and then, on the Link menu, click the corresponding option.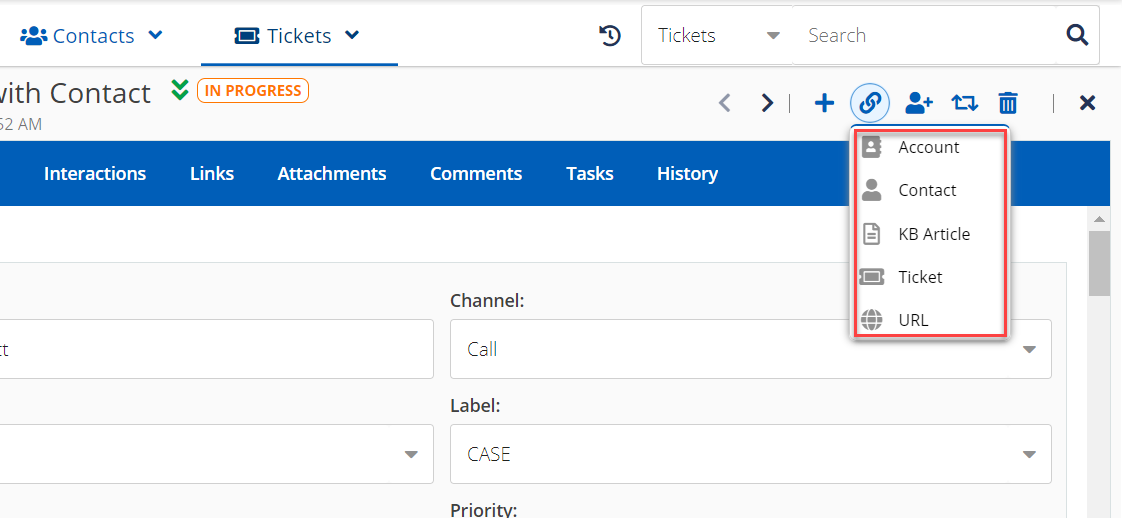
The linked addresses and KB articles appear on the Links tab of the Ticket.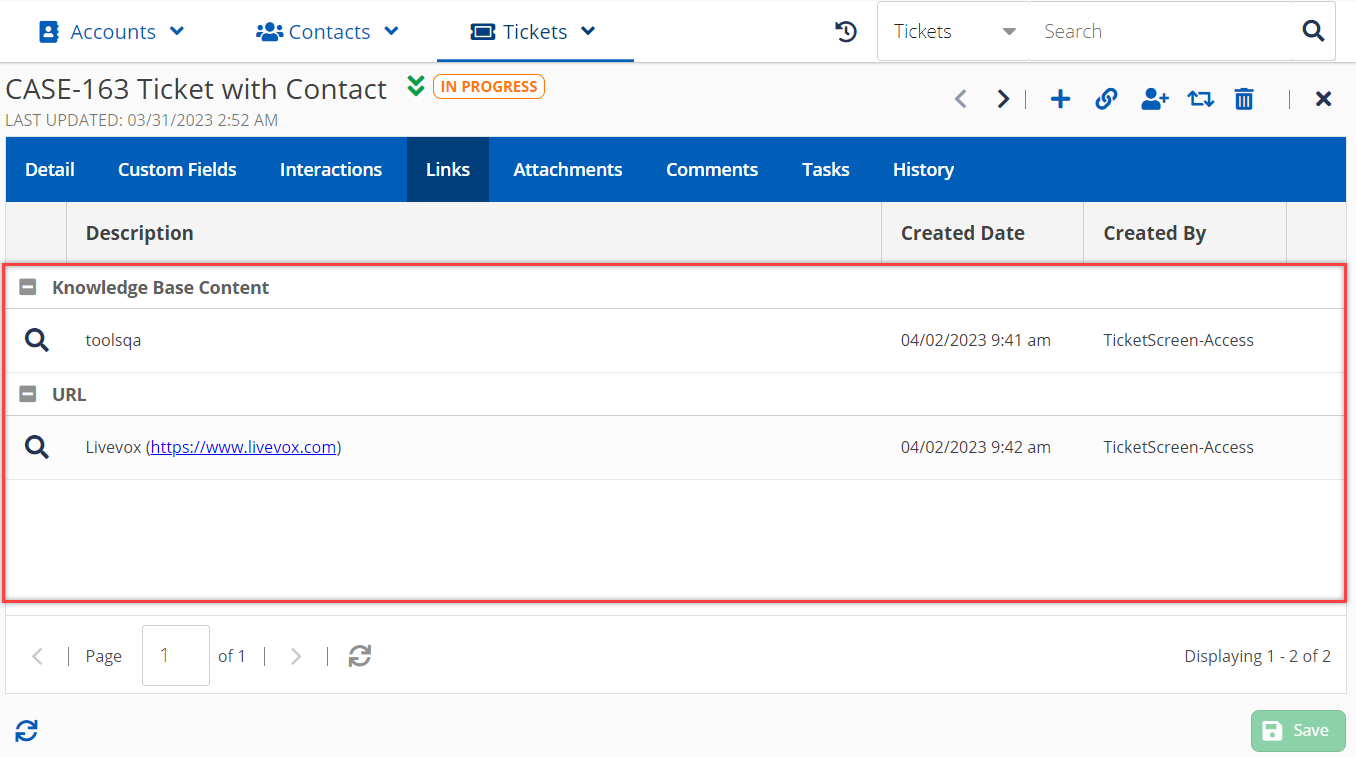
To assign a Ticket to yourself, access the ticket, and then click the horizontal bar icon ![]() > Assign to Me.
> Assign to Me. 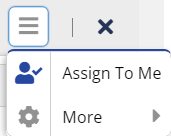
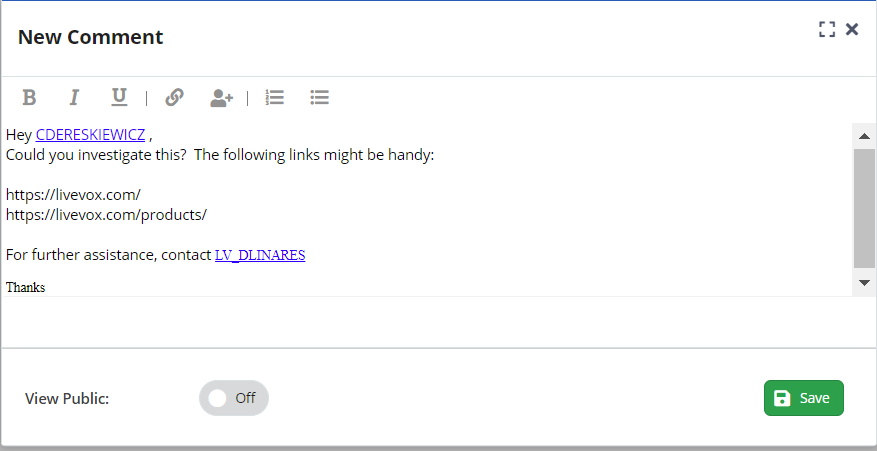
To add a comment to a ticket:
- Access the ticket.
- On the New menu, click Comment.
The New Comment window appears. Enter your comment.

- To modify the appearance of your comment, use the formatting options (bold, italic, underline, numbered list, and bulleted list).
- To add a web address in the comment, click the link icon
 , and then enter the address.
 - To tag an agent or a supervisor in the comment, click the Mention icon
 , and then select the required user or enter the user's first or last name. Tagged users are notified of the comment by email. In addition, depending on the ticket configuration, tagged users are added as followers of the ticket and are notified of any further changes to the ticket by email.
 - To allow the customer to view the comment, select the View Public option in the Off state.
- Click Save.
The comment is created, and it appears in the Comments tab of the ticket.
- To modify a comment, on the Comments tab, click the Edit icon
 next to the comment.
 - To delete a comment, on the Comments tab, click the Delete icon
 next to the comment.
If you want to be notified of any change to a ticket by email, you can follow a ticket. To follow a ticket, access the ticket, and then click Follow. To stop following the ticket, click Unfollow.
The Follow or Unfollow menu contains the names of all the followers of the ticket. These followers include those who have manually clicked Follow; those who are tagged in the Description field; those who are tagged in the comments on the Comments tab; and those whom your manager has added as Label Followers (that is, users who are automatically added as followers if the ticket has a specific label).
You can change the value in a field for multiple tickets. For example, you can assign a set of tickets to the same agent team and the same status by specifying the required values in the Agent Team and Status fields of those Tickets.
Before You Begin
To modify only the Tickets that meet certain filter criteria, select or apply the required filter. For more information, see Filtering Accounts, Contacts, and Tickets.
To modify multiple tickets at once:
In the Ticket List or Ticketing section, select the checkbox next to each ticket that you want to modify.
To automatically select all checkboxes together, select the checkbox in the column heading.
- Click Edit.
The Edit Tickets window appears. - Specify the required values in the fields.
- Click Save.
A message stating that the Tickets are updated appears.
You can export tickets from the agent desktop to a comma-separated values (CSV) file.
Before You Begin
Ensure that the Ticket List or Ticketing section displays the tickets that you want to export. For information about how to filter Tickets, see Filtering Accounts, Contacts, and Tickets.
To export the accounts, in the Ticket List or Ticketing section, click the Settings icon ![]() , and then click Export Tickets.
, and then click Export Tickets.
A CSV file containing the tickets from the agent desktop is downloaded.
You can import tickets from a file to the agent desktop.
Before You Begin
Ensure that each ticket record in the file that you want to import contains a subject for the ticket and that the file size is not more than 15 megabytes (MB).
To import tickets:
- In the Ticket List or Ticketing section, click the Settings icon
 , and then click Import Tickets.
The Import Tickets window appears. Specify values in the following fields:
- File: Click the magnifying glass icon
 , and then select the file.
 Input Filter: Select an input filter (a predefined format to import the data from the file). Ensure that the format of the file you selected in the File field corresponds to the format of the input filter.
- File: Click the magnifying glass icon
- Click Import.
A message stating that the data was imported appears. The tickets from the file appear in the Ticket List or Ticketing section (depending on the current filter).
To delete a ticket, access the ticket, and then click the Delete button.