Human Call Initiator (HCI) Service
The Human Call Initiator (HCI) service is a human-initiated outbound voice service that helps you manage compliance and improve productivity.
HCI involves two types of agents, Clicker Agents and Closer Agents. Upon initiating a campaign, the Clicker Agent views all the phone numbers associated with the campaign on the Clicker Agent desktop and proceeds to launch calls by clicking on each phone number and confirming the number in a call launch dialog box. When a customer or an answering machine answers the call, the call is automatically connected to an available Closer Agent who handles the customer interaction and terminates the call.

For information about the Human Text Initiator (HTI) service that you can use to configure an SMS campaign and manage compliance, see Human Text Initiator.
Configuring the HCI Service
Before You Begin
Before you begin configuring the HCI service, ensure that you have:
- Created Clicker and Closer Agents.
- Created a service group and assigned Closer Agents to the service group.
- Access to a Contact Flow Results Rule Set for HCI.
- Access to an HCI call template.
To configure an HCI service:
- Log on to the SmartReach Portal as an administrative user.
- Navigate to Configure > Services > Service.
- Use the filter option to search for an HCI service.
- Copy and create a new HCI service from an existing HCI service. For detailed information, see Copying a Service.
- Double click the new HCI service. The Edit Service window appears.
- On the General tab:
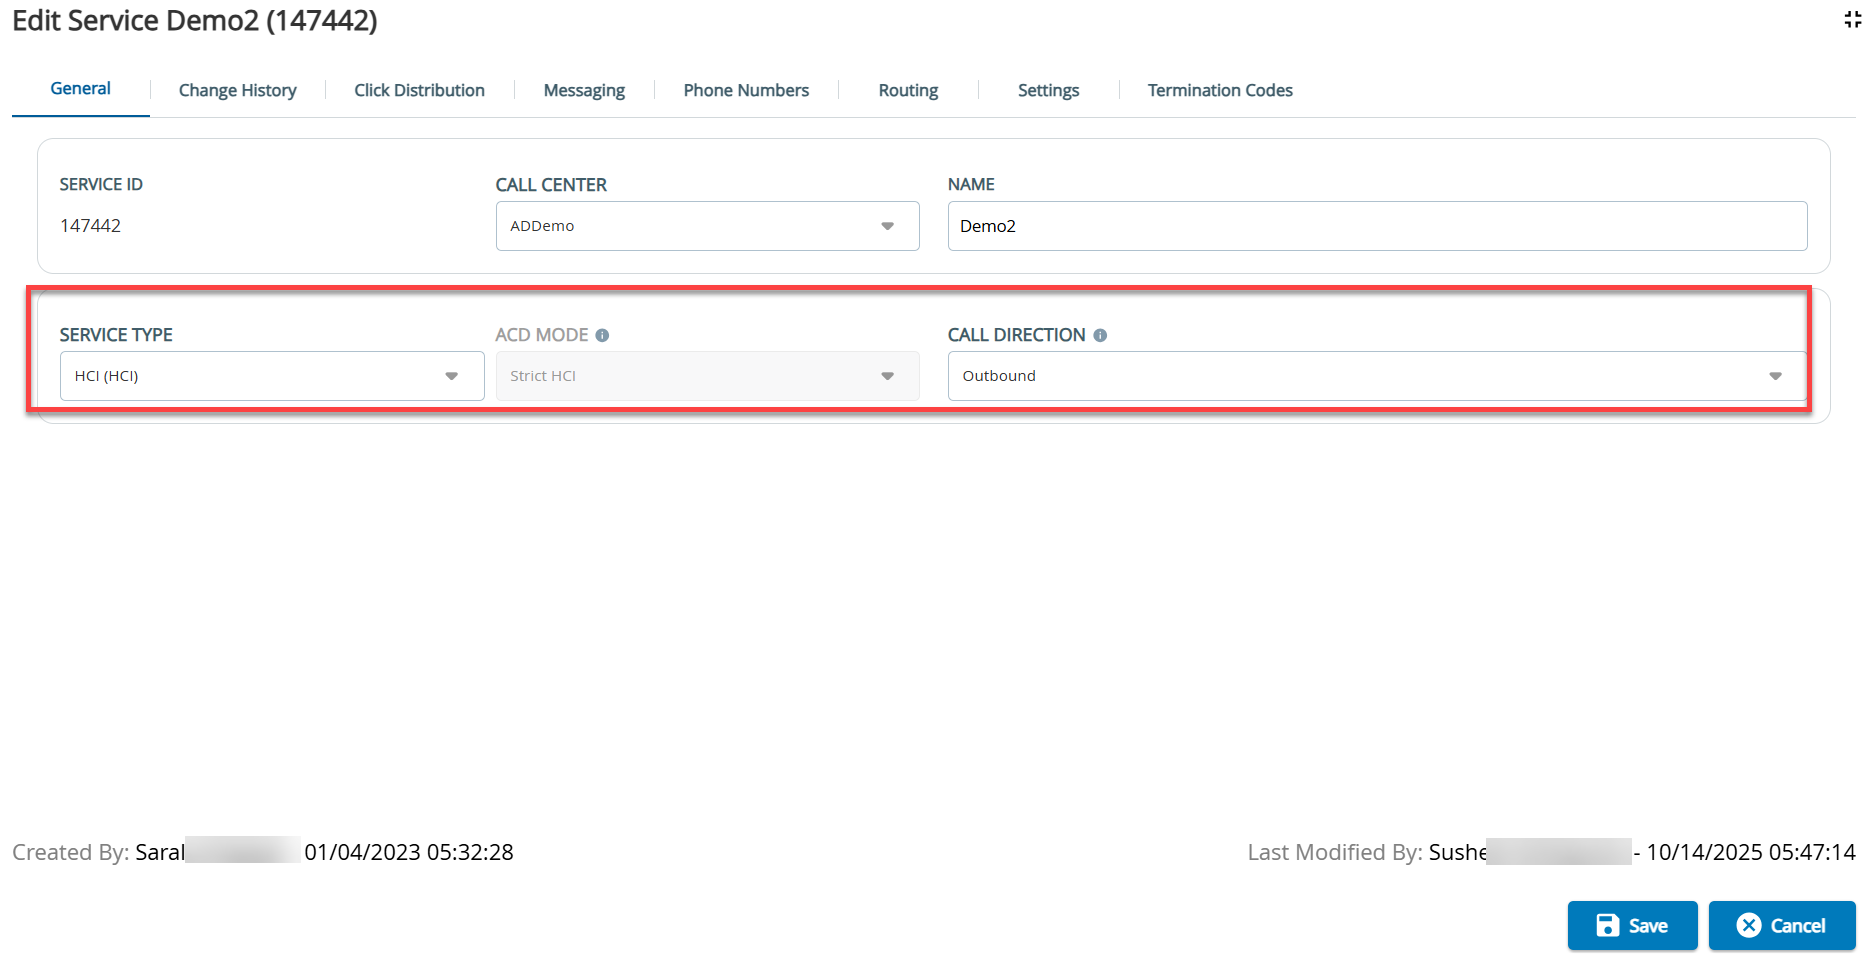
- Select the Service Type as HCI(HCI).
- Select the Call Direction as Outbound.
- Select the ACD mode as Strict HCI.
Strict HCI restricts the number of calls a Clicker Agent can launch. The restriction is based on the number of Closer Agents available at any given time to handle the answered calls.
- Click Save.
- On the Click Distribution tab:
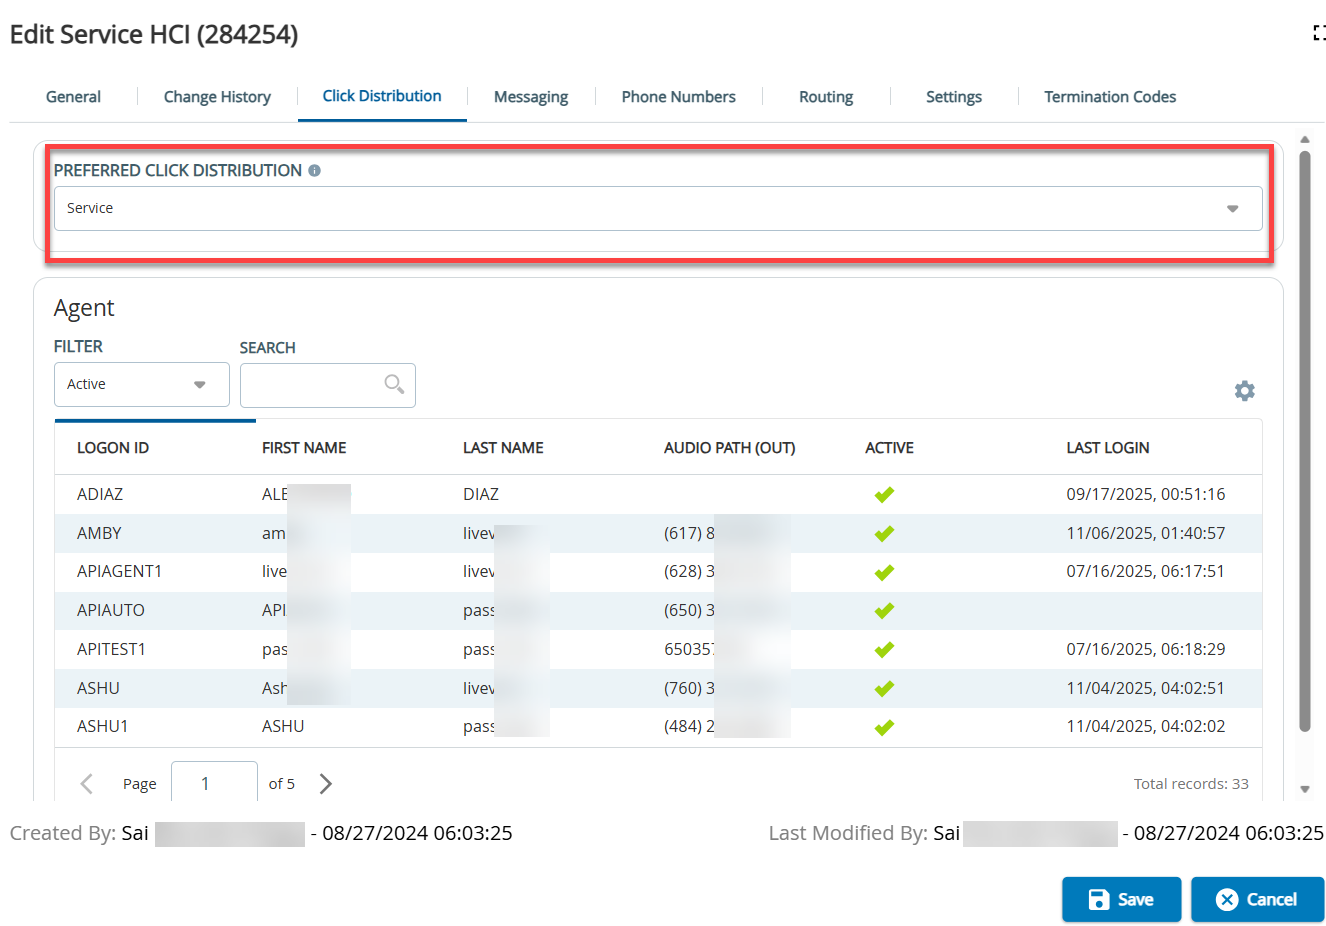
- Select Preferred Click Distribution as the Service or Service Group.
All the associated services and agents are listed in the Services and Agent grid.
Select Service for clicks to be routed to Clicker Agents assigned directly to this service.
- Select Service Group for clicks to be routed to Clicker Agents assigned to the services associated with a service group.
- If Service Group is selected, select the Service Group Name to view all the associated services and agents listed in the Services and Agent grid.
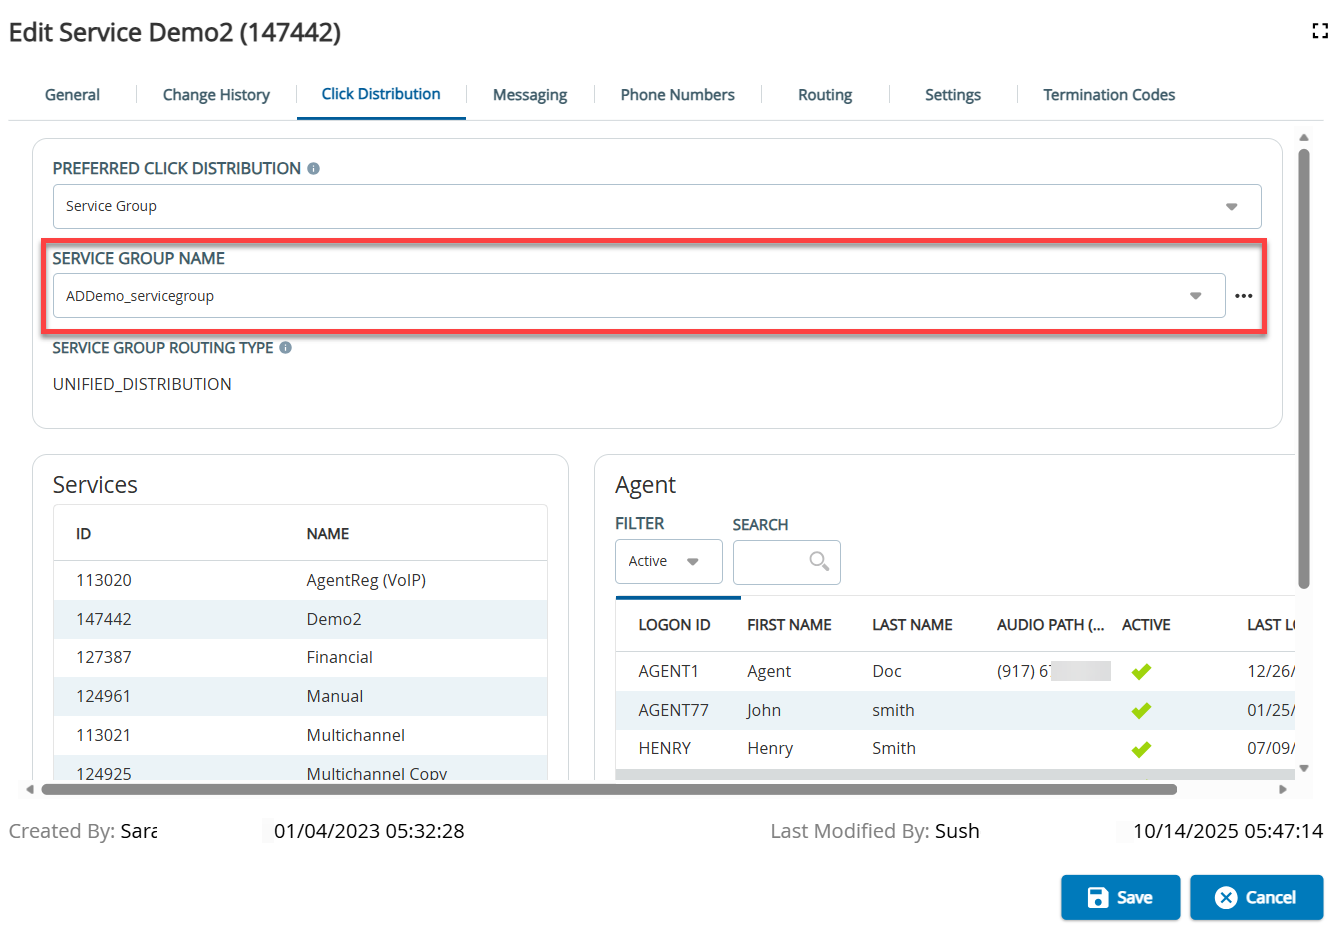
- Click Save.
- Select Preferred Click Distribution as the Service or Service Group.
- On the Messaging tab:
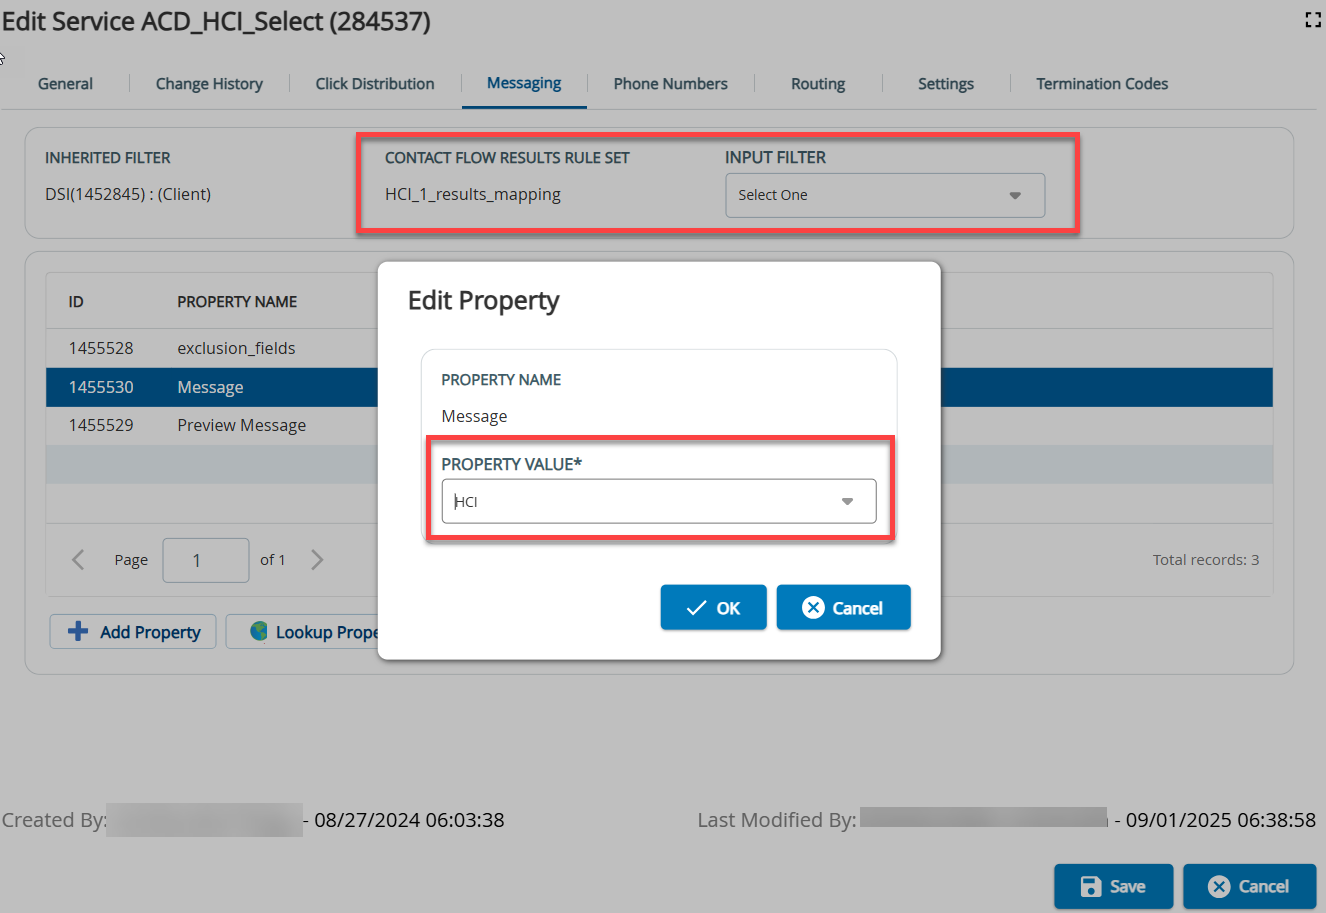
- Ensure that the Contact Flow Results Rule Set is set to a contact flow associated with an HCI service.
- Double click the message ID and select an HCI template from the Property value drop-down list.
- Click OK.
- Click Save.
- On the Routing tab:
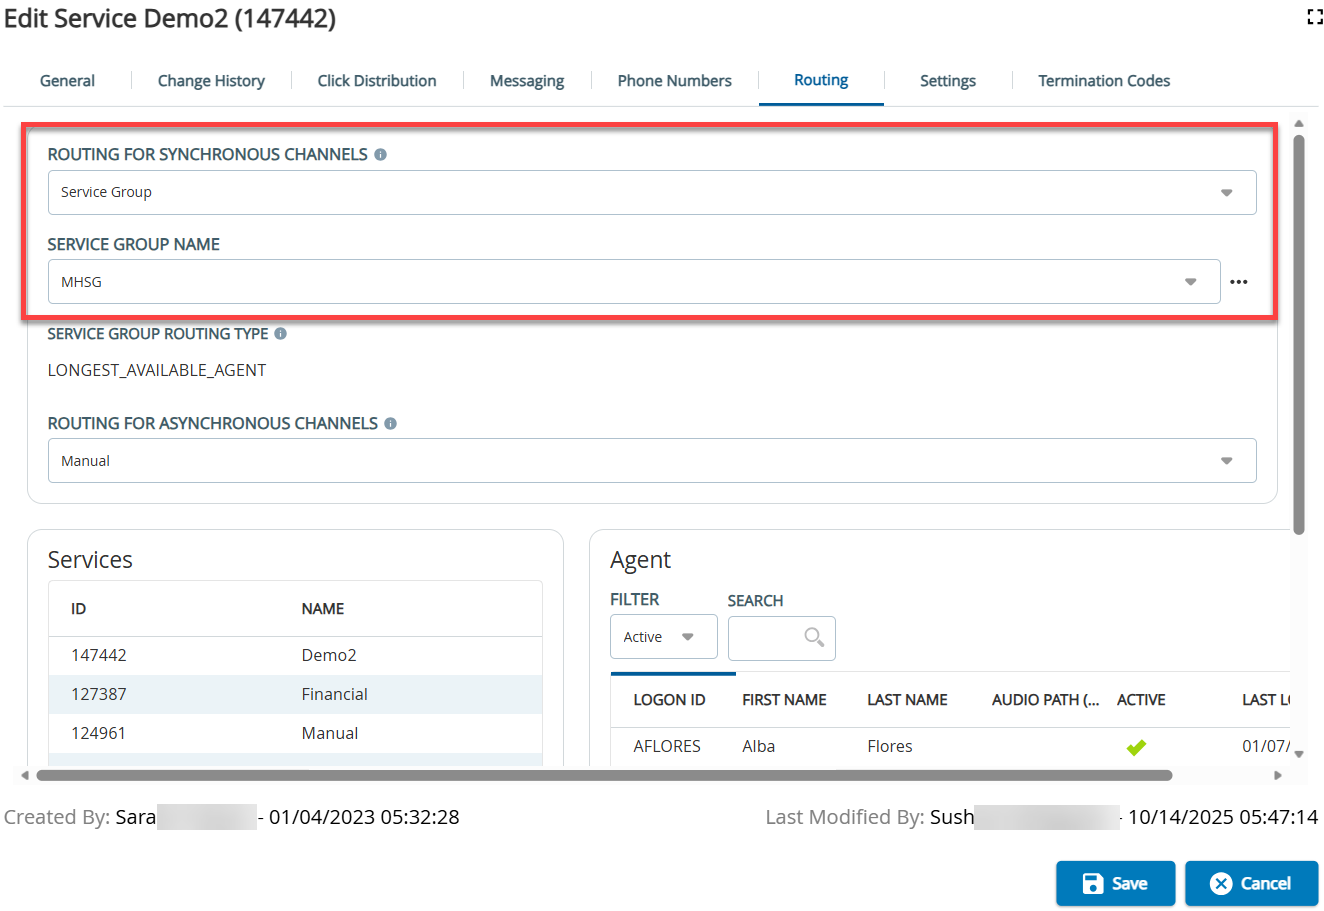
- Select Preferred Routing as the Service Group.
- Select a Service Group Name. A list of all the Services and Agent (Clicker Agents) assigned to the service group are listed.
- Click Save.
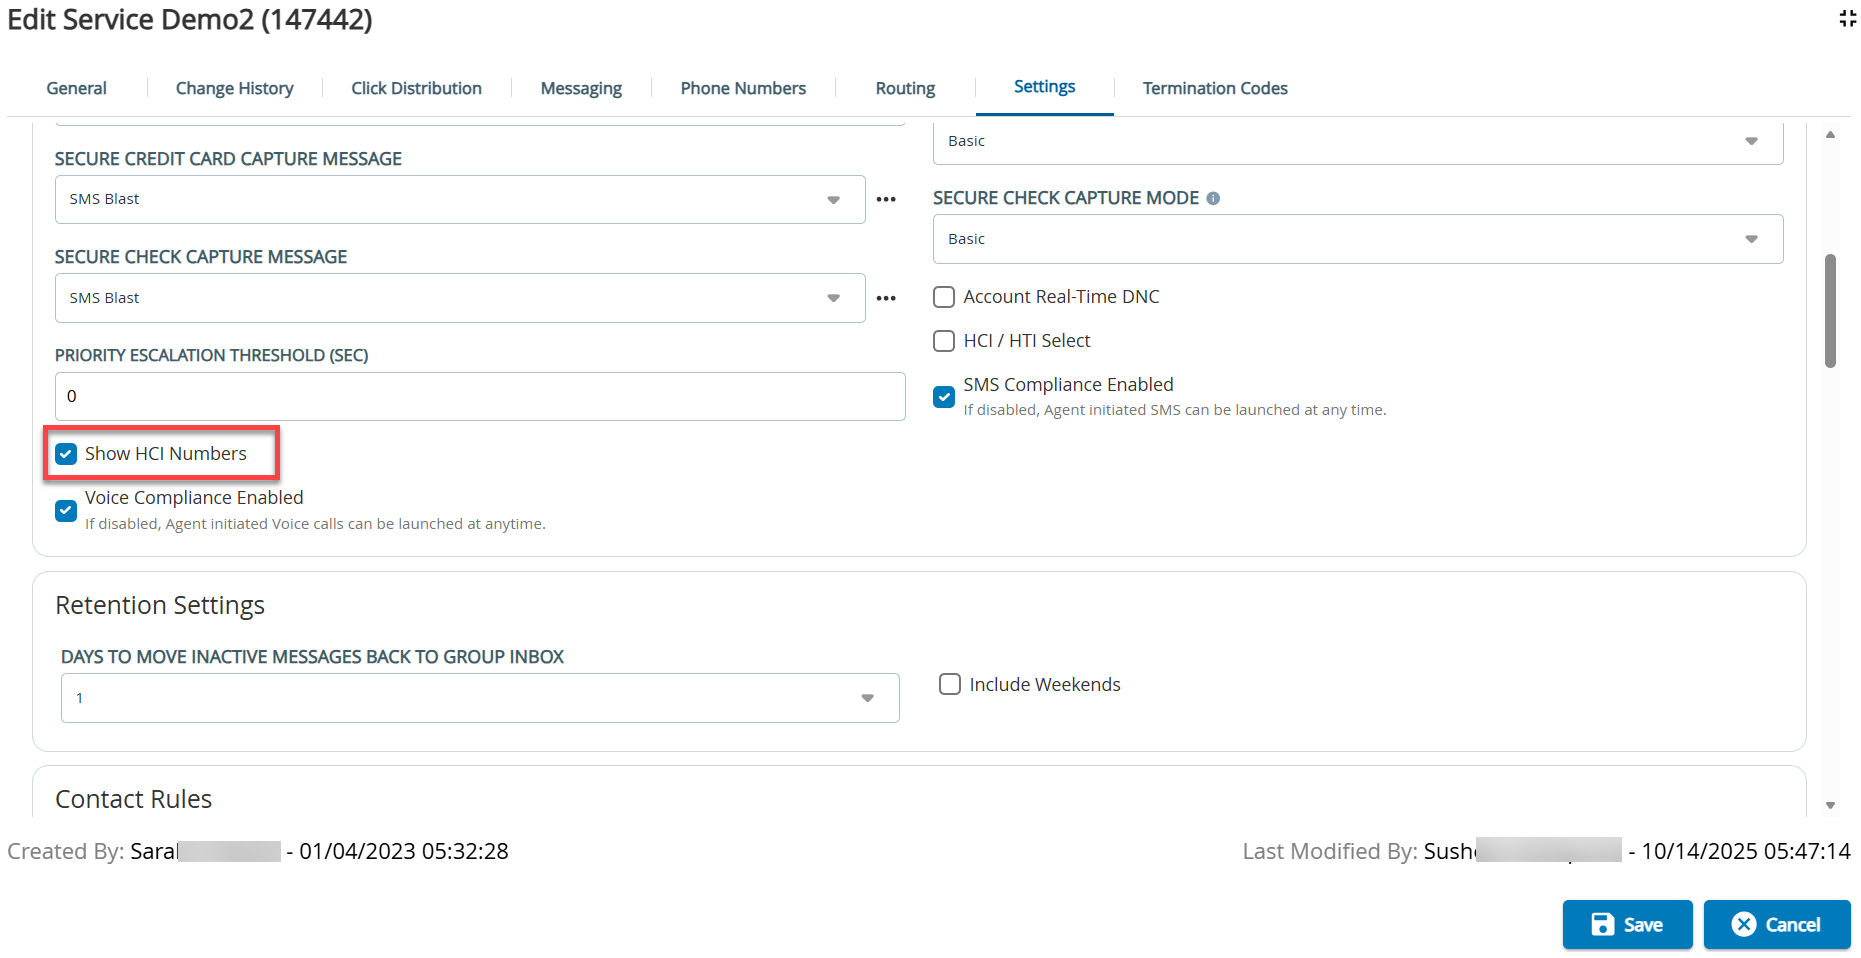
- On the Settings tab, in the Agent Desktop section, enable the Show HCI Numbers checkbox and click Save.
- On the Termination Codes tab, enable the Termcode Enabled checkbox to ensure term codes are visible to agents.
- Create and run a campaign to launch calls. See Configuring Campaigns.