Human Text Initiator
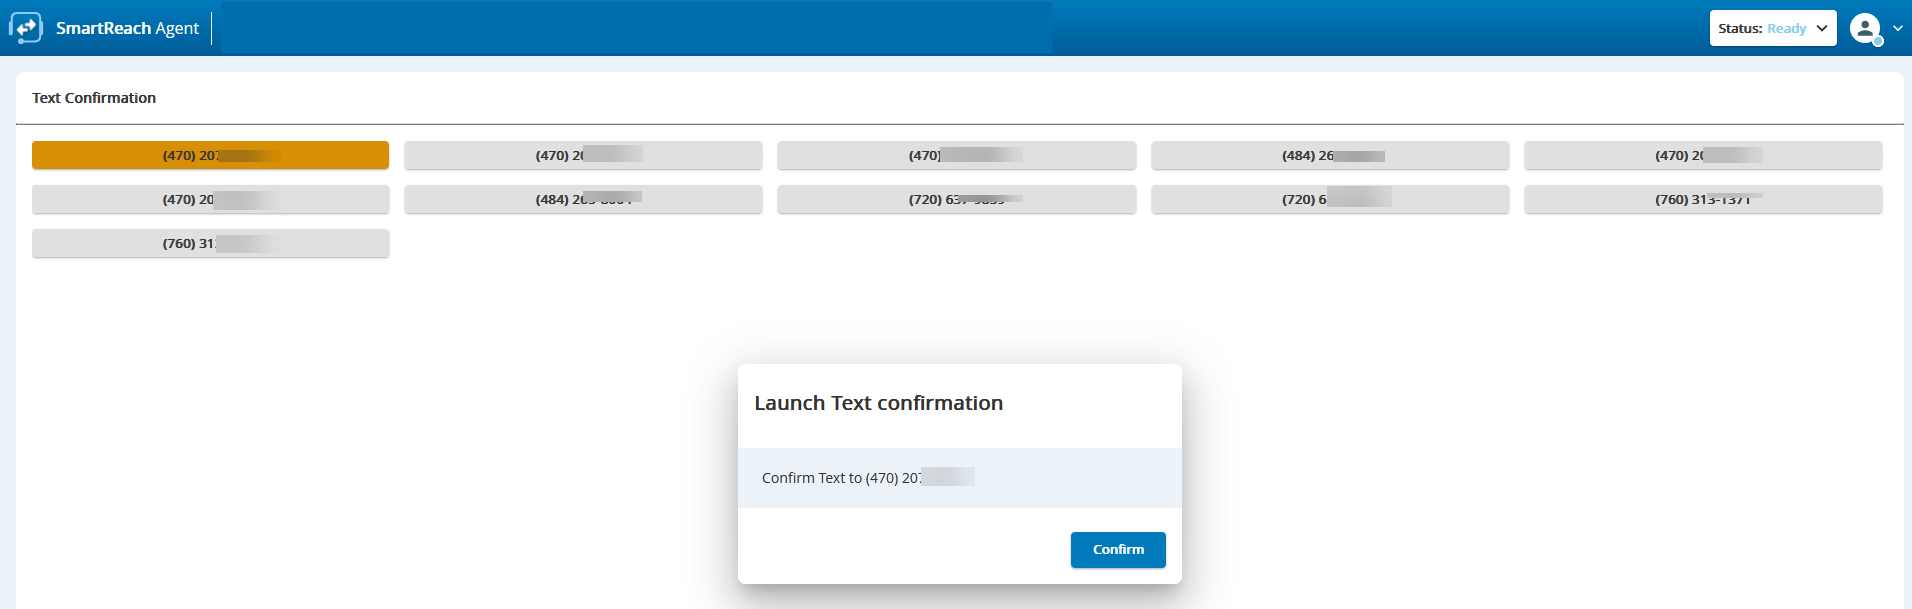
The Human Text Initiator (HTI) service is an outbound service that enables agents to manually launch text messages using a mouse click. Agents using the HTI desktop to launch manual text messages are often referred to as Clicker or HTI Agents. Clicker Agents are signed in to the HTI service to manually select and launch text messages from the HTI desktop. Any agent who can reply to an inbound SMS can reply to messages launched by HTI Clicker Agents.
The HTI messaging system can increase outbound message volume, as compared to manual messaging, and can also mitigate the Telephone Consumer Protection Act (TCPA) compliance risk. HTI enables agents to manually launch text messages quickly—though still one at a time—by logging into the HTI service. HTI functionality must be enabled by permitted users and can be enabled from the SmartReach administrator portal.

- Closer Agents are not required in the HTI service.
- When agents are logged in to an HTI service, they cannot switch to other service types, but they can switch to other HTI services.
- HTI Clicker Agents can place themselves into a Not Ready state (including break codes, if enabled) as needed. When Clicker Agents are in the Ready state, they can continue to manually initiate text messages.
- Permitted users (Supervisors) can change the status of HTI Clicker Agents from the Agent Panel within the SmartReach. For more information about status changes, see Status Updates, Service Switch and Messages by Manager.
Once the administrative user configures the prerequisites, HTI service and creates a campaign from the SmartReach administrative portal, then agents can send the messages from the Agent Desktop.
Prerequisites
Ensure that the SMS Channel is enabled. To check if the SMS Channel is enabled, navigate to Configure > Services > Client > Billing tab > Channels section. 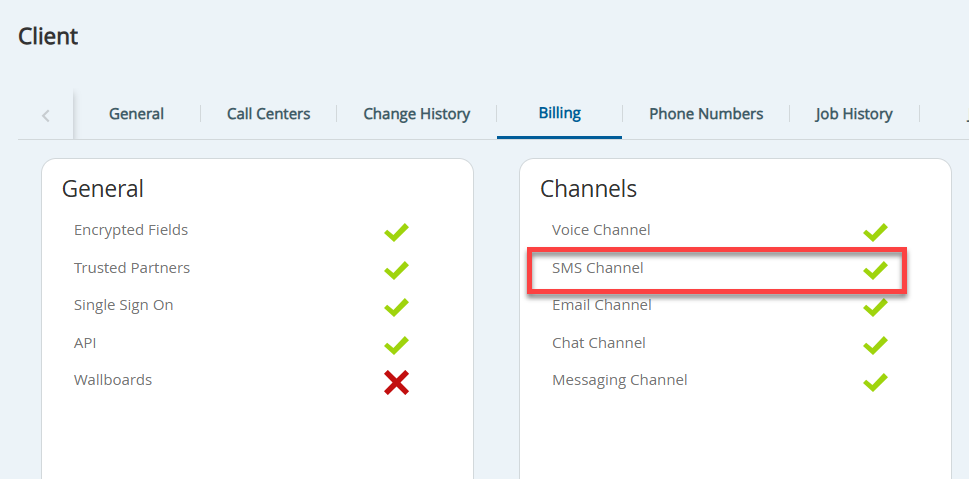

To enable SMS Channel, contact the SmartReach Customer Care Team.
Configuring an HTI Service
- Log on to SmartReach as an administrative user.
- Navigate to Configure > Services > Services.
- To create a new HTI service, copy an outbound or existing HTI service. Hover on the required service and click the Copy icon.
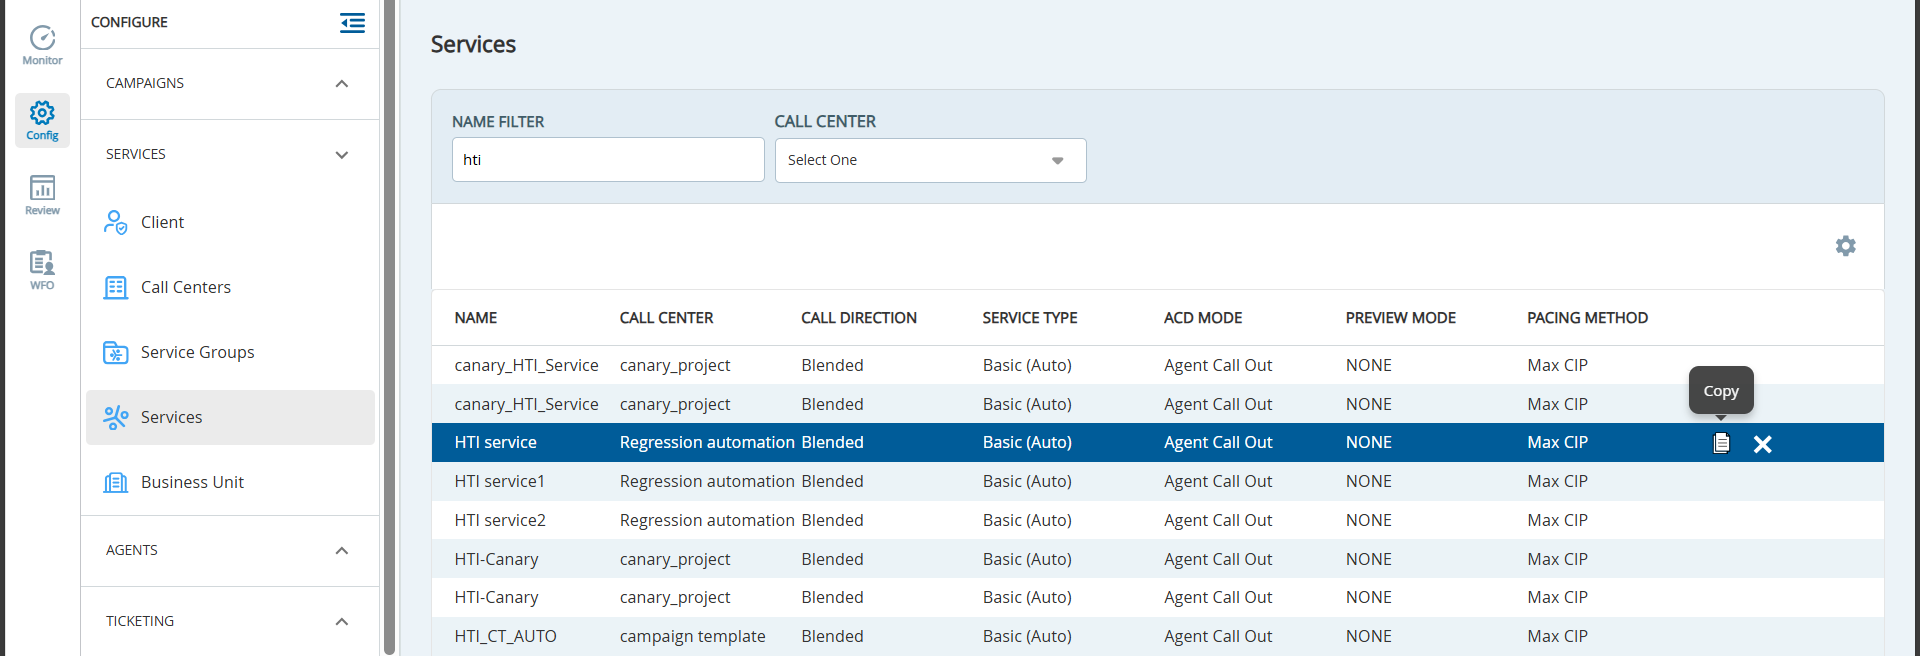
- The Copy Service pop-up appears.
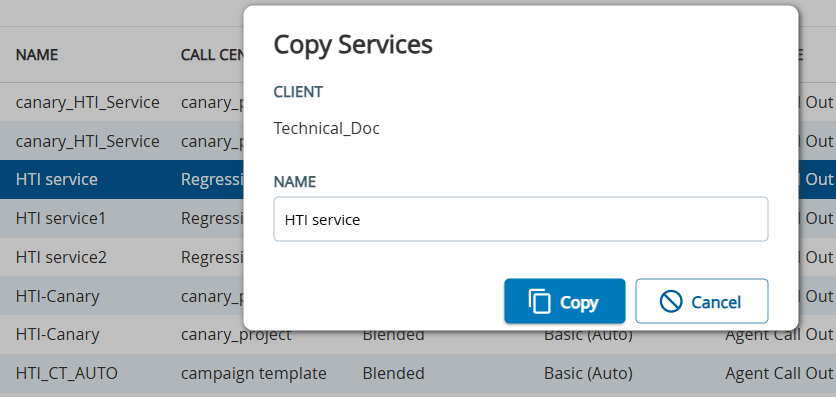
- Specify the Name of the new service.
- Click Copy.
- After the service is copied, double click the copied service. The Edit Service window appears.
- In the General tab, configure the following fields:
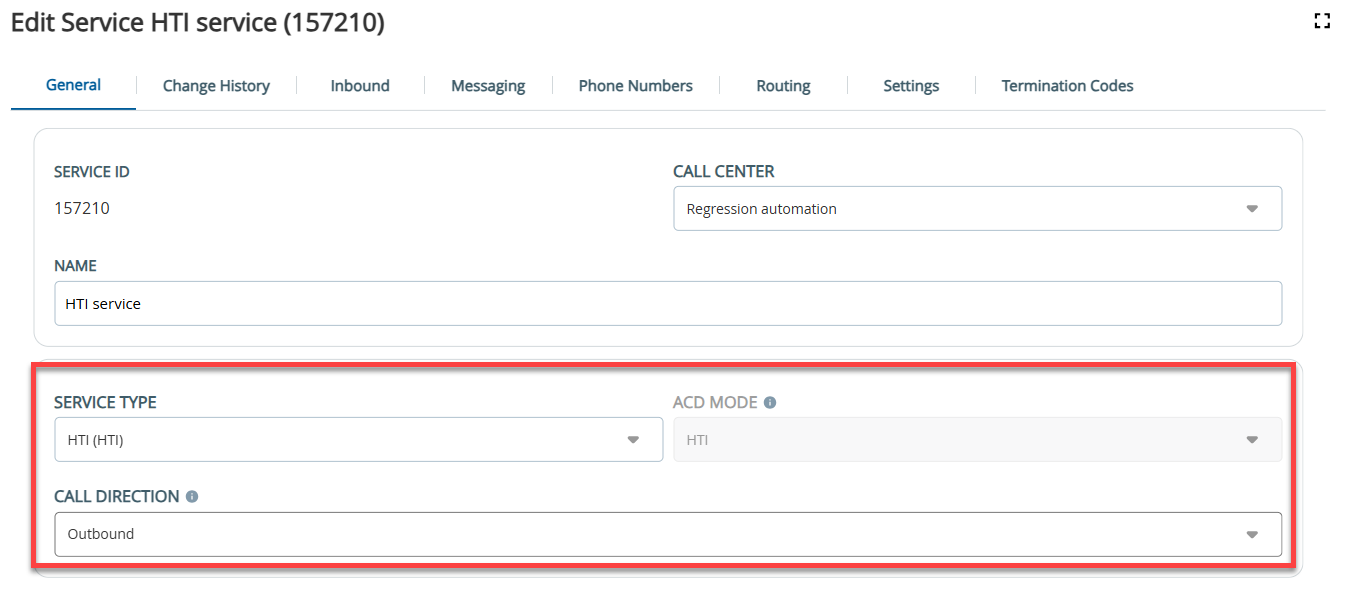
- Select the Service Type as HTI (HTI) from the drop-down list.
- Select the Call Direction as Outbound from the drop-down list.
- Select the ACD mode as HTI from the drop-down list.
- In the Messaging tab, configure the following fields:
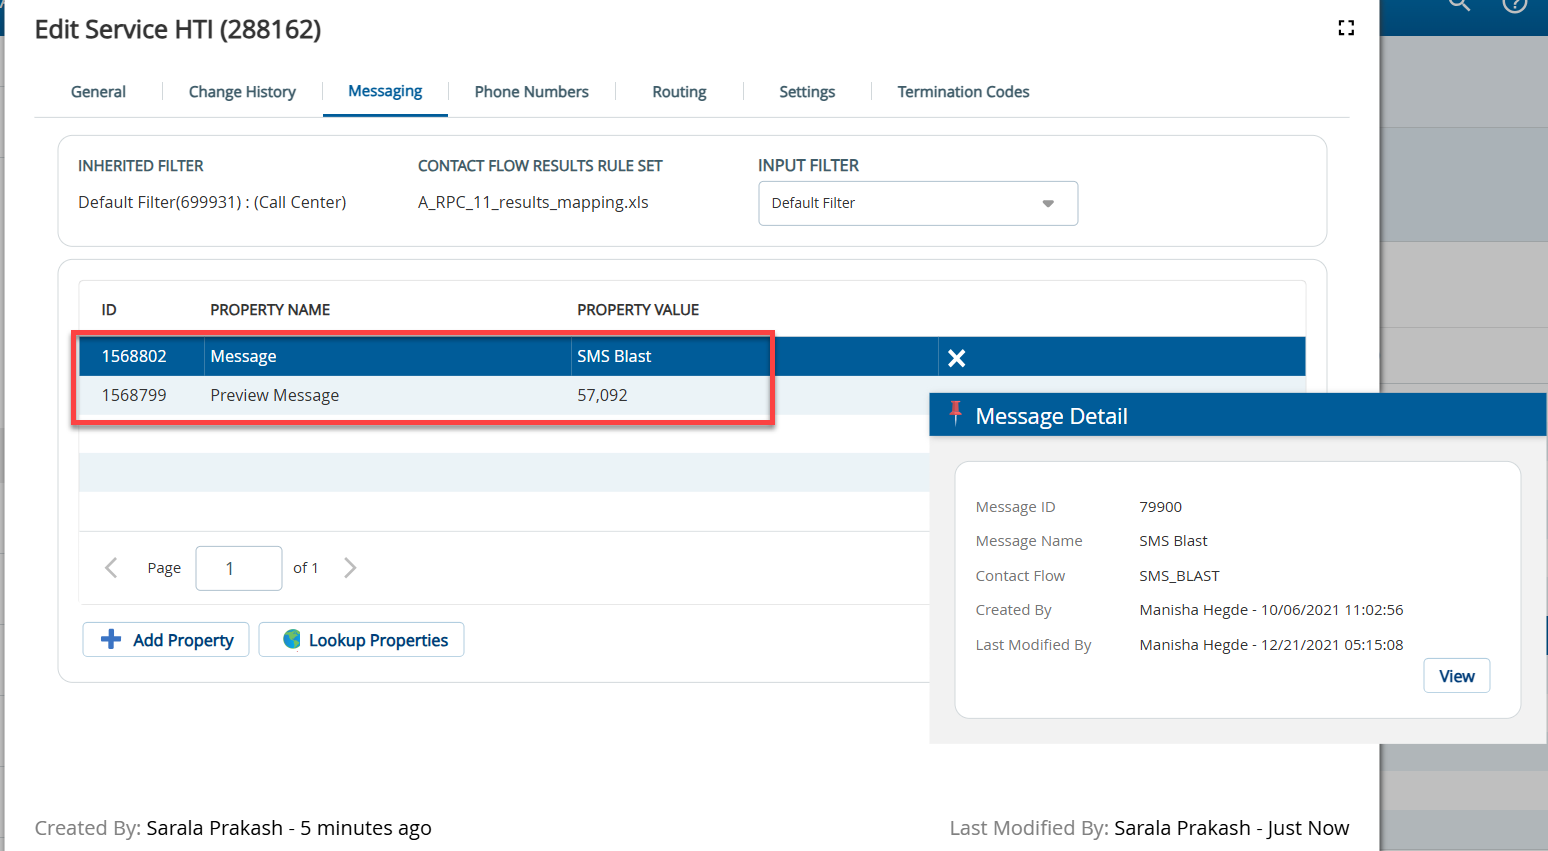
- The Inherited Filter displays the client-level default filter or the filter that is used, if nothing is specified in the Input Filter field.
- The service-level filter supersedes the inherited or client-level default input filter. If required, select the required Input Filter from the drop-down list.
- The Contact Flow Results Rule Set displays the Rule Set associated with the given Contact Flow of the given message that is assigned to the service.
- Add the Message properties with the required property value.
In addition to the Message property, you must include the exclusion_fields property.
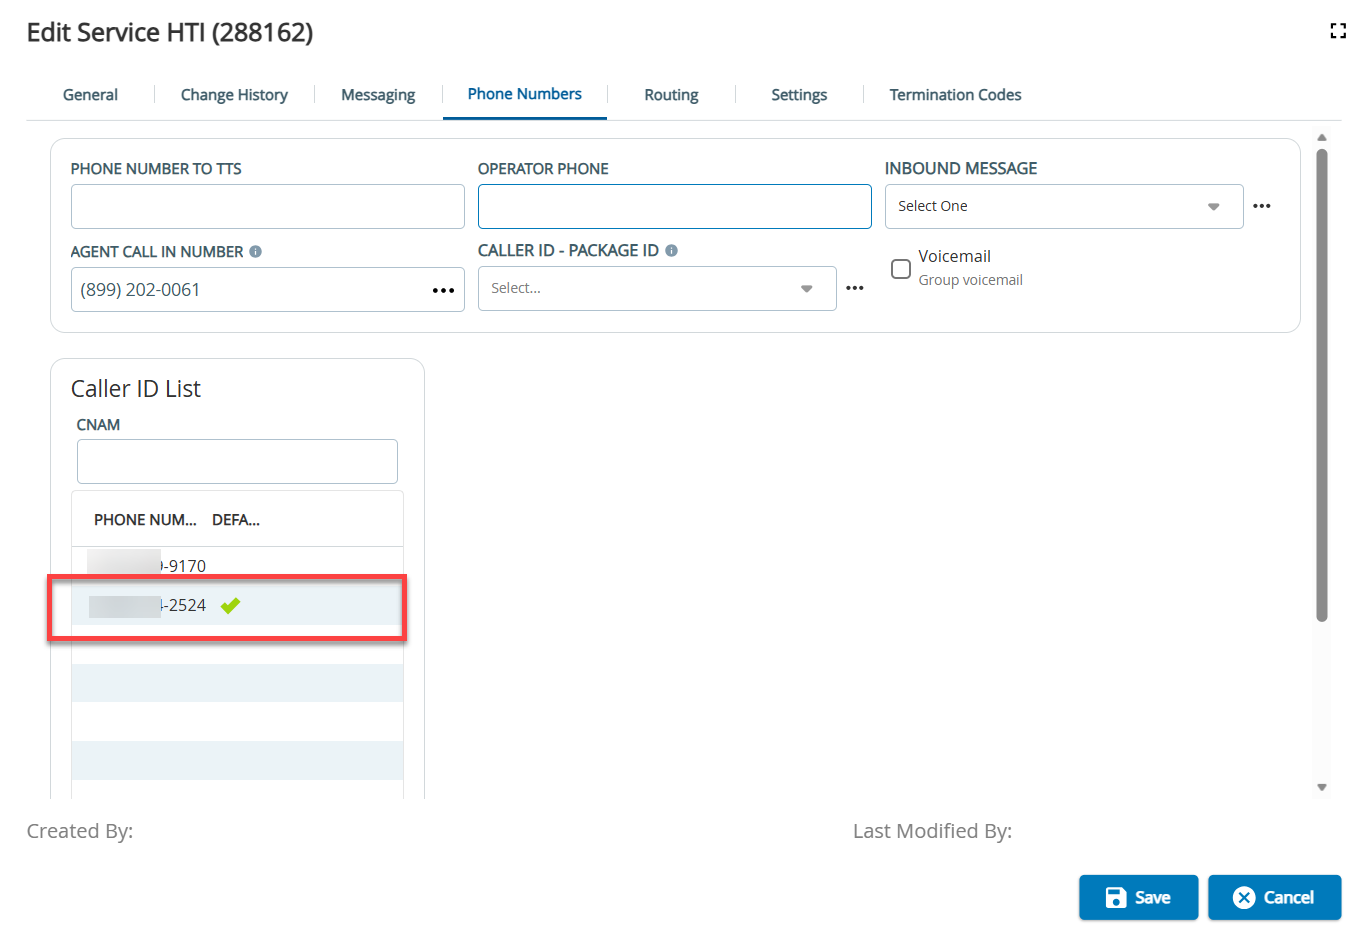
- In the Phone Numbers tab, add the Caller ID to the Caller ID List. This is the list of phone numbers that can be set (default option) to appear on the recipient's caller ID display.
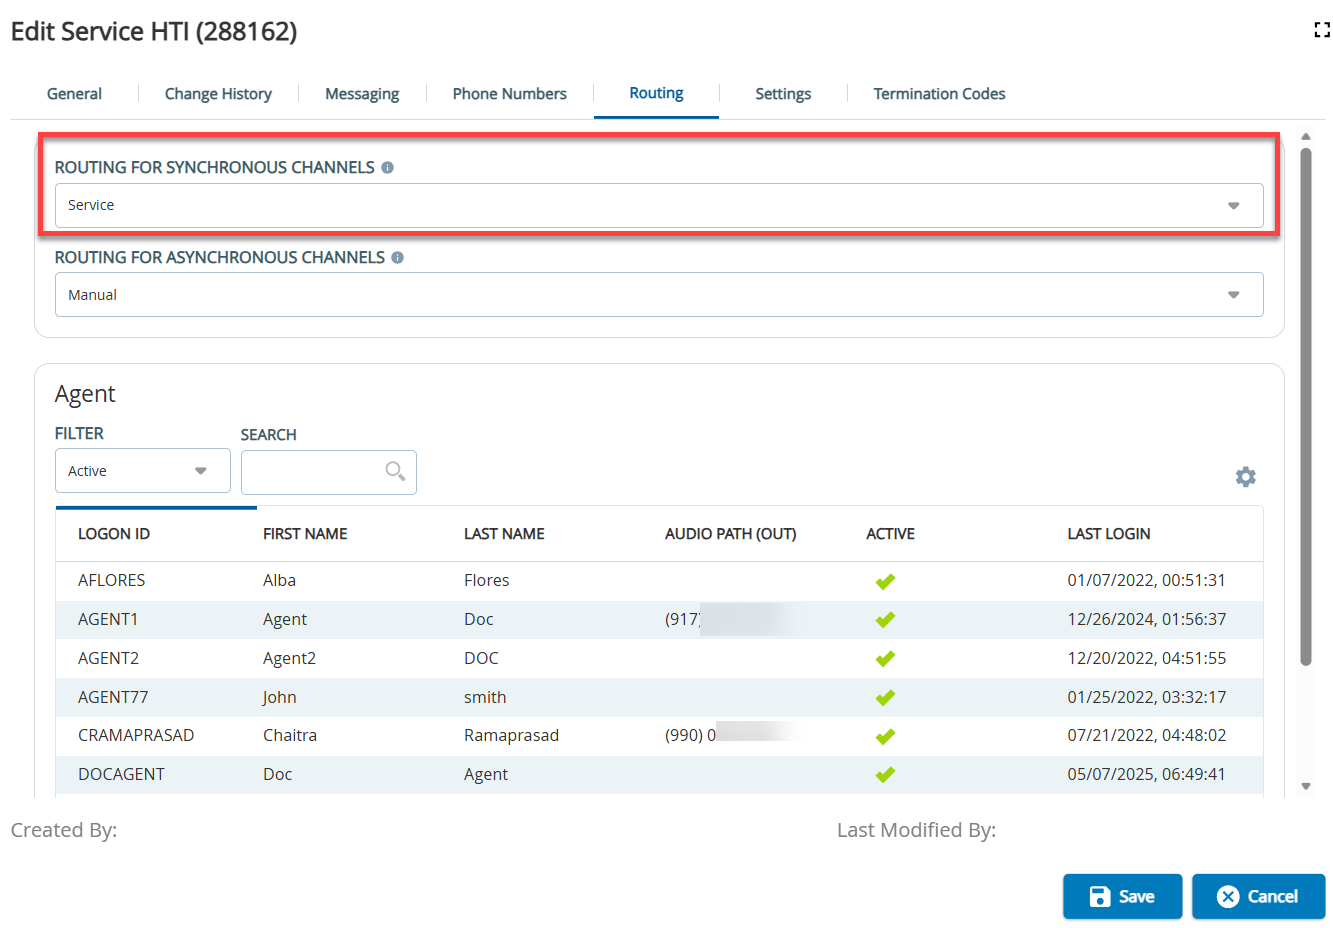
- In the Routing tab, select the Routing For Synchronous Channels as Service from the drop-down list.
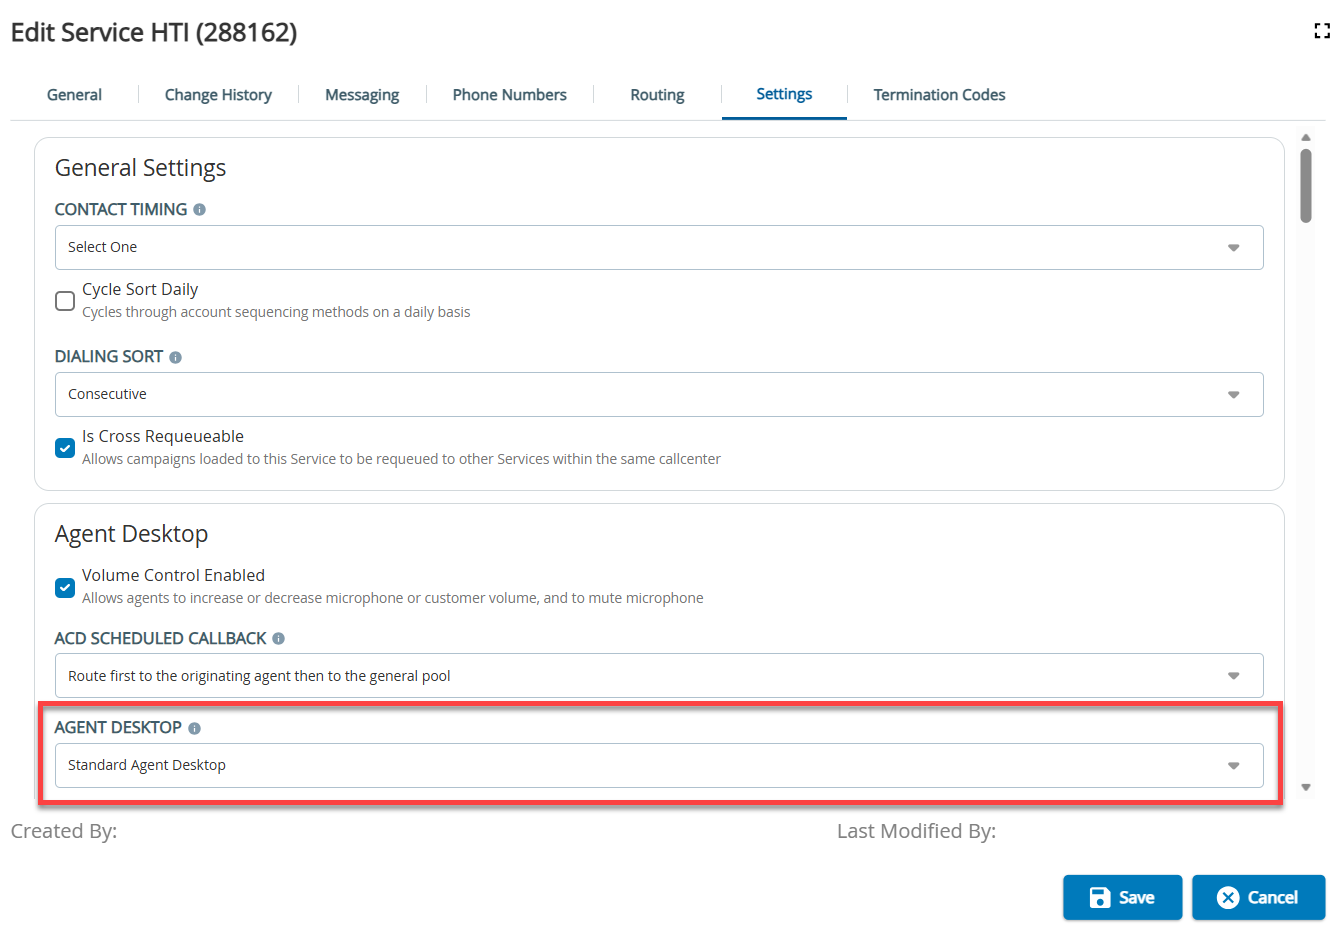
- In the Settings tab, configure the following fields:
- Select the required Agent Desktop from the drop-down list.
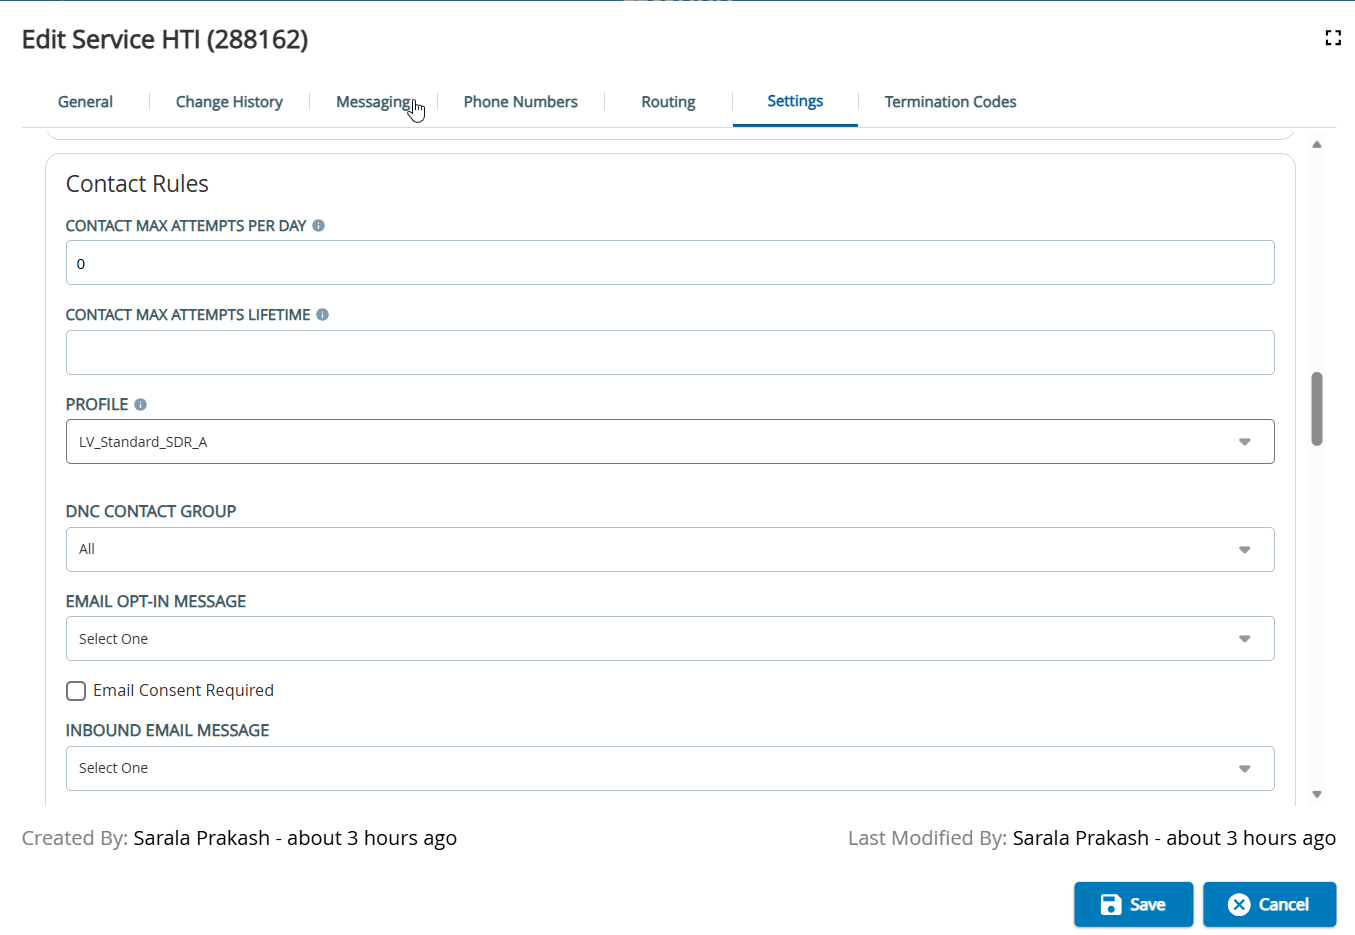
- Select the dialing Profile as default dialing profile, which is LV_Standard_SDR_A.
- Select the required Agent Desktop from the drop-down list.
- Click Save.
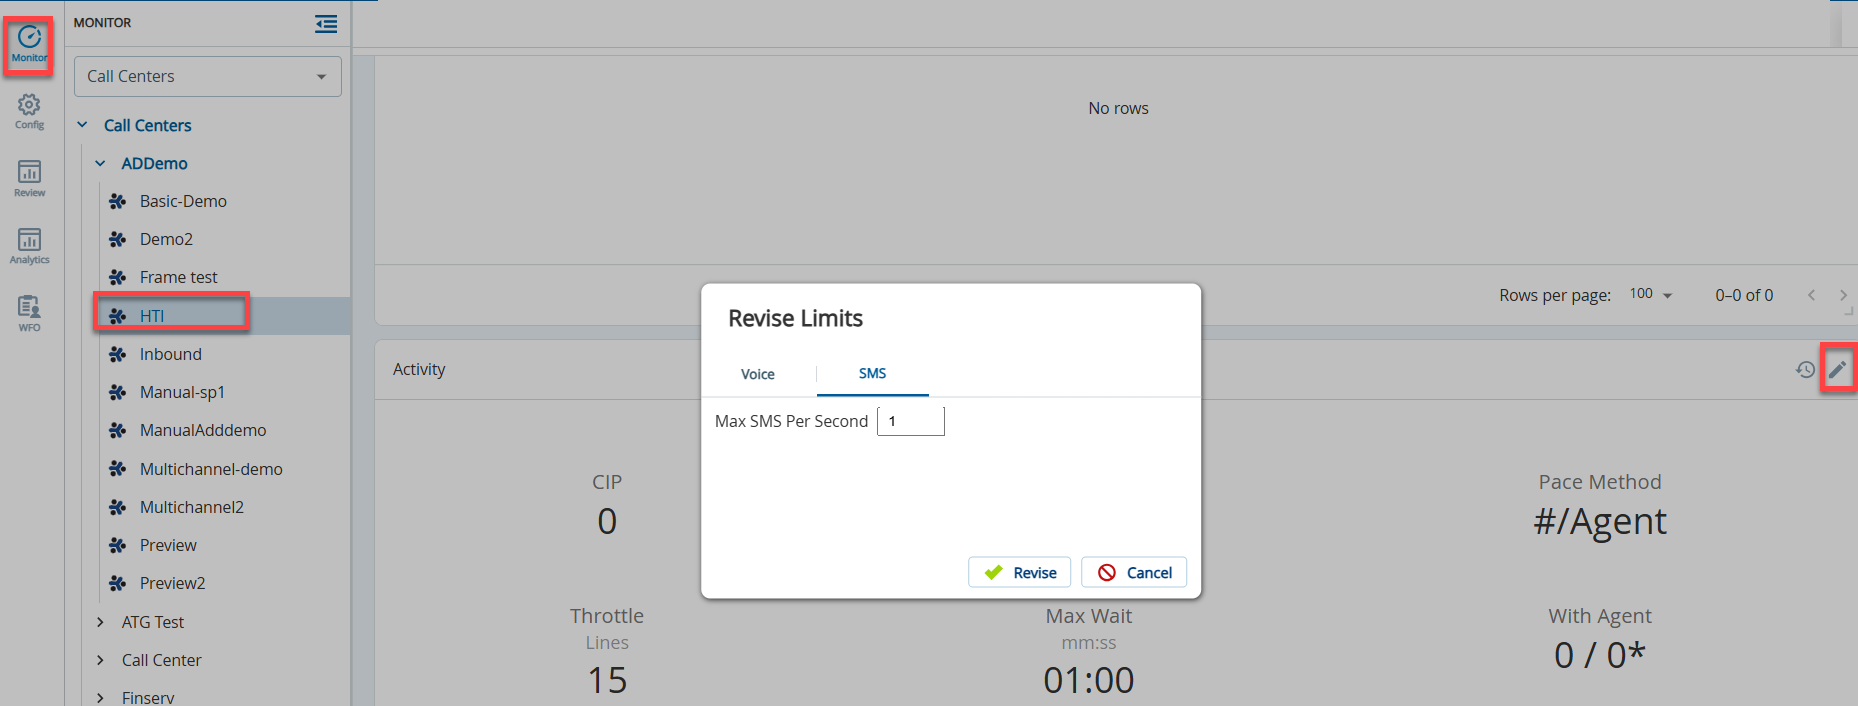
- Configure the MAX CIP limit to the required value by navigating to the Monitor > Call center > Service > Activity widget. Click the revise icon. The Revise Limits pop-up is displayed. Revise the SMS limit, as required.
Creating a Campaign
After configuring the HTI Service, create a campaign from the Campaigns editor or Contact Manager.
Campaigns Editor
- In SmartReach, navigate to the Configure > Campaigns > Campaigns editor.
- Click Upload, the Upload Campaign pop-up appears.
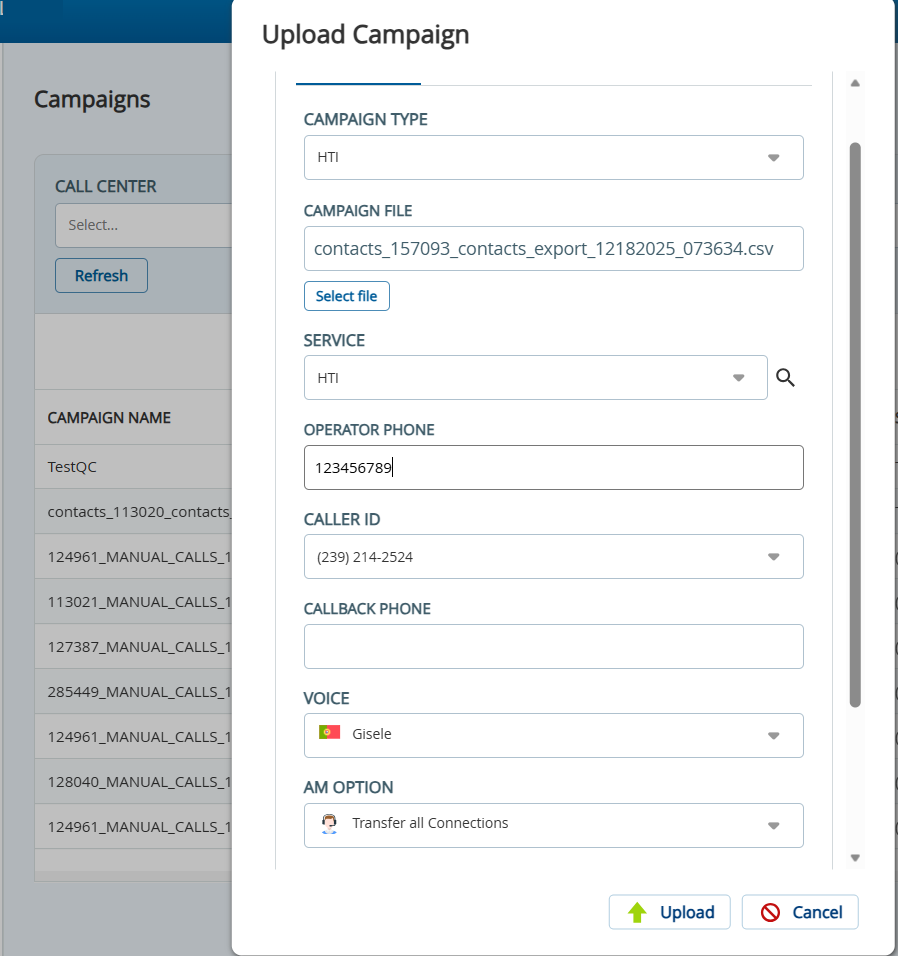
- In the Basic tab, select the Campaign Type as HTI from the drop-down list.
- Click Select a File to upload, and then select the campaign file that you want to upload.
- Select the HTI on which you want the campaign to run.
- Enter the Operator Phone number.
- Select the Caller ID from the drop-down list.
- Enter the Callback Phone number.
- Select the voice that you want to be used in the calls from the Voice drop-down list.
- Select the AM (answering machine) Option that you want to use for the calls. The available options are as follows:
- Don't Leave Messages: If an answering machine is detected, does not leave a message and disconnects the call.
- Transfer all Connections: Does not detect answering machines and transfers all connections to agents.
- Select the Dial Strategy that you want to be use for contacting the phone numbers.
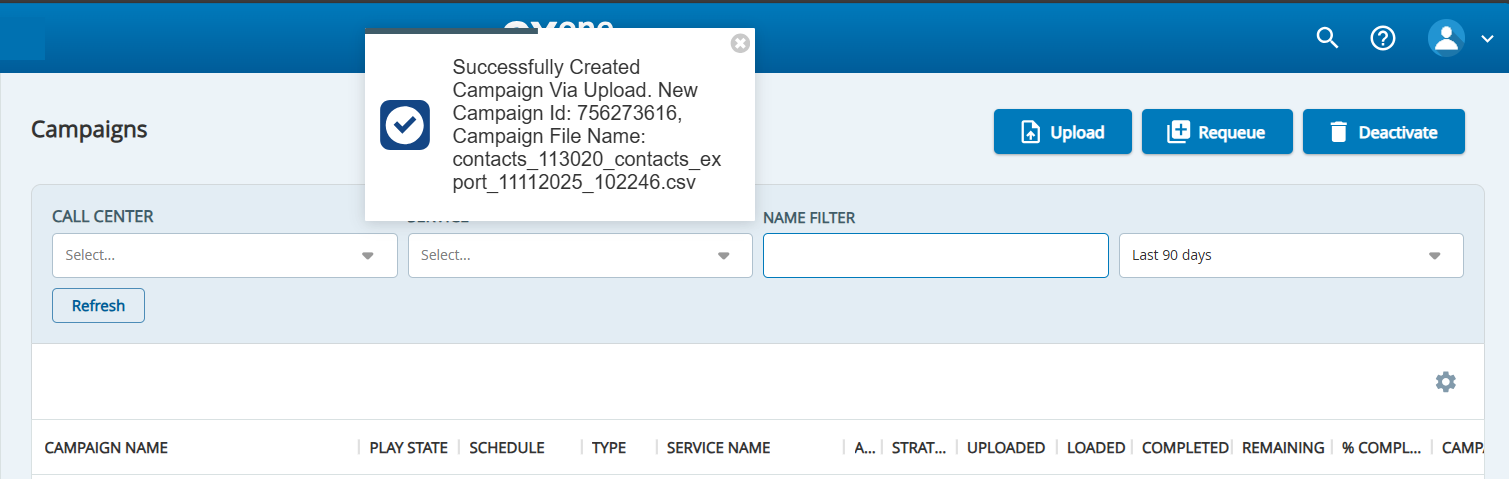
- Click Upload.
- The success message appears.
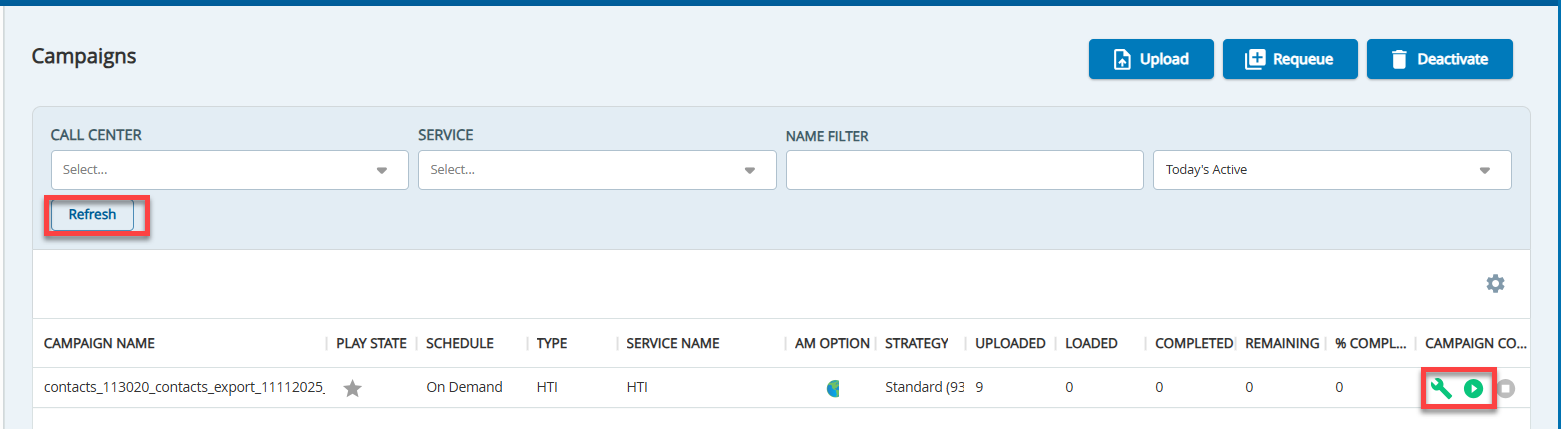
- Click Refresh, the Build (
 ) and Play (
 ) campaign icons appear in green.
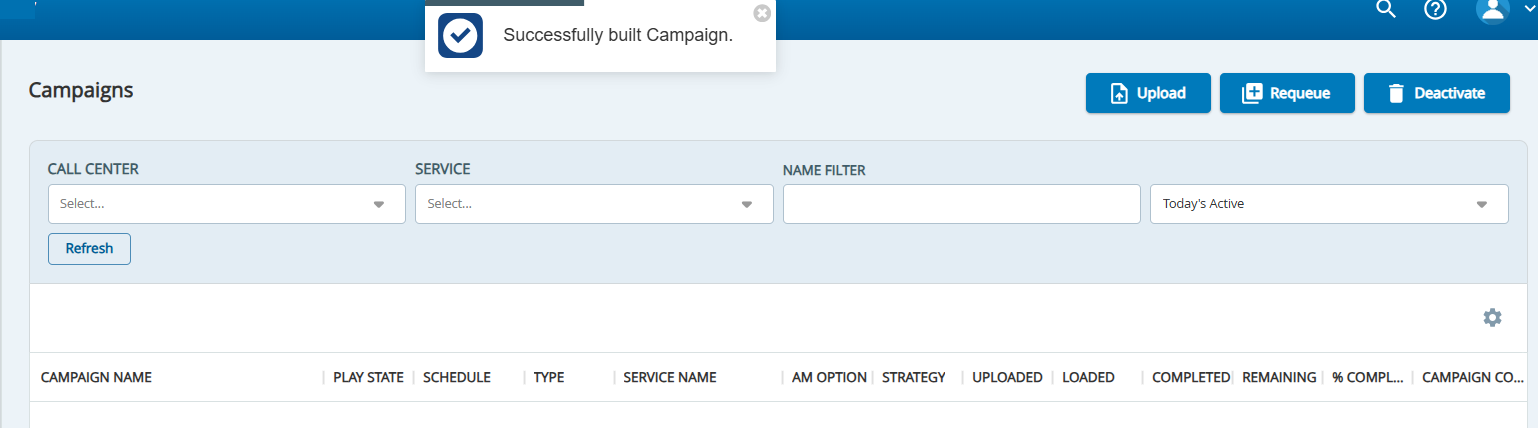
- Click the Build (
 ) icon to build a campaign. The success message appears.
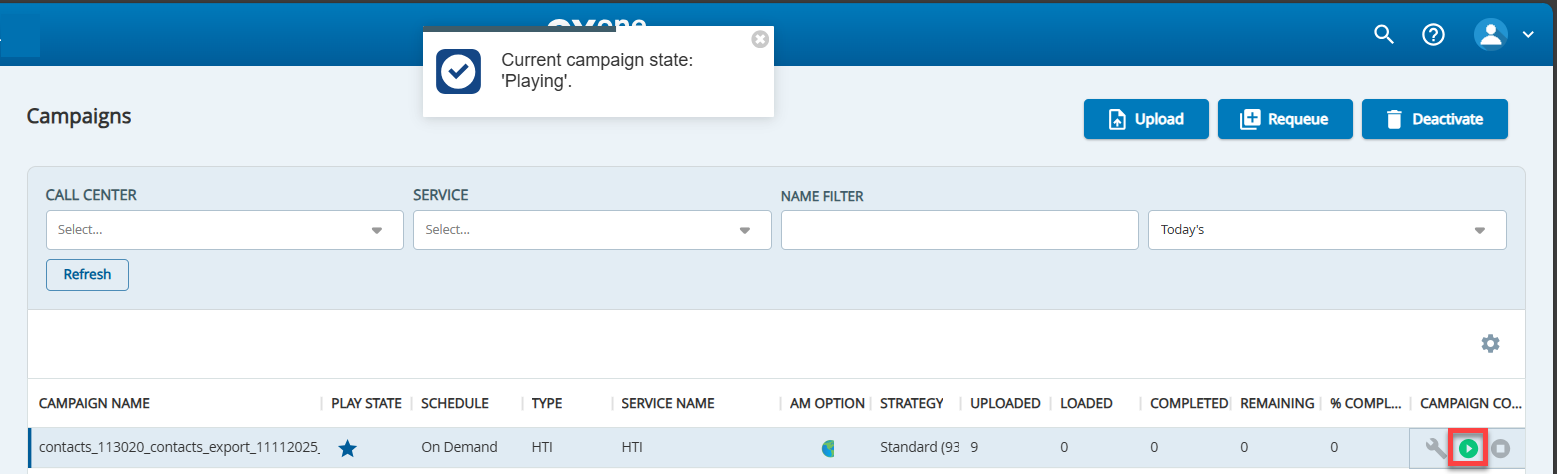
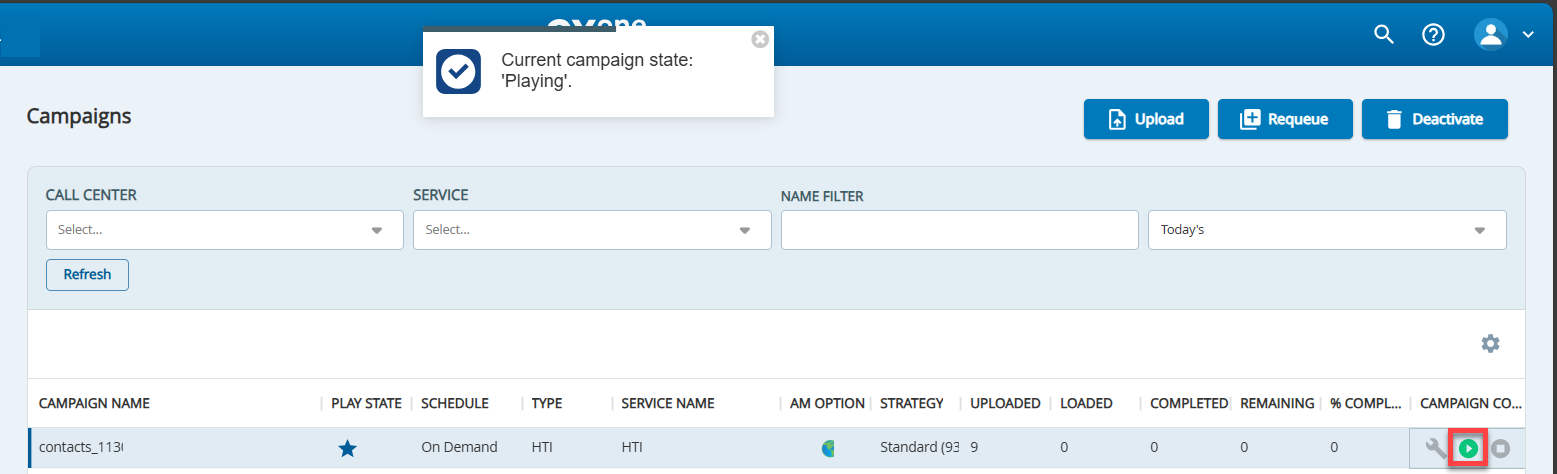
- Click the Play (
 ) icon to play a campaign. The following message appears.
Contact Manager
- In SmartReach, navigate to Configure > Contacts > Contacts manager.
- Search the contact list to create a campaign by using the Search or Advanced Search options.
- Click Make a Campaign. The Create Campaign pop-up appears.
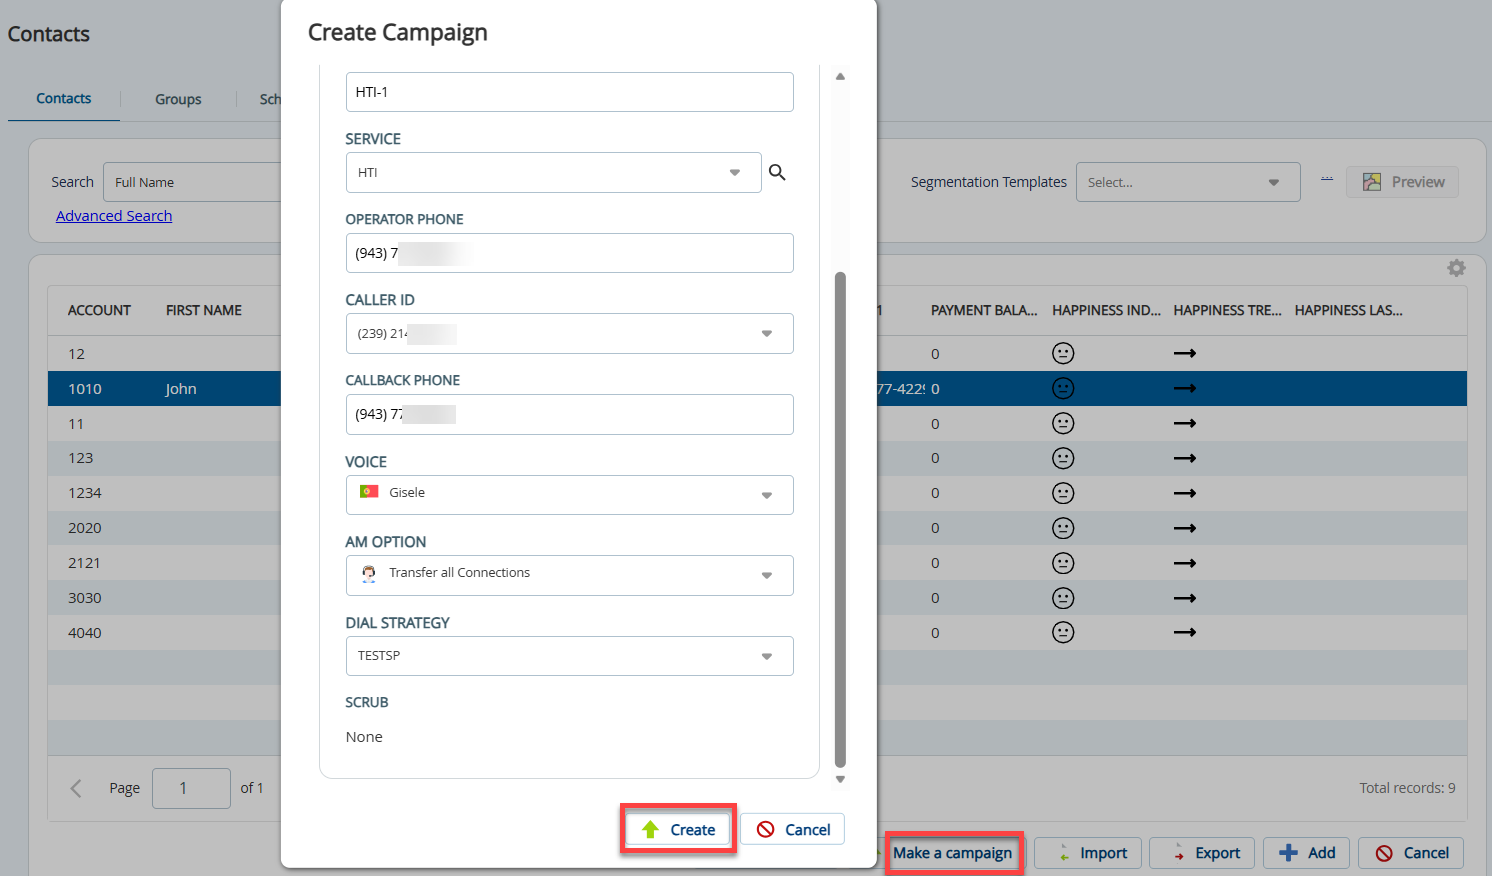
- In the Basic tab, select the Campaign type as Outbound from the drop-down list.
- Enter the Campaign Name to identify the campaign throughout the SmartReach Portal.
- Select the HTI service on which you want the campaign to run.
- Enter the Operator Phone number.
- Select the Caller ID from the drop-down list.
- Enter the Callback Phone number.
- Select the voice that you want to be use in the calls from the Voice drop-down list.
- Select the AM (answering machine) Optionthat you want to be use for the calls. The available options are as follows:
- Don't Leave Messages: If an answering machine is detected, do not leave a message and disconnect the call.
- Transfer all Connections: Does not detect answering machines and transfers all connections to agents.
- Select the Dial Strategy that you want to be use for contacting the phone numbers.
- Click Create.
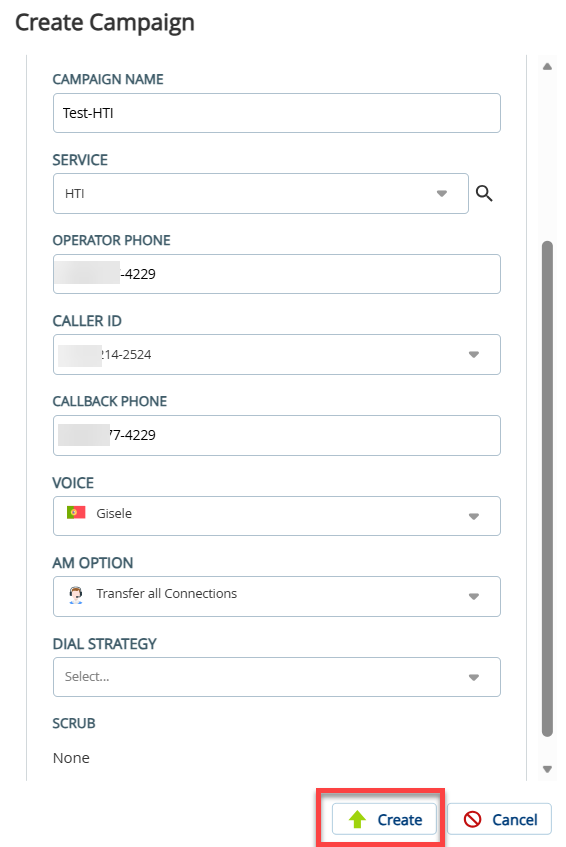
- The successful message appears.
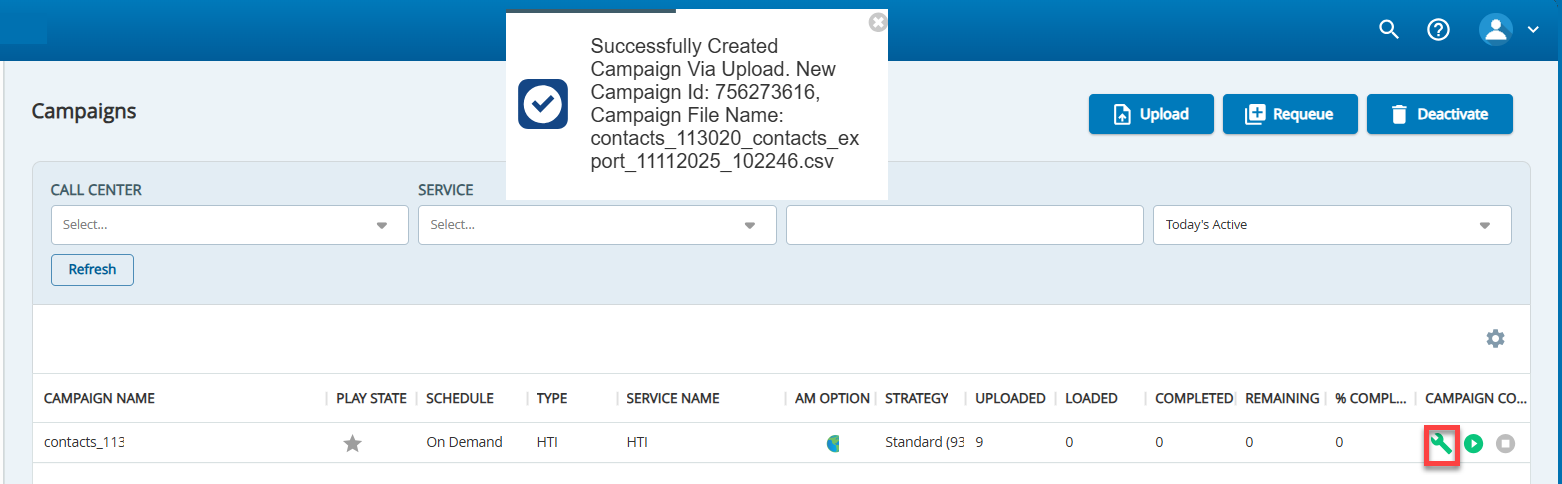
- Navigate to Configure > Campaigns > Campaigns editor, the Build () and Play () campaign icons appear in green.
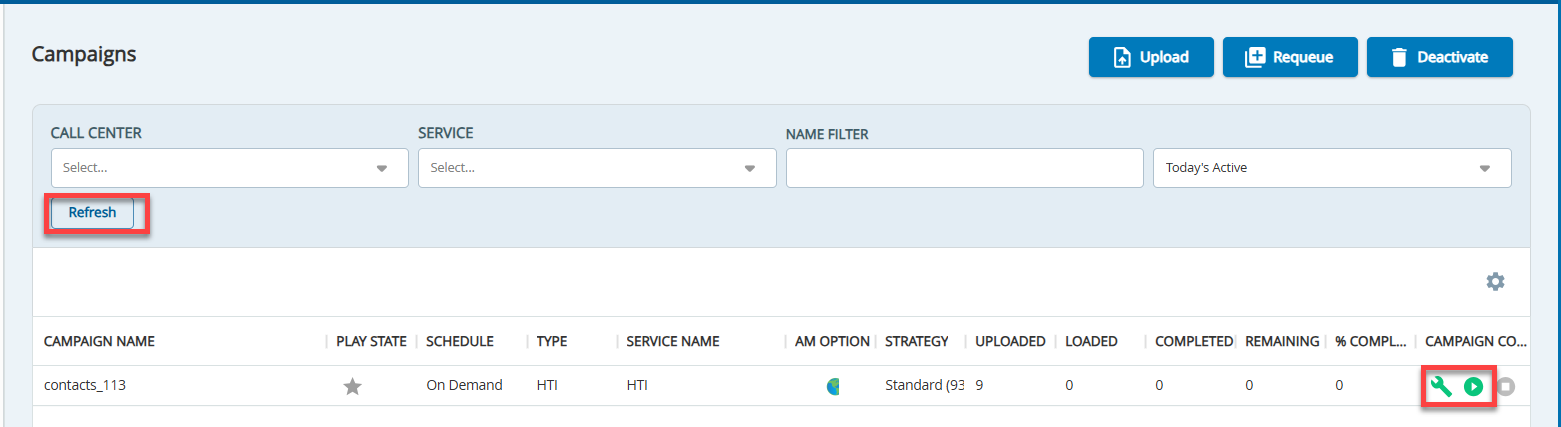
- Click the Build () icon to build a campaign. The success message appears.
- Click the Play () icon to play a campaign. The following message appears.
Agent Desktop
Once, the administrative user has configured the HTI service and the campaign is playing, agents can now launch text messages using the mouse click.
- Log on as an agent to the HTI service.
- Change the status to Ready state.
- The Launch Text Confirmation window is displayed on the HTI agent desktop.
- Click Confirm to send the message.