Download PDF
Download page Assign Shifts.
Assign Shifts
You can assign shifts to agents by drag and drop, or in bulk, or by copying across dates. You can assign shifts from WFO > Workforce Management > Agent Scheduling (alternatively, go to Configure > Agents > Agent Scheduling ). Click the Schedule tab.
Before you Begin
You must configure the shifts before assigning them to agents. For information about creating a shift, see Create Shifts.
Assigning Shifts from the Agents Tab
You can assign shifts from the Agents tab by using one of the following methods:
Assigning Shifts by Drag and Drop
- On the WFO tab, go to Workforce Management > Agent Scheduling. You can also access the Schedule tab from Configure > Agents > Agent Scheduling.
- Click the Schedules tab.
- From the Assign drop-down menu, click By Drag & Drop.
- Select a shift from the drop-down menu.
In the first row, the shift and the shift timings appear. - From the first row, drag the shift and drop it in the corresponding agent cell to assign the shift.

- (Optional). Select the Unscheduled Only checkbox to filter the available agents.
- You can do this for the number of slots available for the respective shift. After all the slots are filled, you cannot apply that shift to other agents.
- (Optional). While assigning shifts, you can assign reasons why an agent would not be available. These reasons are called Not Ready Reasons. The following is the list of Not Ready Reasons:
Break
Lunch
Meeting
Other
Tech Difficulties
Training - Click Publish to save all the changes and make the schedule available for the agents and other managers.
Assigning Shifts in Bulk
By using bulk assignment, you can select multiple agents for shift assignment.
- On the WFO tab, go to Workforce Management > Agent Scheduling. You can also access the Schedule tab from Configure > Agents > Agent Scheduling.
- Click the Schedules tab.
- From the Assign drop-down menu, click In Bulk.
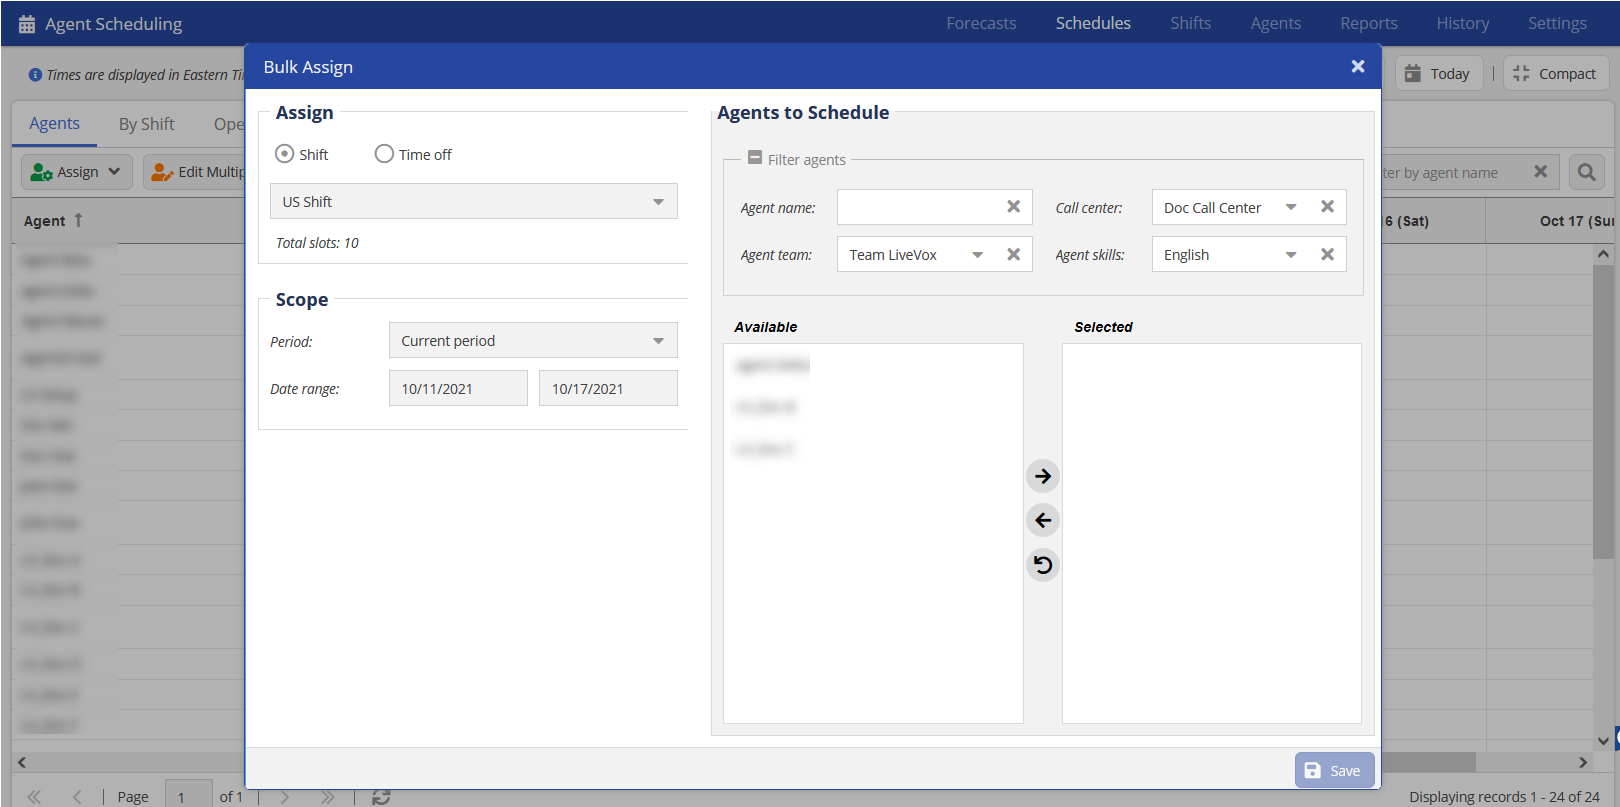
- Select the required Shift for scheduling.
- Select the Scope to assign the shift for a specific time.
- You can Filter the list of Available Agents by:
- Agent Name
- Call Center
- Agent Team
- Agent Skills
- Select one or multiple agents (hold CTRL to select multiple) from the Available column and move them to the Selected column.
- Click Save to save the shift assignment.
- Click the Publish button to save all the changes and make the schedule available for the agents and other managers.
- You can assign agents to multiple shifts per day and schedule multiple breaks per shift.
- You can change the hours for the shift and breaks per shift.
- You can assign reasons why an agent would not be available. These reasons are called Not Ready Reasons. The following is the list of Not Ready Reasons:
Break
Lunch
Meeting
Other
Tech Difficulties
Training
Assigning Shifts by Copying Across Dates
You can copy the shift assignment for a specific day or a range of days to another range of days using the Copy Assignments option. To copy shift assignment:
- On the WFO tab, go to Workforce Management > Agent Scheduling. You can also access the Schedule tab from Configure > Agents > Agent Scheduling.
- Click the Schedules tab.
- From the Assign drop-down menu, click By Copying Across Dates.
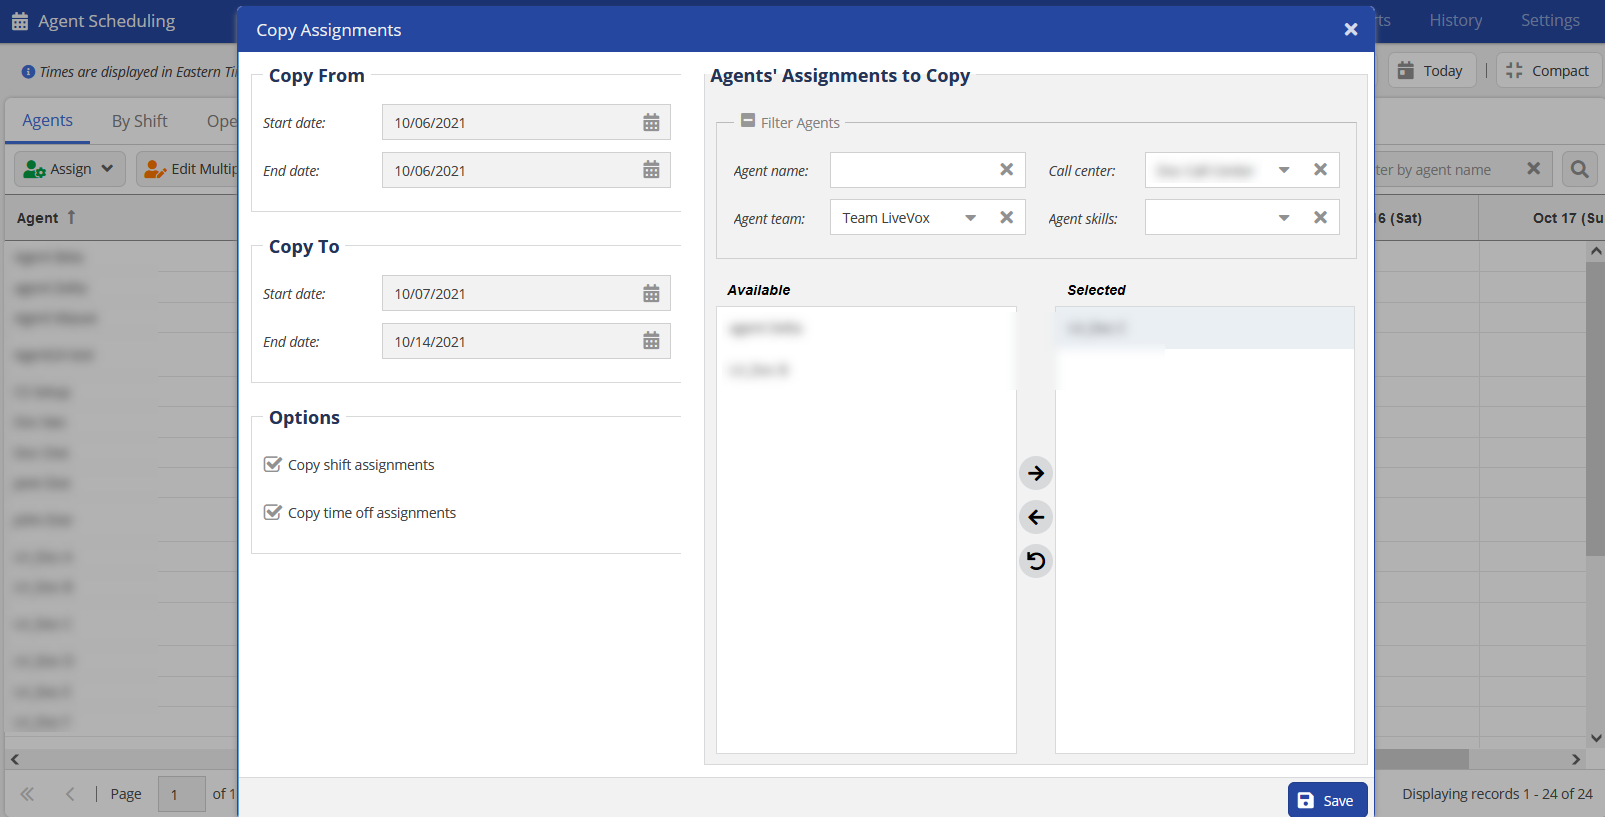
- Select Copy From and Copy To date range.
- From the Options section, select the required options.
- From the Available list, select the agents for whom you want to assign the shifts. You can also filter out the available agents from the Agents' Assignments to Copy section.
- Click the Copy button and then the Publish button.
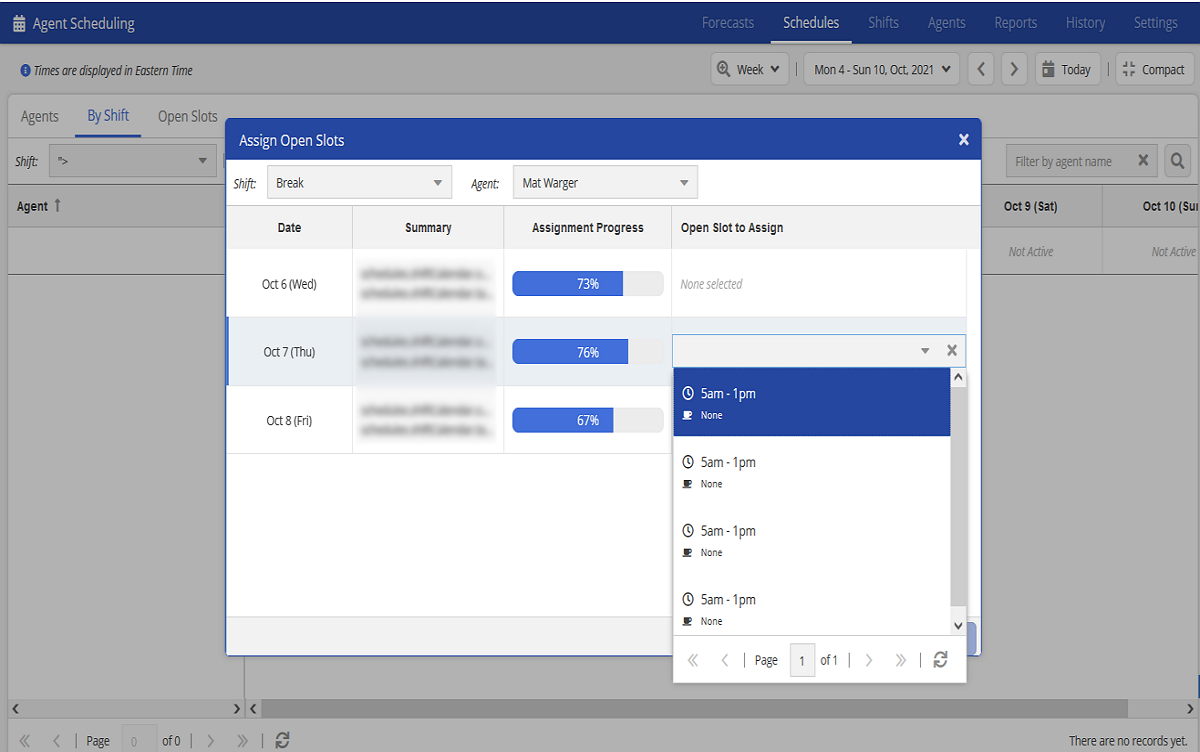
Assigning Shifts from the Shifts Tab
You can assign the available slots to agents by using the Schedules > By Shift tab. To assign shifts from this tab:
- On the WFO tab, go to Workforce Management > Agent Scheduling. You can also access the Schedule tab from Configure > Agents > Agent Scheduling.
- Click the Schedules tab and then click the By Shift tab.
- From the Shift drop-down menu, select the shift.
- Click Assign > Assign Open Slots. The Assign Open Slots window appears.
- From the Agent drop-down list, select the agent to whom you want to assign the open slot.
- In the Open Slot to Assign column, double-click on the cell to select a slot.
- From the drop-down list, select a slot.
- Click Assign to save the changes.
Assigning Shifts from the Open Slots Tab
You can auto-schedule a shift by using the Open Slots tab.
Before you begin
Before you use this option to assign shifts to agents, ensure that you have created a forecast. For more information about forecasts, see Create Staffing Forecasts.
- On the WFO tab, go to Workforce Management > Agent Scheduling. You can also access the Schedule tab from Configure > Agents > Agent Scheduling.
- Click the Schedules tab and then click the Open Slots tab.
- Click Auto Schedule. The Auto Schedule window appears.
- From the Select a published forecast drop-down, select a published forecast.
- From the Select a shift option, select a shift to which you want to assign agents. If you want to create a new shift, click Or Create a new shift option and then create a new shift.
- From the Assign Agents section, select one of the options and then click OK.
Other Filters
You can view the shift details for a specific month or for two weeks or for a week or for one day. If you are viewing the shift for a specific day, you can also view the break duration for that shift in increments of 5, 10, or 15 minutes.
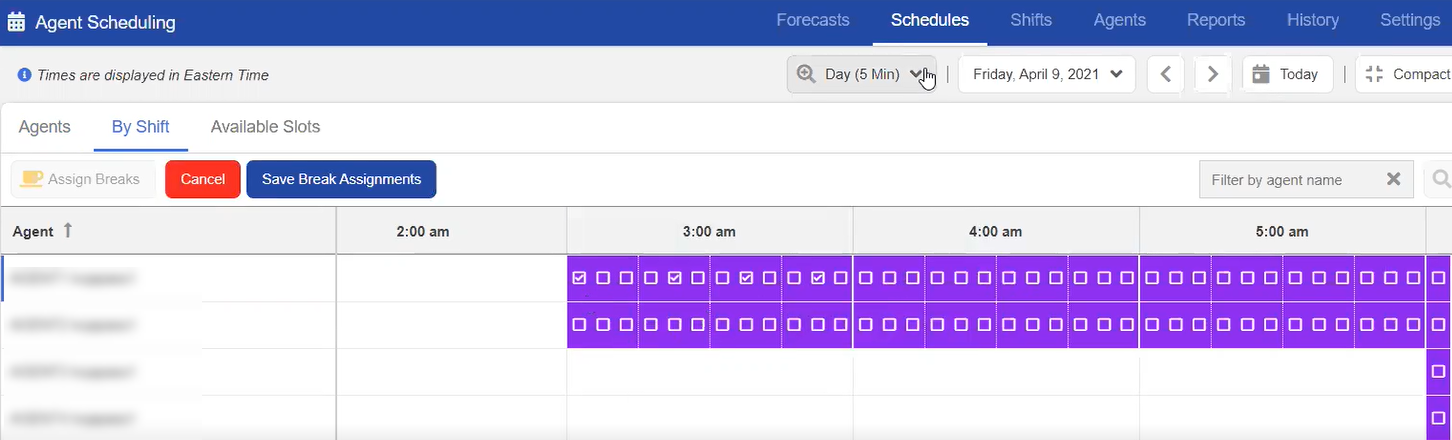
In the above image, a shift is displayed for a day with a 5-minute break duration. According to the break duration, an hour is split into four blocks of 5 minutes. Every block contains one 5-minute break.
Similarly, you can select 10 or 15 minute duration and add the break duration accordingly.