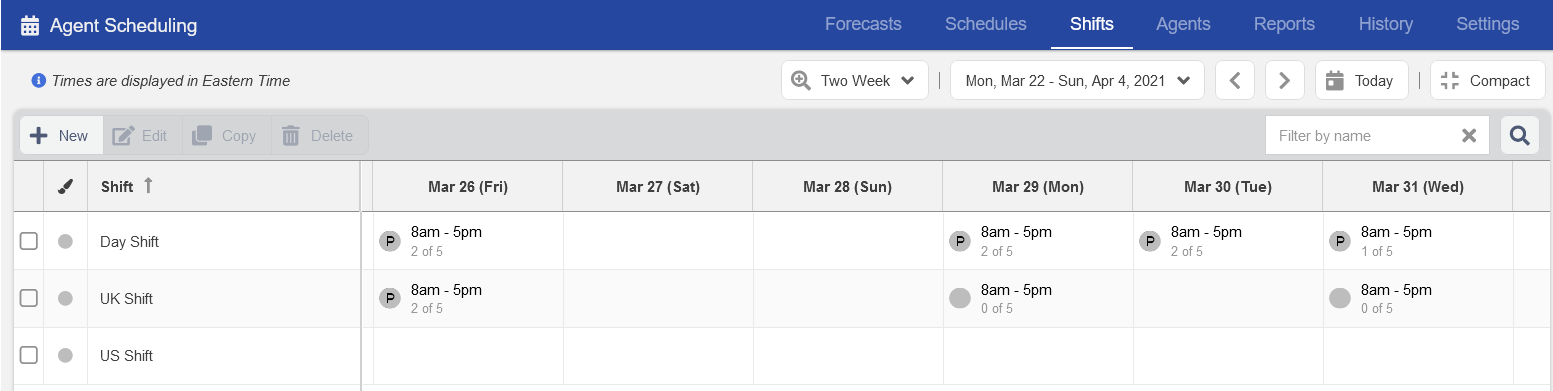
After adding the work area, time off category, and other settings, you can start adding shift details. The Shifts tab allows you to create, copy and edit shift details. Navigate to WFO > Workforce Management > Agent Scheduling(alternatively, you can navigate Configure > Agents > Agent Scheduling), select the Shifts tab from the Agent Scheduling.
Before you begin
You must configure the work area, Time Off Category, shift duration, break duration before creating a shift schedule. See the Agent Scheduling Settings section for more information on configuring these parameters.
All times displayed are in Eastern Time.
Adding Shifts
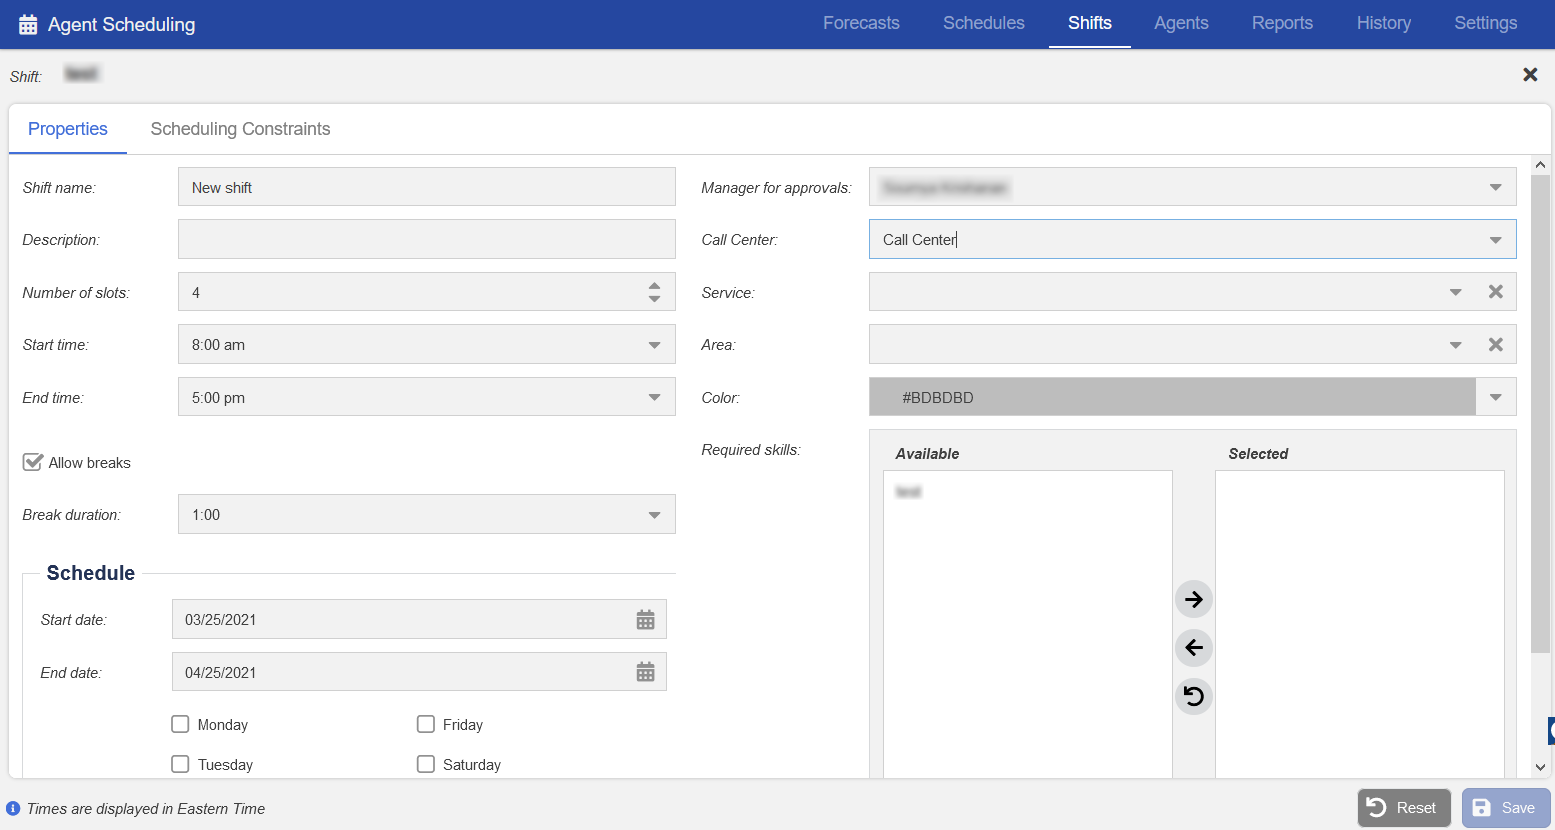
Click theNewbutton at the top-left corner of theShifttab.
Specify theShift Name.
Enter a description in the Create Shift window. Click Save. The shift gets created and a new shift window appears.
Verify the shift name in the Shift name window.
Select theManager for approvalsfrom the drop-down menu to approve tasks for the shift.
Verify the description of the shift.
Select theCall Centerfrom the drop-down menu to associate the shift to a specific call center.
Select theNumber of slotsyou want to allocate for the shift.
Select theServicefrom the drop-down menu to associate the shift to a specific service.
Select the Work Area for the shift in theAreafield. You can choose the area that you created on theConfigtab.
Select theStart timeof the shift.
Select theEnd timeof the shift.
You can choose to assign a color to a shift to distinguish between multiple shifts.
Select theRequired skillsfor the shift you are creating. Select the skills from the Available column and move to the Selected column.
Select theAllow breakcheckbox to define the break time duration for the shift.
Select theBreak durationfrom the drop-down menu.
Define theScheduleof the Shift:
Select theStart dateandEnd date.
Select specific days of the week.
For information about Scheduling Constraints, see the Configuring Scheduling Constraints section in Agent Scheduler Settings.
You can also copy the shift details of an existing shift using theCopyoption on theShift Detailstab.
Editing Shift Details
You can edit the Shift Details from theScheduletab.