Download PDF
Download page Deploying a Bot.
Deploying a Bot
Before You Begin
LiveVox configures a contact flow and a message for the bot that you create on LiveVox Bot. In addition, a service and a web widget are configured and associated with the message. Thus, the bot that you created on LiveVox Bot will be deployed and available on your website to be used by your customers. If you have created another bot and want to deploy it instead, you must change the bot ID in the message. If, however, you want to deploy an additional bot, you must first copy the default message and then change the bot ID in the new message (in addition to other steps).
If you have purchased both U-Chat and SMS, LiveVox creates two messages for the contact flow—one for the chat channel (chat message), the other for the SMS channel (SMS message).
Changing the Bot ID in a Message
Before you change the bot ID in a message, record the following values:
- The ID of the bot that you want to deploy to your website. This ID appears on the address bar when accessing the bot.

- The name of the chat or SMS message that LiveVox configured to deploy your bot.
To change the bot ID in a message:
- On the Configure tab, click Messaging > Messages.
The Messages window appears. - In the Message(s) field, select the recorded message.
The associated contact flow appears on the Visual tab. - Double-click the bot_init block.
The Property(s) window appears.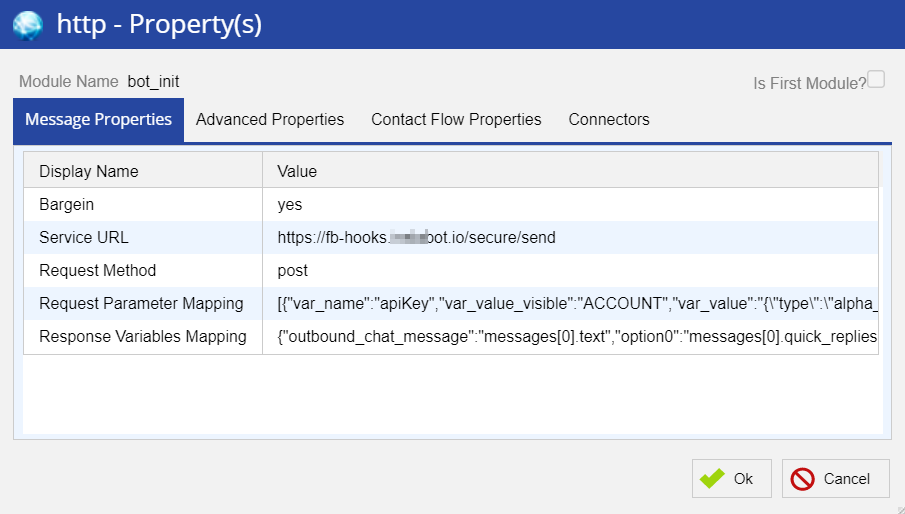
- On the Message Properties tab, in the Request Parameter Mapping row, in the Value column, double-click the value.
The http_request_parameters window appears.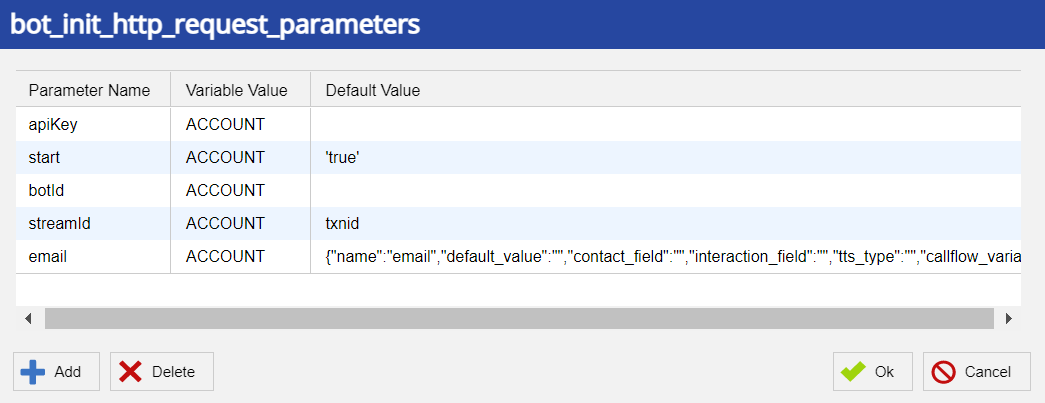
In the botId row, in the Default Value column, double-click the value, and then enter the recorded bot ID.
Enclose the bot ID in single quotation marks.
- Click Ok, including in the Property(s) window.
- In the Messages window, click Save, and then click Deploy.
Deploying an Additional Bot
Before you deploy an additional bot, record the following values:
- The ID of the bot that you want to deploy to your website. This ID appears on the address bar when accessing the bot.
- The name of the chat or SMS message that LiveVox configured to deploy your first bot.
- The name of the service and call center for which you want to deploy the bot.
To deploy an additional bot:
For assistance, contact the LiveVox Customer Care Team.
- On the Configure tab, click Messaging > Messages.
The Messages window appears. - In the Message(s) field, select the recorded chat or SMS message.
The associated contact flow appears on the Visual tab. - Click Copy.
The Copy Message To window appears. In the New Message Description field, enter a name to identify the new message.
Record the entered name.
- Click Copy.
The new message appears. Change the bot ID in the message.

For more information, see Steps 4 through 8 of the Changing the Bot ID in a Message section.
- On the Configure tab, click Services > Services.
The Services window appears. - In the Call Center and Service fields, select the recorded call center and service, respectively.
- On the Settings tab, in the Contact Rules section, in the Inbound Chat message or Inbound SMS message field (as applicable), select the name that you recorded in Step 5.
If you selected the chat message in Step 3, in the Advanced Features section, in the Chat Routing Token field, enter a department (routing token) to which you want the chat to be routed (for example, banking, billing, collections, or support).
Record the name of the department.
- Click Save.
If you selected the SMS message in Step 3, the additional bot is deployed for SMS. - If you selected the chat message in Step 3:
- On the Configure tab, click Web Widget > Widget.
The Web Widget window appears. Configure a web widget.
For information about how to configure a web widget, see Configuring a Web Widget.
When configuring a web widget, in the Form Fields section, if you select the checkboxes next to Email, Phone, and Account, the respective fields appear on the form on the web widget when a customer initiates a chat. The bot uses the values that a customer provides in these fields to search for the associated contact (that is, the LVP contact record whose attributes match those provided by the customer).
In the Web Widget window, double-click the web widget.
The Web Widget Detail window appears.- On the Chat tab, in the Departments section, select the checkbox next to the department that you recorded in Step 11.
- Click Save.
Copy the web widget code into your website.
For information about how to copy the web widget code, see Copying a Web Widget.
The additional bot is deployed to your website for chat.
- On the Configure tab, click Web Widget > Widget.