Download PDF
Download page Call Recording Report.
Call Recording Report
Call Recording Report enables you to search for specific call recordings for monitoring quality control or to assist in agent training. To access the Call Recording Report, on the Review tab of the LVP, click Agent Reports > Call Recording Report.
- This report may only be generated with a start and end time frame no greater than 730 days. Results are based on the configured Call Recording duration set at the Client or Service level. LiveVox maintains access to recordings through the LiveVox Portal for up to 3653 days. However, the search criteria available past 730 days are only Service ID, Agent ID, and duration. By default, all times will be in UTC.
- Once recordings are deleted, they are inaccessible and cannot be restored.
Search Criteria
The Call Recording Report displays a Search tool to select the parameters for filtering the report.
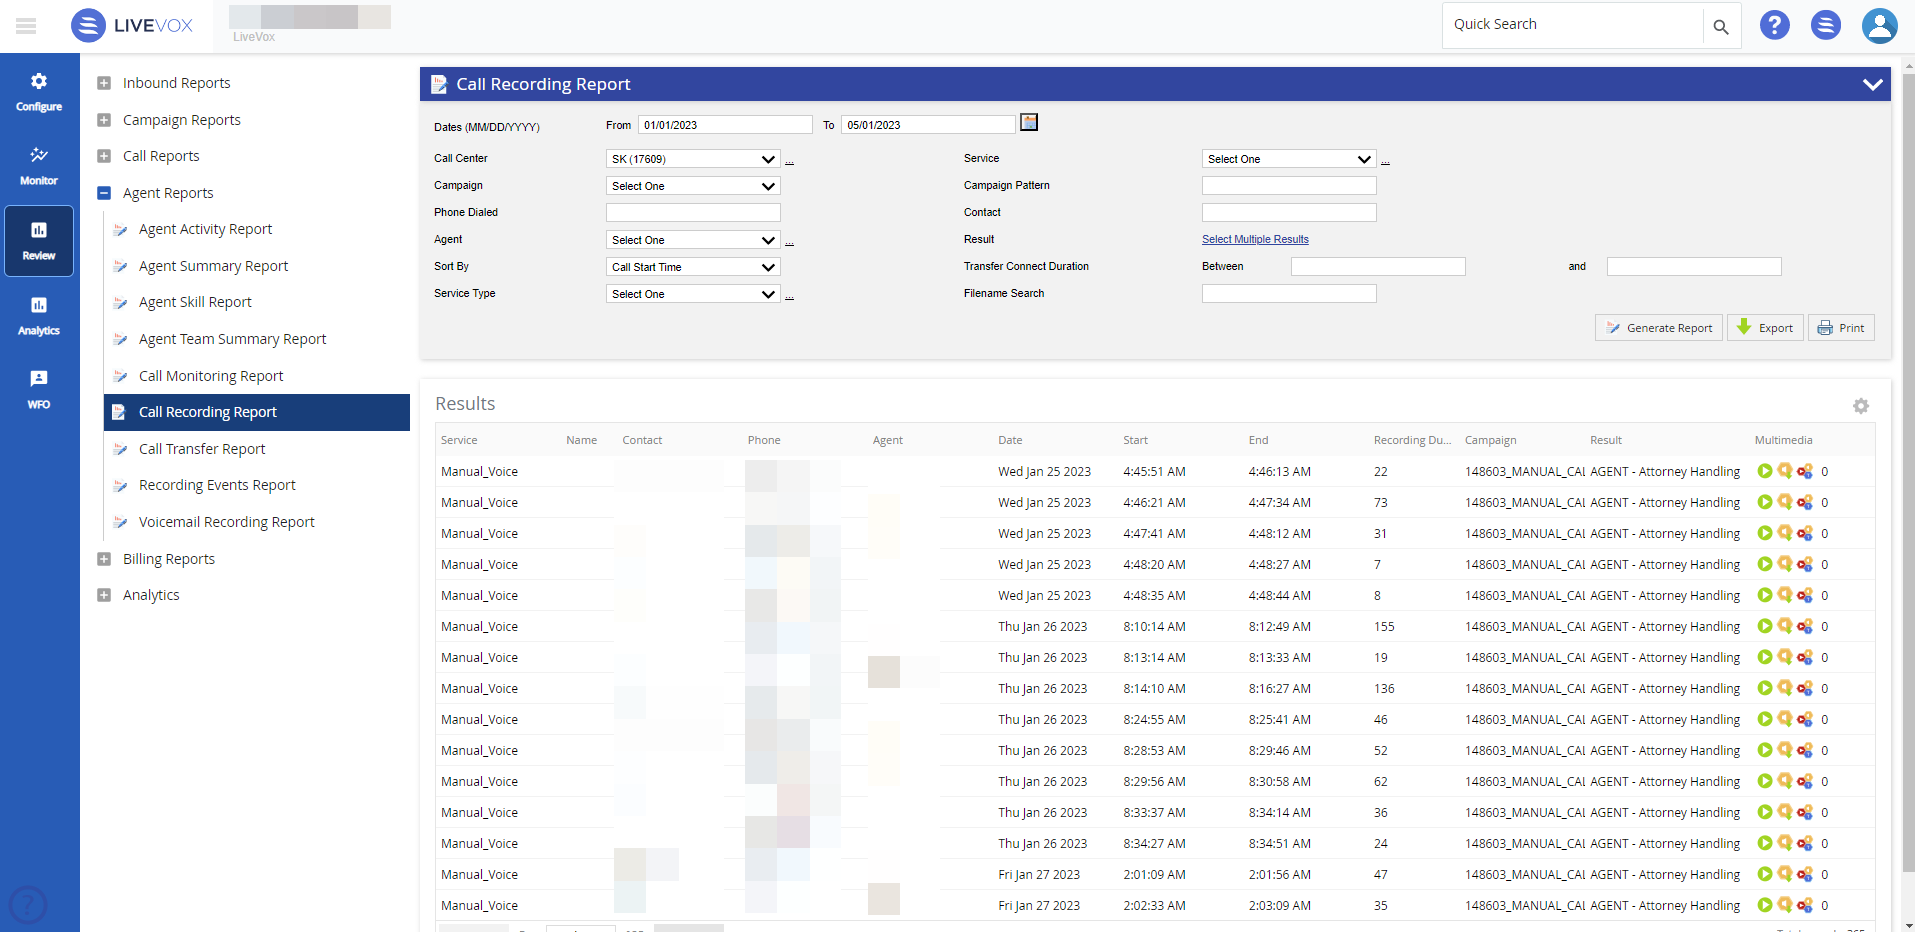
Select or specify values as required in the following fields to generate the report.
| Field | Description |
|---|---|
| Date Range | Enables you to type in dates in the format of MM/DD/YYYY or choose dates using the calendar button. Clicking on the calendar button opens the Date Picker interface.
|
| Call Center | Select a call center with drop-down menu.
|
| Service |
If you search call recording report for multiple services with the different durations of Call Recording set at the service level, the call recording report will be generated according to the duration of Call Recording set at the client level.
|
| Campaign | Allows you to select a particular campaign for the report. |
| Campaign Pattern | Allows you to search by a portion of the campaign name. This is useful for running reports on a specific book of business with a similar filename.
|
| Phone Dialed | Enables you to pull all recordings associated with an individual phone number entered. This could be the outbound number dialed or the inbound number's caller ID. |
| Contact | Enables you to pull all the recordings of the multiple account number entered. A maximum of 10 account numbers can be searched at a time using comma as a delimiter. |
| Agent | You can select an individual agent ID to search for recordings. |
| Result | You can select an individual or group of result codes to search for recordings by clicking the Select Multiple Results link.
|
| Sort By | You can sort the generated list by Call Start Time, Account Number, or Agent. |
| Transfer Connect Duration | You can search for specific calls within a call length range. |
| Service Type | Allows you to select a particular service type using the Service Type drop-down menu. If a particular service type is selected, only the services available for that service type appear in the Services drop-down list.
|
| Filename Search | Allows you to search for a call recording report by its filename. |
Customizing Results Column
Results columns and sequences can be easily modified to provide you with a report view that is important to your business operation.
To customize columns:
- Click the cog icon in the upper right corner of the Results panel. You are presented with the Customize Column window.
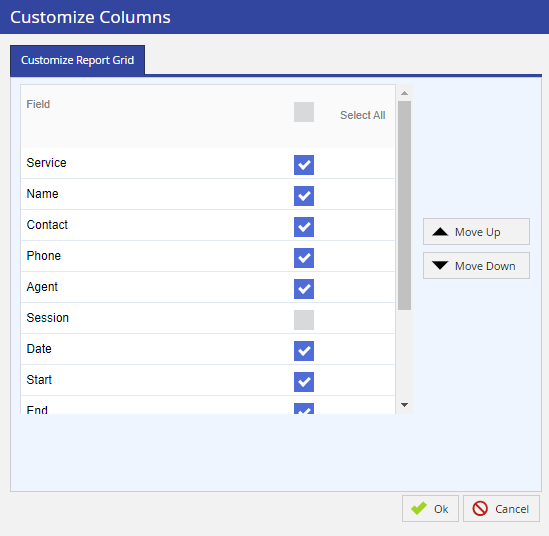
- Select the columns that you want to see in the report.
- Re-sequence the displayed fields by selecting a column and moving it up or down using the appropriate button.
Click OK to update the view.
Generating Report
After your selection of search parameters, you can generate the report by clicking the Generate Report button located at the bottom of the search criteria. This generates the report as below.
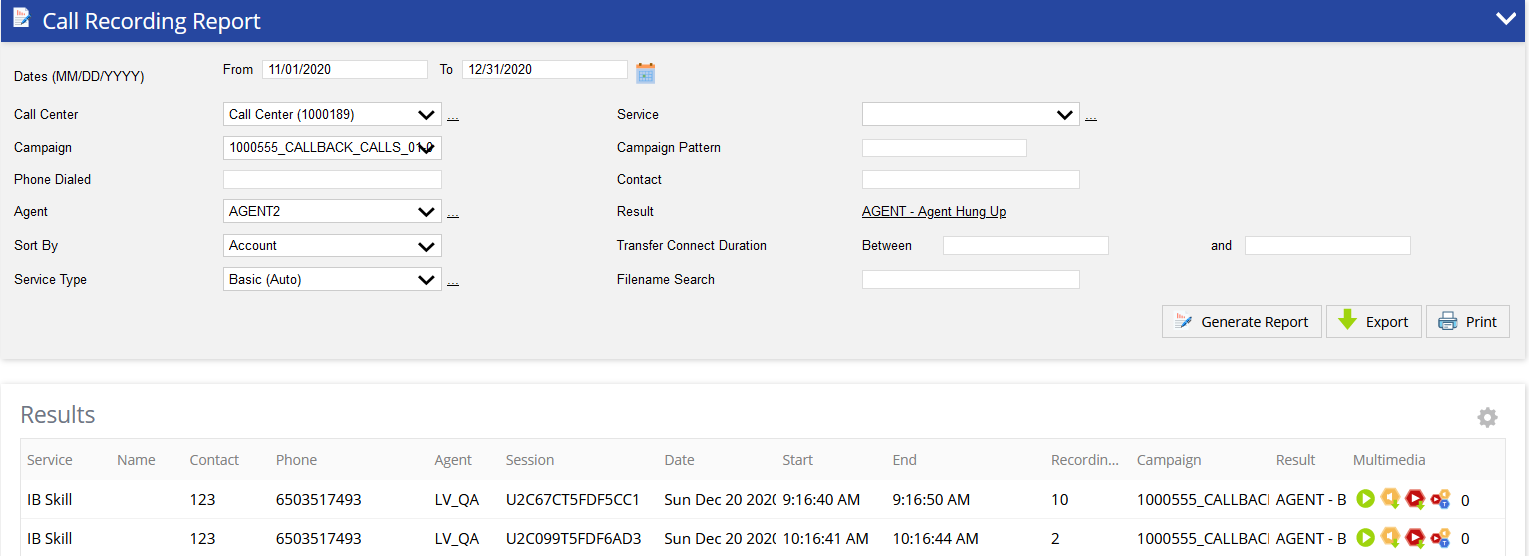
The following optional fields are available as report columns:
| Field | Description |
|---|---|
| Service | Service Name on which the account was attempted (or on which the inbound call was received). |
| Name | First and Last Name of customer. |
| Contact | Account number for the record. |
| Phone | Phone number used to contact the account, or the inbound call's caller ID. |
| Agent | Agent name (blank if agent disconnects from ACD prior to assigning a disposition code, and assigns generic Operator Transfer outcome). |
| Session | A session number associated to the recording. |
| Date | Date of the call. |
| Start | Actual time the call was connected to the agent in Hours: Minutes: Seconds. |
| End | End time of the call in Hours: Minutes: Seconds. |
| Recording Duration | Total time of the recorded conversation in seconds (This metric is calculated as Transfer duration – Transfer hold duration). |
| Campaign | Name of the campaign the phone number was found within. |
| Results | The LiveVox result code assigned to the call. |
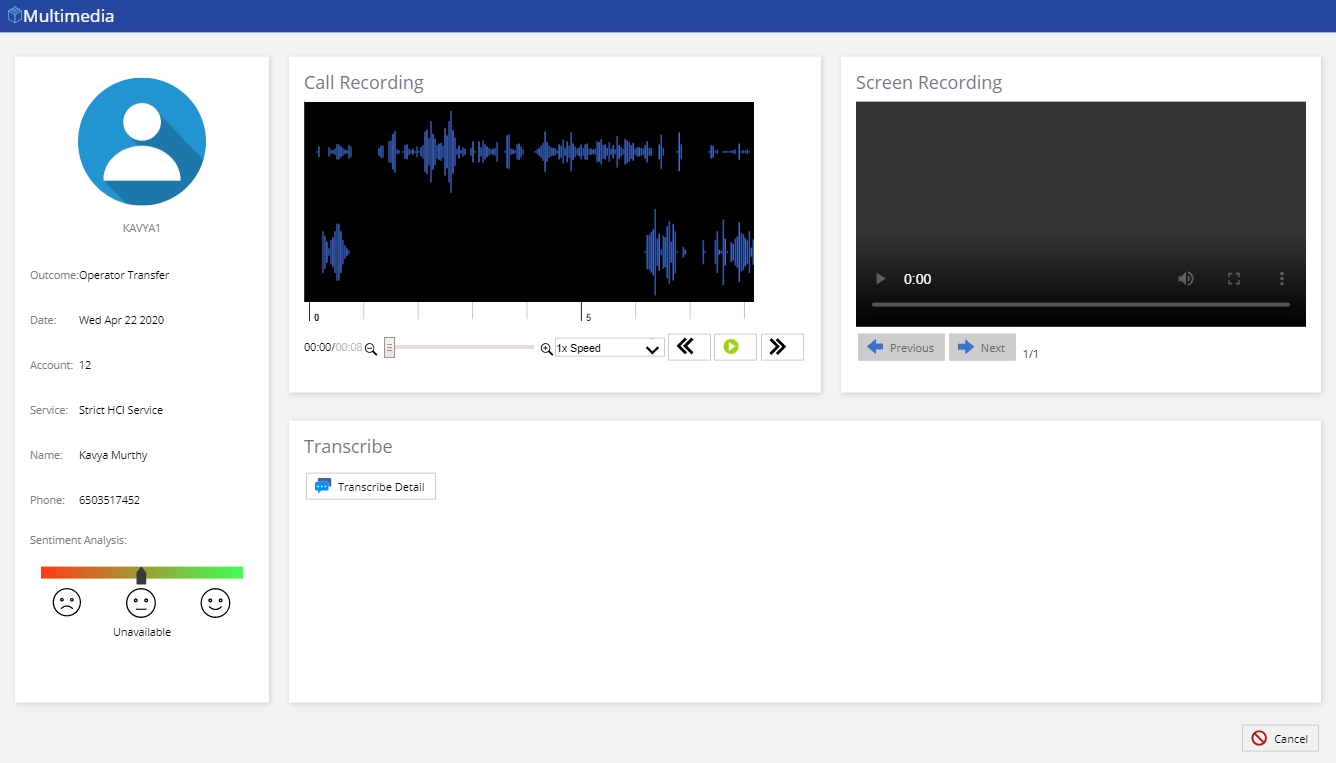
| Multimedia | You can access the multimedia (audio and video) recording of an agent by clicking on the following multimedia icon.
|
Exporting Report
Click Export ( ) to export the report and select the required option of file type. The available options are PDF, MS Excel, and CSV.
Printing Report
Click Print ( ) to print the report. The generated report opens in another tab. Select the settings for printing the report and click Print.