Download PDF
Download page Creating a Bot.
Creating a Bot
You can define the customer journey by creating a bot, which visually represents the journey by automatically organizing conversation paths into workflows and sub-workflows.
To create a bot:
- In the left pane of LiveVox Bot, click Bot Management.
The Bot Management window appears. Click New Bot. Alternatively, on the New Bot menu, you can click Start with a blank bot.
The Build tab appears.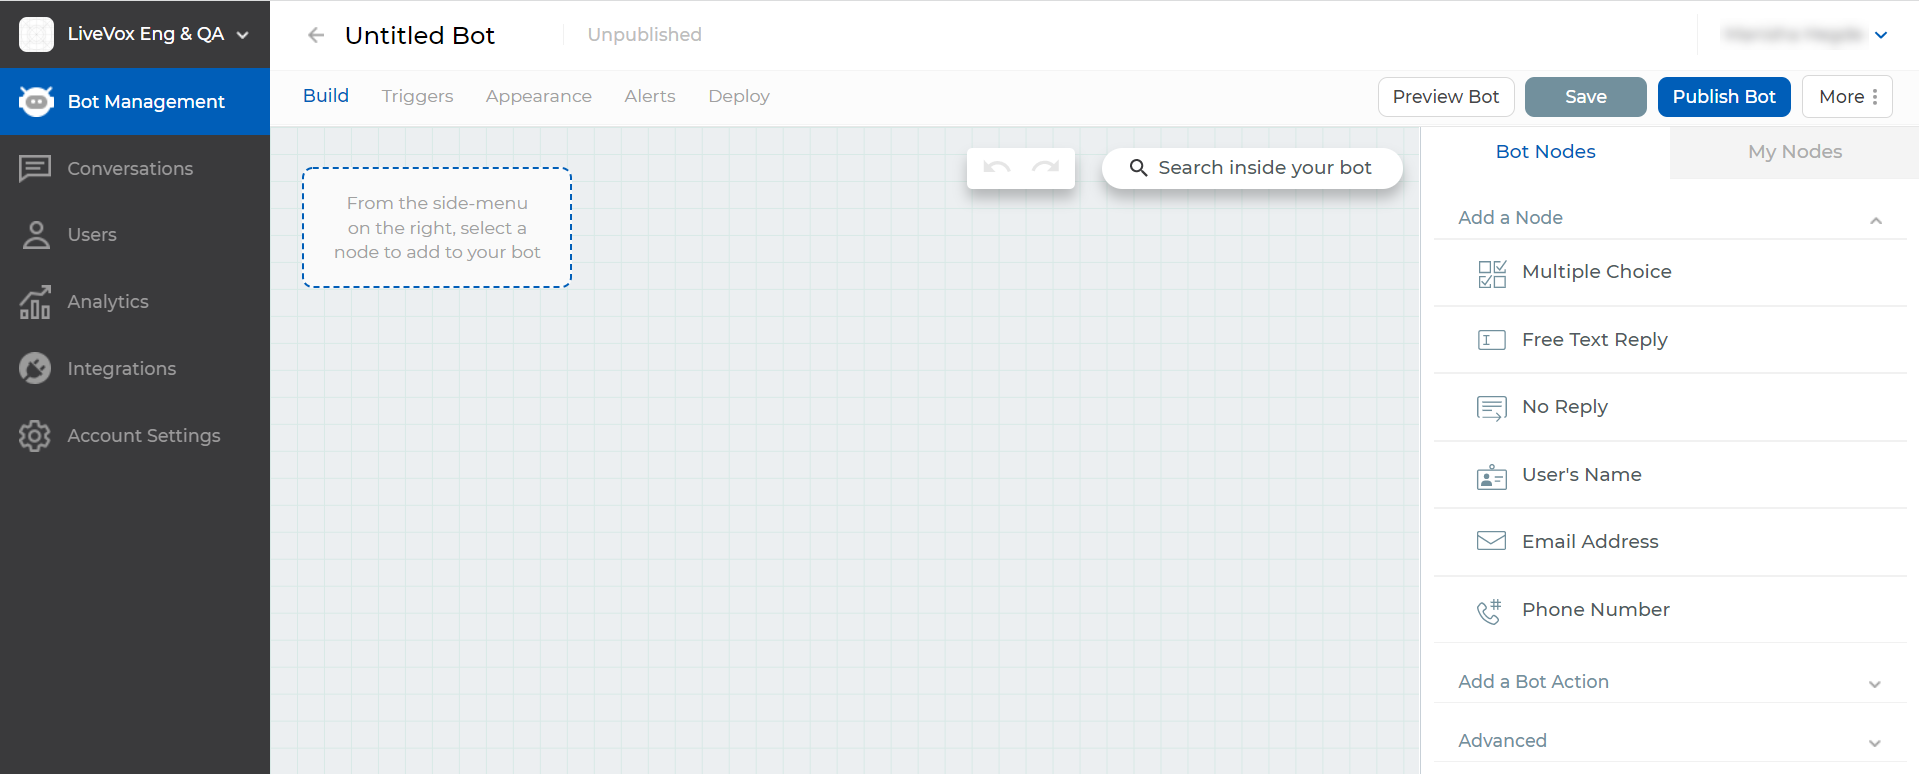
- Above the Build tab, enter a name for the bot.
On the Bot Nodes tab (right pane), on the Add a Node menu or the Advanced menu, select the required node, and then specify its characteristics.
- The Add Node menu and the Advanced menu contain basic nodes and advanced nodes, respectively.
- For information about bot nodes, see Nodes.
- For information about how to enhance a node message, see Enhancing a Node Message.
- To change the selected node, in the Select how the user will respond field, select the required node. This field appears depending on the node that you have selected.
Optional: To save the response provided by the customer to the node as a user property:
Select the Save the user's response to their profile checkbox.
This checkbox appears depending on the node that you have selected.
A drop-down list box containing user properties appears.
In the drop-down list box, select the user property as which you want to save the response.
To create a user property, in the same box, enter the name for the property, and then click Create New User Property.

- If a value for a user property for a customer already exists, it is updated with the value that the customer provides during a bot conversation.
- For more information, see Properties.
Optional: To name the node or save the node as a bot goal or to your node library, on the Additional Options menu, specify values in the fields.
- This menu appears depending on the node that you have selected.
For information about bot goals, see Goals.
For information about the fields on the Additional Options menu, see Node Options.
Click Add Node.
The node appears on the Build tab.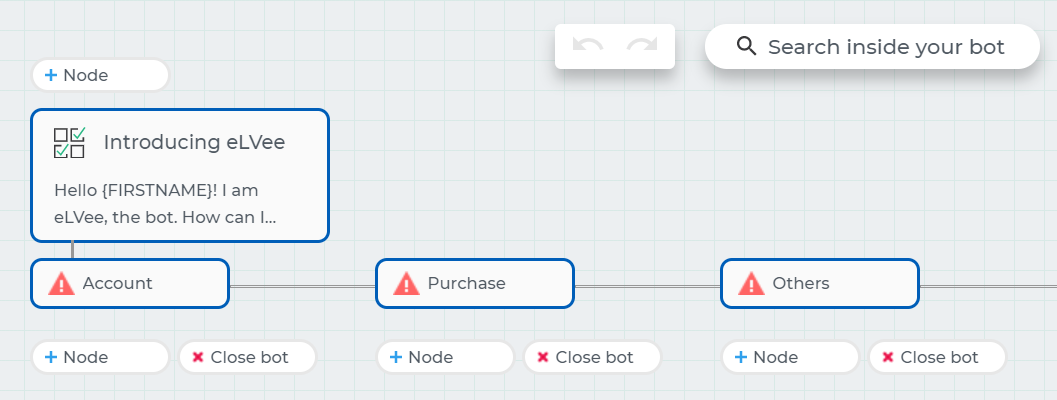
- To add another node:
On the Build tab, click Node next to the node from which you want the new node to originate.
The Bot Nodes tab appears (in the right pane).- To copy an existing node, on the Add a Node menu (in the right pane), select any node, click the Copy from existing
 icon, and then select the node that you want to copy.
 - After you copy the node, you can modify the characteristics of the copy. This action does not update the original node (that is, the copied node). You can also copy the entire path of the existing node by additionally selecting the Also duplicate the node path checkbox on the Additional Options menu.
- To copy an existing node, on the Add a Node menu (in the right pane), select any node, click the Copy from existing
Perform Steps 4 through 7. If, however, you copied an existing node, perform Steps 5 through 7.
The new node appears on the Build tab.
- Optional: To link a node to an existing node:
- On the Build tab, hover over Node next to the node to which you want to link an existing node.
The Action button appears. - Click Action.
The Bot Nodes tab appears. On the Add a Bot Action menu, click Link to an Existing Node.
The LINK TO field displaying a list of the names of the nodes that exist in the bot appears.For more information about this option, see Node Actions.
Select the name of the node to which you want to send the customer.
You can use the Search existing node box to search for the name of the required node.
Click Add Node.
The node appears on the Build tab.
- On the Build tab, hover over Node next to the node to which you want to link an existing node.
- Optional: If you have added a Multiple Choice node and want to link an option of the node to a web page:
- On the Build tab, hover over Node next to the Multiple Choice option.
The Action button appears. - Click Action.
The Bot Nodes tab appears. On the Add a Bot Action menu, click Redirect to an External URL.
The SEND USER TO THE URL field appears.For more information about this option, see Node Actions.
In the SEND USER TO THE URL field, enter the address of the web page.
If you do not want the web page to open in a new browser tab, clear the Open link in a new browser tab checkbox.
Click Add Node.
A node appears on the Build tab.
- On the Build tab, hover over Node next to the Multiple Choice option.
- Optional: If you want to end the bot after playing a node, on the Build tab, click Close bot next to that node.
The Close bot block appears. - Click Save.
The bot is created.
- If the bot contains an error, a red exclamation mark appears on the More button. You can view the error by clicking More > Errors.
- You can save a copy of your bot by clicking More > Save as.
Next Step