Download PDF
Download page Work Center - LV Connect.
Work Center - LV Connect
LiveVox Connect or LV Connect comprises the following communication tools:
- Alerts - Messages of importance that are automatically or manually launched to alert individuals to an event or situation that might need their attention.
- Posts - Any message that can be viewed by anyone in the organization or directed to a select group.
- Notifications - Messages launched automatically from the Work Queue feature to notify individuals about events, such as a new task, overdue task, and so on. You can initiate a notification from the Workforce Management (WFM) Agent Scheduling screen when a new agent schedule is published or from the Contact Center CRM interface to draw attention to a specific account, ticket, or contact.
- Reminders - Alerts to remind individuals of action to be taken for an important task.
Viewing Information about LV Connect Items
Click Alerts, Posts, or Notifications to see information about the alerts, posts or notifications.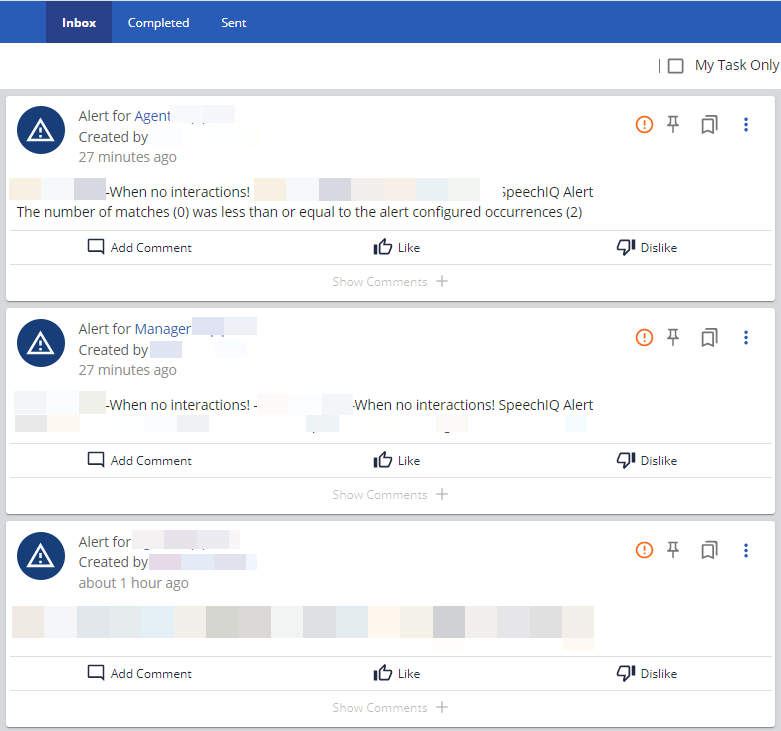
- Click
 to search for specific items.
 - Select the My Task Only check box to display only your tasks.
- To mark an item as important, click
 .
. - Click
 to pin the item.
 - Click
 to bookmark the item.
 - Click
 to see more options, such as Delete, Mark as Complete, Reassign, View, or View in New Tab.
Filtering for Specific Records
To filter for specific types of records:
- Click
 to filter.
 - In the Filter window, select Types from the Available list and click the arrow to move the item to the Selected list.
- Click Apply.
Alerts
- When you select Alerts, tabs, such as Inbox, Completed, and Sent are displayed. Click the My Task Only check box to see only alerts related to your tasks.
- Click again on a specific alert to obtain more information.
- The Details tab provides information, such as who created the alert and for whom, any comments received for the alert, and so on.
- The Info tab provides information, such as Threshold, Check Frequency, and Notification Frequency for the alert.
- The Audit tab provides information about the changes made and the date/time of the changes made to the alert.
Posts
- When you select Posts, tabs such as Inbox, Completed, Sent, Draft and Pending are displayed.
- Click again on a specific post to obtain more information.
- The Details tab provides information, such as who created the post, any comments received for the post, and so on.
- The Info tab provides information, such as who can see the post.
- The Audit tab provides information regarding the changes made and the date/time of the changes made to the post.
Notifications
- When you select Notifications, only the Inbox tab is displayed.
- Click again on a specific notification to obtain more details.
Reminders
- When you select Reminders, tabs such as Scheduled, In Progress, and Completed are displayed.
- Click on the specific tab to obtain more details.
Creating a New Post
To create a new post:
- Navigate to the Alerts, Posts, or Notifications page from the main Work Center page.
- Click
 from the top banner and select New Post. The New Post window is displayed.
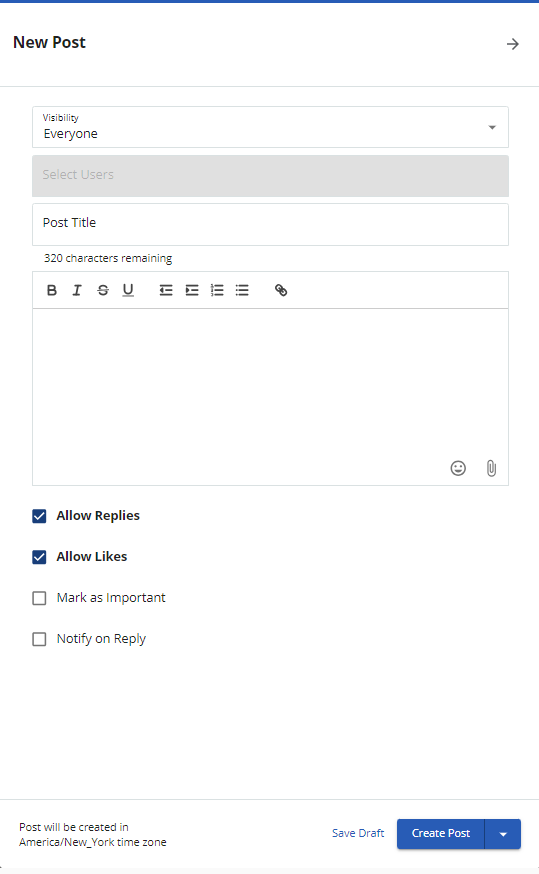
- Select Visibility from the drop-down. If you select Specific Agent Teams, Specific Agents, Specific Call Centers, Specific Services, or Specific Users, enter the usernames in the Select Users window. Use to search for specific users.
- Enter the Post Title for the new post.
- Enter the post body for the new post.
- Select Allow Replies, Allow Likes, Mark as Important, and Notify on Reply as required. You can select as many as required.
- Click Create Post to send the new post.

You can save the draft using the Save Draft option if you intend to modify it and then send it at a later time/date.
- To send the post at a later time/date, click the arrow next to the Create Post button and select Send Later. You are asked to enter a date in the Schedule Date field.
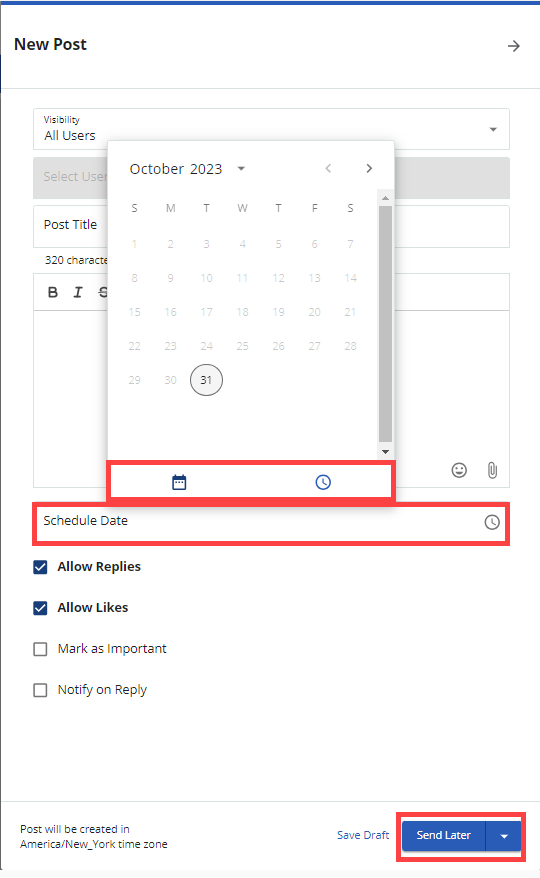
- Click Send Later.
Creating a New Poll
To create a new poll:
- Navigate to the Alerts, Posts, or Notifications page from the main Work Center page.
- Click from the top banner and select New Poll. The New Poll window is displayed.
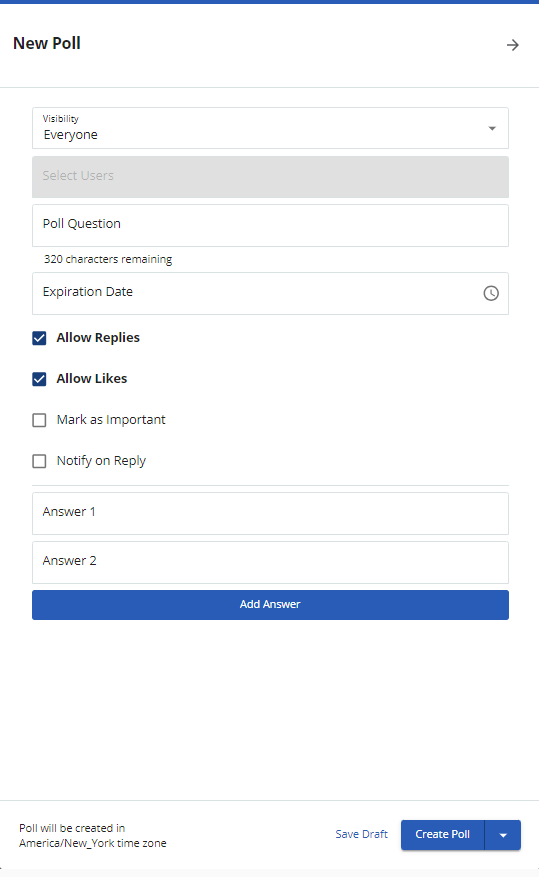
- Choose Visibility from the drop-down. If you select Specific Agent Teams, Specific Agents, Specific Call Centers, Specific Services, or Specific Users, enter the usernames in the Select Users window. Use to search for specific users.
- Enter the Post Question for the new poll.
- Select the Expiration Date using
 .
. - Select Allow Replies, Allow Likes, Mark as Important, and Notify on Reply as required. You can select as many as required.
- Enter Answer 1 and Answer 2. To provide more options for the poll, click Add Answer to add as many options as you prefer.
- Select Create Poll to send the new poll.
You can save the draft using the Save Draft option if you intend to modify it and then send it at a later time/date.
- To send the poll at a later time/date, click the arrow next to the Create Poll button and select Send Later. You are asked to enter a date in the Schedule Date field.
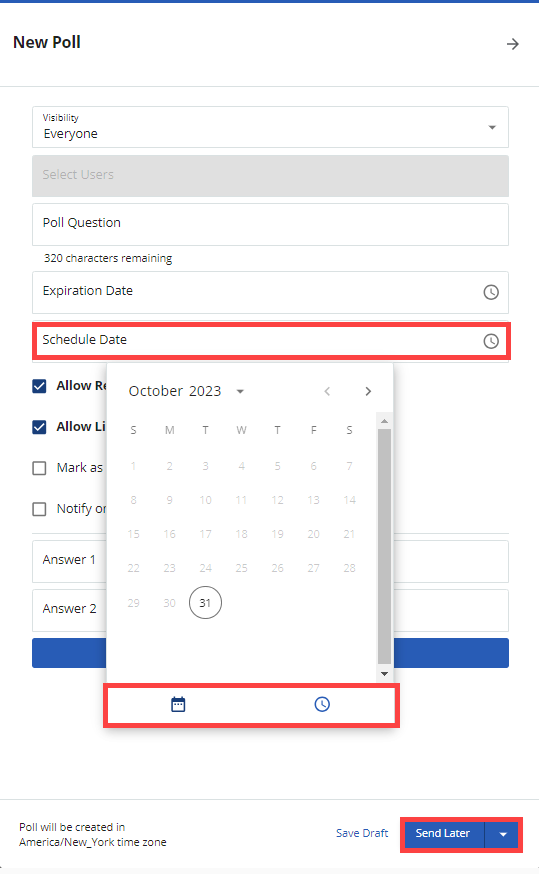
- Click Send Later.
Creating a New Reminder
To create a new reminder:
- Navigate to the Alerts, Posts, or Notifications page from the main Work Center page.
- Click from the top banner and select New Reminder. The New Reminder window is displayed.
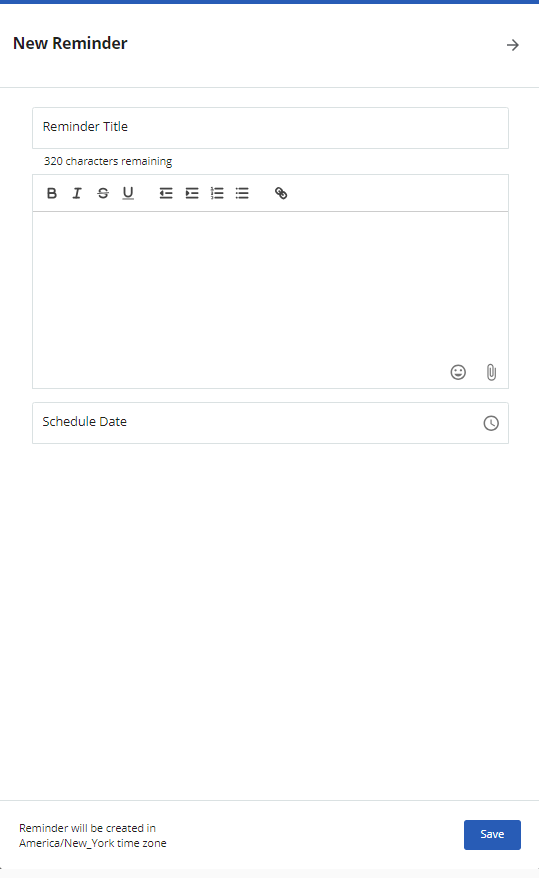
- Enter the Reminder Title for the new reminder.
- Enter the body for the reminder.
- Enter a date in the Schedule Date field.
- Click Save.
You can navigate between different LV Connect items using the arrow key in the top banner. Click LV Connect to go back to the main Work Center page.
You can also configure LV Connect on the agent desktop. When configured, it acts as a communication channel between the LiveVox Portal and the Agent Desktop to send and receive alerts, posts, and notifications. Managers and agents can use this for communication purposes.