Dialing strategies allow you to define the order in which the LiveVox Platform dials phone numbers within a campaign. You can define rules regarding the inclusion of numbers, sequence of dialing, whether to move to the next number in the sequence, and if a number can be included in a requeue campaign.
The Strategy editor enables you to create and edit a Dialing strategy. You can use one of the standard strategies, pre-built on the LiveVox Portal (LVP), or you can create one of your own. By default, the Dialing strategy selected for Campaigns is Standard and is defined as dialing each phone sequentially (Phone 1, Phone 2, Phone 3, and so on).
Sysadmins, Superusers, and Managers (with restrictions) can define which strategies to apply to certain services using the Strategy editor. For more information about user roles and permissions, see User Roles and Permissions.
Accessing the Strategy Editor
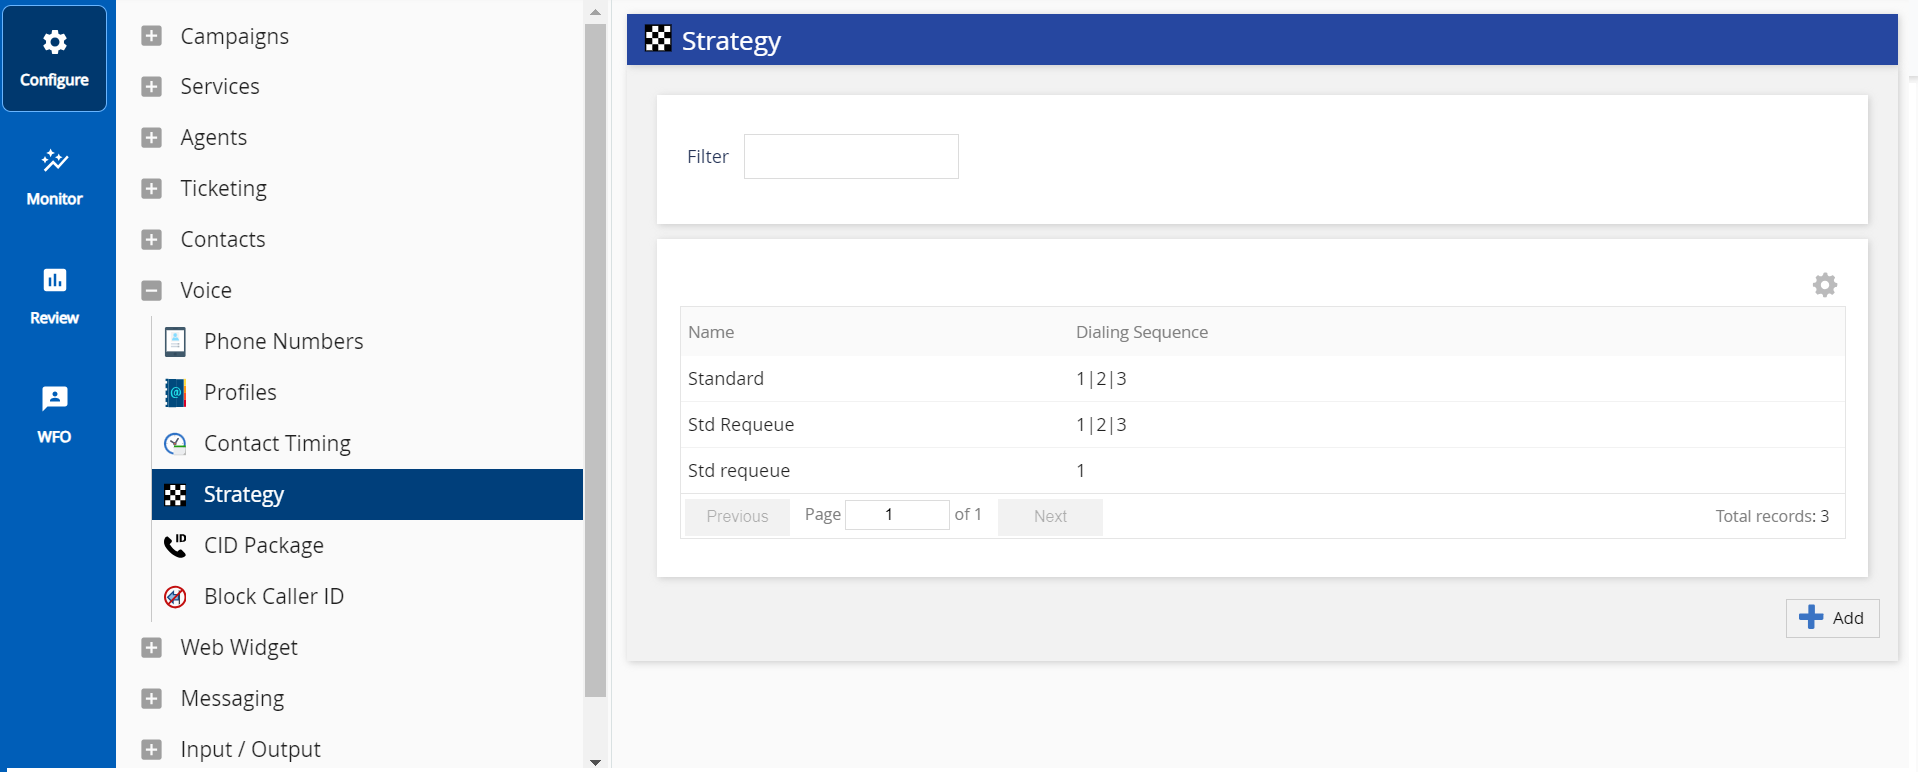
To access the Strategy editor, navigate to Configure > Voice > Strategy.
From the Strategy editor, you can configure multiple options for different dialing strategies and outcomes.
The Strategy editor provides a consolidated view of all the strategies. The following information is displayed:
ID: System-assigned identifier.
Name: Assigned by you to identify the strategy.
Dialing Sequence: The phone fields from your input filter and their order of potential dial make up the sequence. See your Input Filter for information about which input file location contributes to each phone field.
Use the Filteroption to search for a specific strategy. Filteroptions can include characters, numerical values, and special characters(such as _, -, *).
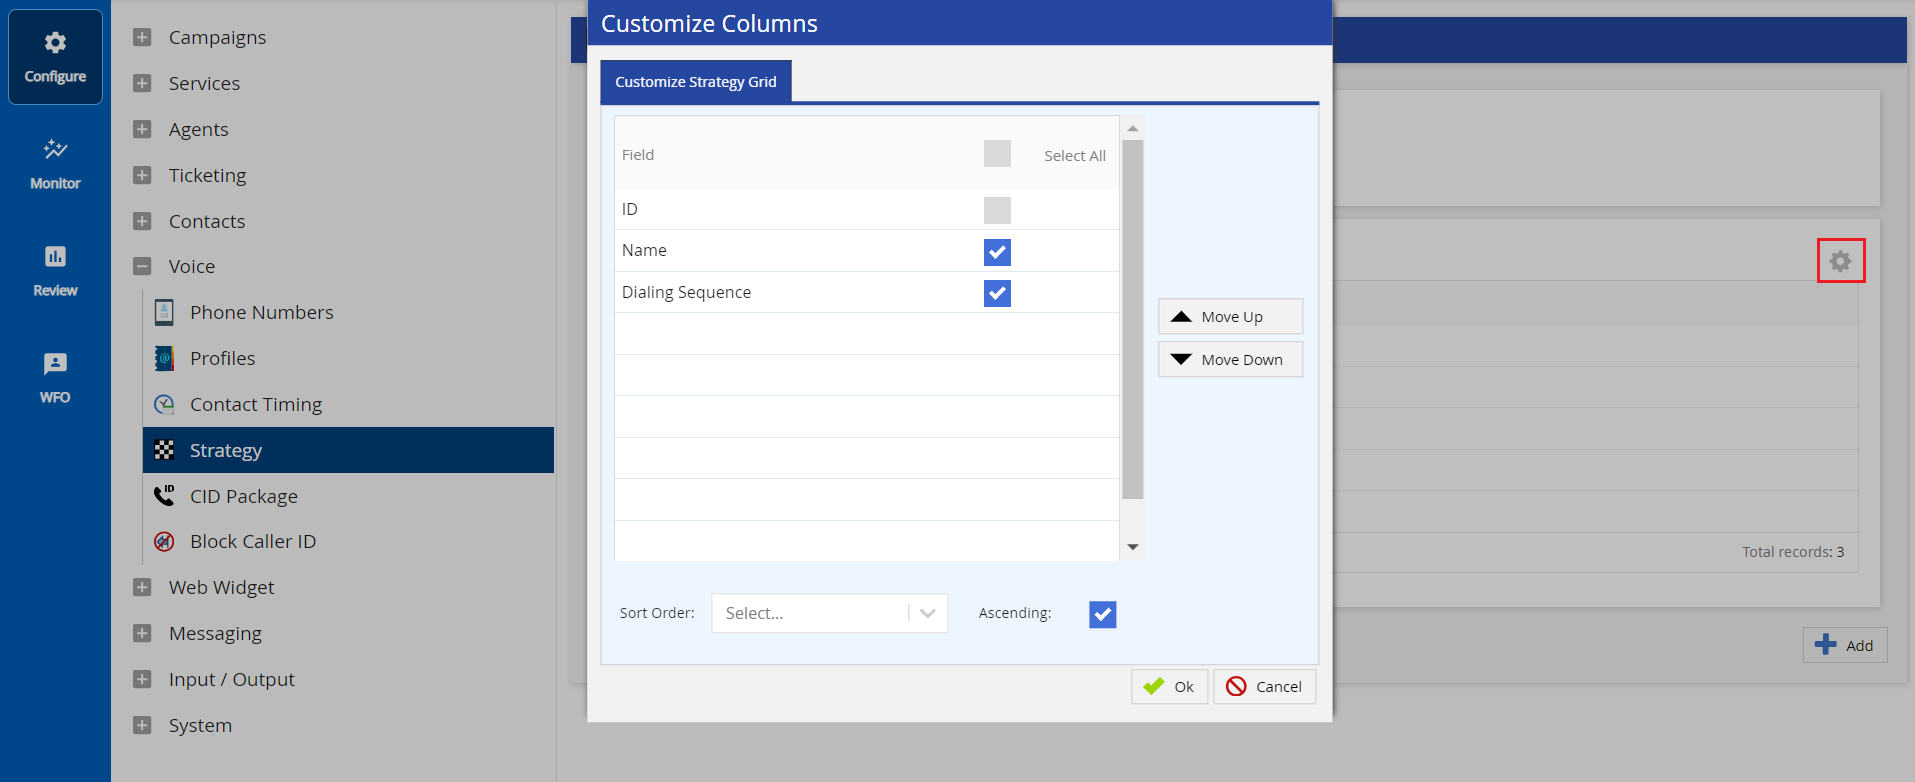
Use the cog icon in the upper right corner of the Strategy editor to customize the column display.
Click the cog icon to open the Customize Column window.
Use the check box to select the field you want to be displayed and uncheck those that should be hidden. Use the Select All check box to select all the fields.
Re-sequence the fields by selecting a field and moving it up or down using the appropriate arrows.
Choose which field to use for ordering the displayed information from theSort Orderdrop-down.
If you prefer ascending order, select theAscendingcheckbox.