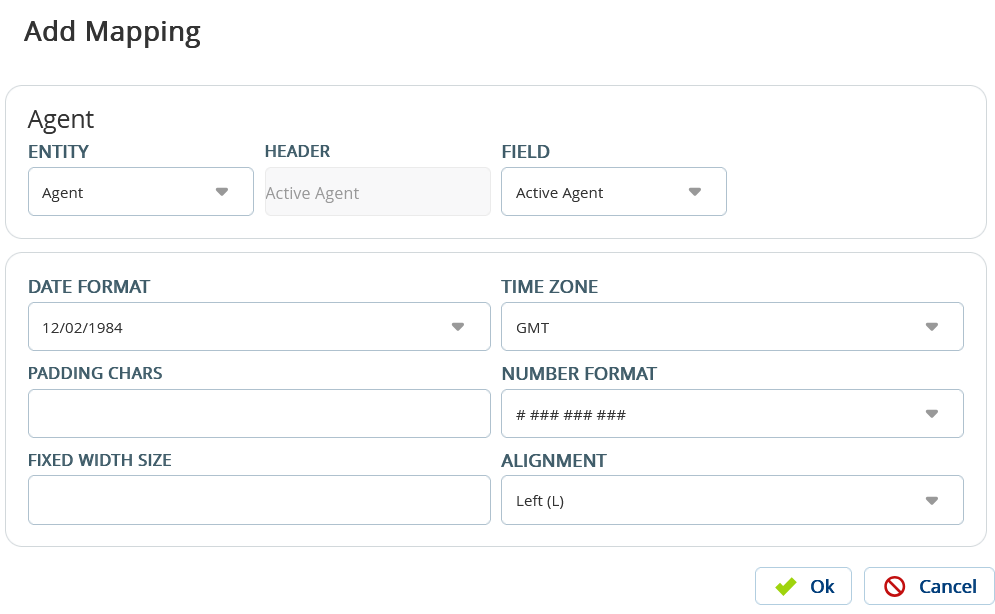
In the Export Format screen, select the Editor from the drop-down list.
Click theAdd Mapping drop-down, and then select Add Mapping.
Specify all the mapping details.The following options define a mapping:
Entity: Select the required editor from theEntity drop-down list.
The values displayed in the Entity drop-down list varies based on the Editor selected.
Field: Select the required field from the drop-down list. This selected field is going to be a column in your export file.
The values displayed in the Field drop down list varies based on the Entity selected.
Header: Displays text asActive Agentfor Contact and Agent editors, and Accountfor Report Map.
Date Format: Select the date format option depending on the field you are adding. For example, if a date or time DB field is mapped, you must select a date format from the Date Formatdrop-down list.
Time Zone:Select a time zone from the drop-down list (optional).
Number Format: Select the number format option depending on the field you are adding. For Example, if a phone DB field is mapped, you must set a number format from the Number Formatdrop-down list.
Fixed Width Size: If the column width is fixed and not delimited, you must specify values in the following fields:
Fixed Width Size
For SMS, set the Fixed Width Size to a value greater than 150.
The information gets truncated if the Fixed Width Size is set to a value less than the actual length of characters.