Deploying a Web Widget
To use a web widget on your website, you must copy the code associated with the widget to the website.
- From the Configure tab, click Web Widget > Widget.
The Web Widget window appears. Hover over the widget whose code you want to copy to your website.
The Snippet Code option appears on the widget.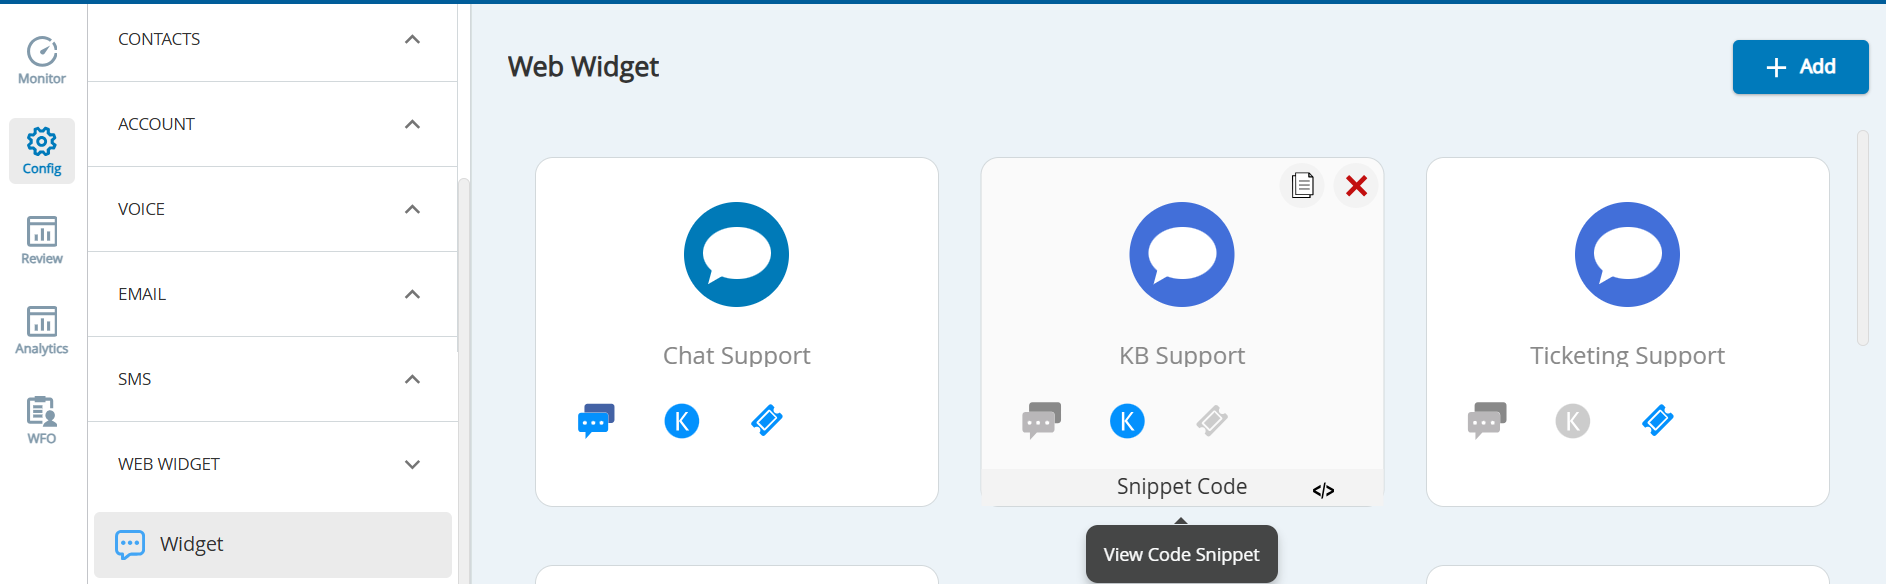
Click the Snippet Code option.
The Code Script window appears. This window displays the code associated with the widget.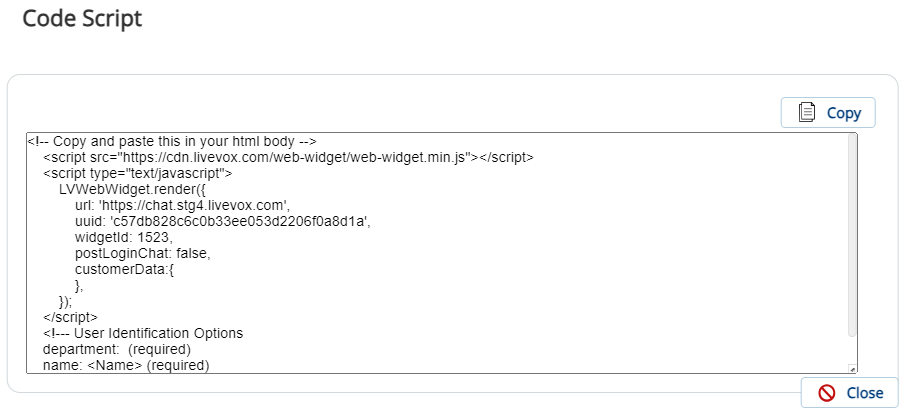

You can now configure the chat widget to be visible or hidden on the web page using the hideInactiveChat property within the snippet code . If you do not include the hideInactiveChat property, the default behavior on the web page is to make the chat widget visible. The chat widget cannot be hidden while the customer is in an active chat conversation. For example, see the snippet code below:
<script src="https://cdn.livevox.com/web-widget/web-widget.min.js"></script>
<script type="text/javascript">
LVWebWidget.render({
url: 'https:*******.com',
uuid: 'c57db828c6c0b33ee053d2206f0a8d1a',
widgetId: 1523,// new feature flag for Fall 24
launcherSelector: ".widget-launcher",
hideInactiveChat: true,
postLoginChat: false,
customerData:{
},
});
</script>
<!--- User Identification Options
department: (required)
name: <Name> (required)
Account: <Account>
-->Click Copy.
The code is copied. You can now paste the code into the HTML source code of your website.- Any further changes to the widget (in the Web Widget window) are automatically applied to your website.
- If Post Login Chat is enabled, your portal admin must modify the customerData object before pasting the code snippet into your web page.
Your customers do not need to reopen the web widget to continue chatting with the agent as they navigate to other pages on your website where the widget is deployed. If the web widget snippet is on every page of your website, the widget is transitioned from one page to another.
Opening the Chat Widget Using a Website Trigger
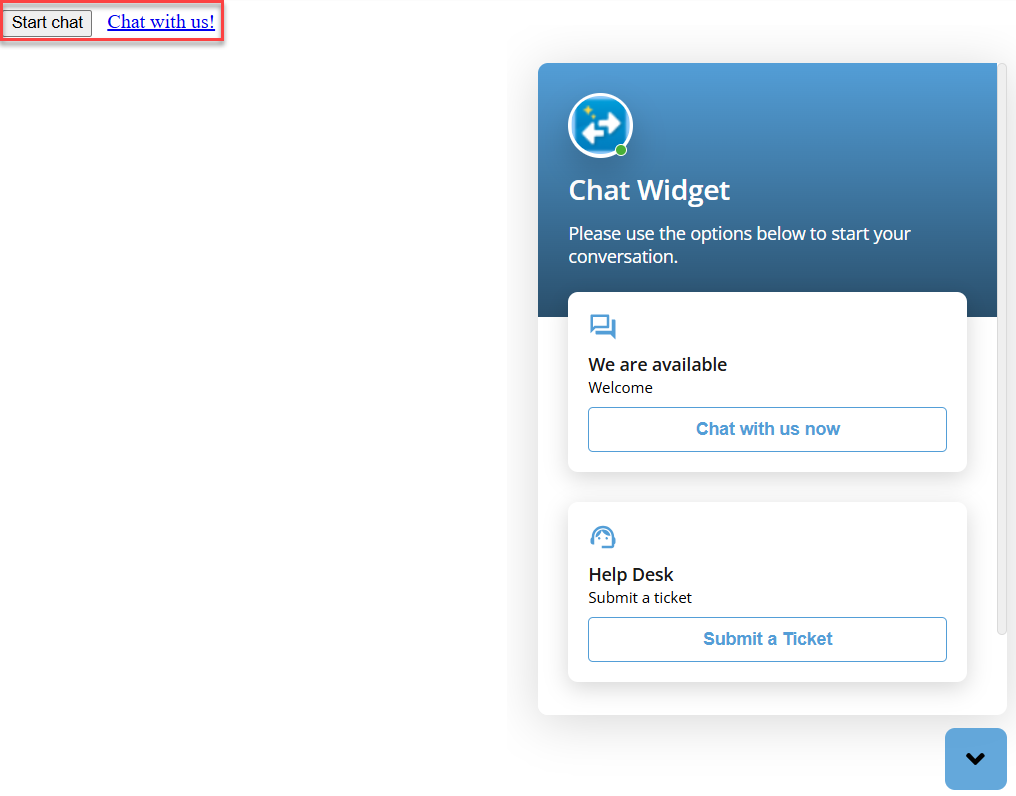
You can now configure a button or link on the web page to open the web widget using a JavaScript function. When your customer visits your web page, the web widget may initially be minimized or hidden. When the customer clicks the button or link, the widget opens into its fully expanded state.
For example, see the code snippet below:
<!-- in the html of the page -->
<!-- only click event is needed -->
<button onclick="LVWebWidget.open();">Start chat</button>
<!-- only click event is needed -->
<a href="javascript:void(0);" onclick="LVWebWidget.open();">Chat with us!</a>
<!-- snippet -->
<script type="text/javascript">
LVWebWidget.render({
url: "https://*****.com",
uuid: 'af8016b9f52e73d7e0539d01c90a03d0',
widgetId: 512,
// no need to configure anything in the widget snippet,
// just make sure the widget script is loaded when the user clicks
};
</script>
Simplifying the Customer Experience for Starting a Web Chat
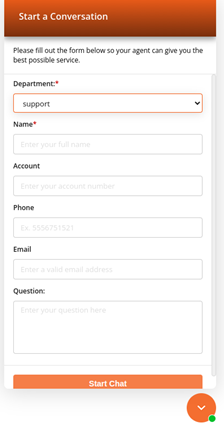
You can now customize a web widget to show or hide a welcome page. The welcome page allows you to present your business information, greetings, chat hours, and ticket forms to the customer. Hiding the welcome page allows the customer to start a chat as soon as they click the widget icon. If the chat widget has only one Chat Department enabled, the customer is no longer required to select a Department within the Pre-Chat Form. You can enable a new Question field within the Pre-Chat Form. The customer can use this field to articulate their inquiry before they start the chat.
For example, see the code snippet below:
<html>
<head>
<title>Test Page</title>
</head>
<body>
<!-- use while testing -->
<script src="https://cdn-dev.livevox.com/web-widget/web-widget.min.js"></script>
<script type="text/javascript">
LVWebWidget.render({
url: 'https://****.com',
uuid: 'af8016b9f52e73d7e0539d01c90a03d0',
widgetId: 512,
// new feature Fall 24
skipToChatForm: true,
});
</script>
</body>