Download PDF
Download page Voicemail Recording Report.
Voicemail Recording Report
Allows you to download or playback group voicemails based on configurable optional User powers. However, personal voicemails are not available to play or download.
- The Voicemail Recording Report is available when you are using Voicemail 2.0.
- This report is generated with a start and end time frame no greater than 90 days.
Search Criteria
To access the Voice Recording Report, navigate to Review > Voice Recording Report.

- Date Range – You enter the dates in the MM/DD/YYYY format or choose dates using the calendar button. Click the calendar button to open the Date Picker interface.
- Under the Range tab, you can select the date range.
Under the MultiSelect tab, you can select multiple sequential or non-sequential dates.

You must specify the date range to generate the report.
- Call Center – Select a call center from the Call Center drop-down menu.
- Multiple Call Center Selection – Click the link next to the Call Center drop-down menu to open the Select Call Center window.
- Search the required call center by typing the text in the Search textbox.
- Click a call center from the Available column to move it to the Assigned column.
- Click the Assign All button to add all the available call centers to the Assigned column.
- Click a call center from the Assigned column to remove the assigned call center. It will be moved to the Available column.
- Click the Remove All button to remove all the assigned call centers. They will be moved to the Available column.
- Multiple Call Center Selection – Click the link next to the Call Center drop-down menu to open the Select Call Center window.
- Service – Select a particular service from the Service drop-down menu. If a particular call center is selected prior to selecting a service, services only available for that particular call center will appear.
- Multiple Service Selection – Clicking on the link next to the Service drop-down menu will open the Service Selection window:
- Search the required Service by typing the text in the Search textbox.
- Click a service from the Available column to move it to the Assigned column.
- Click the Assign All button to add all available services to the Assigned column.
- Click a service from the Assigned column to remove it from the assigned services. It will be moved to the Available column.
Click the Remove All button to remove all the assigned services. They will be moved to the Available column.
- Multiple Service Selection – Clicking on the link next to the Service drop-down menu will open the Service Selection window:
- Phone Dialed – Enter a phone number to pull all the recordings associated with that individual phone number. This could be the outbound number dialed or the inbound number's caller ID.
- Contact – You can search recordings for multiple contact numbers. A maximum of 10 numbers can be searched at a time using comma as a delimiter.
- Sort By – You can sort the generated list by Call Start Time, Contact Number, or Agent.
- Transfer Connect Duration – You can specify the transfer connect duration to search for specific calls within a call length range.
- Service Type -Select a particular service type using the Service Type drop-down menu. If a particular service type is selected, only the services available for that service type appear in the Services drop-down list.
- Multiple Service Selection – Click the link next to the Service Type drop-down menu to open the Select Service Type window:
- Search the required service type by typing the text in the Search textbox.
- Click a service type from the Available column to move it to the Assigned column.
- Click the Assign All button to add all available service types to the Assigned column.
- Click a service type from the Assigned column to remove it from the assigned service types. It will be moved to the Available column.
- Click the Remove All button to remove all the assigned service types. They will be moved to the Available column.
- Multiple Service Selection – Click the link next to the Service Type drop-down menu to open the Select Service Type window:
Generate Report and Results
Report columns and sequence can be easily modified to provide you with a report view that is important to your business operation.
Column Customization
To customize columns:
- Click the cog icon in the upper right of the Results panel. You are presented with the Customize Column window.
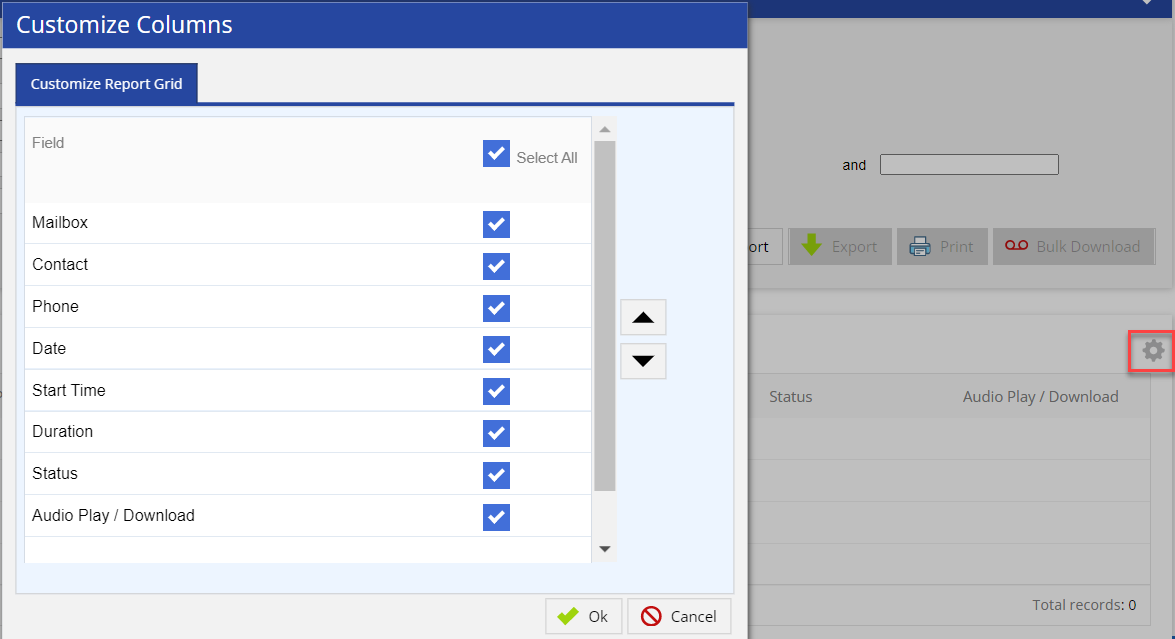
- Place a checkmark to the right of the field you want to be displayed and unchecked for those to be hidden. See below the Generate Report section for more information on available fields in the report.
- Re-sequence the displayed fields by selecting a column and moving it up or down using the appropriate button.
- Click OK to update the view.
Generate Report
After the selection of your search parameters, you can generate the report by clicking on the Generate Report button located to the bottom of the search criteria.
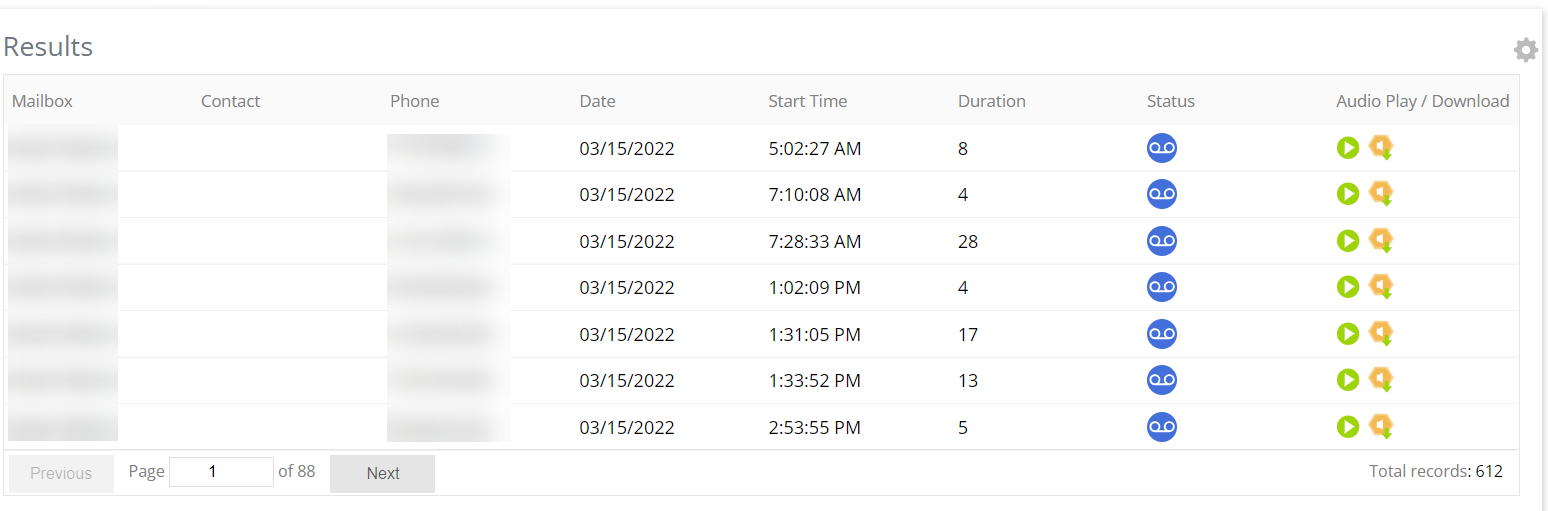
The following optional fields are available as report columns:
- Mailbox: Mailbox Identifier.
- Contact: Contact number for the record.
- Phone: Phone number used to contact the customer, or the inbound call's caller ID.
- Date: Date of the call.
- Start Time: Actual time the call was connected to the agent in Hours: Minutes: Seconds.
- Duration: Total time of the recorded conversation in seconds.
- Status: Current status of the recording. The
 icon indicates that voicemail is heard by agent;
  indicates that voicemail is not yet heard by agent.
 - Audio Play / Audio Download:
 Audio Play: Internal sound player. You can listen to the recordings through the browser without having to download the file. Click the Play button to listen.
 Audio Download: Link to download the sound file.
The naming format of downloaded recording audio file is <date>_<phone number>.mp3. For Example, 05_13_2020_2_31_36_AM_6503517485.mp3
Additional Buttons
- To export the generated report, click the Export button (next to the Generate Report button) and select the required option of file type. The available options are PDF, Excel, CSV.
- To print the generated report, click the Print button (next to the Export button). The generated report opens in another tab. Select the details for printing the report and click the Print button.
- To download up to 5 recordings from the generated reported, select them and clicking on a new Bulk Download button. The output is a zip file.