Download page Unpacking a Transformation on the Desktop.
Unpacking a Transformation on the Desktop
Fields from the input file that should be displayed on the agent desktop must be stored in translatable DB fields or utilize theset_extra_from_multiple_sourcetransformation to pack multiple non-translated fields into a translatable field. Instructions for setting up a transformation or confirming certain fields that can be displayed can be found in thecreate transformation section. In order to display non-translatable fields you must unpack the single field and choose the position it was stored in. To utilize this transformed field:
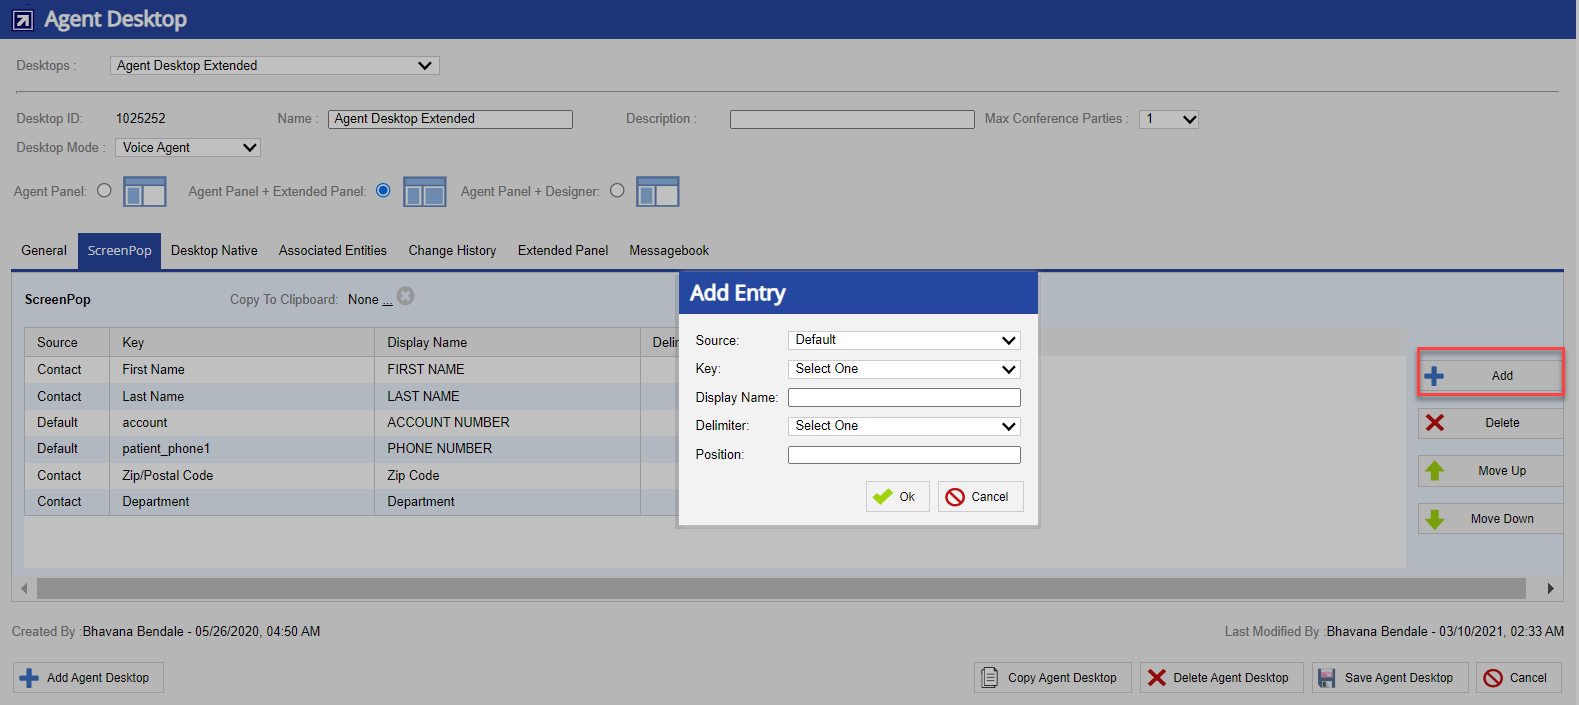
Navigate to Configure > Agents> Agent Desktop > ScreenPop tab.
Click theAddbutton from the ScreenPoptab. The Add Entry pop-up appears.
Select the source of the Key filed from the Source drop-down list. Following are available options: Default, Contact, Contact Flow.
Click on theKeydrop-down list and select yourfield.
Assign aDisplay Name(what will show on agent's desktop).
ChooseDelimiteras| Vertical bar.
SelectPositionand type in the numerical location of your specific field within the transformed DB location where the first position begins at 0 and increments from there. For example, in the transformed group: CUSTOM_1,CUSTOM_2,CUSTOM_3,CUSTOM_4,CUSTOM_5,CUSTOM_7,CUSTOM_8; the CUSTOM_1is position 0;CUSTOM_2is position 1;CUSTOM_3is position 2;CUSTOM_4is position 3 and so on.
Click theSave Agent Desktopbutton from the bottom of the screen.