Download PDF
Download page Functions Library.
Functions Library
Automating Tasks Using the Functions Library
The Functions Library tab of Designer enables you to establish a connection between LiveVox and external applications (such as Jira or Salesforce) through the application programming interface (API) methods. You can use the tab to create multiple security models and pass data (for example, Contact Manager and scripter data) in the API calls. You can also specify the events based on which you want function calls to be triggered (for example, when an account is created).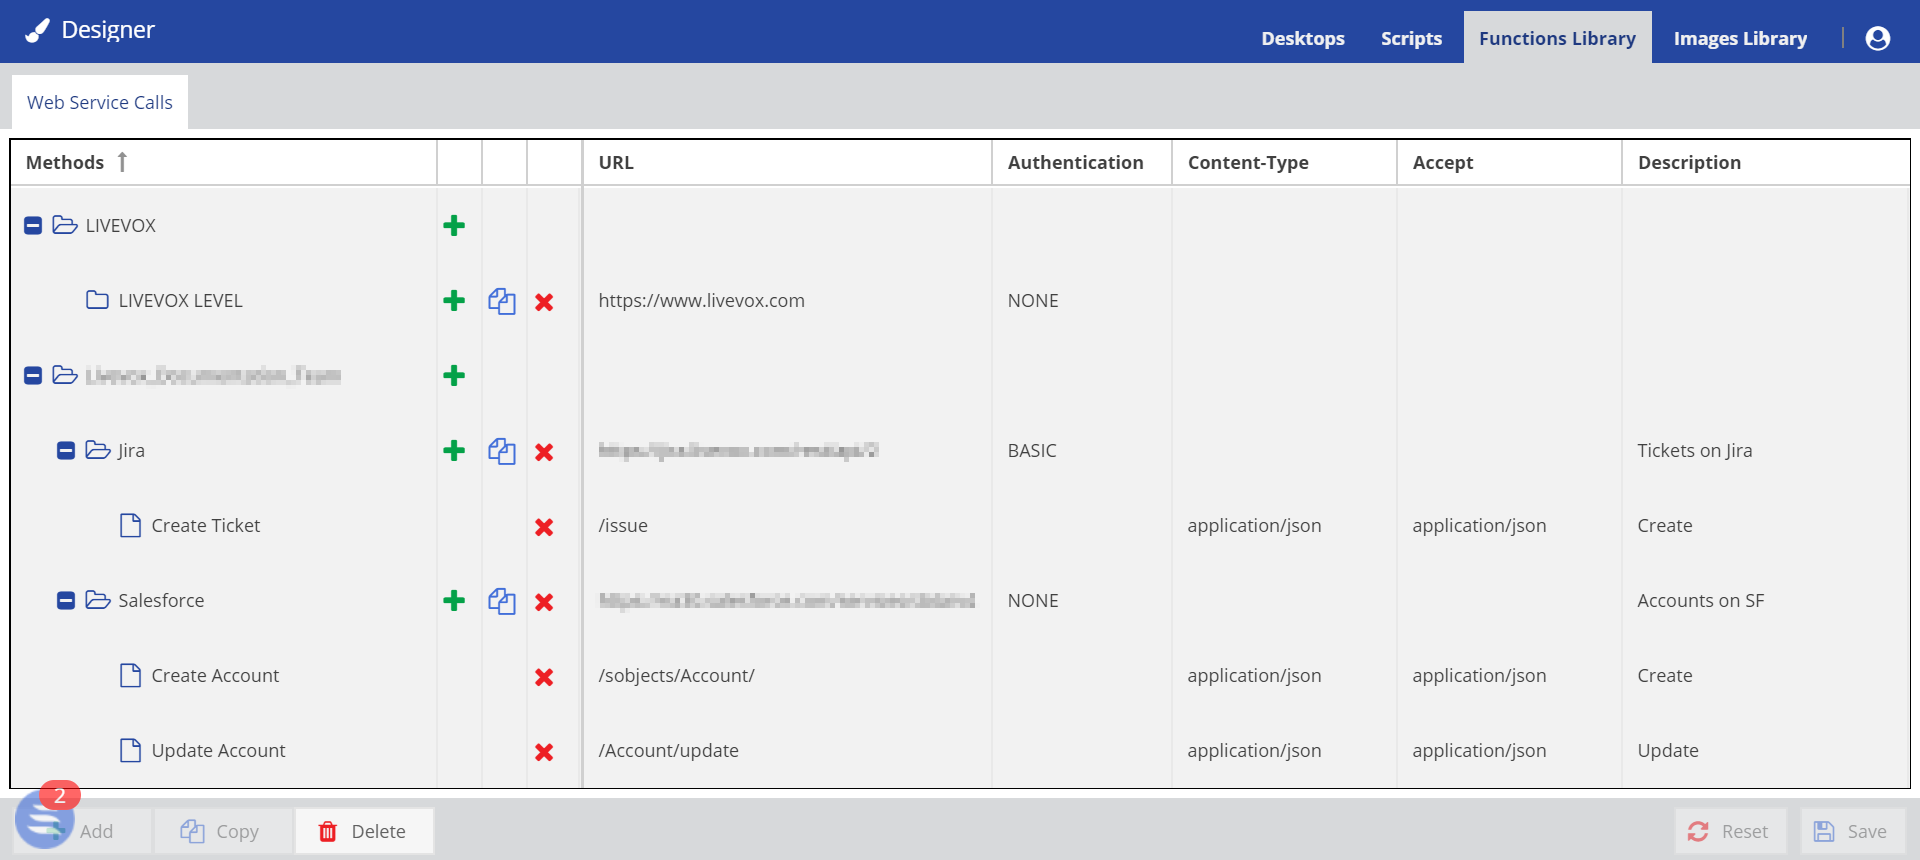
Configuring a Web Service Call
API
To configure an API:
- Access Designer.
- Click the Functions Library tab.
- On the Web Service Calls tab, click the Add icon
 next to the name of the client for which you want to add an API. Alternatively, you can click the name of the client, and then click Add.
The API Editor window appears. On the General tab, specify values in the following fields as required.
Field Description API Name Name for you to identify the API.
This field requires a value.
Base URL Uniform Resource Locator (URL) of the application that you want to be called (for example, https://www.livevox.com).
This field requires a value.
Description Description for the API. Service Service to be associated with the API.
If you select a service, the API considers the configuration associated with the service.
If you want the function call to be authenticated:
On the Authentication tab, in the Authentication Method field, select one of the following authorization protocols based on which you want the agent to sign in to the application whose URL is specified in the Base URL field of the General tab:
- NONE
- BASIC
- BEARER
LIVEVOX
This option appears if the value in the Base URL field contains livevox.
- OAUTH
- OAUTH2
Depending on the selected method, additional fields appear.
- Specify values in the additional fields.
- If you want to specify the API headers:
- On the Default Headers tab, click Add an API header.
The Parameter Editor window appears. Specify values in the following fields.
- Name: Name for the parameter as you want it to appear on the agent desktop.
Value: Value for the parameter as you want it to appear on the agent desktop.
- If you want a dynamic value to appear for the parameter, use the Insert dynamic system info button.
- The values that you specify in the Parameter Editor window for an API are automatically applied to all the methods for the API.
Click Apply.
You can modify or delete the parameter by using the pencil icon
 or the close icon
  , respectively, next to the parameter.
Click Save.
The API is added, and it appears in the left pane.
API Method
When configuring an API method, you can configure the following additional parameters:
- Request: Used to send additional data to the external application.
Response: A value from an API request to be returned to the agent desktop for the value to be associated with a data field within LiveVox or for the value to appear in an alert message on the agent desktop.
You can use the response parameters of an API method as a request parameter of a different API by using the Insert dynamic response info button.
To configure a method for the API:
- On the Functions Library tab, on the Web Service Calls tab, click the Add icon next to the API for which you want to configure a method.
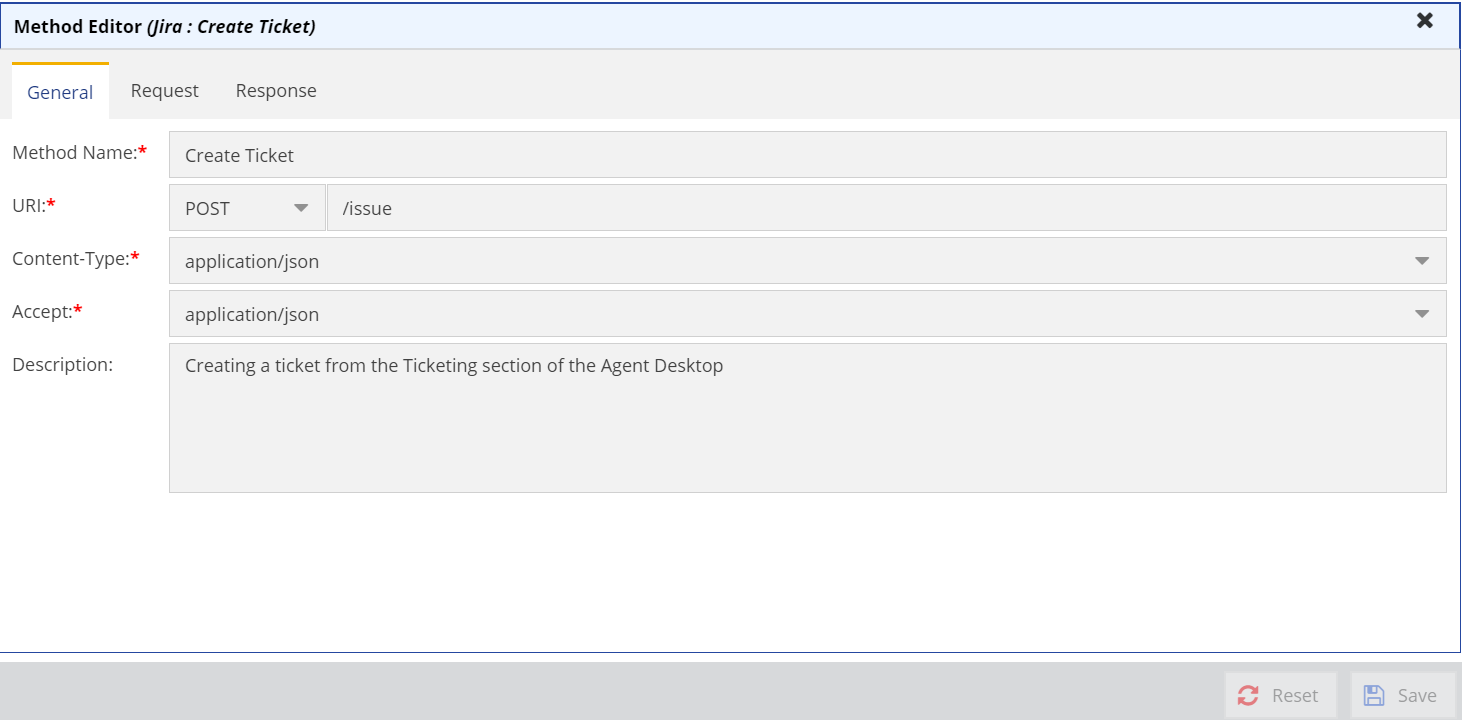
The Method Editor window appears. On the General tab, specify values in the following fields as required.
Field Description Method Name Name for you to identify the method.
URI Uniform Resource Identifier (URI) to identify the method of running a request associated with an external application.
The first subfield contains the following options (request methods):
- GET: Returns data from the external application to LiveVox.
- POST: Creates a record in the external application.
- PUT: Updates LiveVox data in the external application.
- DELETE: Deletes LiveVox data in the external application.
In the second subfield, specify the function for the request method.
Examples
- The URI GET/search?jql=assignee = currentUser() AND resolution = Unresolved order by updated DESC searches for all those records in the external application that are both assigned to the agent and unresolved, and sorts them in descending order of their updated time stamps.
- The URI POST/issue creates a record in the external application based on the values specified by the agent for the record on their agent desktop.
- The URI PUT/account/update updates an account in the external application to match the respective account in LiveVox.
Content-Type Format in which the data is sent to the external application for processing.
This field contains the following options:
- application/json: Sends the data in the JSON format.
- application/xml: Sends the data in the XML format.
Accept Format in which you want LiveVox to receive the response to the data you sent.
This field contains the following options:
- application/json: Accepts the response if its format is JSON.
- application/xml: Accepts the response if its format is XML.
Description Description for the method.
This field is optional.
If you want to configure the API request:
On the Request tab, click one of the following subtabs as required.
Subtab Description Headers When you click this subtab, the Add a method header button appears.
Query Parameters When you click this subtab, the Add a query parameter button appears.
Path Parameters When you click this subtab, the Add a path parameter button appears.
Payload When you click this subtab, the Advanced Payload Editor and Add a payload parameter buttons appear.
The Payload subtab appears for POST, PUT, and DELETE types of requests.
Click the button to add a parameter for the selected subtab.
The Parameter Editor window appears.When you click Advanced Payload Editor, an additional section appears on the Payload subtab to enable you to copy and modify complex request payload data.

Specify values in the following fields.
- Name: Name for the parameter as you want it to appear on the agent desktop.
- Value: Value for the parameter as you want it to appear on the agent desktop. If you want a dynamic value to appear for the parameter, use the Insert dynamic system info button.
Click Apply.
You can modify or delete the parameter by using the pencil icon
or the delete icon , respectively, next to the parameter.
If you want to configure the API response:
- On the Response tab, click the Parameters subtab, and then click Add a response parameter.
The Response Parameter Editor window appears. Specify values in the following fields.
- Name: Name for the parameter as you want it to appear on the agent desktop.
- Path: Path for the parameter.
- Click Apply.
The selected name and path appear on the Parameters subtab.
- If you want to add a callback method to a web service:
- On the Response tab, on the Callbacks (Web Services) subtab, click Add a web service callback.
A drop-down list box, which contains all API methods, appears on the subtab. In the drop-down list box, select the API method that you want to add.
You can delete the API method by using the Delete icon
 next to the method.
- On the Response tab, on the Callbacks (Web Services) subtab, click Add a web service callback.
- If you want to add a callback method for an external web address (that is, to invoke a callback URL):
- On the Response tab, on the Callbacks (External URL Pops) subtab, click Add an external url pop callback.
A drop-down list box, which contains all API methods, appears on the subtab. In the drop-down list box, select the API method that you want to add.
You can delete the API method by using the Delete icon
next to the method.
- On the Response tab, on the Callbacks (External URL Pops) subtab, click Add an external url pop callback.
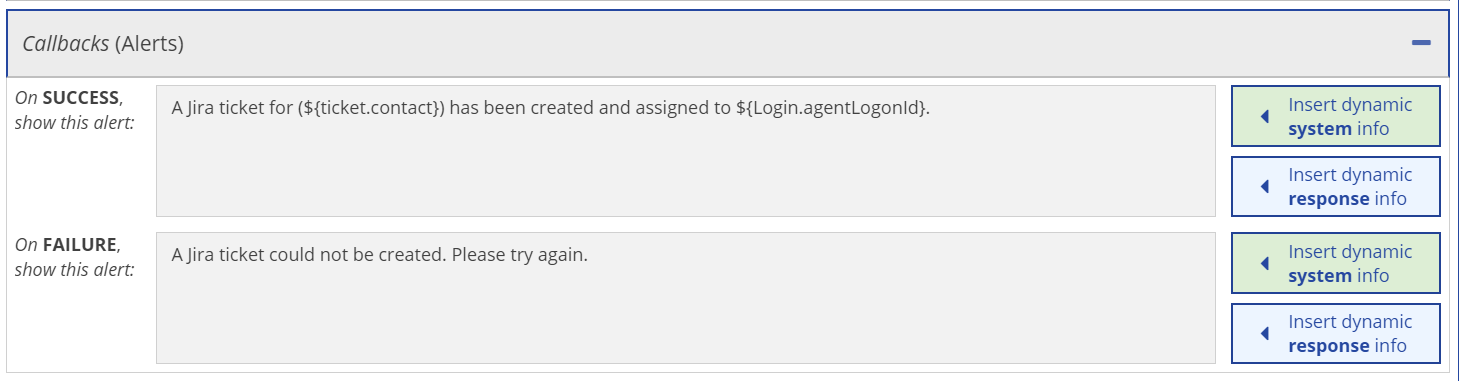
If you want a message to appear on the agent desktop when a function call succeeds or fails, on the Response tab, on the Callbacks (Alerts) subtab, specify values in the following fields as required:
- On SUCCESS, show this alert: Message that you want to be displayed on the agent desktop when a function call succeeds. If you want the message to display dynamic values, use the Insert dynamic system info button.
On FAILURE, show this alert: Message that you want to be displayed on the agent desktop when a function call fails. If you want the message to contain dynamic values, use the Insert dynamic system info button.
If you want the messages to display the parameters that you specified on the Parameters subtab, click Insert dynamic response info, and then select the parameter.
- On the Response tab, click the Parameters subtab, and then click Add a response parameter.
- Click Save.
The API method is configured, and it appears in the left pane.
- You can copy an API, including its methods, by using the Copy icon
 .
. - You can delete an API, including its methods, by using the Delete icon or the Delete button.