PDF
Download PDF
Download page Call Detail Report (CDR).
Call Detail Report (CDR)
- Provides details such as Recording File Name, Account Number, Call Start Time, Phone Dialed, Session Id, Call Result, Agent Result, Campaign Filename, Client Id, Agent Name, and Duration in seconds for every account dialed during a selected date range.
- Apply filters to include or exclude certain service types, automated system vs. agent-assigned outcomes, and other criteria automatically.
- Use plugins to display various values in a CDR to improve platform usability.
To access the Call Detail Report, navigate to Review > Call Detail Report (CDR).
This may only be generated for a three day window due to the amount of data within the report. LiveVox can create call-level results for additional time frames if requested. Data can be generated from up to 270 days back.

Search Criteria
- The following selection variables available within the search tool allow you to manipulate filtering criteria:
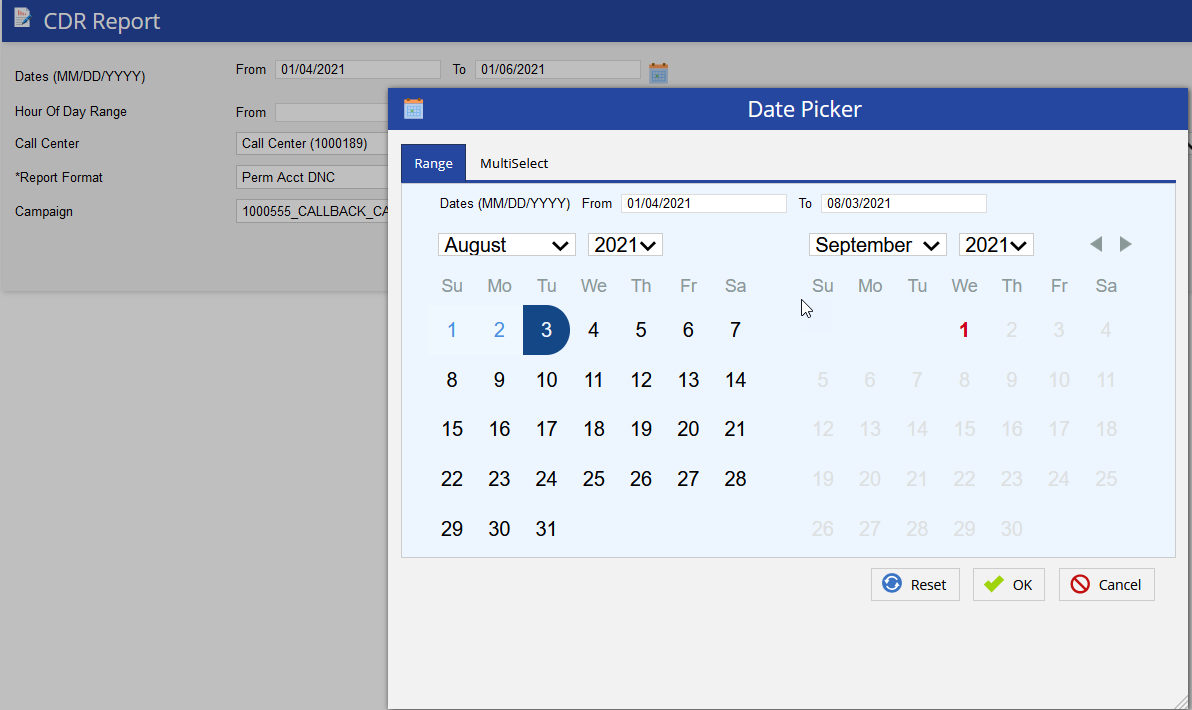
- Date Range – Enables you to type in dates in the format of MM/DD/YYYY or choose dates using the calendar button. Clicking on the calendar button opens the Date Picker interface.
- Under the Range tab, you can select the date range.
- Under the MultiSelect tab, you can select multiple sequential or non-sequential dates.

- Date Range – Enables you to type in dates in the format of MM/DD/YYYY or choose dates using the calendar button. Clicking on the calendar button opens the Date Picker interface.
- Hour Of Day Range – Enables you to search for calls within a specified hour of the day range. You can select to search for calls with call start time or call finish time defined within the specified range.
- Call Center – Select a call center with a drop down menu. Multi-Call Center Selection can be performed by using the hyperlink titled Show Multi-Call Center Selection.
- Multiple Call Center Selection – Clicking on the link next to the Call Center drop-down menu opens the multiple call center selection screen.
- Click a call center row from the Available column to move it to the Assigned column.
- Click the Assign All button to add all the available call centers to the Assigned column.
- Click a call center row from the Assigned column to remove the assigned call center. It will be moved to the Available column.
- Click the Remove All button to remove all the assigned call centers and move them to the Available column.
- Multiple Call Center Selection – Clicking on the link next to the Call Center drop-down menu opens the multiple call center selection screen.
- Service – A particular service can be selected using the service drop down box. If a particular call center is selected prior to selecting a service, services only available for that particular call center will appear.
- Multiple Service Selection – Clicking on the link below the Service drop-down menu opens the multiple service selection window:
- Click a service row from the Available column to move it to the Assigned column.
- Click the Assign All button to add all the available services to the Assigned column.
- Click a service row from the Assigned column to remove it from the assigned services. It will be moved to the Available column.
- Click the Remove All button to remove all the assigned services and move them to the Available column.
- Multiple Service Selection – Clicking on the link below the Service drop-down menu opens the multiple service selection window:
- Service – A particular service can be selected using the service drop down box. If a particular call center is selected prior to selecting a service, services only available for that particular call center will appear.
- Report Format – Defines the type of format in which you want the report generated. This is usually defined during the set-up process and can be something customized for your organization. The "Expanded Delimited Report" format is standard and available for all clients.
- Campaign – Allows you to select a particular campaign for a CDR report.
- Campaign Pattern – Allows you to search by a portion of the campaign name. This is useful for running reports on a specific book of business with a similar filename. The % symbol acts as a wildcard. If searching for filenames with a shared beginning (like new_business_date_time or Bobsaccounts_metal), type the shared component then the wildcard (new_business% or Bobsaccounts%).
Generate Report
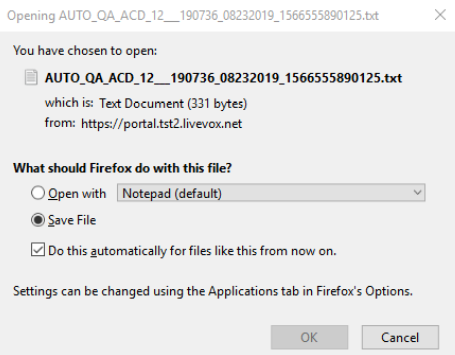
After selecting parameters, generate the report by clicking the Generate Report button located at the bottom of the page. This takes you to the screen below:
Open, Save or Cancel File Download – Open the file directly into Notepad or save the report elsewhere to be opened in another program (E.g., Text pad or Excel).