Download PDF
Download page Web Widget Fields.
Web Widget Fields
The following table describes the fields and sections that appear on the Chat tab in the Web Widget Detail window.
Field/Section | Description |
|---|---|
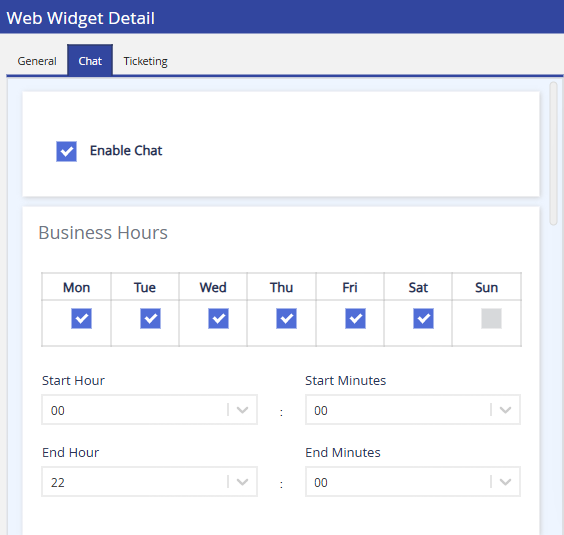
Enable Chat | Select the Enable Chat checkbox to enable the chat channel on the web widget for your customers. You can preview the chat web widget by selecting this checkbox. The preview appears in the Preview section of the Web Widget Detail window. |
Business Hours | Select the checkbox next to the days that you want the chat channel to be enabled on the widget. In the following fields, select the period during which you want the chat channel to be enabled: Start Hour, Start Minutes, End Hour, End Minutes The values in the time fields are represented in Eastern Standard Time, regardless of your time zone. |
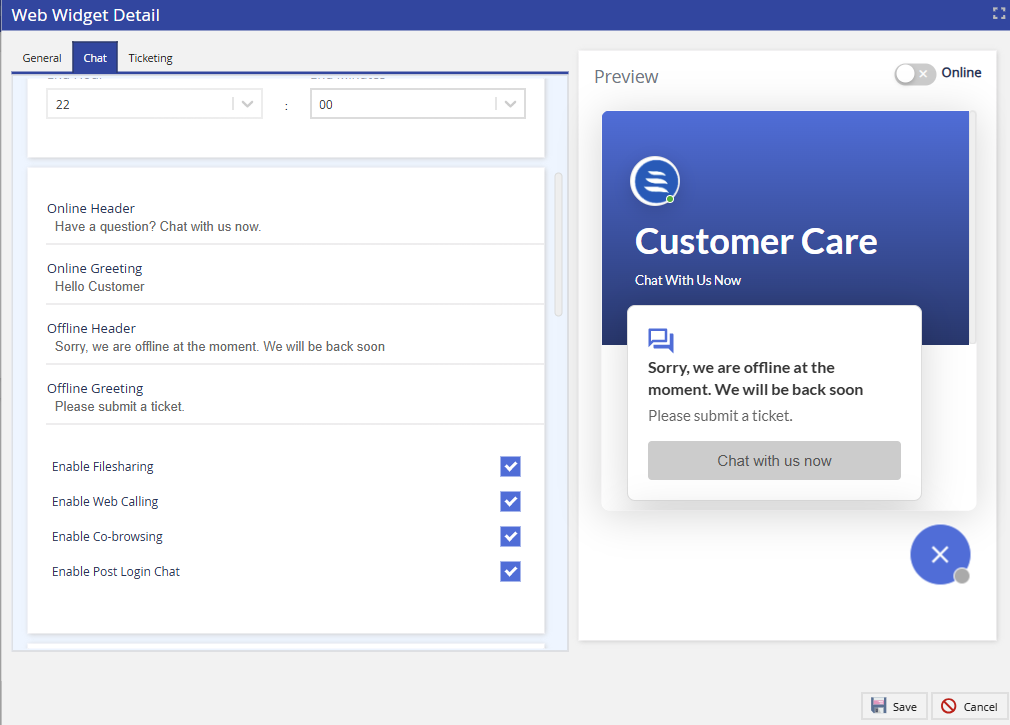
Online Header | Enter the title that you want to be displayed on the chat widget during your business hours (that is, the days and the period for which you enabled the chat channel). |
Online Greeting | Enter the greeting that you want to be displayed on the chat widget during your business hours. You can also include a web address or an email address in the greeting. This address appears as a hyperlink to customers. |
Offline Header | Enter the title that you want to be displayed on the chat widget outside your business hours. |
Offline Greeting | Enter the greeting that you want to be displayed on the chat widget outside your business hours. You can also include a web address or an email address in the greeting. This address appears as a hyperlink to customers. Example: Our office is currently closed. Please visit www.livevox.com for after-hour services. |
Enable Filesharing | Select the Enable Filesharing checkbox to enable agents and customers to send files to each other.
The Enable Filesharing option allows you to enable or disable your customers' ability to share attachments. This setting does not affect your agents' ability to share attachments. Agents can share attachments regardless of this setting. |
Enable Web Calling | Select the Enable Web Calling checkbox to enable digital agents to transition their conversations with customers from a web chat to a web call. If you select the checkbox, the Enable Webcall icon appears in the chat window of digital agents (on the Agent Desktop) to enable these agents to call the customers with whom they are chatting.
|
Enable Co-browsing | Select the Enable Co-browsing checkbox to enable digital agents to visually guide the customer to a solution through collaborative browsing (co-browsing). Co-browsing involves simultaneously browsing the web page that the customer is viewing (that is, the page on which the customer is using web chat), in real time. If you select the checkbox, the Init co-browsing icon appears in the chat window of digital agents (on the Agent Desktop) to enable them to initiate co-browsing with the customers with whom they are chatting.
|
Enable Post Login Chat | Select the Enable Post Login Chat checkbox to pass the customer information (such as their name, account ID, email address, and phone number) to a web chat when a customer logs in to your website. In addition to adding security, this checkbox saves the customer's time by eliminating the need for the customer to provide their information twice—once to log in to your website, and again when starting a web chat. After you enable Post Login Chat, the widget's Snippet Code reflects the following: <!-- Copy and paste this in your html body --> Within the customerData object, replace the variable values (department, name, email, etc.) using properties from your web page. Chat must become aware that the properties from your web page represent the customer's information. |
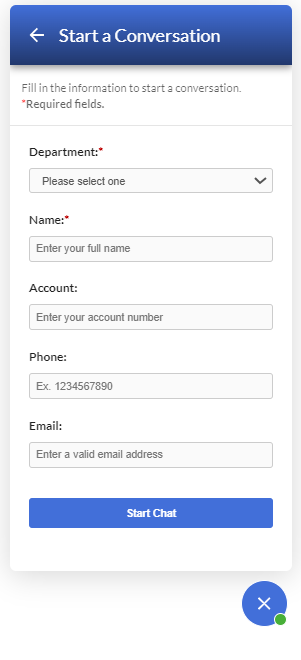
Form Fields | The Form Fields section contains the fields that you can add to the form that appears to customers when they initiate a web chat. The table in the Form Fields section displays the following columns:
|
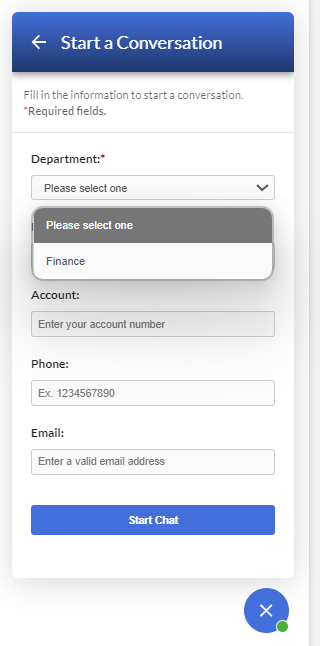
Departments | Departments are used to maintain routing. For example, when a customer initiates a web chat, the customer can select a department that is related to a query or issue so that the chat is routed to the agents who have logged in to the service associated with the department. A department is represented by the value in the Chat Routing Token field of a service. The Departments section contains the departments that you can add as options to the Department drop-down list box on the form. The table in this section displays the following columns:
|
Rules | For information about this section, see Making a Web Chat Proactive. |


Chat Web Widget Rule Fields
The following table describes the fields that appear in the Edit Rule window.
| Field | Description |
|---|---|
| Name | The intent of the rule (for example, Invite to buy or Invite to get support). This value is not displayed to your customers. |
| Invitation | |
| Field | Description |
| Title | The title of the chat invitation message that you want to be displayed in the pop-up window (for example, Let us help you). This field is optional. |
| Image URL | The link to the image that you want to be displayed within the pop-up window. |
| Department | The service to which you want the chat initiated by the rule to be routed when the chat invitation is accepted by a customer. This field displays values that appear in the Chat Routing Token field of your services. |
| Prompt | The chat invitation message that you want to be displayed in the pop-up window (for example, Do you need assistance with any of our products?). You can also include a web address or an email address in the message. This address appears as a hyperlink to customers. Example: Have a question? Check out https://livevox.com/FAQ or chat with one of our agents now. |
| Condition | |
| Field | Description |
| Variable | The parameter based on which you want the rule to be initiated. The following options are available:
|
Operation | The operator that you want to be applied to the variable. |
Value | The value that you want to be applied to the variable. |
| Match all conditions | The evaluation strategy indicating that the rule is initiated if each condition is met. |
| Match any conditions | The evaluation strategy indicating that the rule is initiated if any of the conditions are met. |