When you login into the LV PBX, the Dashboard is the landing page. You can customize or use the standard dashboard to navigate to the application. It provides a historical and real-time view of the components listed in the dashboard. This topic describes all the widgets on the Dashboard. LV PBX Dashboard provides widgets to help you monitor system performance in real-time and allows you to quickly access specific PBX features by simply clicking the widgets.
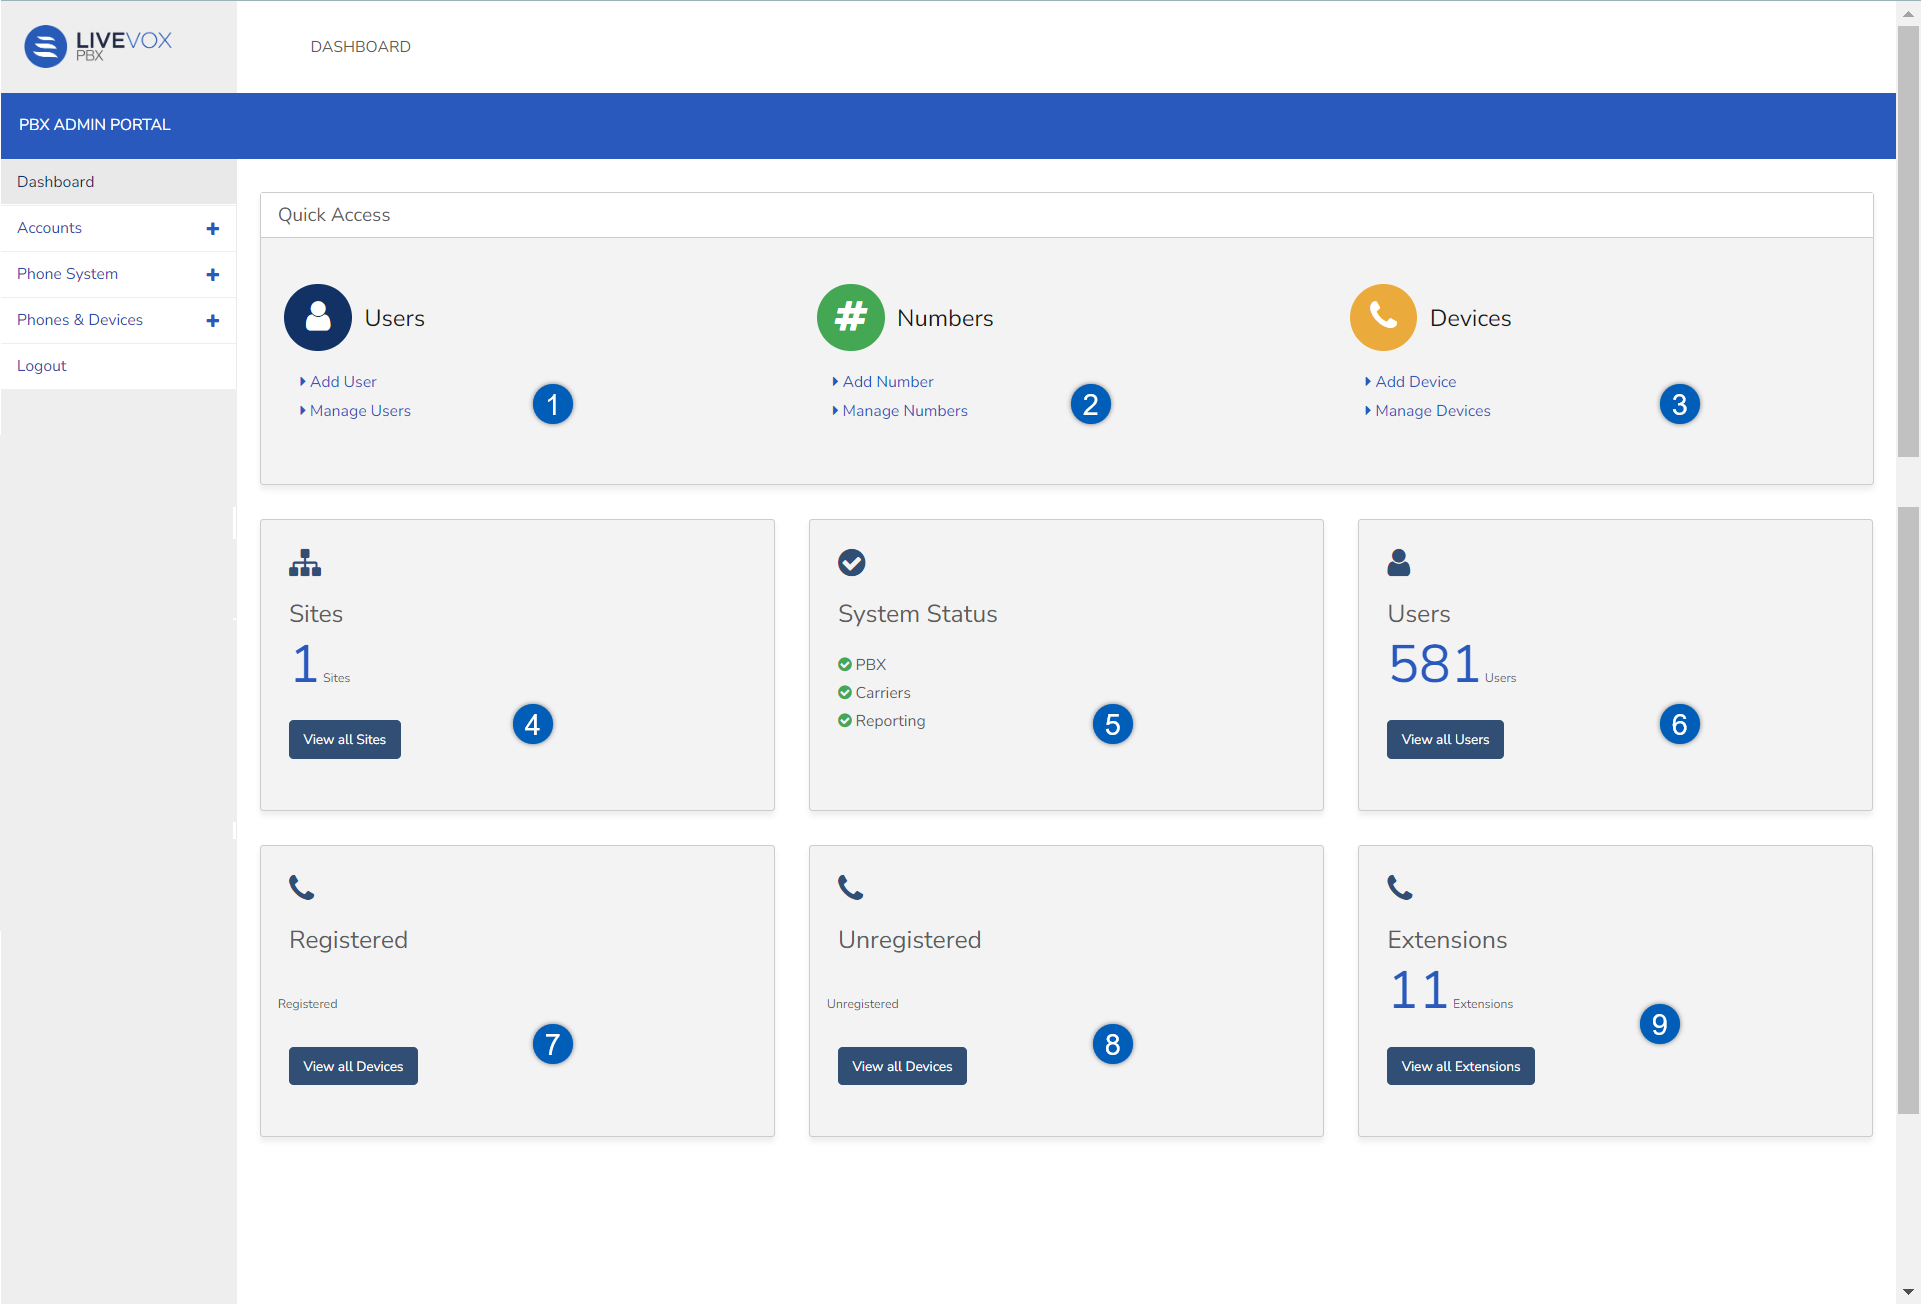
- Users: You can create, delete, or view a PBX user from here. You can create uses from the PBX application; the users available on the LVP appear here. For more information on creating and managing a user, see
- Numbers: You can buy a number and specify the number here. You can purchase the number from the Vectorpbx website. In case you already have the number and want to check the details of the number, you can call the Vectorpbx representative. You can add any number to the PBX. Make sure that you own the numbers before you add them.
- Devices: You can add a new device or configure an existing device.
- Sites: You can create a site and then add users and devices to the site and monitor or filter the call detail records based on the new site.
- System Status: The System Status panel displays the working status of PBX, Carriers, and Reporting systems. A green check indicates that the system is working fine.
- Users: You can view the available users in the User window.
- Registered: You can register a new device. When registering a new or existing device, you should have the device details like device name, device type, Mac address, and firmware details handy.
- Unregistered: You can unregister/discontinue a registered device.
- Extensions: You can view all the available extensions from here.