Download PDF
Download page Configuring Contact Center for Salesforce.
Configuring Contact Center for Salesforce
The LiveVox administrator users must make certain configuration changes within the LiveVox Portal to enable the Salesforce integration.
To update the settings, log in to LVP as an administrator:
Agents who use the Contact Center for Salesforce application can log into Manual and Quick Connect services. To update the agent login services, go Configure > Services > Services. From the services list, double-click the service you want to update. The Edit Service window appears.
In the Edit Service window, go to General > Service Type and select Manual or Quick Connect.

Manual services should be on an API enabled queuer. Quick Connect and right-party contact services should be on an automated queuer. Contact your LiveVox representative to verify this setting.
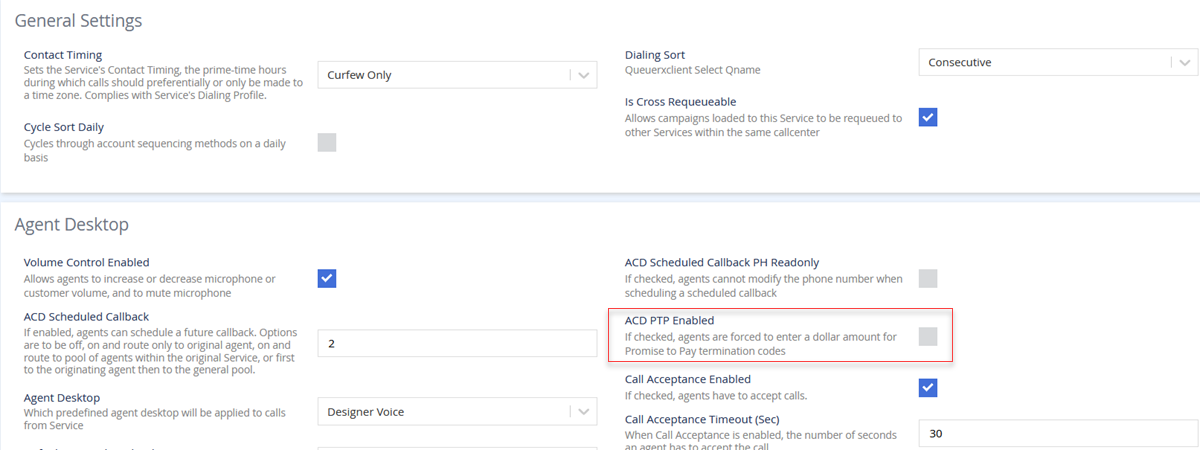
- To disable ACD PTP, go to Configure > Services > Services. From the services list, double-click the service you want to update. The Edit Service window appears.
- ACD: Automatic Call Distribution (ACD) is a component that allows the logged in agents to be in a queue. Customer calls are then automatically distributed to agents that are in the queue.
- PTP: Promise to Pay (PTP) refers to an assurance from a customer that the outstanding payment will be made.
- In the Edit Service window, go to Settings > ACD PTP Enabled and clear the ACD PTP Enabled checkbox.
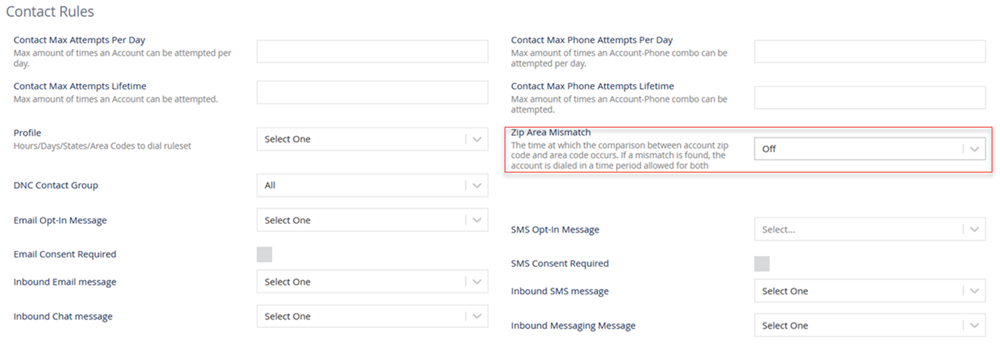
To turn off the zip area mismatch, go to Configure > Services > Services. From the services list, double-click the service you want to update. The Edit Service window appears.
In the Edit Service window, go to Settings > Zip Area Mismatch and select Off from the drop-down list.
- This step is required for manual services only.
- When an agent initiates a voice call, the agent is prompted to enter a zip code. If the call is not permissible at the time based on the Zip Area Mismatch rules, the agent will see an error message. The call is not launched.
- To update your agent call-in number, go to Configure > Services > Services. From the services list, double-click the service you want to update. The Edit Service window appears.
- In the Edit Service window, go to Phone Numbers> Agent Call In Number and enter the agent call-in number. If you do not have an agent call-in number, enter any value in this field. Do not leave this field blank.

- In the Edit Service window, go to Phone Numbers> Agent Call In Number and enter the agent call-in number. If you do not have an agent call-in number, enter any value in this field. Do not leave this field blank.
- To enable termcodes, go to Configure > Services > Services. From the services displayed, double-click the service you want to update. The Edit Service window appears.
- In the Edit Service window, go to Termination Codes > Termcode Enabled and select the Termcode Enabled checkbox.

- In the Edit Service window, go to Termination Codes > Termcode Enabled and select the Termcode Enabled checkbox.
- To disable the account number required, go to Configure > Agents > Agent Desktop. From the agent desktop list, double-click the service you want to update. The Edit Agent Desktop window appears.
- In the Edit Agent Desktop window, go to General > Account Number Required and clear the Account Number Required checkbox.

- In the Edit Agent Desktop window, go to General > Account Number Required and clear the Account Number Required checkbox.
- To disable the account number validation for calls, go to Configure > Agents > Agent Desktop. From the agent desktop list, double-click the service you want to update. The Edit Agent Desktop window appears.
- In the Edit Agent Desktop window, go to General > Account Number Validation for Inbound and Manual Calls and clear the Account Number Validation for Inbound and Manual Calls checkbox.

- In the Edit Agent Desktop window, go to General > Account Number Validation for Inbound and Manual Calls and clear the Account Number Validation for Inbound and Manual Calls checkbox.
- To enable the home agent, go to Configure > Agents > Agents and double-click the agent name, and then select the Home Agent checkbox.
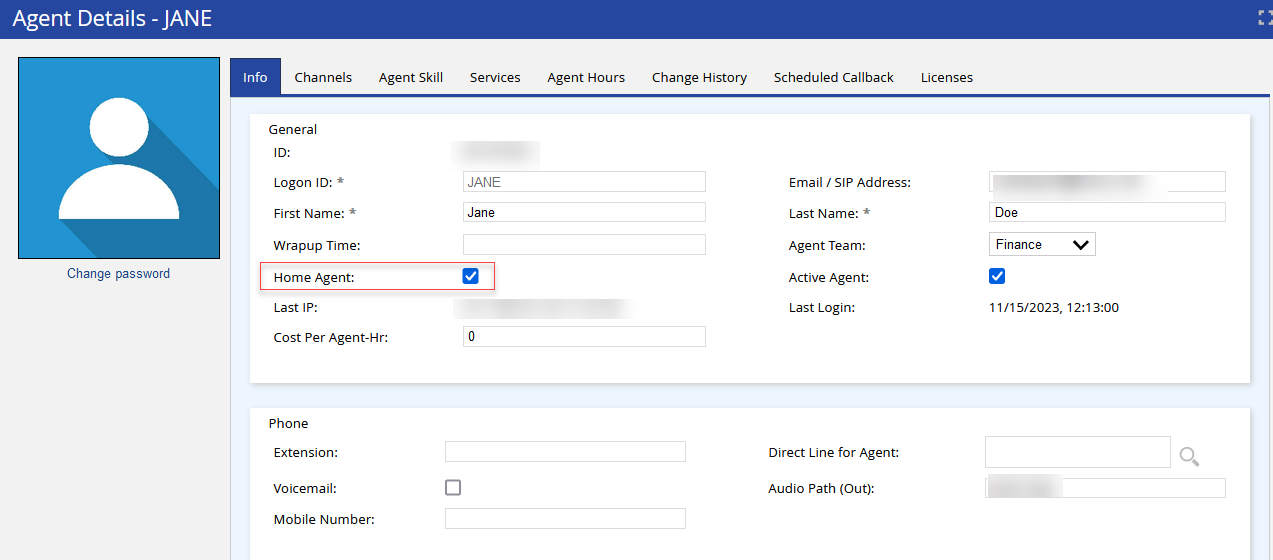
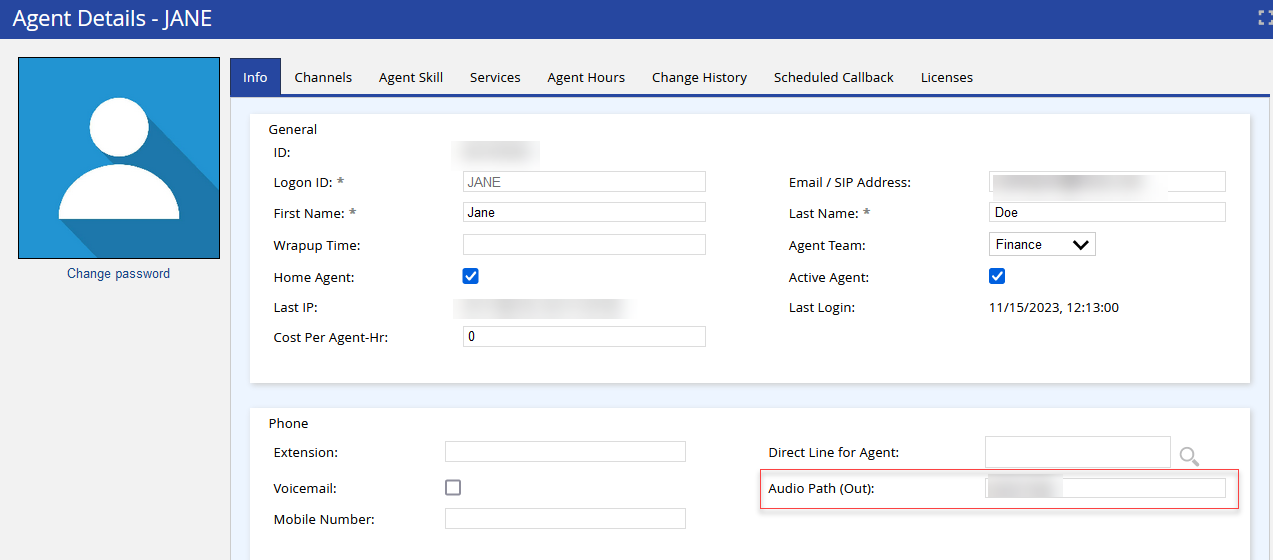
- To update the Audio Path (Out) field, go to Configure > Agents > Agents and double-click the agent name. From the Info tab > Audio Path (Out) enter any value that is not 10 digits.
Recommended Settings
- To enable call acceptance, go to Configure > Services > Services > Settings > Call Acceptance Enabled and select the Call Acceptance Enabled checkbox.

- To update when the call acceptance should timeout, go to Configure > Services > Services > Settings > Call Acceptance Timeout (Sec). In the Call Acceptance Timeout (Sec) field, enter any number greater than zero.

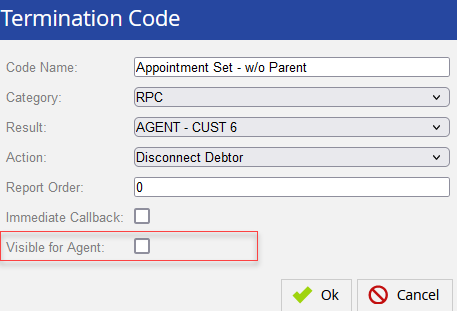
- To disable agents from viewing termination codes outside of the Salesforce user interface, go to Configure > Agents > Termination Codes and double-click the termination code, and clear the Visible for Agent checkbox.
