Download PDF
Download page Managing Callflows.
Managing Callflows
Create dial plan call flows that determine how inbound calls are handled.
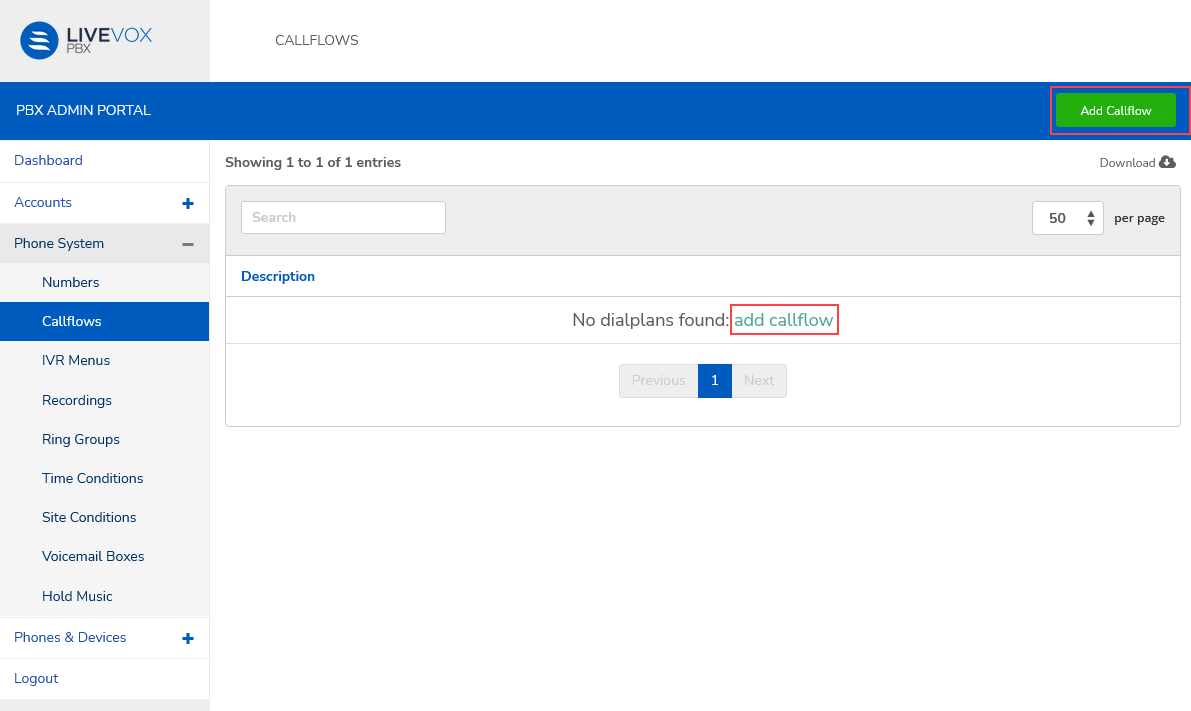
Navigate to Phone System > Callflows. The Callflows screen displays the dial plans currently available in the system.
Click Download to save the dial plans database on your local computer in .csv format.
Create a call flow
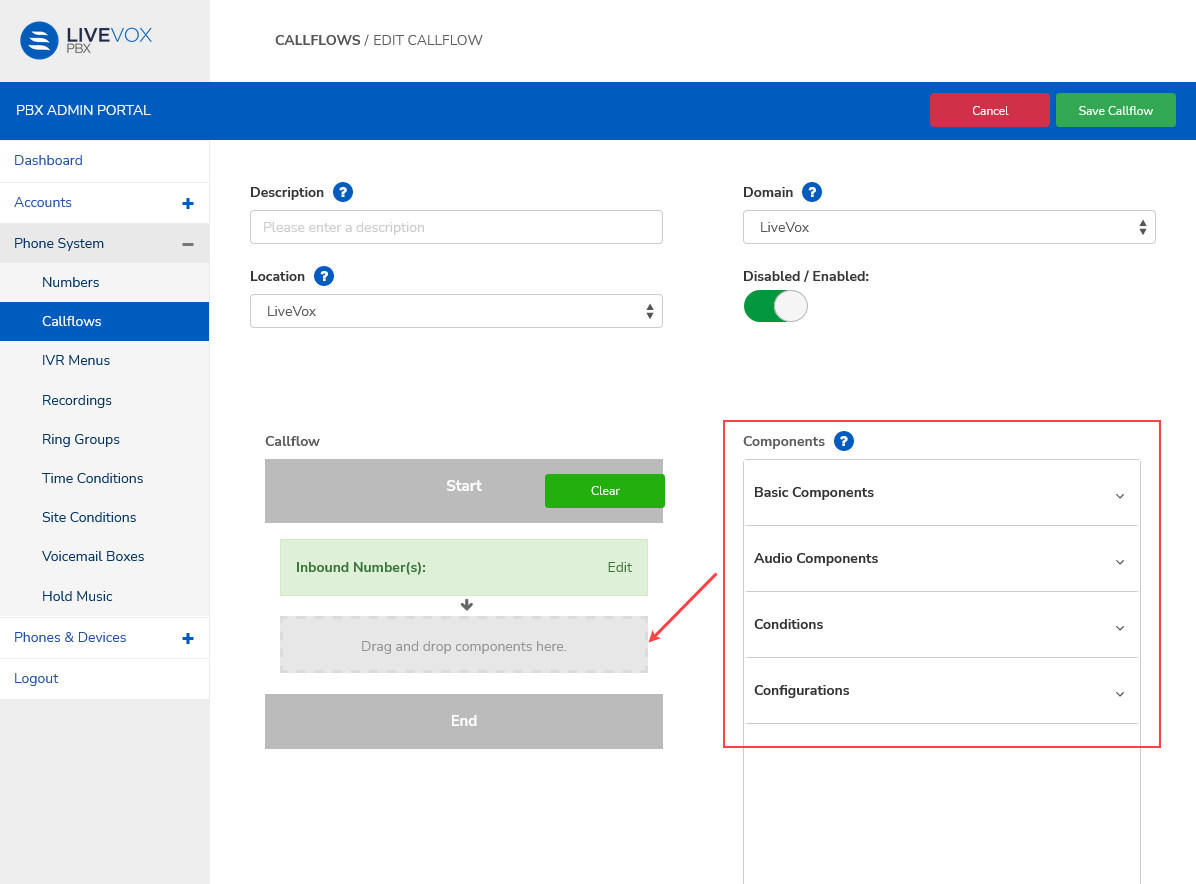
- In the Callflows screen, click the Add Callflow button or the add callflow link. The Edit Callflow window appears. (this should read Add, not Edit)

Enter the required details in the fields.
Field Description Description Describe the purpose of the call flow. This value is visible on the Callflows screen and helps identify the call flow. Domain Select the domain that this dial plan should be hosted on. Location Select the physical location where this endpoint is hosted. Disabled/Enabled: Move the slider to set the availability of this call flow. To build a call flow/dial plan, drag and drop components on the right to the callflow section on the left, in the required sequence after the Start module. (what is the final terminology to use between call flow and dial plan?)
You must configure the call flow components individually before you can use them to build a call flow.

Click Clear to remove all components from the call flow/dial plan.
The Inbound Number(s) is the number that starts the call flow when dialed. When you click Edit, the Options window opens. Select a provisioned number or add an extension number, and click Add to Callflow.
Drag and drop these components in the required sequence to build a call flow.
Basic Components
Component Description User - Select a user from the dropdown list. To add a user to this menu, see Managing Users and SIP Credentials.
- Set the Timeout value (what is this?)
- If you want the dial plan to process the next component even if this component fails, select Yes in the Continue menu. (What happens when the user selects no - does the dial plan end abruptly or does the user need to design for it?)
Phone Number - Add a forwarding number (what is this?)
- Set the Timeout value (what is this?)
- If you want the dial plan to process the next component even if this component fails, select Yes in the Continue menu. (What happens when the user selects no - does the dial plan end abruptly or does the user need to design for it?)
Voicemail Box - Select a voicemail from the dropdown list. To add a voicemail box to this menu, see Managing Voicemail Boxes.
- Select the Method value to either Check voicemail or Leave a voicemail. (what does this mean?)
Ring Group Select a ring group from the dropdown list. To add a ring group to this menu, see Managing Ring Groups. Conference Select a conference from the dropdown list. To add a conference to this menu, see Managing Conferences. SIP Profile - Select an SIP user from the dropdown list. To add an SIP user to this menu, see Managing Users and SIP Credentials.
- Set the Timeout value (what is this?)
SIP URI - Select the SIP URI (add format example)
- Set the Timeout value (what is this?)
Dial by Name how is this used? Audio Components
Component Description Add Audio Select a recording from the dropdown list. To add a recording to this menu, see Managing Recordings. Hold Music Select a music stream from the dropdown list. To add a recording to this menu, see Managing Hold Music. Start/Stop Recording Set the recording status to Start or Stop. (add detail) IVR Menu Select an IVR from the dropdown list. To add an IVR to this menu, see Managing IVRs. Conditions
Condition Description Location Condition Select a site condition from the dropdown list. To add to this menu, see Managing Site Conditions. Time Condition Select a time condition from the dropdown list. To add to this menu, see Managing Time Conditions. Timezone Select a timezone from the dropdown list. Configuration:
Dialplan: Select a dialplan from the dropdown list.
- Click Save Callflow to complete the process. The call flow now appears in a table on the Callflows screen.
Edit or delete a callflow
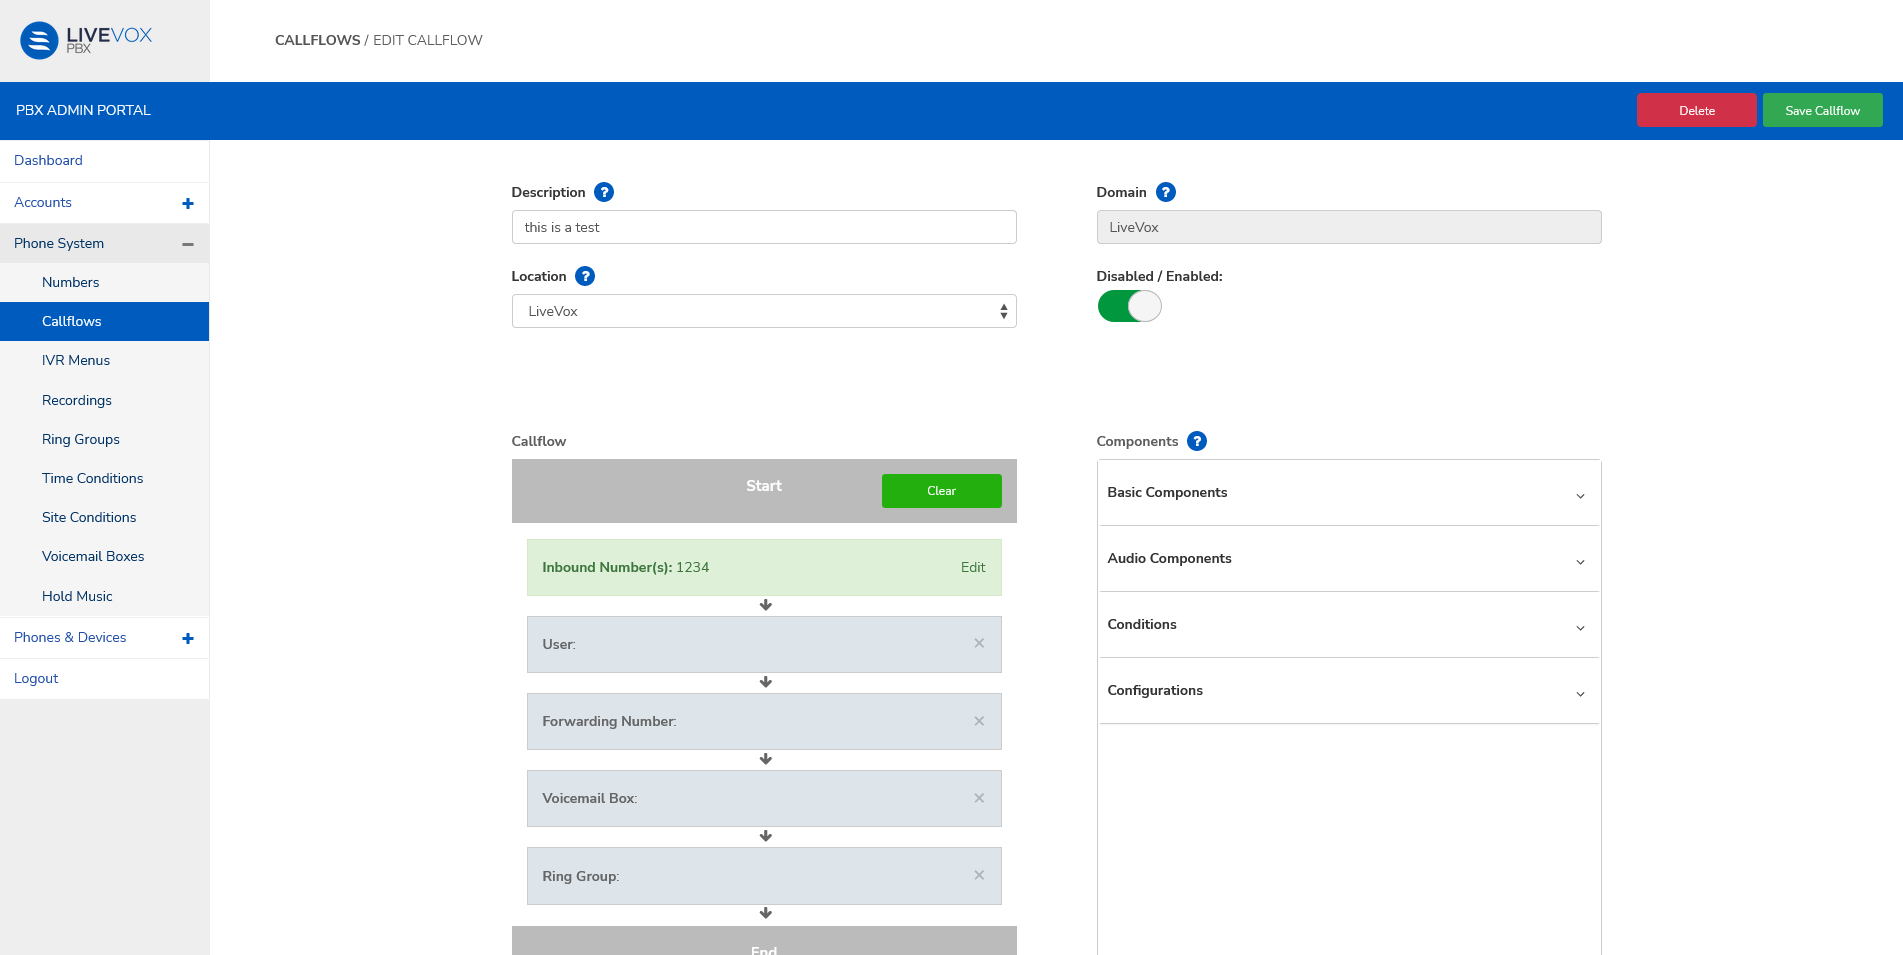
- Click the required row in the table on the Callflows screen. The Edit Callflow screen appears.

Edit the fields if required. See Create a Callflow for field descriptions.
The next actions you may take on this page are:
UI element
Description
Delete Click to delete the callflow. In the confirmation popup window, click Yes, Delete!
On deletion, the page redirects to the Callflows screen.
Save Callflow Click to save your edits and return to the Callflows screen.