Adding a Termination Code

  1. Select Add. The Termination Code pop-up appears.
  2. Add termination code attributes. For more details on the attributes. see the Viewing Existing Termination Codes page.
  3. Click Ok and then Save to add the code. 
  • Some changes to term codes (example: set the data to be automatically added to DNC) may require additional configuration by LiveVox. Contact the LiveVox Customer Care Team through email (customercare@livevox.com) or phone ((888) 477-3448) to inquire about changes not covered in this document.
  • If a new term code requires assigning a "reporting outcome" that matches your system, please navigate to the Reporting Outcomes Mapper for further details.

Modifying a Termination Code

  1. Select the call center and the service whose termination codes you want to modify. 

    Unattended or Message Only services do not need termination codes.


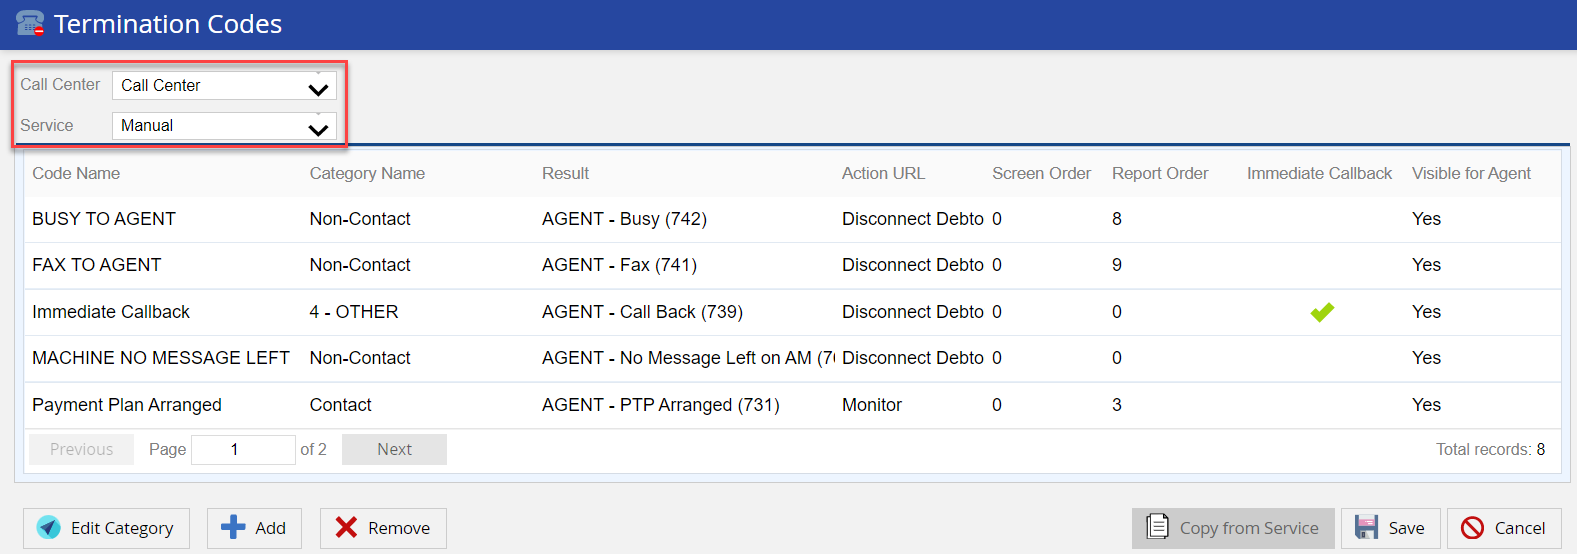
    You can adjust the column width, as well as sort by column, on all sections of configuration tab with column and row display. To adjust the width, simply place the cursor on the side of the column's header; the cursor will change to display a tool to adjust the column width. To sort by column click on the header and the list will automatically be displayed in ascending order according the selected column.

  2. Select the termination code you wish to change and double-click on the row. The Termination Code pop-up appears. This pop-up allows you to make changes to the existing attributes. For more details on the attributes. see the Viewing Existing Termination Codes page.

  3. After you modify the required attributes, click OkThis highlights the row in green.

  4. Click Save to save the changes.

Deleting a Code from the List

  1. Select the code you wish to remove.
  2. Click Remove. This highlights the row in green.

  3. Click Save to save the changes.

Editing Termination Category

  1. Click Edit Category. The Termination Category appears. This pop-up displays existing Category ID and Category Name.
  2. Double-click the category name to change it.
  3. Click Ok and then Save to add the code. 

Adding Termination Category

  1. Click Add / Remove to create a new category (refer to the above screenshot).
  2. Specify the new category name.
  3. Click Ok and then Save to add the code.

Removing Termination Category

  1. Click Remove to remove an existing category (refer to the above screenshot).
  2. Select the category name you wish to remove.
  3. Click Ok and then Save to add the code.