Download PDF
Download page Using Campaign Templates.
Using Campaign Templates
Campaign templates are predefined dialing characteristics and schedules that are applied to campaigns based on the file name. The Campaign Templates tool can be found in Configure > Campaigns > Campaign Templates within the navigation panel.
Support for International Numbers
The Operator Phone, Callback Phone, and Caller ID fields in Campaign templates support E.164, which defines a general format for international telephone numbers.
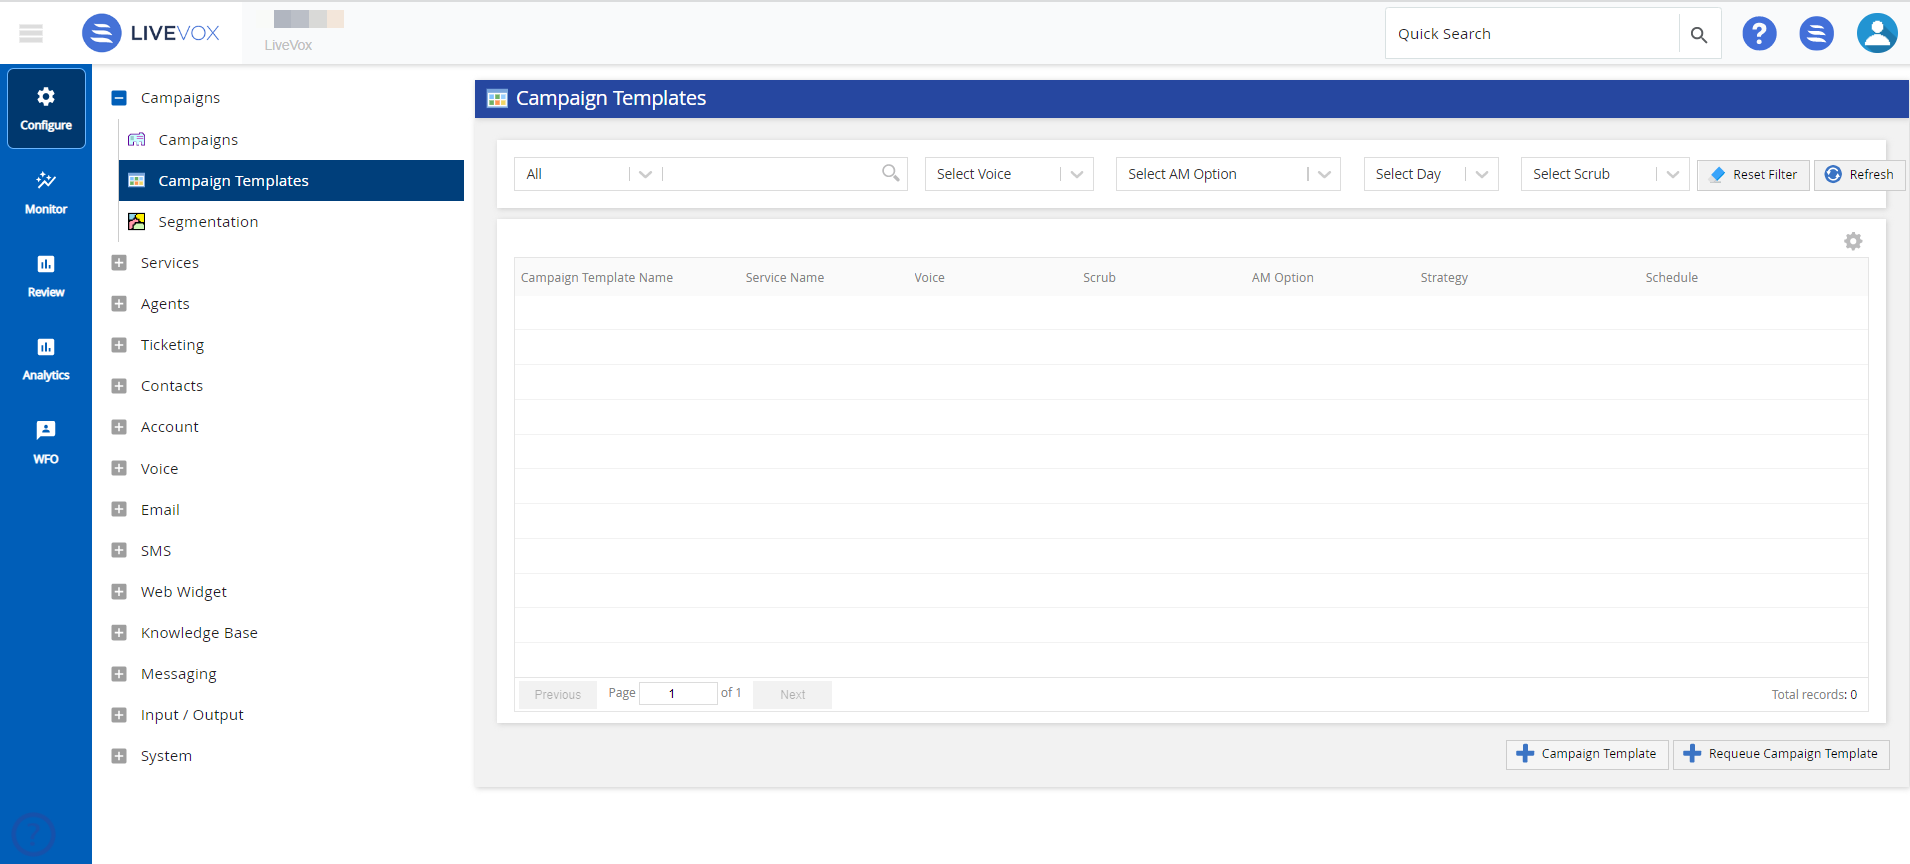
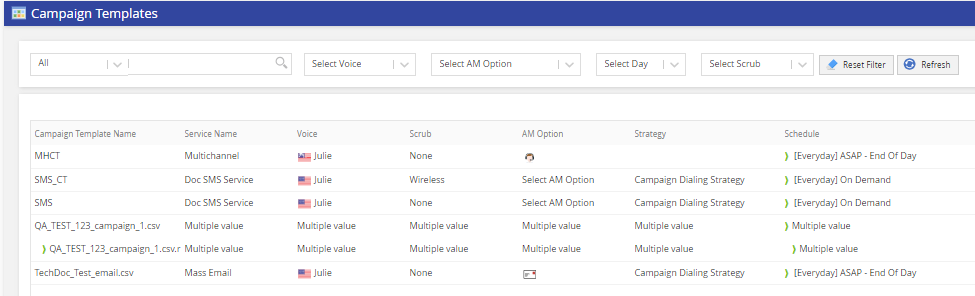
The Campaign Templates search filter allows you to search for specific campaign templates by using any single or combination of available filters such as searching with text for a campaign template's Name, Service, or Dialing Strategy as well as by applying filters of Voice, AM Option, Schedule or scrub option.
- To set up a new Campaign Template, click the Campaign Template button at the bottom right of the window. This will bring up the Add Campaign Template window.
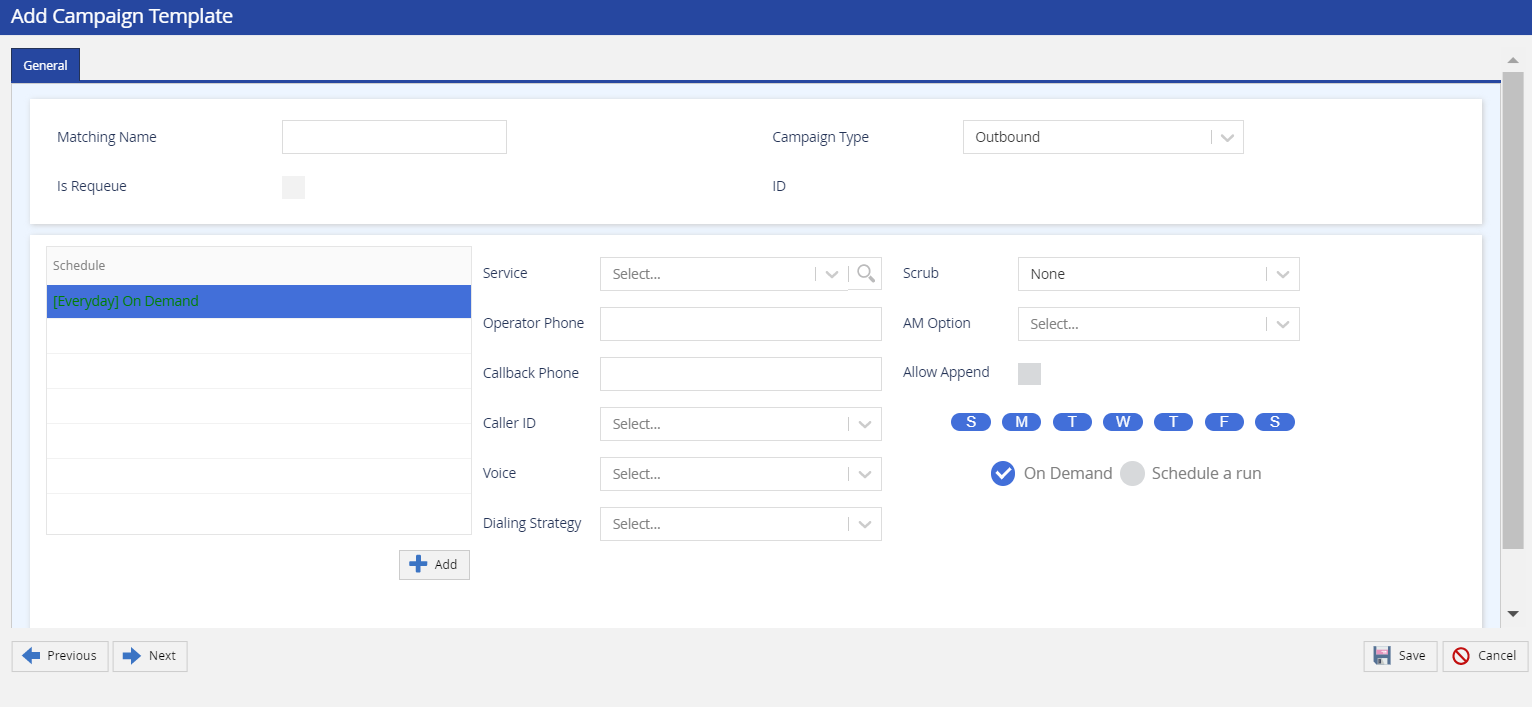
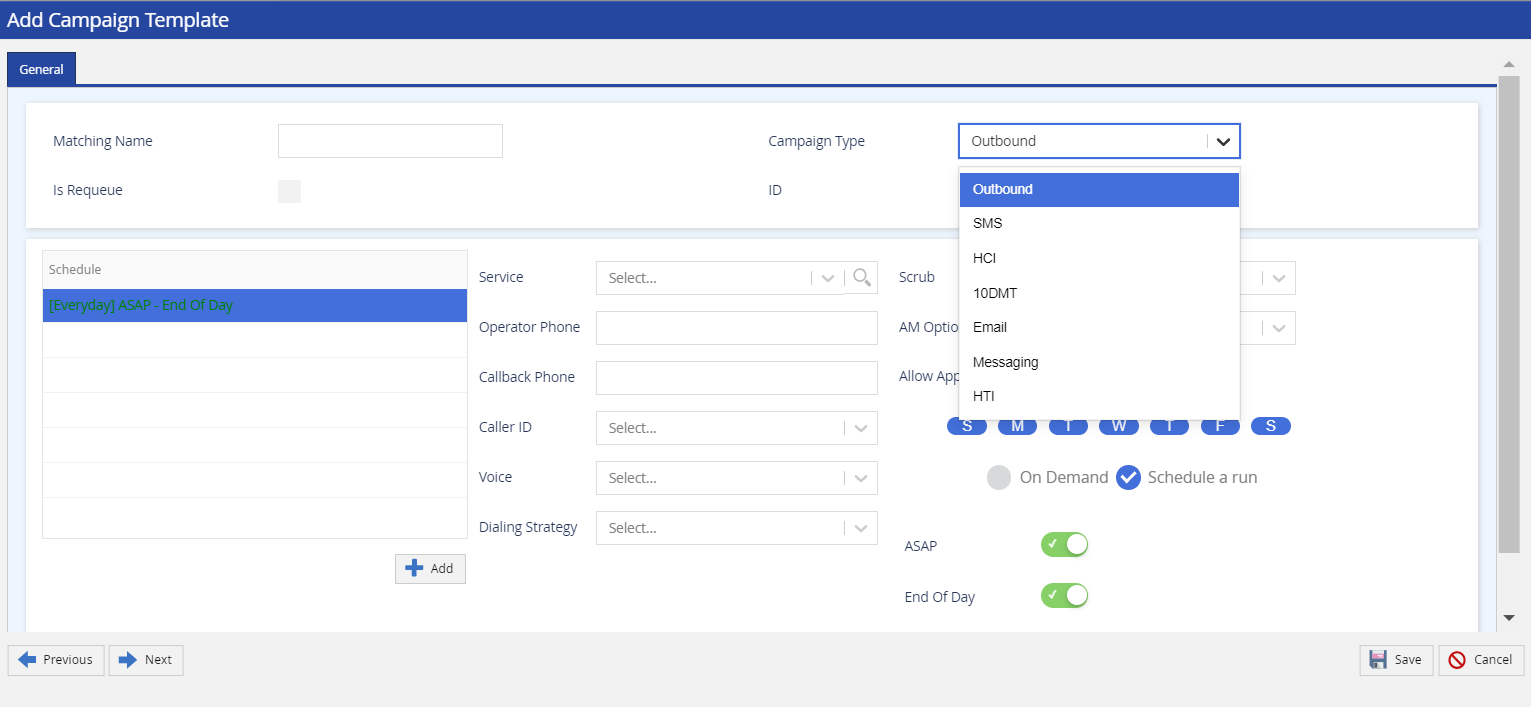
- Specify a file name under the Matching Name field and select the Campaign Type from the drop-down menu.
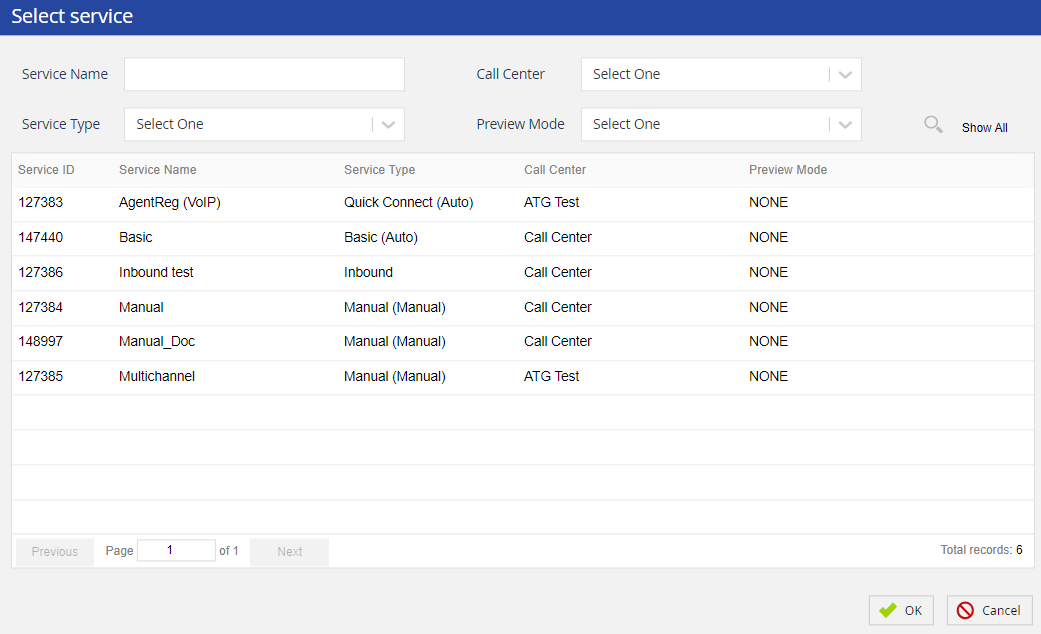
- Select a service from the Service drop-down menu or click the magnifying glass icon to bring up the Select Service screen.
- In the Select Service screen, search for services by Service Name, Call Center, Service Type, and Preview Mode.
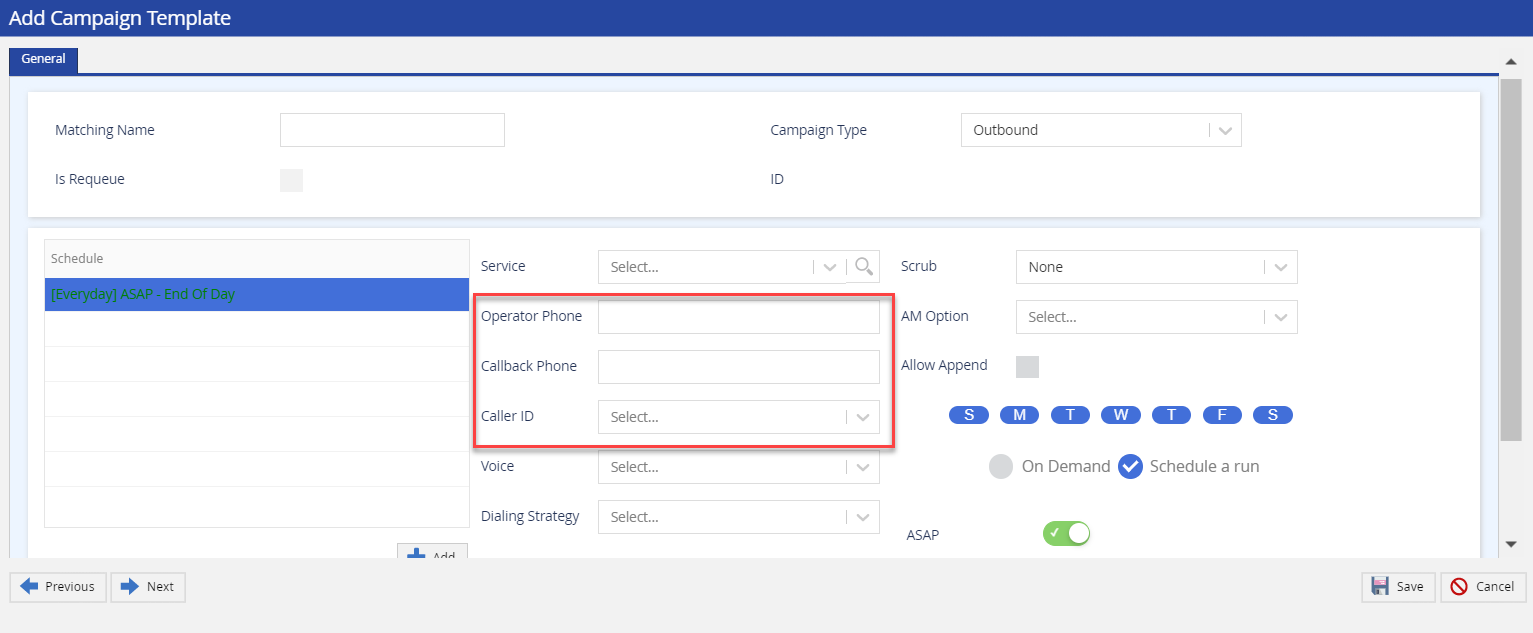
- Adjust or accept the following three phone options.
- The Operator Phone is the number first dialed by LiveVox when extension-based agents are called by LiveVox to tether into the system.
- Caller Id can be selected from the drop-down list. If the Local Caller ID feature is enabled, [Local, rotated] option is the default option. Modify the available CID list from the Service editor.
- The Callback Phone is the number left on answering machines or live person messages by the LiveVox system.
- In the Select Service screen, search for services by Service Name, Call Center, Service Type, and Preview Mode.
- Select the desired voice talent from the Voice drop-down menu.

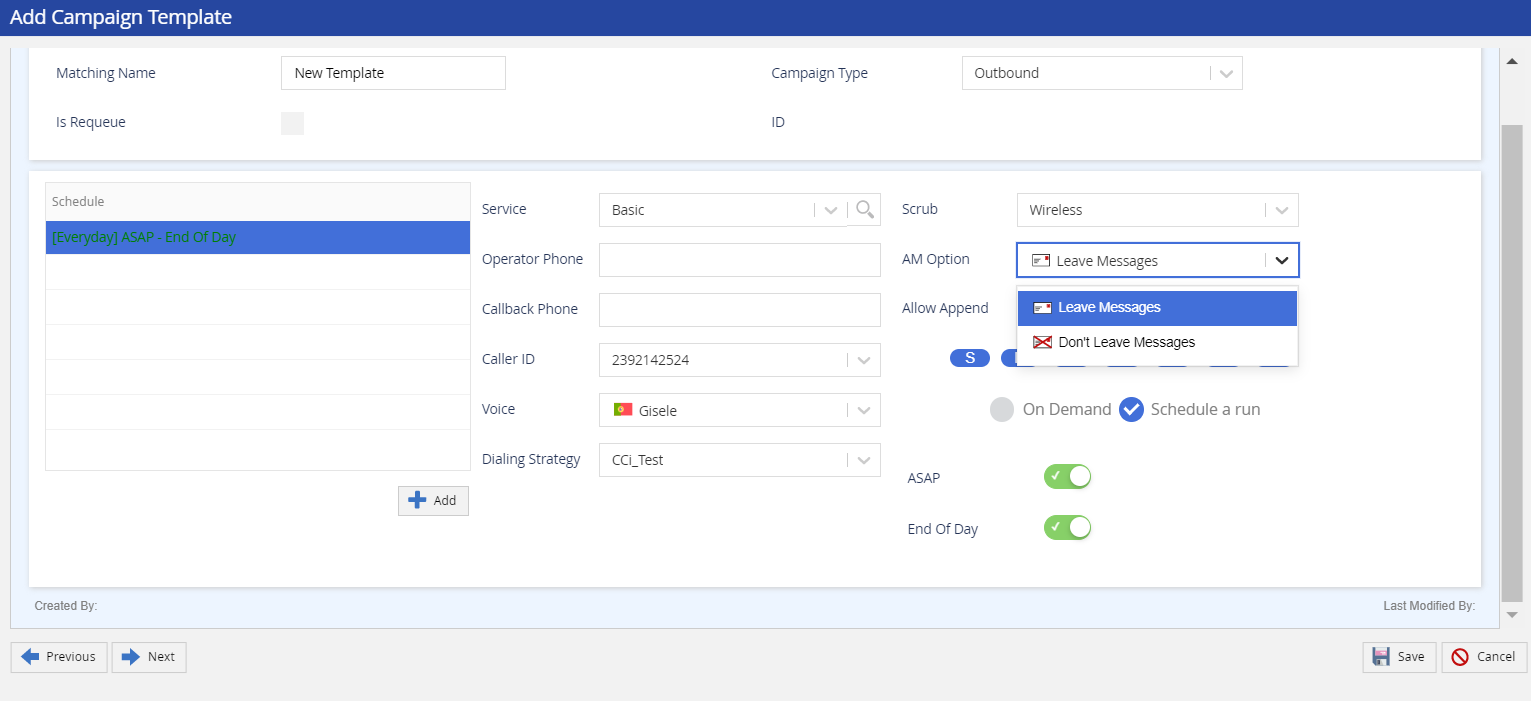
- Select an answering machine messaging option from the AM Option drop-down menu.
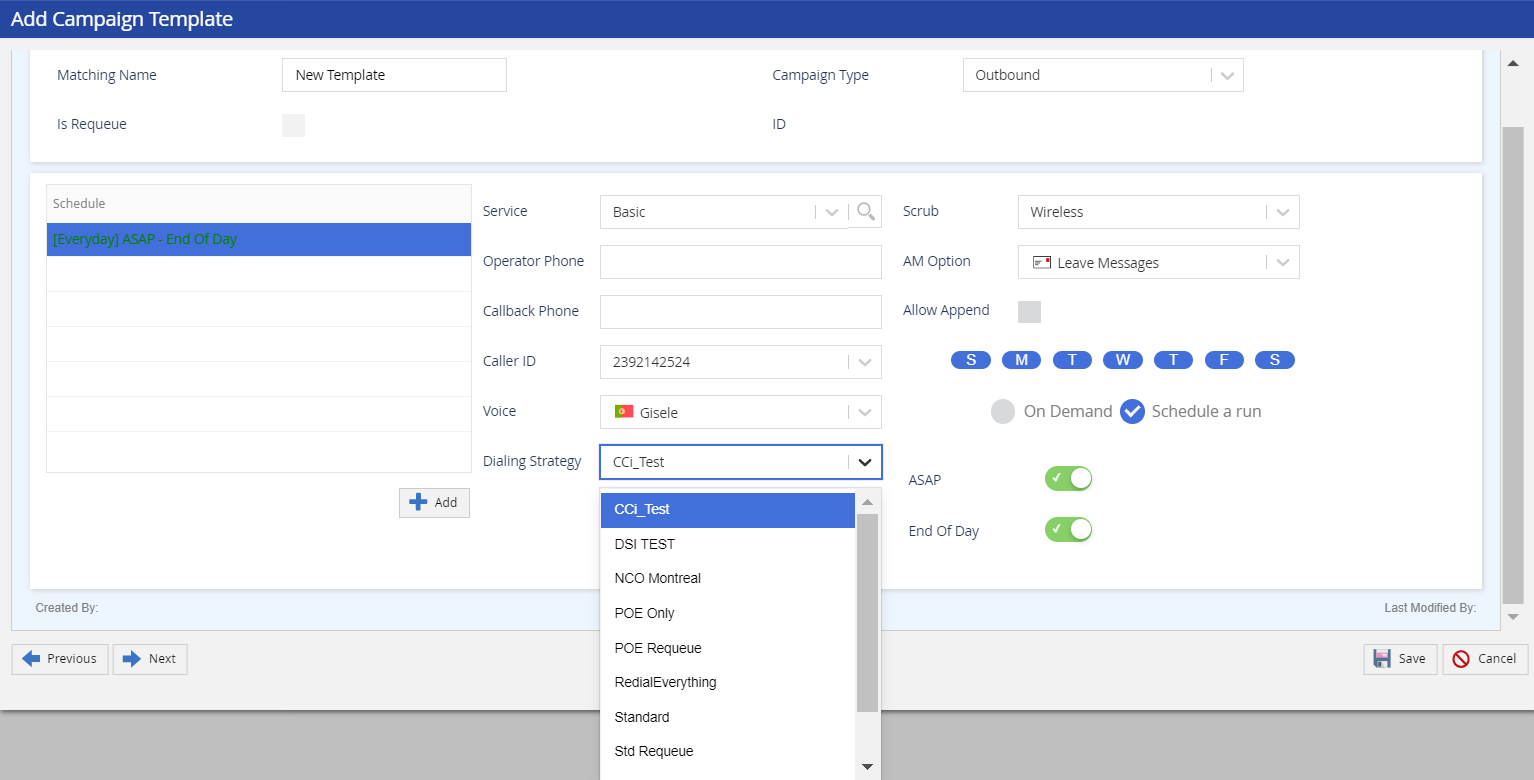
- Select a dialing strategy from the Dial Strategy drop-down menu.
- Select the required Scrub option from the drop-down menu to scrub all wireless phone numbers, all landline numbers, or segment wireless phone numbers from a campaign file during build time.
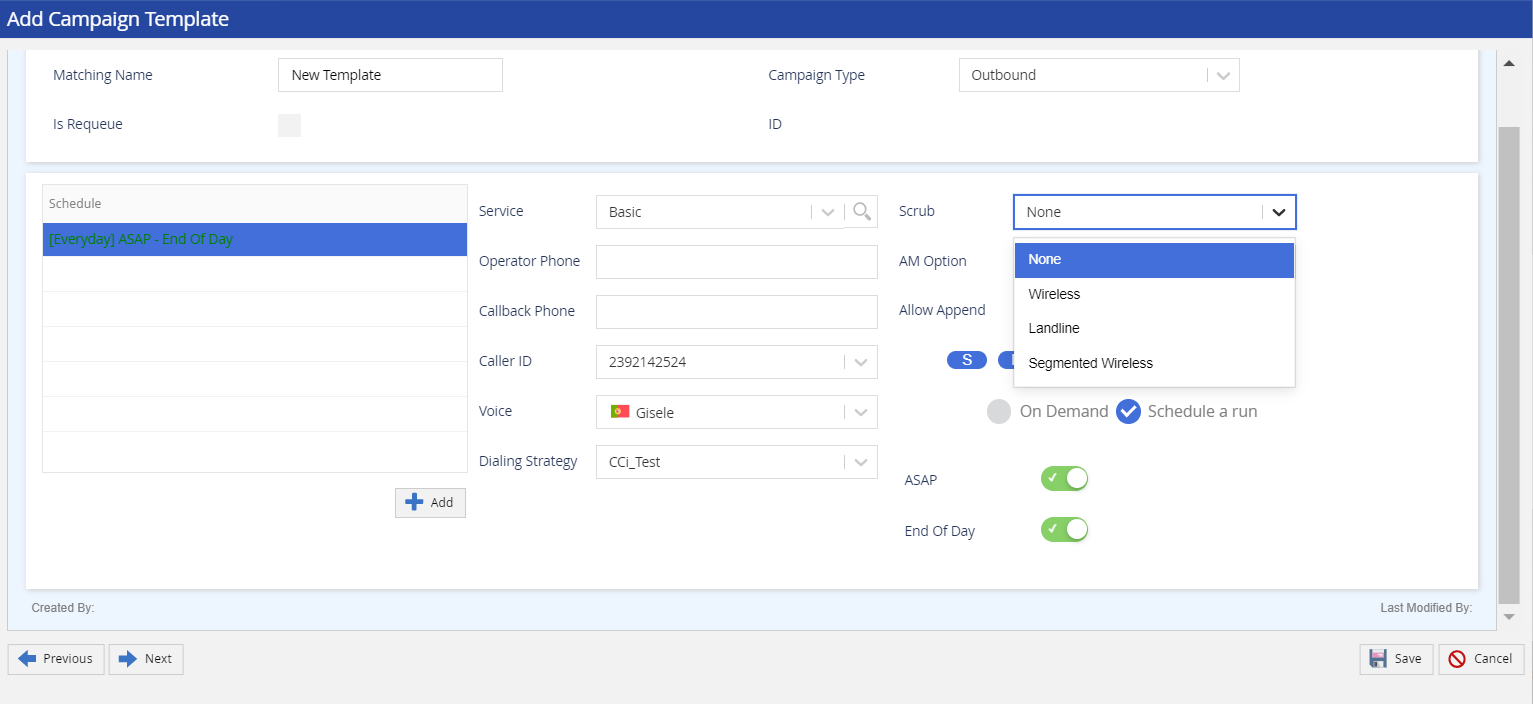
There are four Scrub options to select:- None (0) - This is the default option and if selected no scrub occurs.
- Wireless (1) - Scrubs all wireless phone numbers so that all landline numbers can be dialed.
- Landline (2) - Scrubs all landline numbers so that all wireless phone numbers can be dialed.
Segment Wireless (3) - Scrubs all wireless phone numbers from positions 1-15 and place them starting at position 16.

The service level Scrub option auto-populates for the selected service. If the service level scrub option is selected as Select One (Null) for the particular service, then the client level Scrub option will be auto-populated for that particular service when manually loading the campaign. At this time, permitted users can override this setting by choosing another scrub option from the drop-down. Please see the User Help section for more details on user roles and permissions.
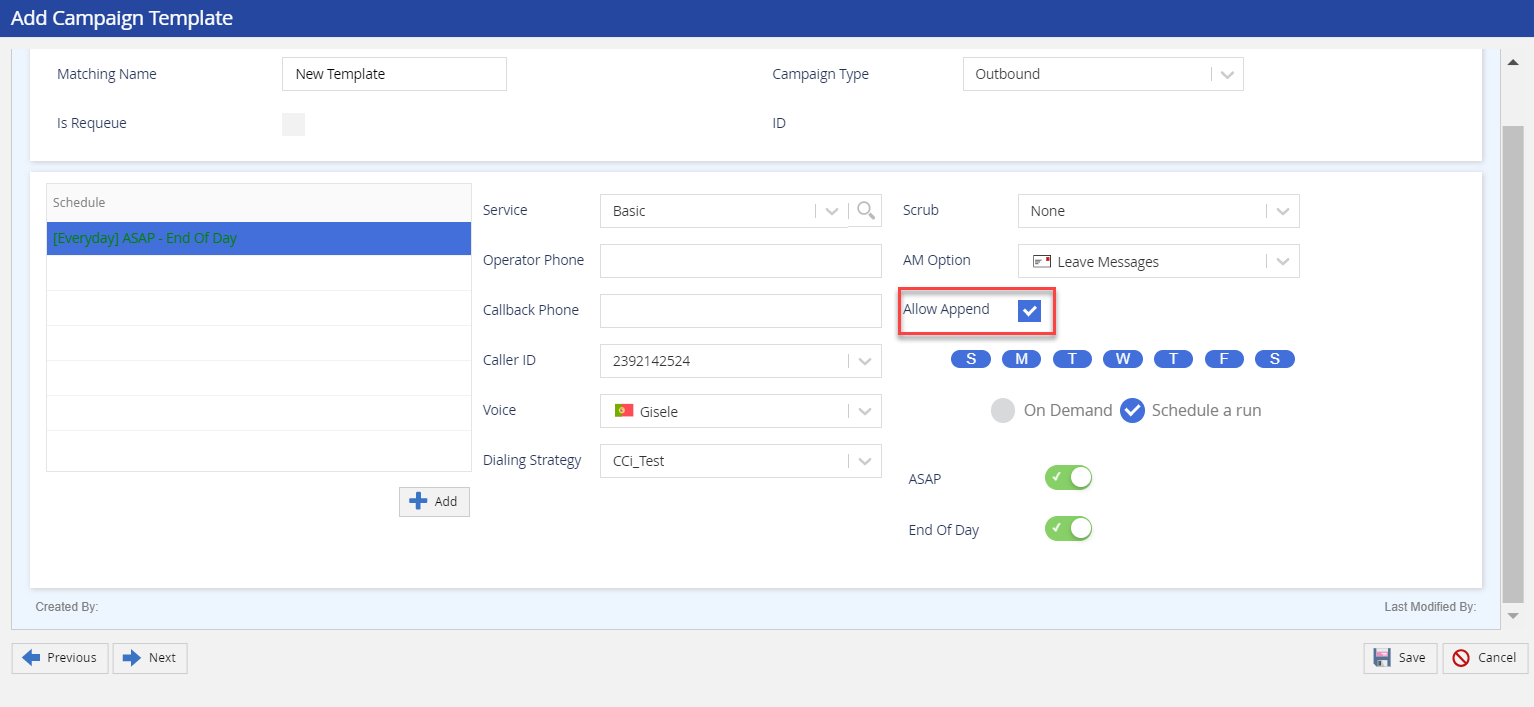
Select Allows append to allow uploaded campaign files to be appended to an active campaign.
- Specify the days of the week you want to set up a schedule for by selecting or deselecting the checkboxes underneath the desired days. You can set up unique schedules for different days by clicking the Add button underneath the Schedule panel on the left.
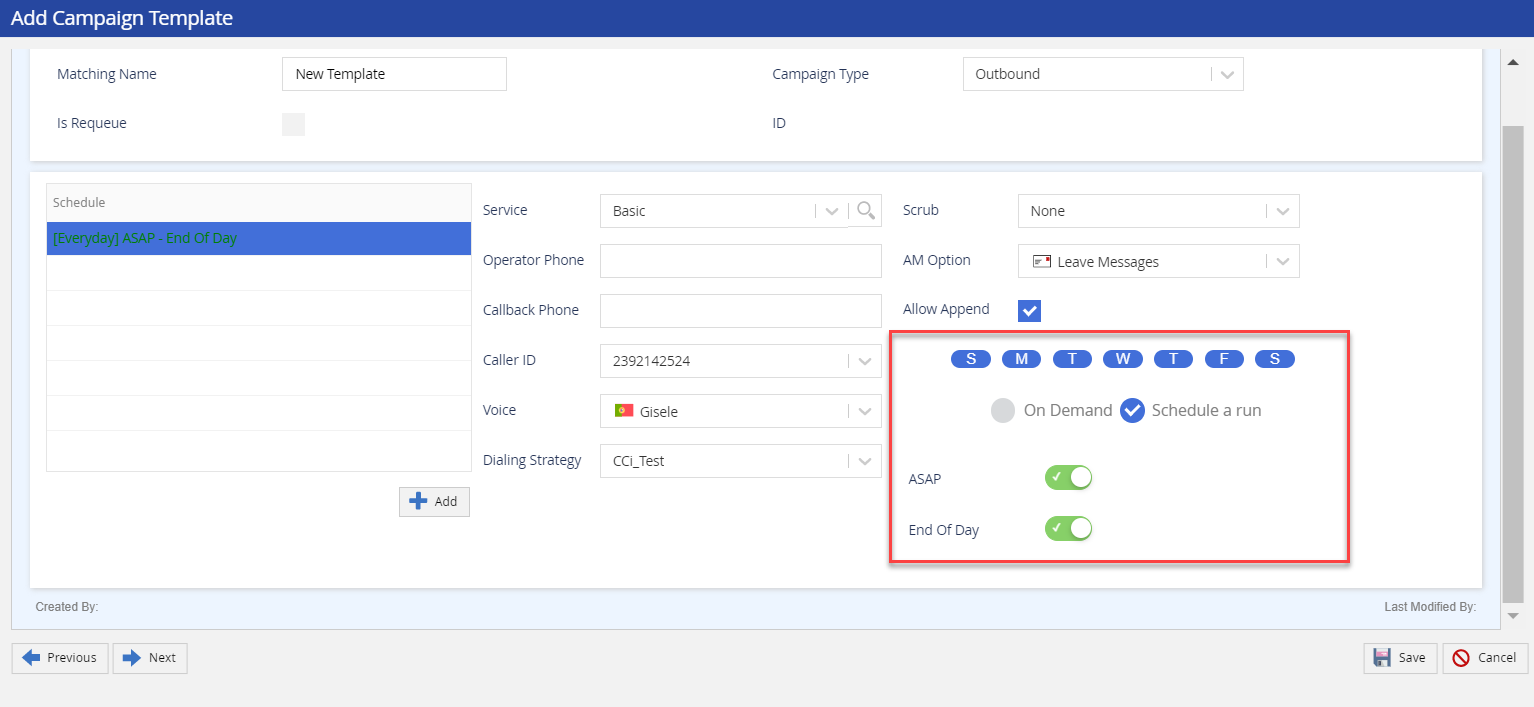
- To manually control the campaign's dialing select the radial button next to OnDemand. The Schedule a run radial button is selected by default to allow for scheduling. The Start Time and End Time values are selected by default.
- ASAP - Start the campaign as soon as possible.
- End of Day - The campaign will end by curfew, depletion, or if a manager stops the campaign.
- To specify either Start Time or End Time, deselect the checkboxes and select the hour and minute from the drop-down menus.
- To manually control the campaign's dialing select the radial button next to OnDemand. The Schedule a run radial button is selected by default to allow for scheduling. The Start Time and End Time values are selected by default.
- After all the dialing characteristics and schedules have been set up click the Save button at the bottom of the Campaign Template Details window.
To set up a campaign template for requeue campaigns, click the Add Requeue Campaign Template button at the bottom right of the window.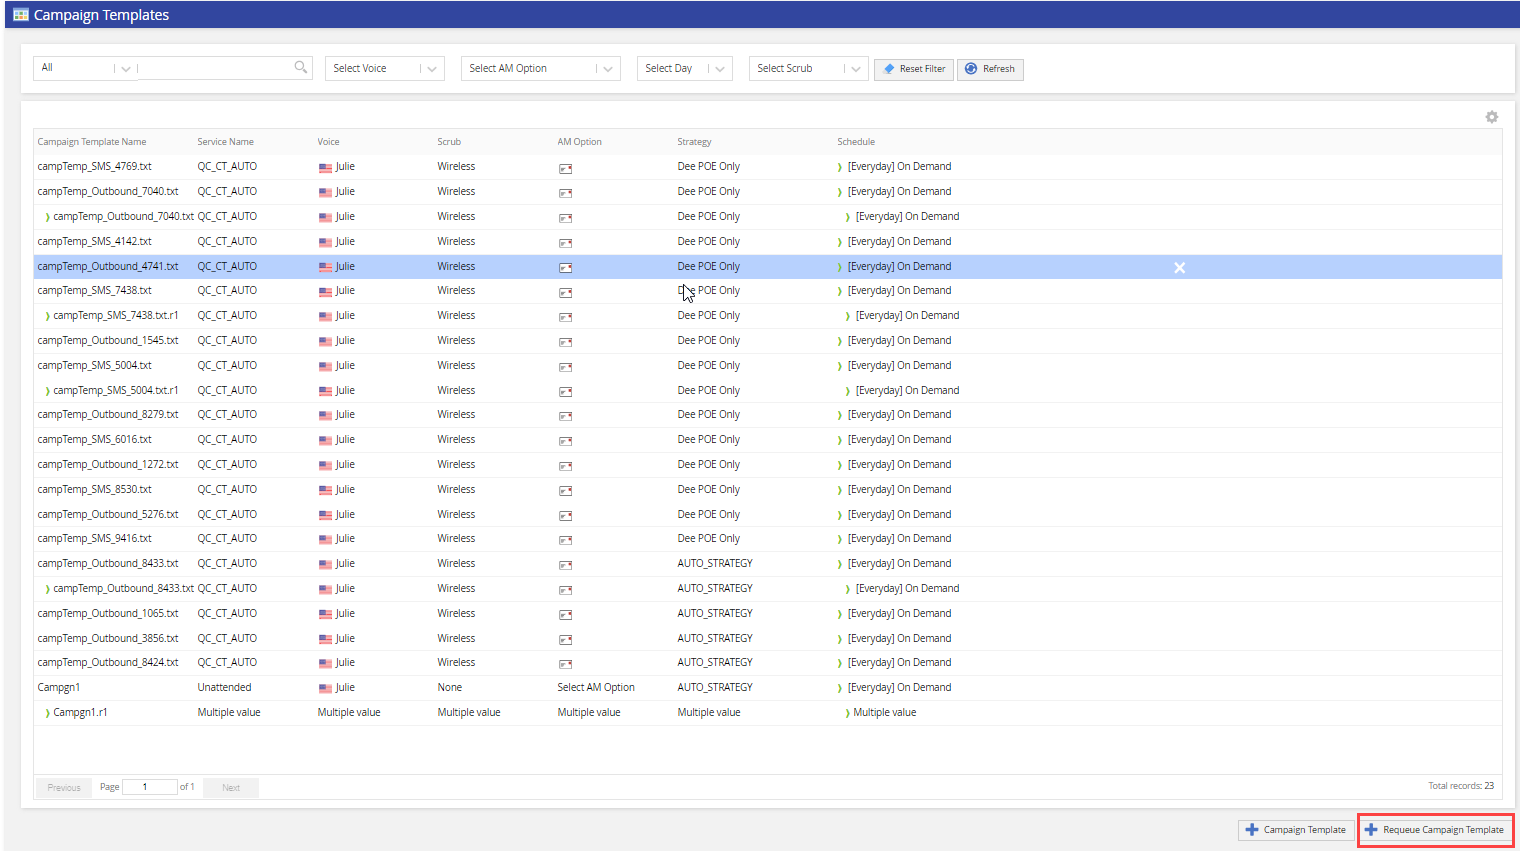
Follow the same steps for setting up a new campaign template.
Subsequently requeued files are appended by a file extension of “.r1” representing each prior requeue. For example:
- Requeue of original file = .r1
- Requeue of first requeue (.r1) = .r1.r1
- Requeue of second requeue (.r1.r1) = .r1.r1.r1
Not building a subsequent requeue off of the previous file’s outcomes will append a sequential file extension such as .r2, .r3, etc.
Adjusting Existing Campaign Templates and Secondary Tabs
Double-click an existing campaign template to adjust the settings from the Campaign Template Details window. The Campaigns tab displays campaigns that have had the campaign template applied. The Change History tab tracks and displays changes made to the campaign template.