Creating a View
To create an account view:
- On the Configure tab of the LiveVox Portal (LVP), click Account > Accounts Config.
- On the Views tab, on the Views subtab, click New.
The New Search View window appears.
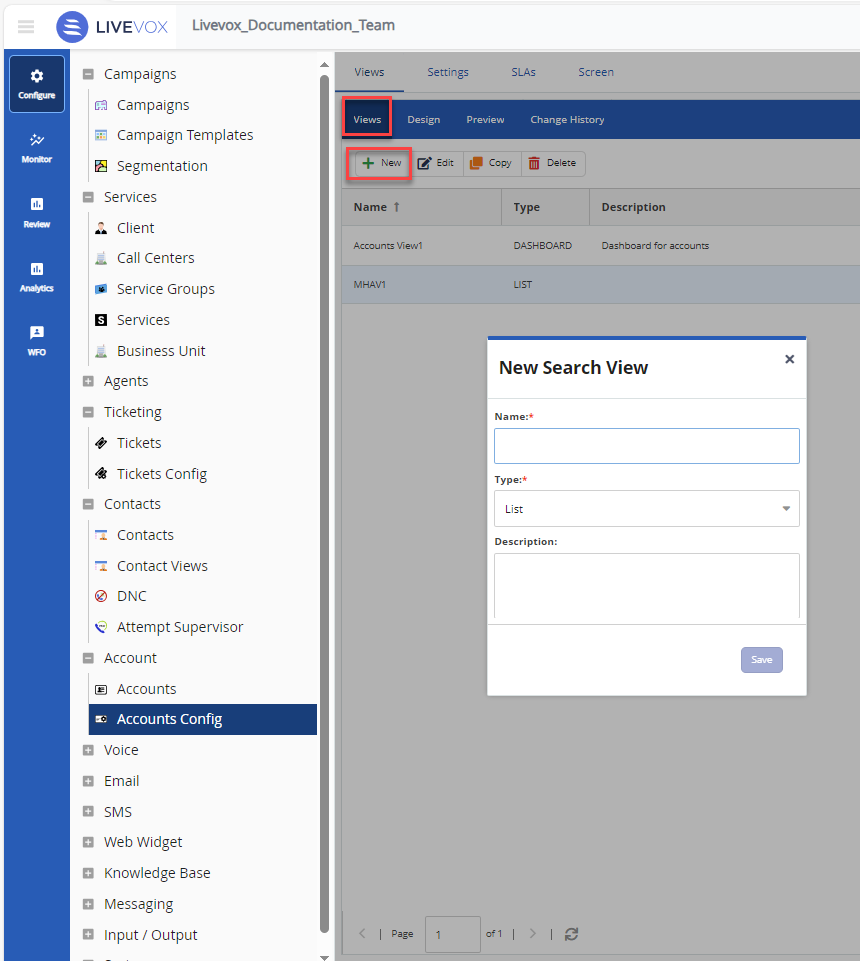
In the Name field, enter a name to identify the view throughout the LiveVox Portal and the agent desktop.
Optional: In the Description field, enter a description of the view.
Click Save.
The view is created and is available on the Views subtab. The Design subtab appears to enable yo
Accessing a View
To access an account view:
- On the Configure tab of LVP, click Account > Accounts Config.
- On the Views tab, on the Views subtab, double-click the row displaying the view.
The Design subtab appears.
Designing a View
An account view is a filter to display the accounts that meet predefined criteria, respectively, in a customized table. Views help you and your agents to easily segment, find, track, prioritize, or manage the records. For example, you can provide the filter criteria for a view, select the fields to display in a view, restrict who can edit the view, and restrict visibility of the view.
To design an account view:
- Access the view.
On the Filter Criteria subtab, in the fields, specify those values based on which you want the records to be filtered.

Account: If you select the Unassigned checkbox, when the current account view is selected, only the Accounts that are not assigned to an agent or agent team appear in the Account table.
Fill the Fields to Display, Restrict Editors, and Restrict Visibility subtabs.
- For information about the subtabs, see Subtabs Used When Designing a View.
- The Summary section on the Design subtab displays the changes that you make on each of its subtabs, in real time.
- Click Save.
A message stating that the view has been updated appears.
Previewing a View
To preview an account view, access the view, and then click the Preview tab.
Modifying, Copying, or Deleting a View
To modify, copy or delete an account view:
- On the Configure tab of LVP, click Account > Accounts Config.
- On the Views tab, on the Views subtab, click the row displaying the view, and then click Edit, Copy, or Delete.
To modify the design of the view, on the Views subtab, double-click the row displaying the view.
Viewing the Changes Made to a View
To view a summary of all the changes made to an account view, access the view, and then click the Change History tab.
A summary of all the changes made to the view appears.
The time in the Created Date column represents your time zone.
Searching for a View
To search for an account view:
- On the Configure tab of LVP, click Account > Accounts Config.
- On the Views tab, on the Views subtab, in the Filter box, enter the name or description of the view (at least three characters).
The views that meet the search criterion appear in the table.