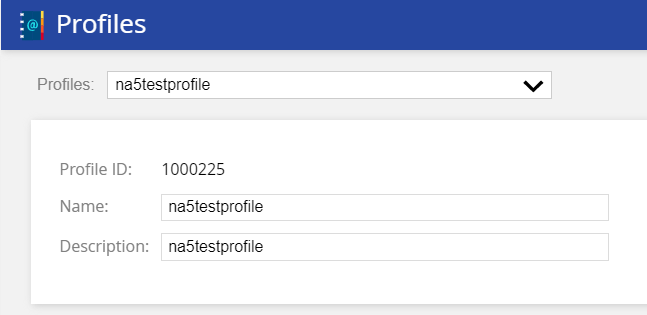
On theConfiguretab, clickVoice>Profiles. TheProfiles window appears.
In theProfilesfield, select the profile that you want to access. The profile appears displaying values in the Profile ID,Name, andDescription fields.
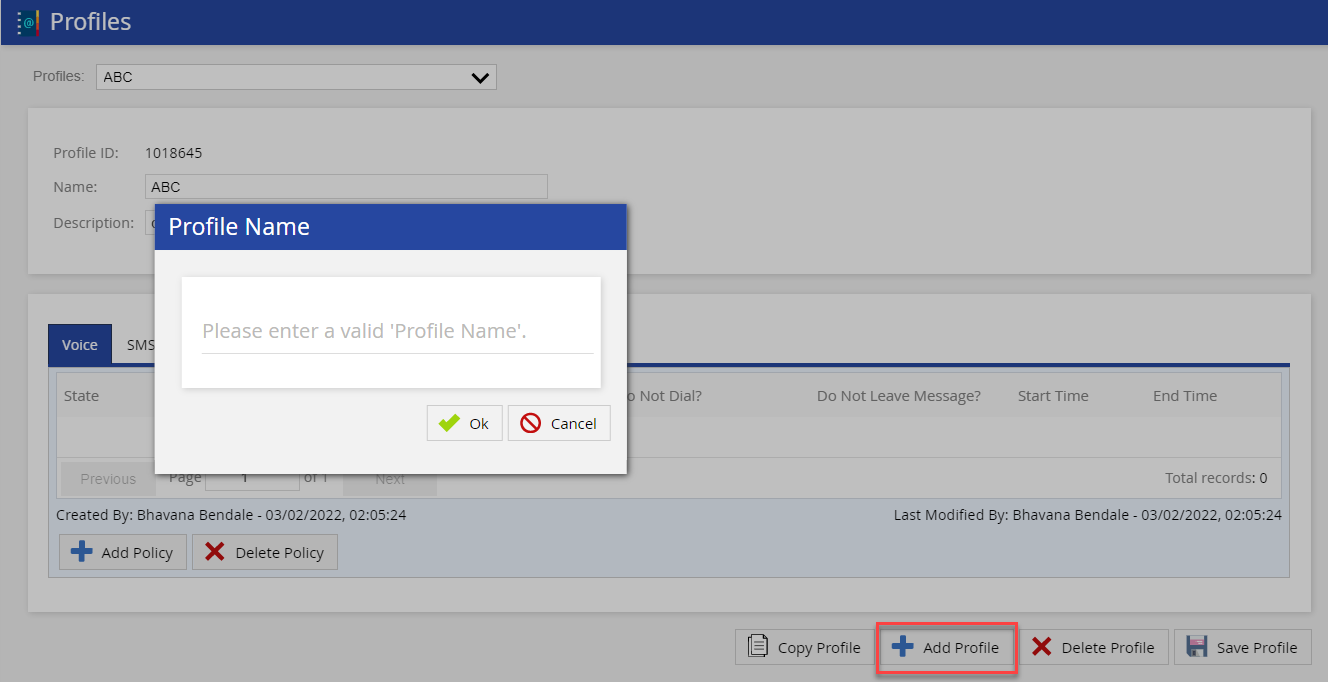
To create a profile:
On theConfiguretab, clickVoice>Profiles. TheProfileswindow appears.
ClickAdd Profile. TheProfile Namewindow appears.
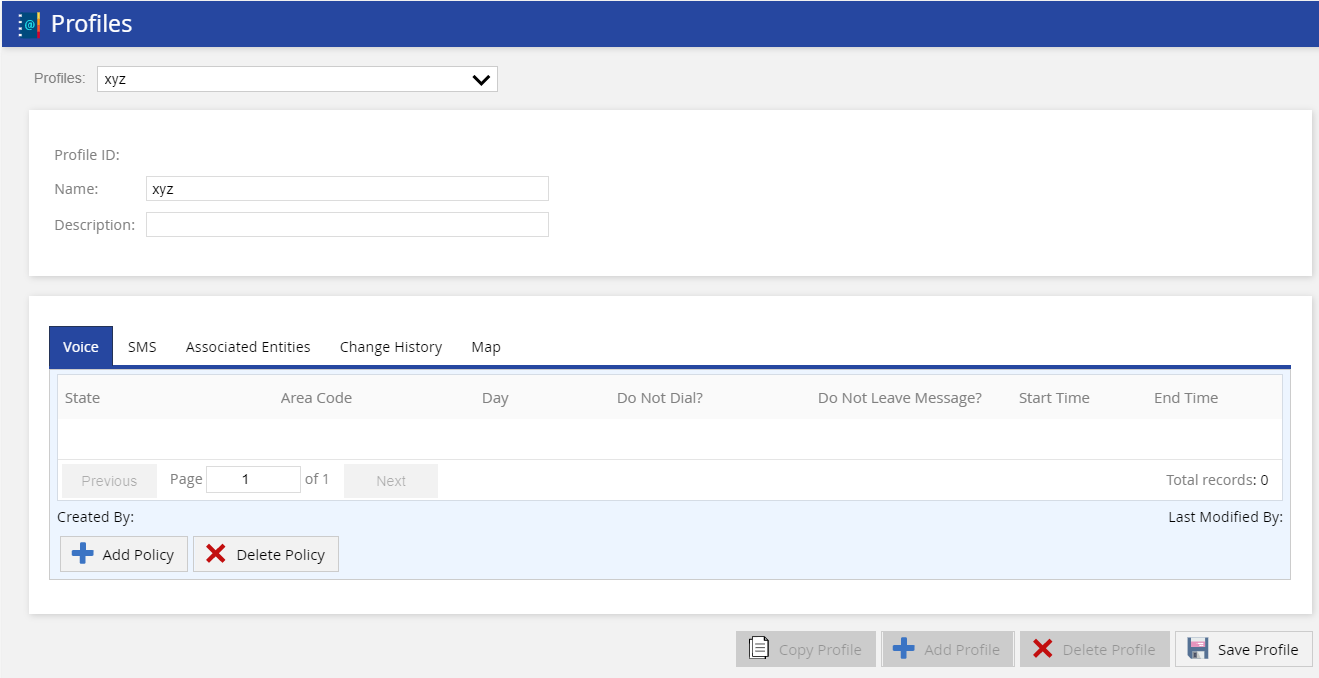
Enter a name to identify the profile, and then clickOK. TheNamefield in theProfileswindow displays the name that you entered.
If required, in the Descriptionfield, enter a description for the profile.
ClickSave Profile. The profile is created.
The profile appears as an option in theDialing Profilefield on theSettingstab of theClient and Serviceswindows.
The profile assigned to a service takes precedence over that of the profile assigned to a client.
If the services associated with a client do not have a designation, they are automatically assigned the profile that is assigned to the client.
Any new profiles that you create and apply inherit only the default customer contact window, which is 08:00–21:00 local time. State exclusions for Nevada and Pennsylvania are not included—you must add them if required.