You can define the behavior of the uploading process of accounts. In addition, you can define and manage the types and classifications of an account.
Defining the Bulk Account Upload Process
To define the behavior of the uploading process of accounts:
- On the Configure tab, click Account > Accounts Config.
The Accounts Config window appears. - Click the Settings tab.
- If you want an account that already exists on the LiveVox Portal (LVP) to be overwritten when the same account is imported to LVP, in the General section, select the Bulk Account Upload checkbox. Otherwise, clear the checkbox.

Creating an Account Classification
The classification of an account is determined by the Classification field of an account. You can create the options (account classifications) for the Classification field.
To create an account classification:
- On the Configure tab, click Account > Accounts Config.
The Accounts Config window appears. - On the Settings tab, in the Classifications section, click New.
The New Classification window appears.
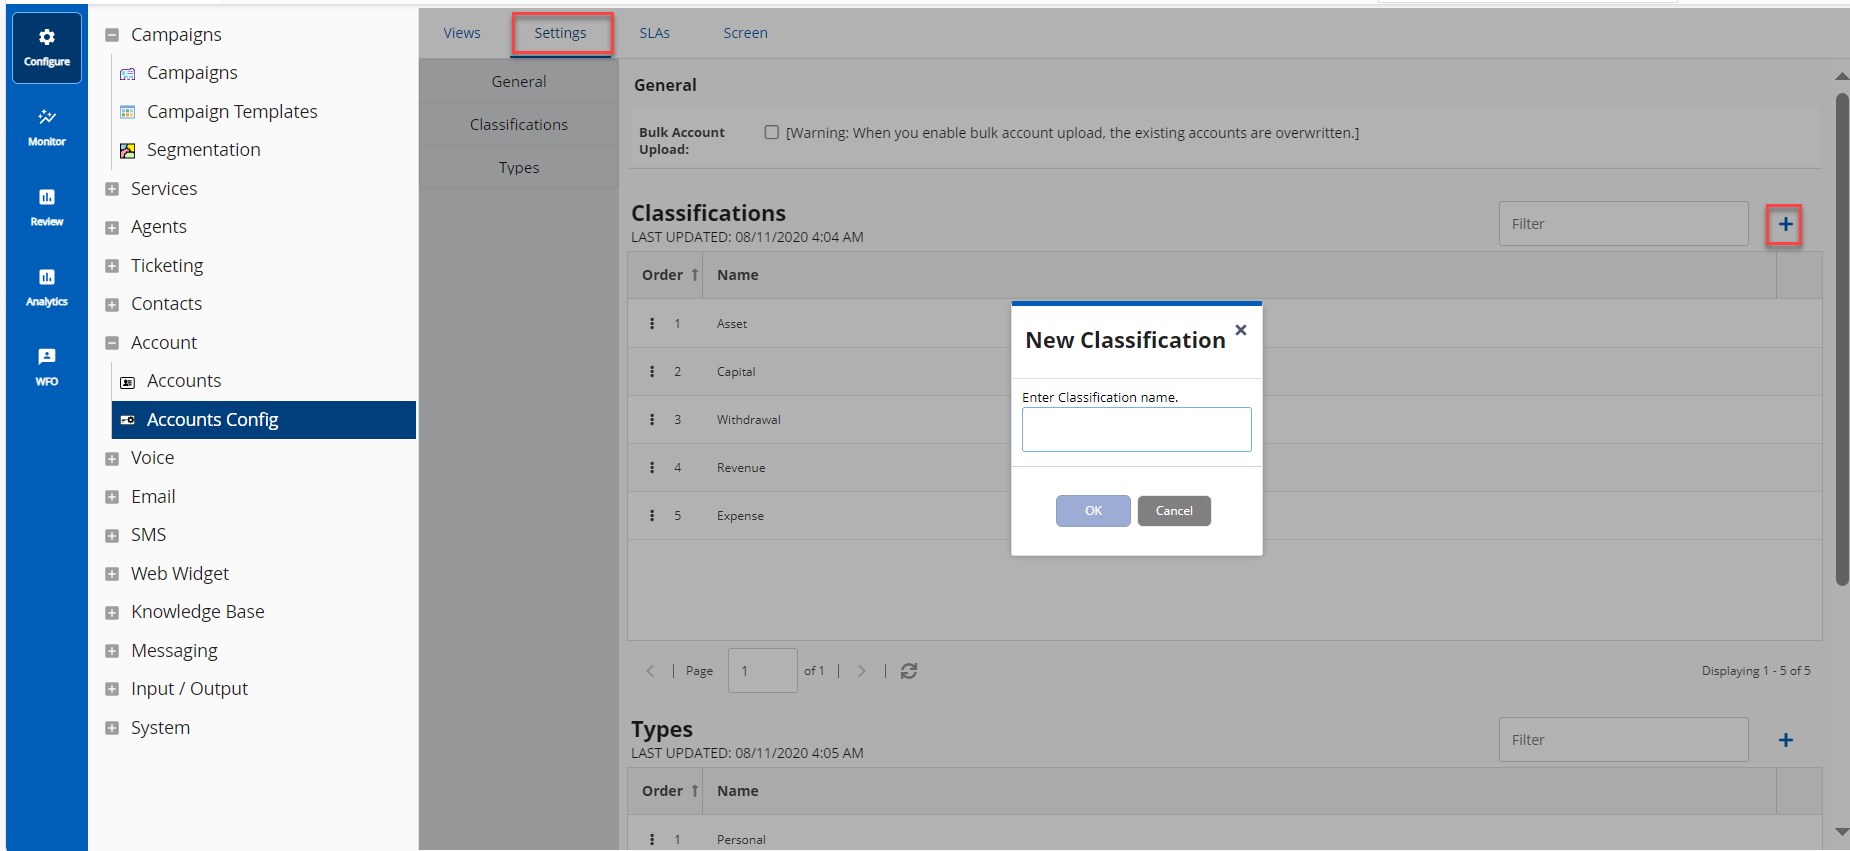
In the Enter Classification name field, enter a name for the account classification (for example, Gold, Platinum, or Silver).
The value that you enter in this field appears as an option in the Classification field of an account.
- Click Save.
The account classification is created, and it appears in the Classifications section.
Creating an Account Type
The type of an account is determined by the Type field of an account. You can create the options (account types) for the Type field.
To create an account type:
- On the Configure tab, click Account > Accounts Config.
The Accounts Config window appears. - On the Settings tab, in the Types section, click New.
The New Type window appears. In the Please enter Type name field, enter a name for the account type (for example, Change Log, Prospect, or Support).
The value that you enter in this field appears as an option in the Type field of an account.
- Click Save.
The account type is created, and it appears in the Types section.

Modifying an Account Classification or Type
- To modify the name of an account classification or type: In the Accounts Config window, on the Settings tab, in the Classifications or Types section, click the cell containing the name, and then enter the name you want.
To define the position of an account classification or type in the Classification or Type field of an account: In the Accounts Config window, on the Settings tab, in the Classifications or Types section, drag the row displaying the account classification or type to the position you want.
The order in which the account classifications and types appear in the Classifications and Types sections represents the order in which they appear as options in the Classification and Type fields of an account. You can also identify the order by the values in the Order column in the sections (for example, the value 1 in the Order column indicates that the corresponding account classification or type appears in the first position in the Classification or Type field of an account).
Searching for an Account Classification or Type
To search for an account type or classification: In the Accounts Config window, on the Settings tab, in the Classifications or Types section, in the Filter box, enter the name of the account classification or type (at least two characters).
Deleting an Account Classification or Type
To delete an account classification or type: In the Accounts Config window, on the Settings tab, in the Classifications or Types section, hover over the row displaying the account classification or type, and then click the delete icon .
.