Download page Managing the Voice Monitor Dashboard View.
Managing the Voice Monitor Dashboard View
You can manage the view on the Voice Monitor Dashboard as required.
Configuring Widgets
You can select the widgets to be displayed on the Voice Monitor Dashboard. To configure these widgets:
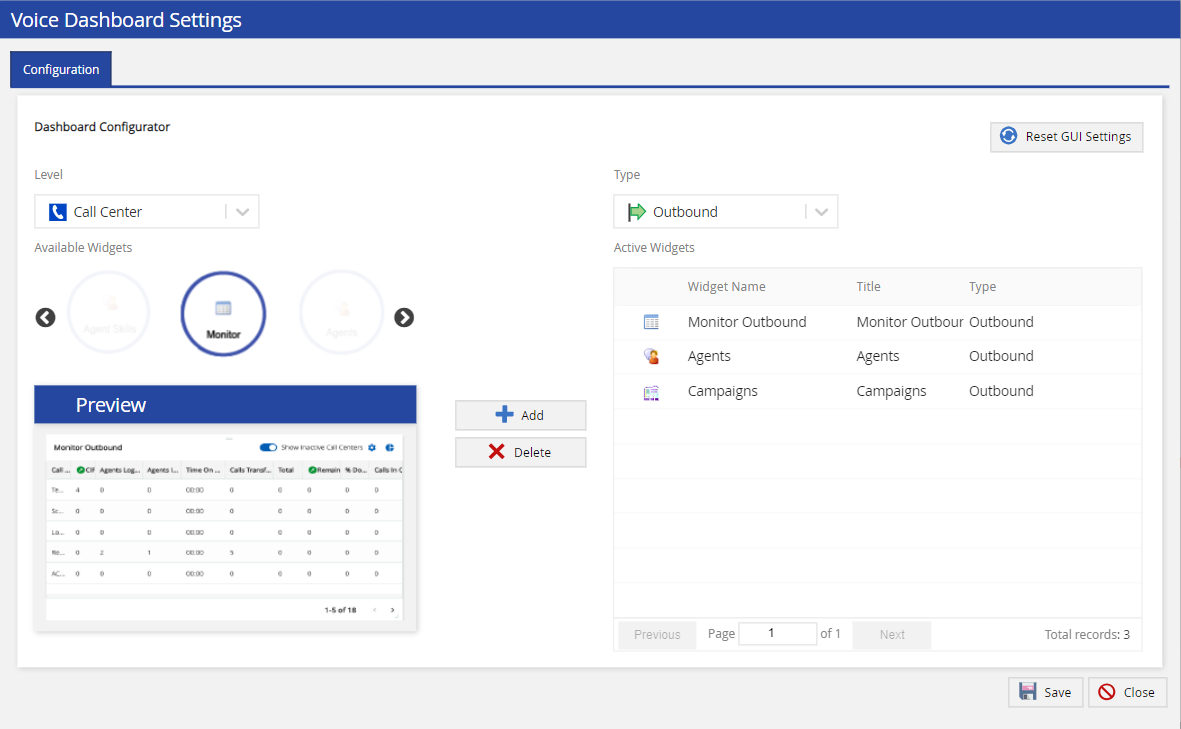
On theVoice Monitor Dashboard, click theGUI Settingsicon. TheVoice Dashboard Settingswindow is displayed.
In the Configurationtab, under theDashboard Configuratorsection:
In the Levelfield, select the level (enterprise, call center, or service) for which you want to configure the settings. The Available Widgetssection displays the widgets that are applicable to the level that you selected.
In the Typefield, select the type of call direction (outbound, inbound, or blended) to view the list of widgets configured for the selected Type. TheActive Widgetssection displays the widgets that currently appear on the voice monitor dashboard for the level and type that you selected.
In the Available Widgetssection, use the arrows to view the available widgets. The Preview section displays the widgets.
Select the widget you want to add to the dashboard and clickAdd.
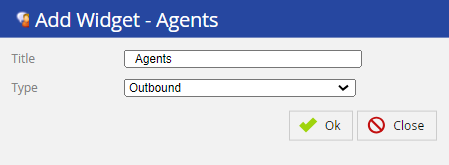
In the Add Widgetwindow, specify the Titleand select the Type from the drop-down list.
Click OK.
ClickSave.
To delete a widget from the dashboard, select the widget from theActive Widgetssection and click.
Arranging the Widgets
To change the position of a widget within the Voice Monitor Dashboard, drag the widget to the required position using drag icon .
Customizing a Widget Table
You can display widgets on the Voice Monitor Dashboard (such as, Agents, Campaigns, Hold Queue, and Monitor) in a tabular format. You can customize the table to display only the columns you want in the order you want, in addition to specifying the column by which you want the rows to be sorted.
The tabular format appears when you click the Flip to Table Viewicon on a widget.
To customize a table:
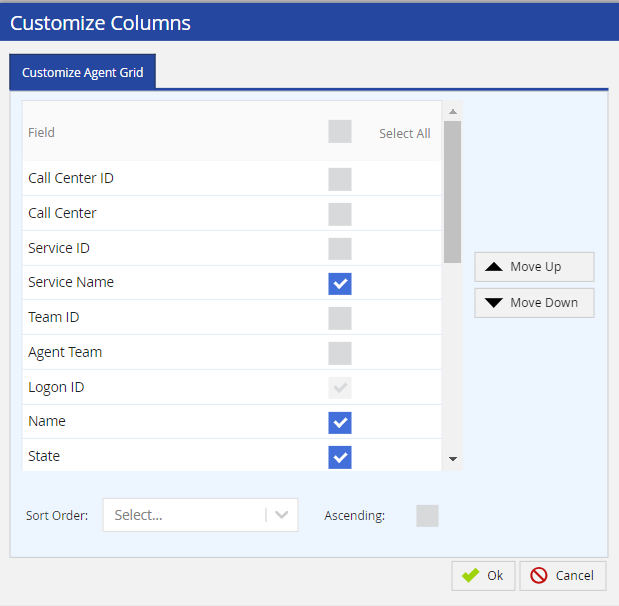
On the Voice Monitor Dashboard, in the tabular format of the widget, click the Customize Columns icon . The Customize Columns window appears.
Select the checkboxes next to the columns that you want to be displayed in the table.
To display all the columns, select the Select All checkbox.
Clear the checkboxes next to the columns that you do not want to be displayed.
You cannot clear the checkboxes next to the columns that are required to be displayed in the table.
Click the up or down arrow to change the order of the columns based on how you want them to be displayed in the table.
In the Sort Order field, select the column based on how you want to order the rows in the table.
If you want the rows in the table to be displayed in ascending order, select the Ascending checkbox.
If you want the rows in the table to be displayed in descending order, clear the Ascending checkbox.
Click Ok. You have customized the table.
Viewing Multiple Widgets
You can view multiple widgets on the Voice Monitor Dashboard by adding as many widgets as you want. For more information, see Monitoring Multiple Agents.