Download PDF
Download page Accessing the Agent Desktop.
Accessing the Agent Desktop
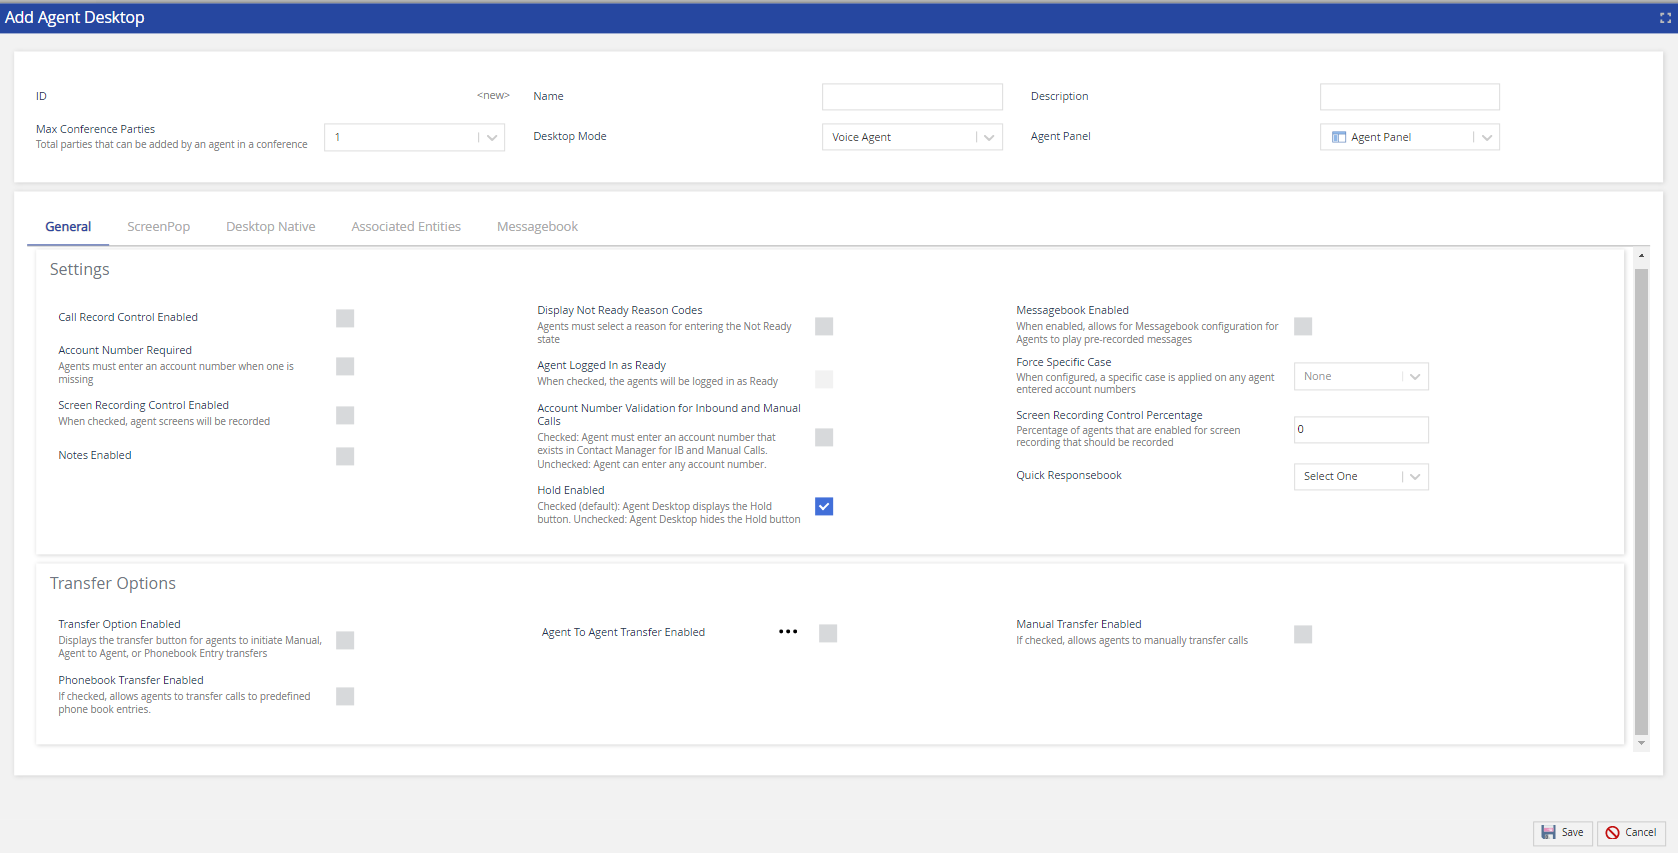
To access the Agent Desktop screen, go to Configure > Agents > Agent Desktop. The Agent Desktop screen appears as shown below. Use the Filter option to search for specific desktops.
Filter options can include characters, numerical values, and special characters (such as _, -, *).
To create a new agent desktop, click Add. To modify an existing agent desktop, double-click the required row.

The following fields are available in the main section.
| Field | Description | ||||||||
|---|---|---|---|---|---|---|---|---|---|
| ID | LiveVox assigned a unique desktop identifier code. | ||||||||
| Name | Displays the name of the selected agent desktop. | ||||||||
| Description | Displays a brief description of the selected agent desktop. | ||||||||
| Max Conference Parties | Select the maximum number of participants that can be added by an agent into the conference (minimum value is 1, and the maximum value is 10). | ||||||||
| Desktop Mode | Select the agent desktop mode from the drop-down list. Available options are:
| ||||||||
| Agent Panel | Allows you to select the agent desktop options: Agent Panel, Agent Panel + Extended Panel, and Agent Panel + Designer. For details, see above the Desktop Mode field description. |
The Agent Desktop editor offers the following tabs:
| Tab | Description |
|---|---|
| General | Provides different options to set the current agent desktop and call transfer options. For detailed information, see the Agent Desktop: General Tab section. |
| ScreenPop | Allows you to set the data fields shown on the agent desktop with the sequence. For detailed information, see the Agent Desktop: ScreenPop Tab section. |
| Desktop Native | Allows you to set configurations for an agent's full-screen recording and .NET functionality. For detailed information, see Agent Desktop: Desktop Native Tab section. |
| Associated Entities | Displays the services that utilize the selected desktop. For detailed information, see the Agent Desktop: Associated Entities Tab section. |
| Change History | The Change History tab tracks and displays the changes made to the agent desktop. For detailed information, see the Agent Desktop: Change History Tab section. |
| Extended Panel | The Extended Panel tab allows users to configure the extended panel widgets of the selected agent desktop. For more information, see the Agent Desktop: Extended Panel Tab section. |
| Designer | The Designer tab allows you to configure the designer desktop, which can be assigned to the required agent desktop. For more information, see Contact Center CRM Agent Desktop section. |
| Messagebook | The Messagebook tab allows you to configure the Messagebook entries for the selected agent desktop. For more information, see the Agent Desktop: Messagebook section. |