Download PDF
Download page LiveVox System Status.
LiveVox System Status
Introduction
The LiveVox Status Page provides information about the operational state of the LiveVox platform components and the reported incidents. In addition, the Status Page contains updates related to system outages and maintenance, live and historical data on system performance, and service interruptions.
Accessing the Status Page
Before You Begin
Ensure that your account is set up by the LiveVox Customer Care Team.
To access the Status Page:
- Go to https://statuspage.livevox.com/.
- Enter your email address and password, and then click AUTHENTICATE.
The LiveVox Status Page appears.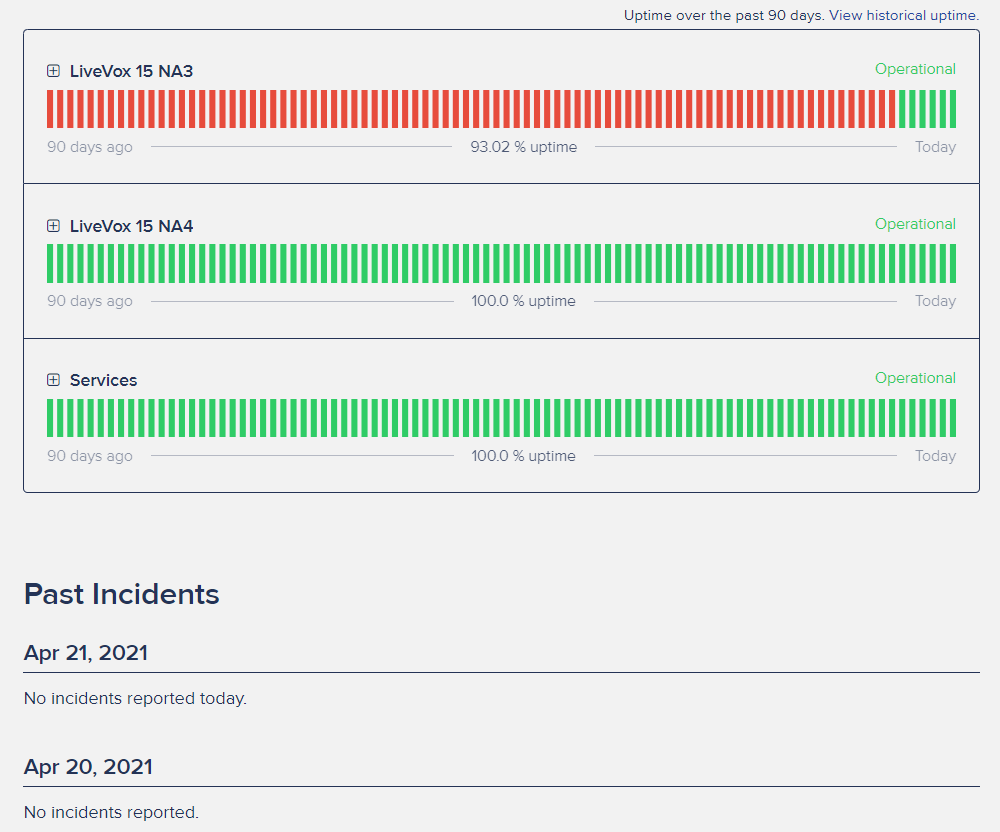
Status Page
Status Information
The following information about the status is displayed on the Status Page:
Overall status (for example, Operational) for the last 90 days, including the current day.
Overall uptime percentage for the last 90 days, including the current day.
Status for each day represented as a red or green bar.
Status Information Levels
The status information is displayed at the following levels:
Platform environment (for example, LiveVox 15 NA3): The information at this level is displayed by default within a section.
You can see the number of components that suffered an outage for a given day by hovering over the red bar for that day.
Component within a platform environment (for example, ACD within LiveVox 15 NA3): The information at this level is displayed when you click the plus icon
 within a section.
You can see the duration of an outage for a given day, including the related incidents, by hovering over the red bar for that day.
Status Indicators
- The status Operational (green) indicates that the components are operating with no issues.
- The status Service Disruption (red) indicates that a component is operating with issues.
The status Partial Service Disruption (orange) indicates that a specific version of a component is affected, however, the instance of the component that you are using is unaffected.
A service disruption that lasts more than 10 minutes generates an incident ticket.
- A red bar indicates that a component suffered an outage.
- A green bar indicates that no downtime was recorded.
Past Incidents
The Status Page also displays the Past Incidents section, which contains a list of the reported incidents and maintenance for the last fifteen days, including the current day.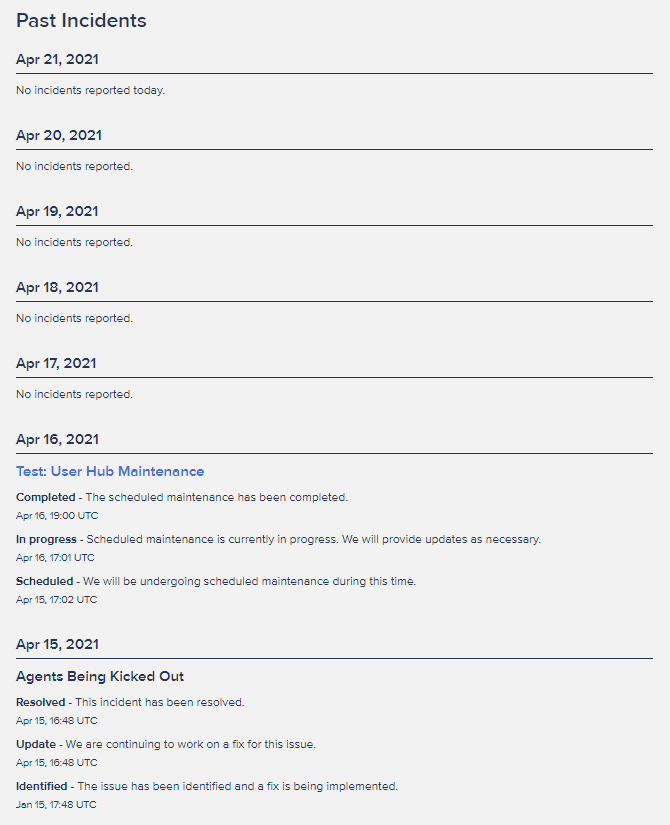
- You can access an incident or maintenance to see which platform, environment, and component were affected by clicking the title of the incident or maintenance.
- You can go back to the home page from the incident or maintenance page by clicking Current Status.
Accessing Historical Uptime
To access the historical uptime, on the Status Page, click View historical uptime.
A page displaying the Uptime tab appears.
- A red bar indicates that a component suffered an outage.
- A green bar indicates that no downtime was recorded for the associated day.
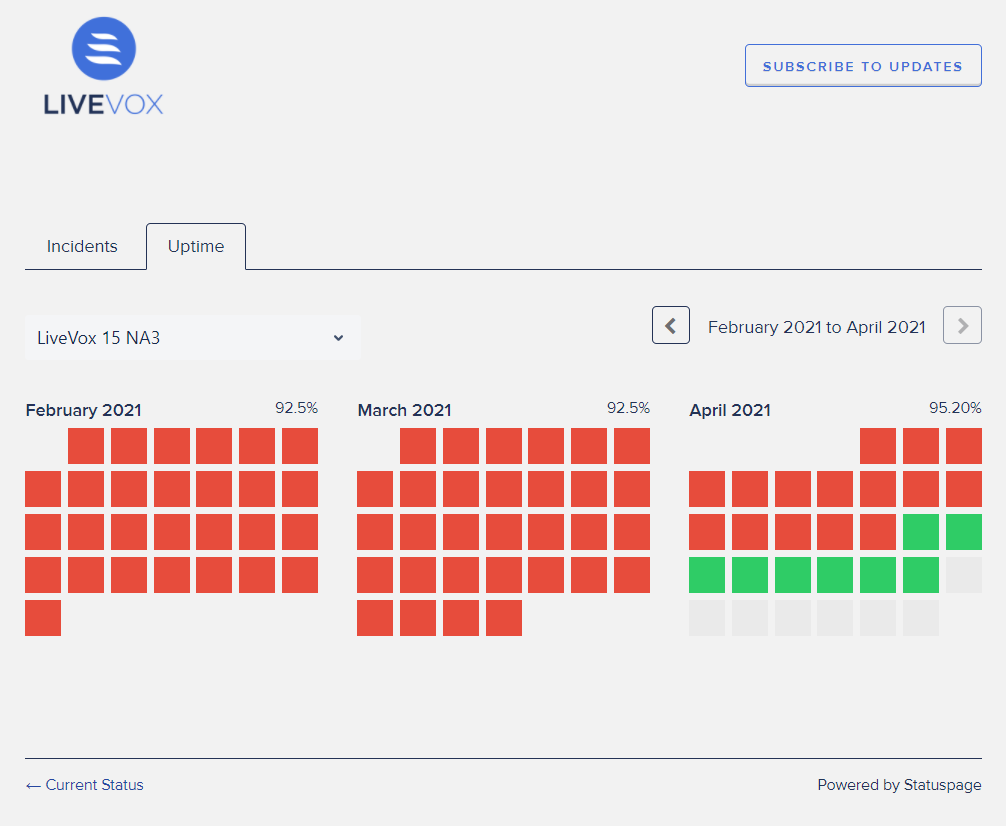
- You can filter the uptime based on a component by using the drop-down list box that displays the platform environment.
- You can access the history for a different period by using the navigation icons that appear on either side of the period (for example, February 2021 to April 2021).
- You can see the number of components that suffered an outage for a given day by hovering over the red bar for that day.
- You can go back to the home page from the incident or maintenance page by clicking Current Status.
Accessing Incident History
To access the history of all incidents, on the Status Page, in the Past Incidents section, click Incident History.
A page displaying the Incidents tab appears.
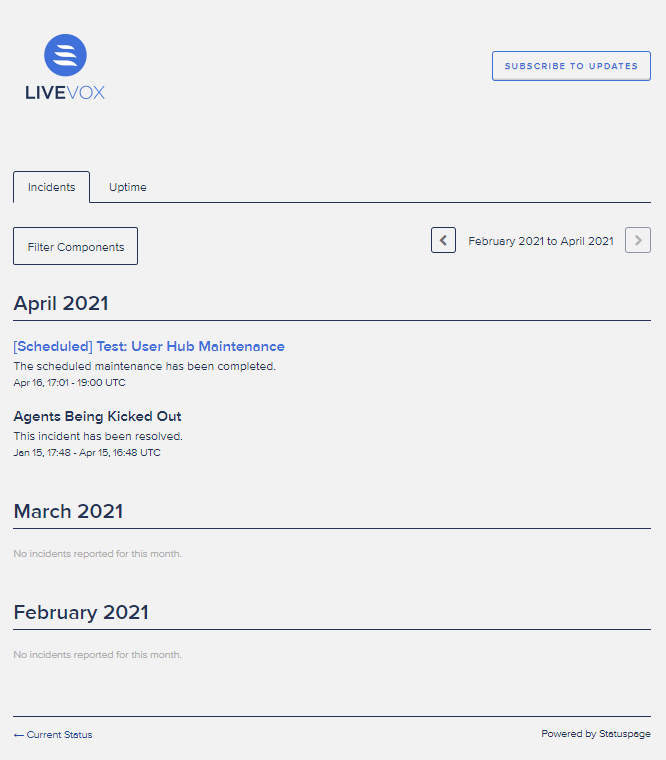
- You can filter the incidents based on a component by using Filter Components.
- You can access the history for a different period by using the navigation icons that appear on either side of the period (for example, February 2021 to April 2021).
- You can go back to the home page from the incident or maintenance page by clicking Current Status.
Subscribing to Updates
You can subscribe to system updates and incidents via email or text message. If you have subscribed via email, you are notified of incidents when they are created, updated, or resolved. If you have subscribed via text message, you are notified of incidents when they are created and resolved.
To subscribe to updates:
- On the Status Page, click SUBSCRIBE TO UPDATES.
A pop-up window appears. If you want to subscribe via email:
Click the mail icon
 , and then click SUBSCRIBE VIA EMAIL.
A page displaying the Components section appears. This section displays the components for which you can receive updates. By default, the checkboxes next to all components are selected.Clear the checkboxes next to the components for which you do not want to receive updates.
- You can clear all checkboxes simultaneously by clicking Select none.
- You can select all checkboxes simultaneously by clicking Select all.
Click SAVE.
You are subscribed to updates via email. An email from LiveVox Status Page confirming your subscription is sent to you.
- If you want to subscribe via text message:
- Click the phone icon
 .
. - In the drop-down list box, select your country.
- In the text box, enter your phone number.
- Click SUBSCRIBE VIA TEXT MESSAGE.
A page displaying the Components section appears. This section displays the components for which you can receive updates. By default, the checkboxes next to all components are selected. Clear the checkboxes next to the components for which you do not want to receive updates.
- You can clear all checkboxes simultaneously by clicking Select none.
- You can select all checkboxes simultaneously by clicking Select all.
- Click SAVE.
You are subscribed to updates via text message.
- Click the phone icon
Managing Your Subscription
You can unsubscribe from updates or modify your subscription preferences.
LiveVox continues to add new components. You can manage your subscription to receive notifications for the new components.
To manage your subscription:
- On the Status Page, click SUBSCRIBE TO UPDATES.
A pop-up window appears. If you want to manage your email subscription:
Click the mail icon
, and then click MANAGE MY SUBSCRIPTION.
A page displaying the Subscriber and Components sections appears. In the Components section, the checkboxes next to components for which you receive updates are selected.- If you want to unsubscribe from updates via email:
- In the Subscriber section, click Unsubscribe from updates.
The Unsubscribe window appears. Click UNSUBSCRIBE FROM UPDATES.
You are unsubscribed from updates via email. An email from LiveVox Status Page confirming that you are no longer subscribed to updates is sent to you.You can resubscribe to updates.
- In the Subscriber section, click Unsubscribe from updates.
- If you want to modify your email subscription preferences, in the Components section, select the checkboxes next to the components for which you want to receive updates, and clear the checkboxes next to the components for which you do not want to receive updates.
- Click SAVE.
Your subscription preferences are saved.
If you want to manage your text message subscription:
- Click the phone icon.
- In the drop-down list box, select your country.
- In the text box, enter your phone number.
- Click SUBSCRIBE VIA TEXT MESSAGE.
A page displaying the Subscriber and Components sections appears. In the Components section, the checkboxes next to components for which you receive updates are selected. - If you want to unsubscribe from updates via text message:
- In the Subscriber section, click Unsubscribe from updates.
The Unsubscribe window appears. Click UNSUBSCRIBE FROM UPDATES.
You are unsubscribed from updates via text message.You can resubscribe to updates.
- In the Subscriber section, click Unsubscribe from updates.
- If you want to modify your text message subscription preferences, in the Components section, select the checkboxes next to the components for which you want to receive updates, and clear the checkboxes next to the components for which you do not want to receive updates.
- Click SAVE.
Your subscription preferences are saved.
- Click the phone icon