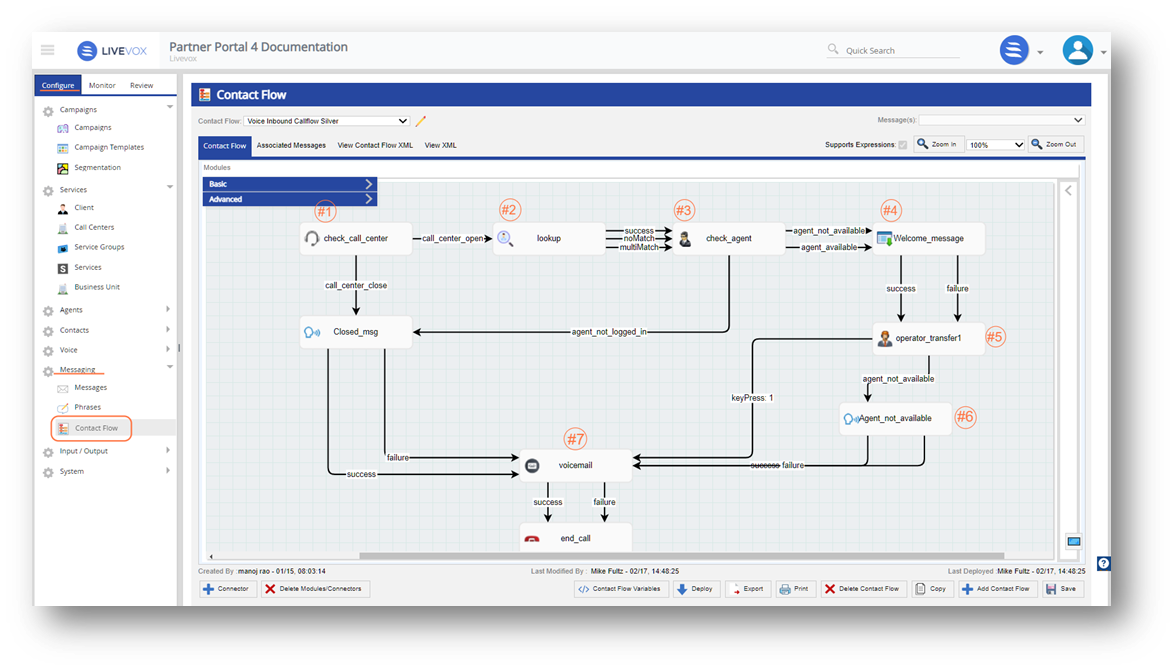
#1 Checks if call center is open. Yes = move to look up, No = Closed message
#2 Looks up account and checks for agent availability
#3 No agents logged in, routes to closed message
#4 Agents logged in, plays a welcome message, and hold music
#5 Transfers to an available agent
#6 Transfers to Voice Mail after closed message plays, Designated hold time expires, or press #1 by customer
Flow Add a Text-To-Speech Phrase: Creating Company Name for Contact Flow
1. Navigate to Configure > Messaging > Phrases > Add Phrases
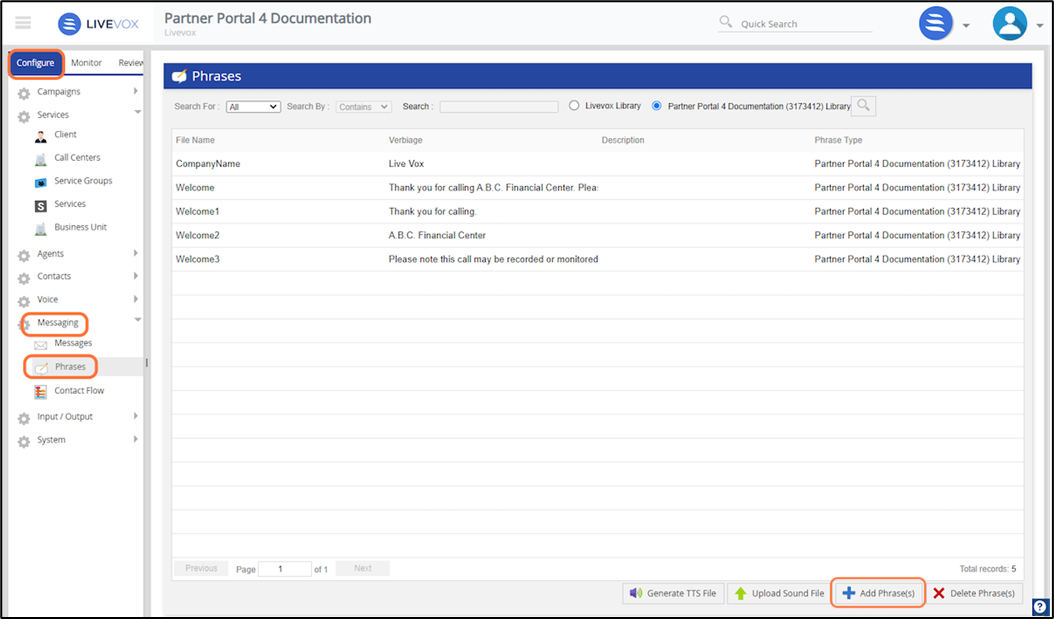
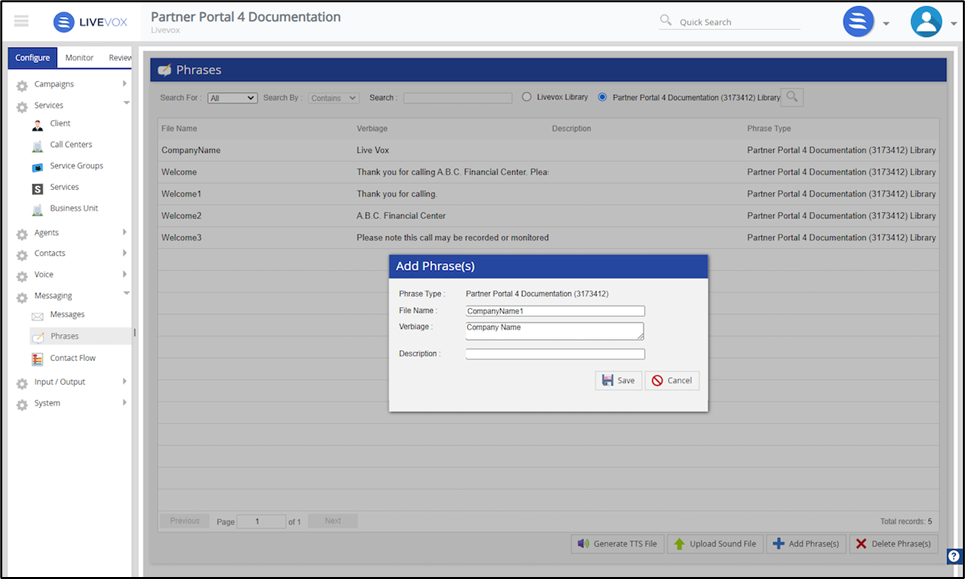
2. Enter File Name (no spaces) and the Verbiage you want the call flow to speak and click Save
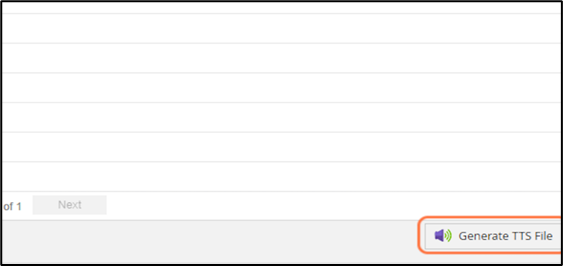
3. Click and highlight the phrase to select it, then click on Generate TTS File
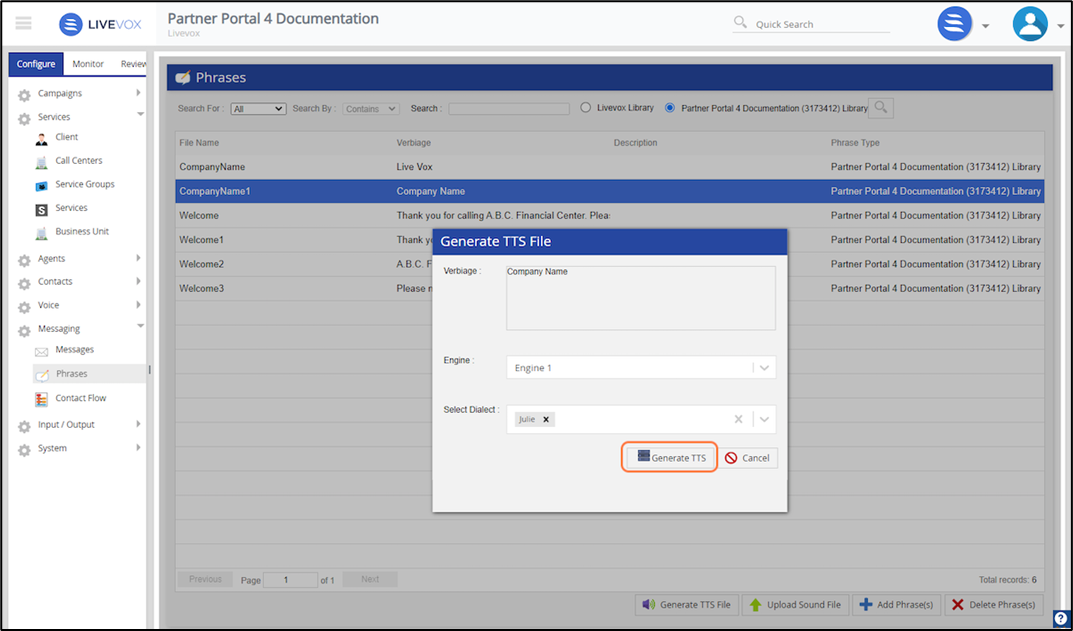
4. Select a Voice Engine (3 to choose from). Select Dialect. Julie for English Female and Bob for English Male. Click Generate TTS
5. To listen to the TTS you generated, open the selected phrase once again to the Edit Phrase window. Click the green play button next to the voice you have chosen (Julie or Bob).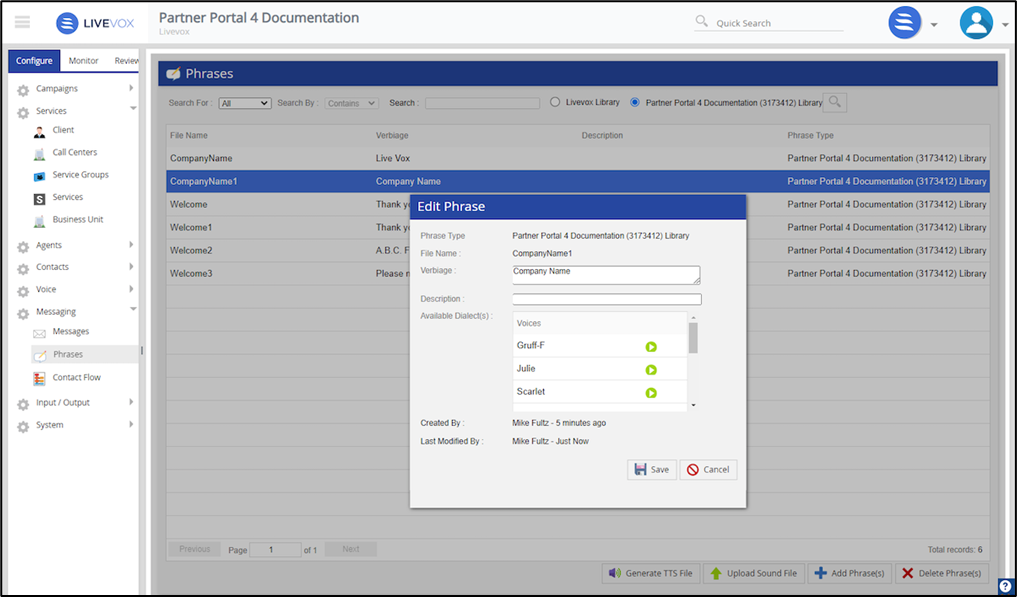
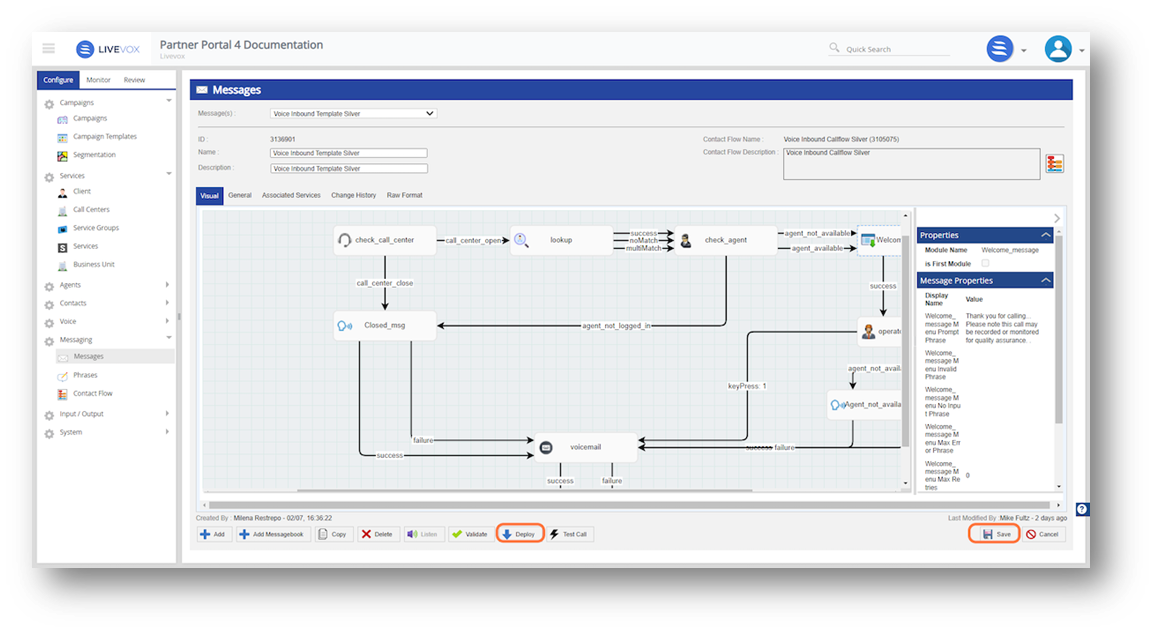
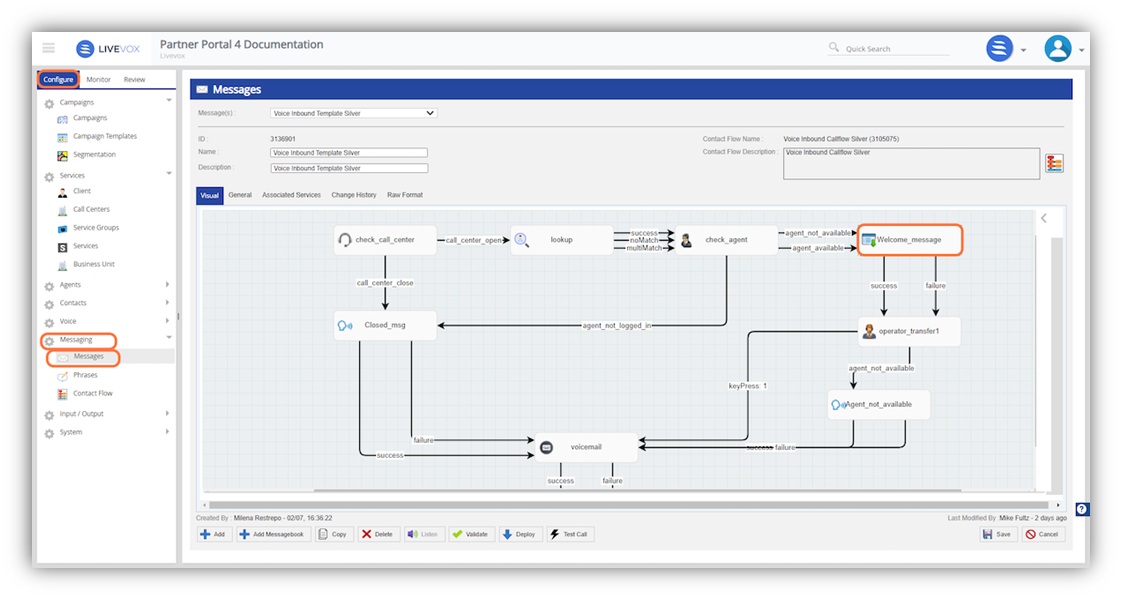
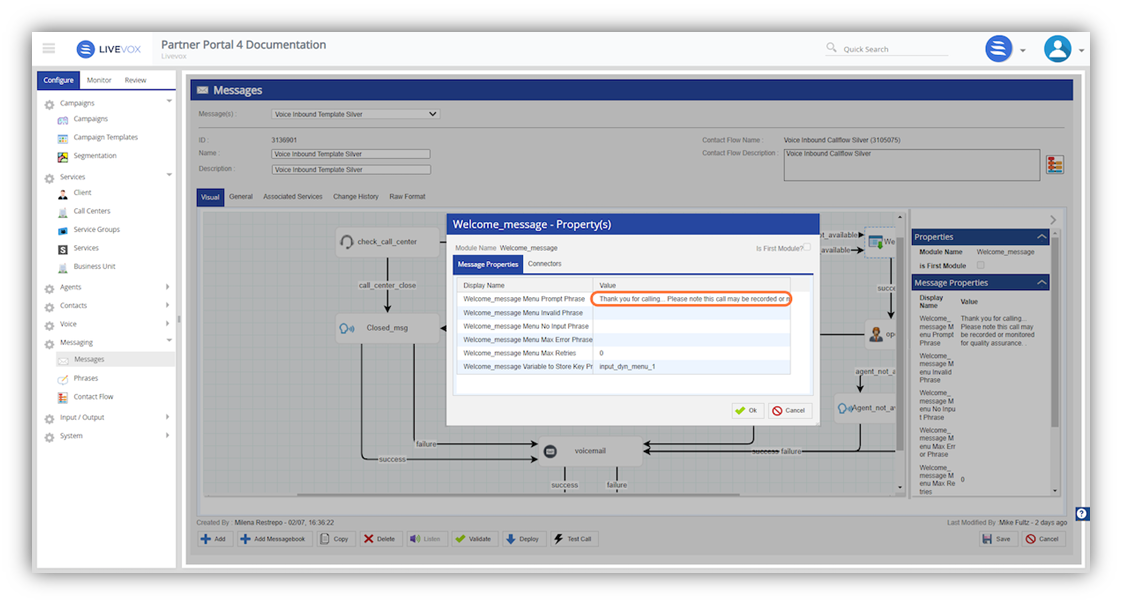
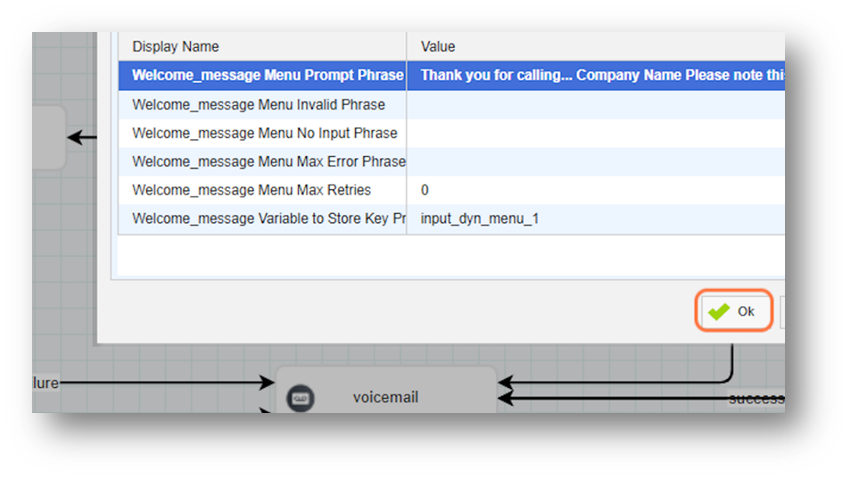
1. Navigate to Configure > Messaging > Messages
- Choose your message template name "Voice Inbound Template Silver"
- From the Visual tab, double click the Welcome_message module to edit the properties
2. Double-click the line with display name "Welcome_message Menu Prompt Phrase"
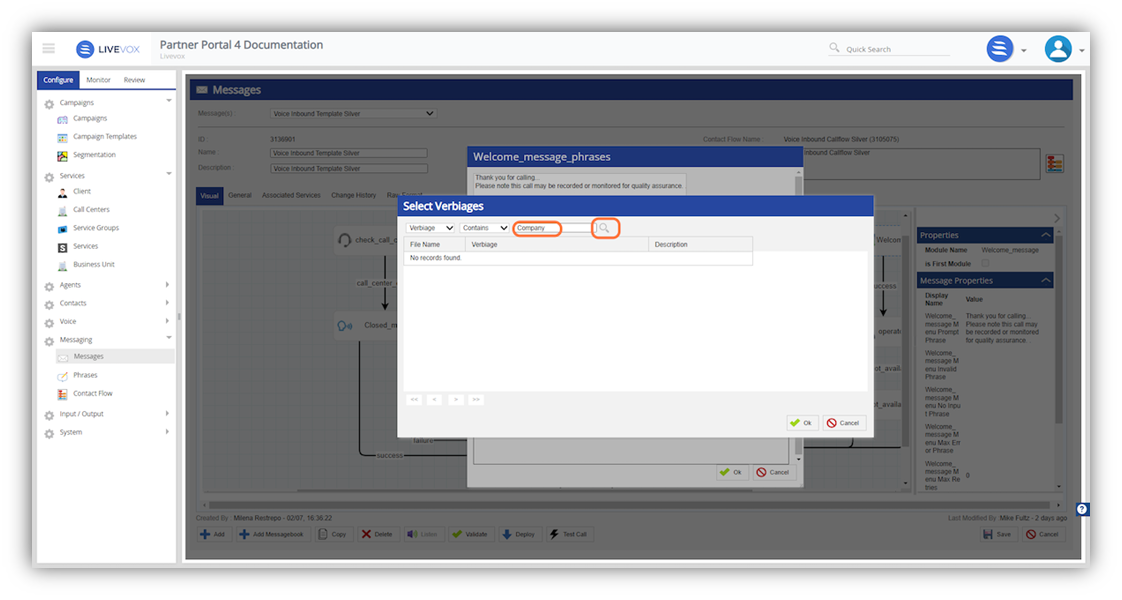
3. Click on Add Verbiage

4. Type the file name of the TTS you generated and click the search icon
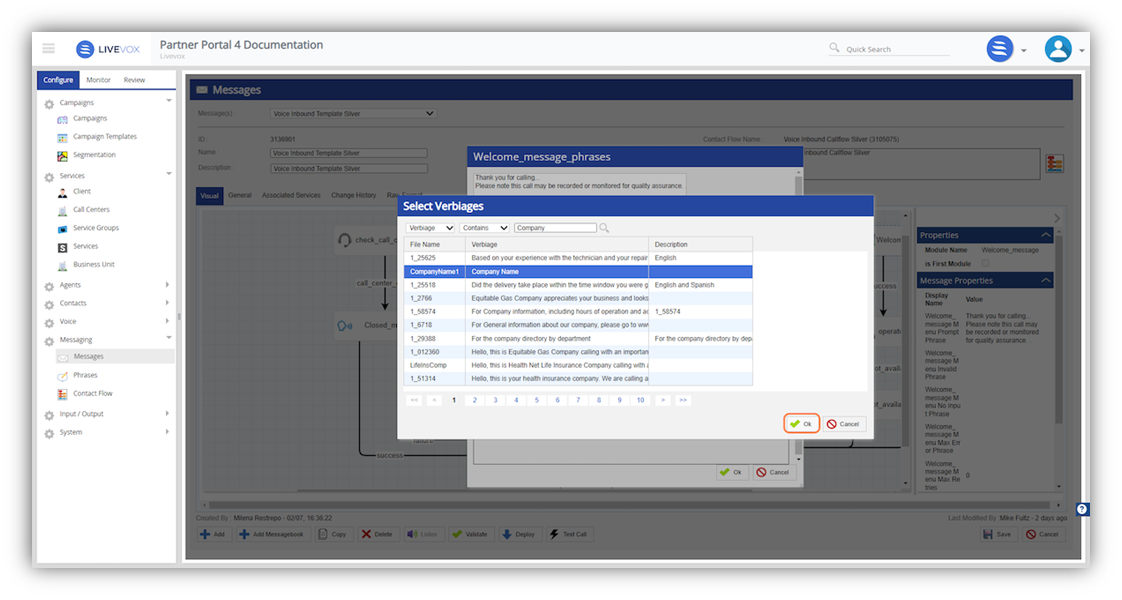
5. Highlight your file name and click OK
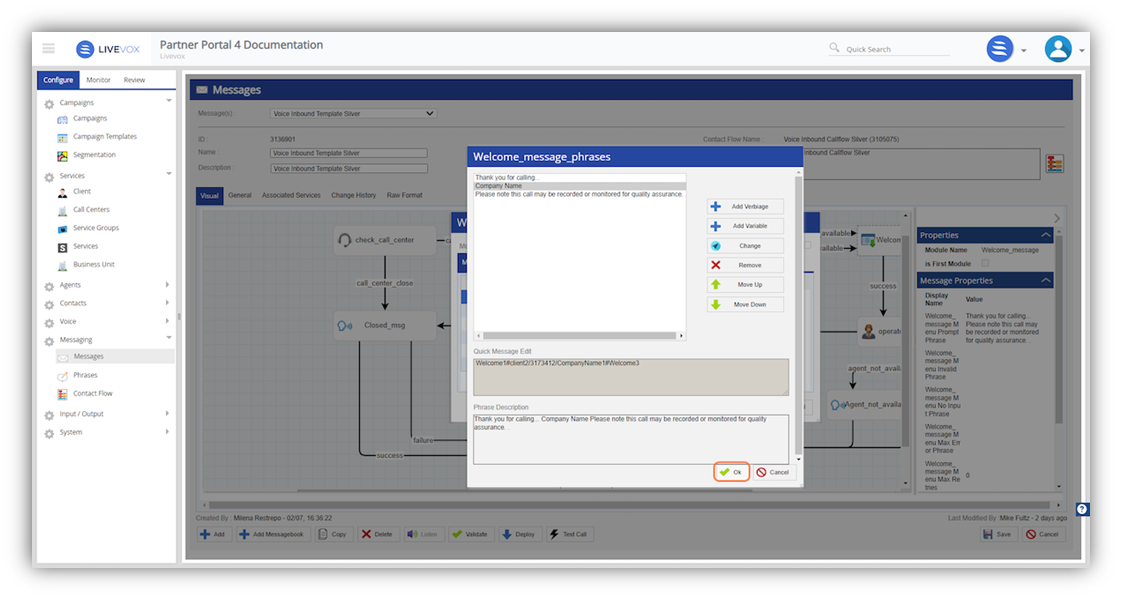
6. To re-order the phrases, click on your company name and click the Move Up button

7. Click on Ok
8. Click on Ok
9. Click Save first, then click Deploy