Download page Routing Calls to Agents within a Service Group.
Routing Calls to Agents within a Service Group
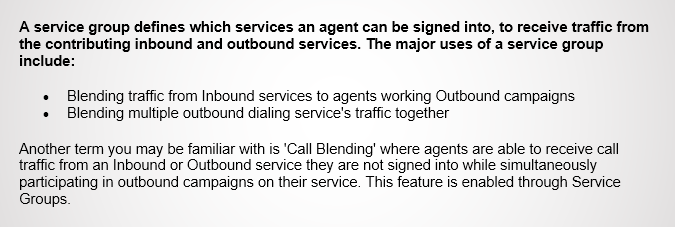
Navigate to Configure > Services > Service Groups
Under the General tab, click the Add button.
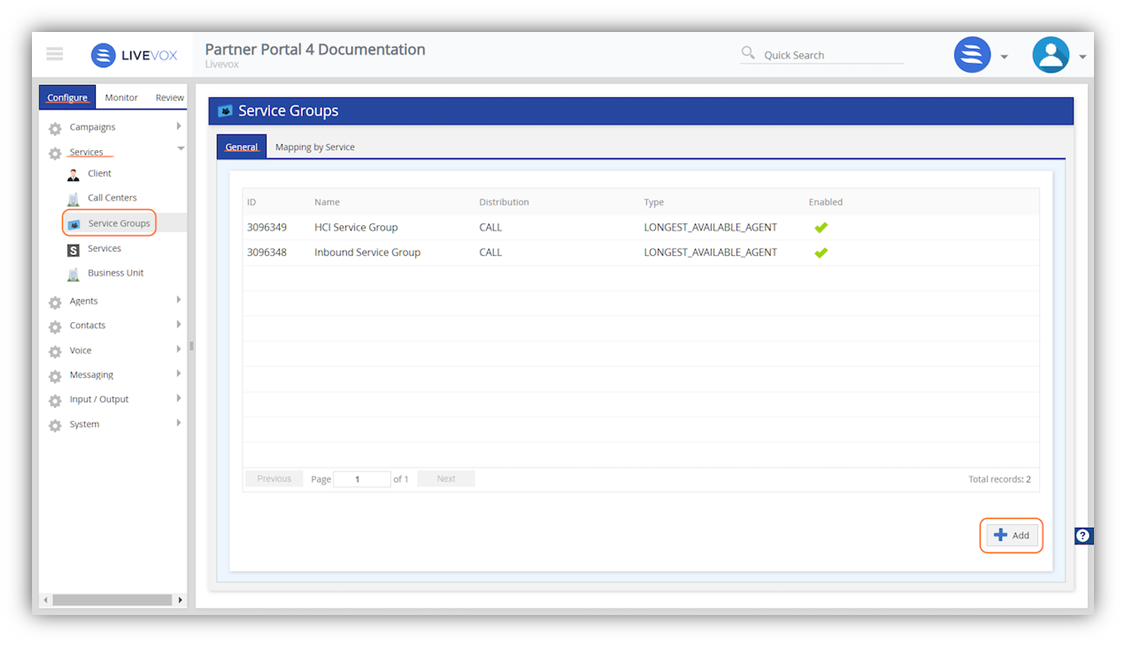
Edit Service Group window:
Name: create a name for the Service Group
For our example, we have chosen 'Seattle QC Group'
Is Enabled: check this box to allow the Service Group to be a visible choice when assigning to the Service's routing
Type: there are 4 types of routing options to choose from, based on your routing needs
Longest Agent Available:
The call is transferred to the agent waiting in a "ready" status the longest
Strict Classification:
The call is transferred to the agent with the assigned "Agent Skill"
Strict Overflow:
The call is first transferred to the agent with the assigned highest "Proficiency"; assigned in the message template
The platform first searches only for agents with Proficiency 1 for the wait time you specify. After that, the search expands to include Proficiency 1 and 2 for the additional time specified for Proficiency 2, and so on.
Uniform Distribution: used for "Clicker" service types only
Agents assigned to the specific HCI/HTI services can initiate outbound calls
Edit Service Group window: under the General tab
Starting with the "Available" column, search for the service you want to add to this service group.
Click the service name to add it to the "Assigned column
Click the Save button
Edit Service Group window: under the General tab 2
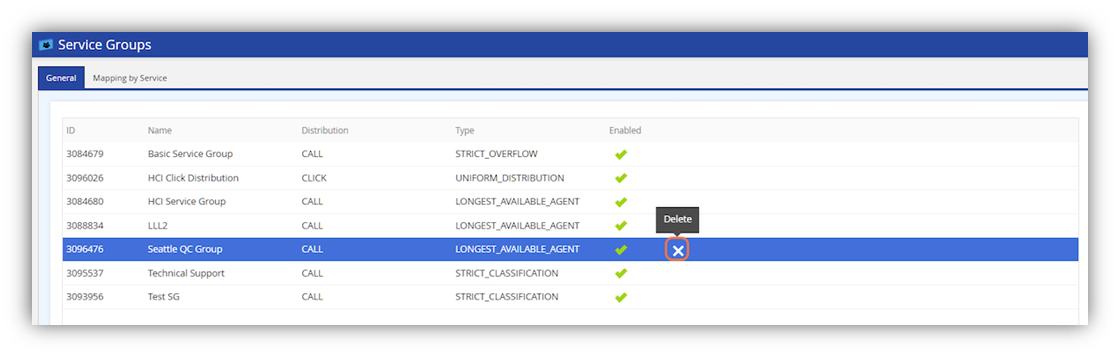
Once you save, you will be back at the main Service Group window
From here you can choose to edit or delete and existing Service Group. Please note that you cannot delete a Service Group unless you unassign it from all services.
Additionally, you can choose to assign multiple Service Groups to a Service by navigating to the Mapping by Service tab
Choose the service from the Service drop-down menu
Click on the Service Group name from the Available Groups column to add it to the Assigned Groups column
Click on Save
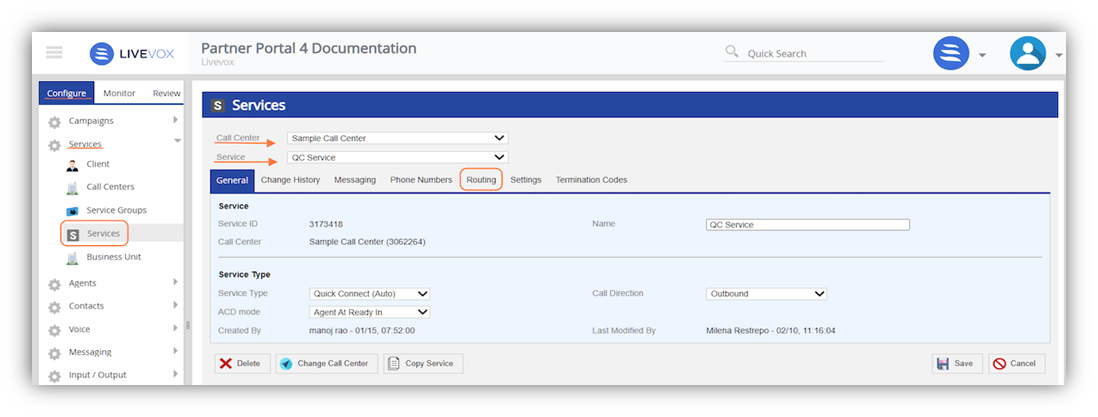
Now that your Service Group has been created, we will need to assign that Service Group to the Routing tab of the Services Editor.
Navigate to Configure > Services > Services
Choose your Call Center from the drop-down menu
Choose your Service from the drop-down menu
Click on the Routing tab
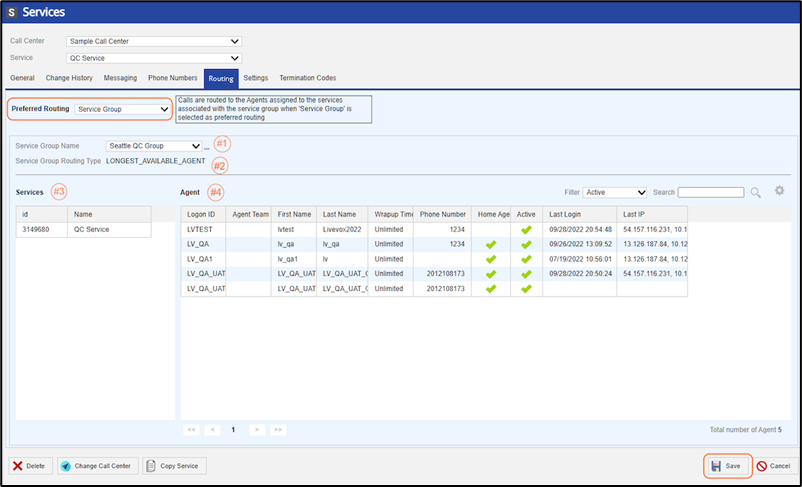
Services window > Routing tab
Set the Preferred Routing to Service Group and click the Save button
Choose the Service Group name from the drop-down list
The Routing Type will automatically populate based on the Service Group's configuration
Displays a list of services that are included in the Service Group
Displays a list of agents with the services assigned and ability to handle these calls