Download PDF
Download page Working with a Ticket Record.
Working with a Ticket Record
his section contains information about the options that you see when you open a ticket.
Accessing a Ticket
To access a Ticket from the table in the Ticket List or Ticketing section, double-click the row displaying the Ticket. The ticket is opened with the Overview, Detail, Links, Attachments, Comments, Tasks, Submitted Form, and History tabs. 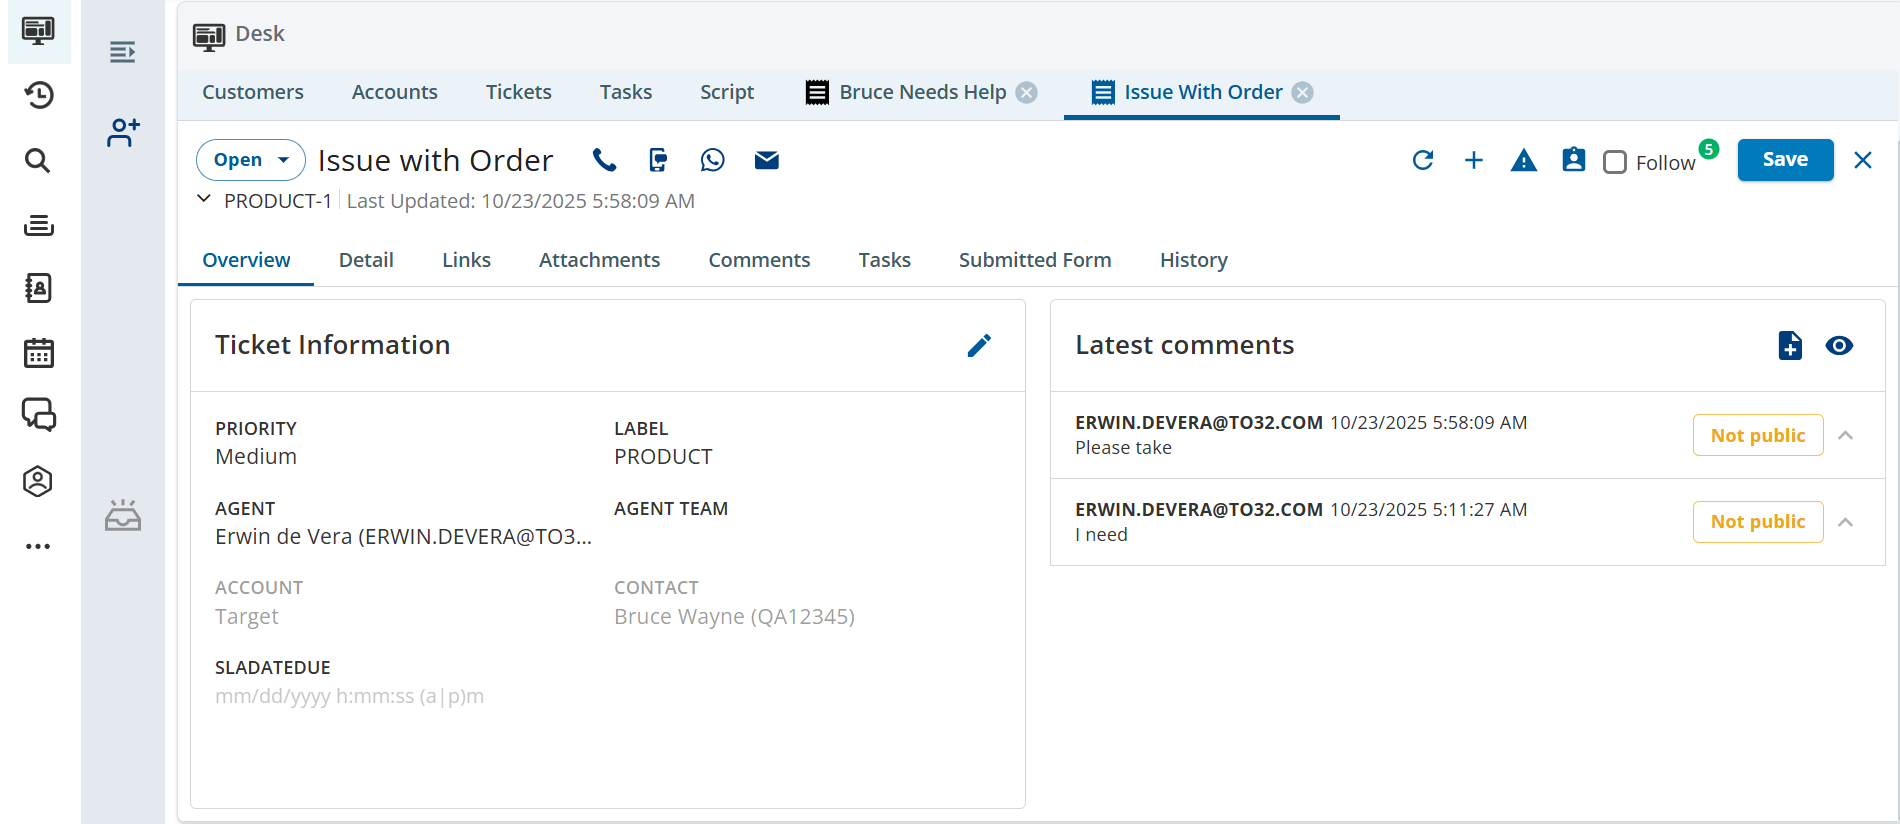
When you open a ticket, you can perform the following tasks:
- Update Status: Click the Open option to change the status of the ticket and select the required status from the drop-down list.
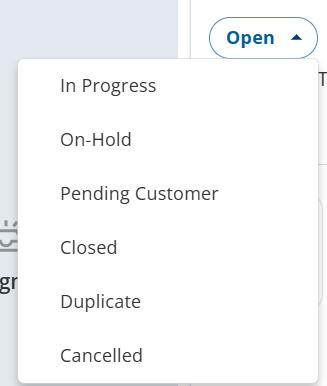
- Contact a customer: You can call, SMS, WhatsApp, or email the customer using the icons next to the Issue with Order.

- Hover on the required icon.
- You are presented with the configured phone number or email ID. The screenshot below shows configured sample phone numbers for the call option.
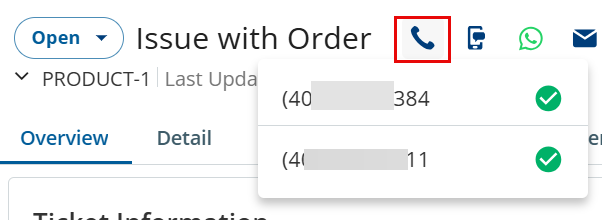
- Click the required option. You are presented with the following window:
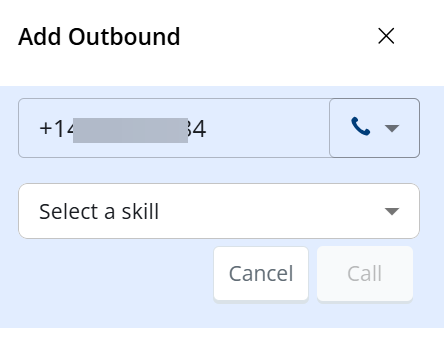
- Select the required skill from the drop-down list.
- Click Call to connect.
- Various Actions on a Ticket: You can refresh, create a new ticket, create an alert, assign the task to yourself, or follow the ticket.
- Refresh: Refreshes the ticket screen. If you want to refresh a ticket to see if there are any new updates, click the Refresh
 icon.
- New Ticket: Create a new ticket. Click the New Ticket
 icon. For more details, see the Creating a Ticket section on this page.
- Create Alert: Create an alert.
- Click the Create Alert
 icon.
The Create Alert popup appears.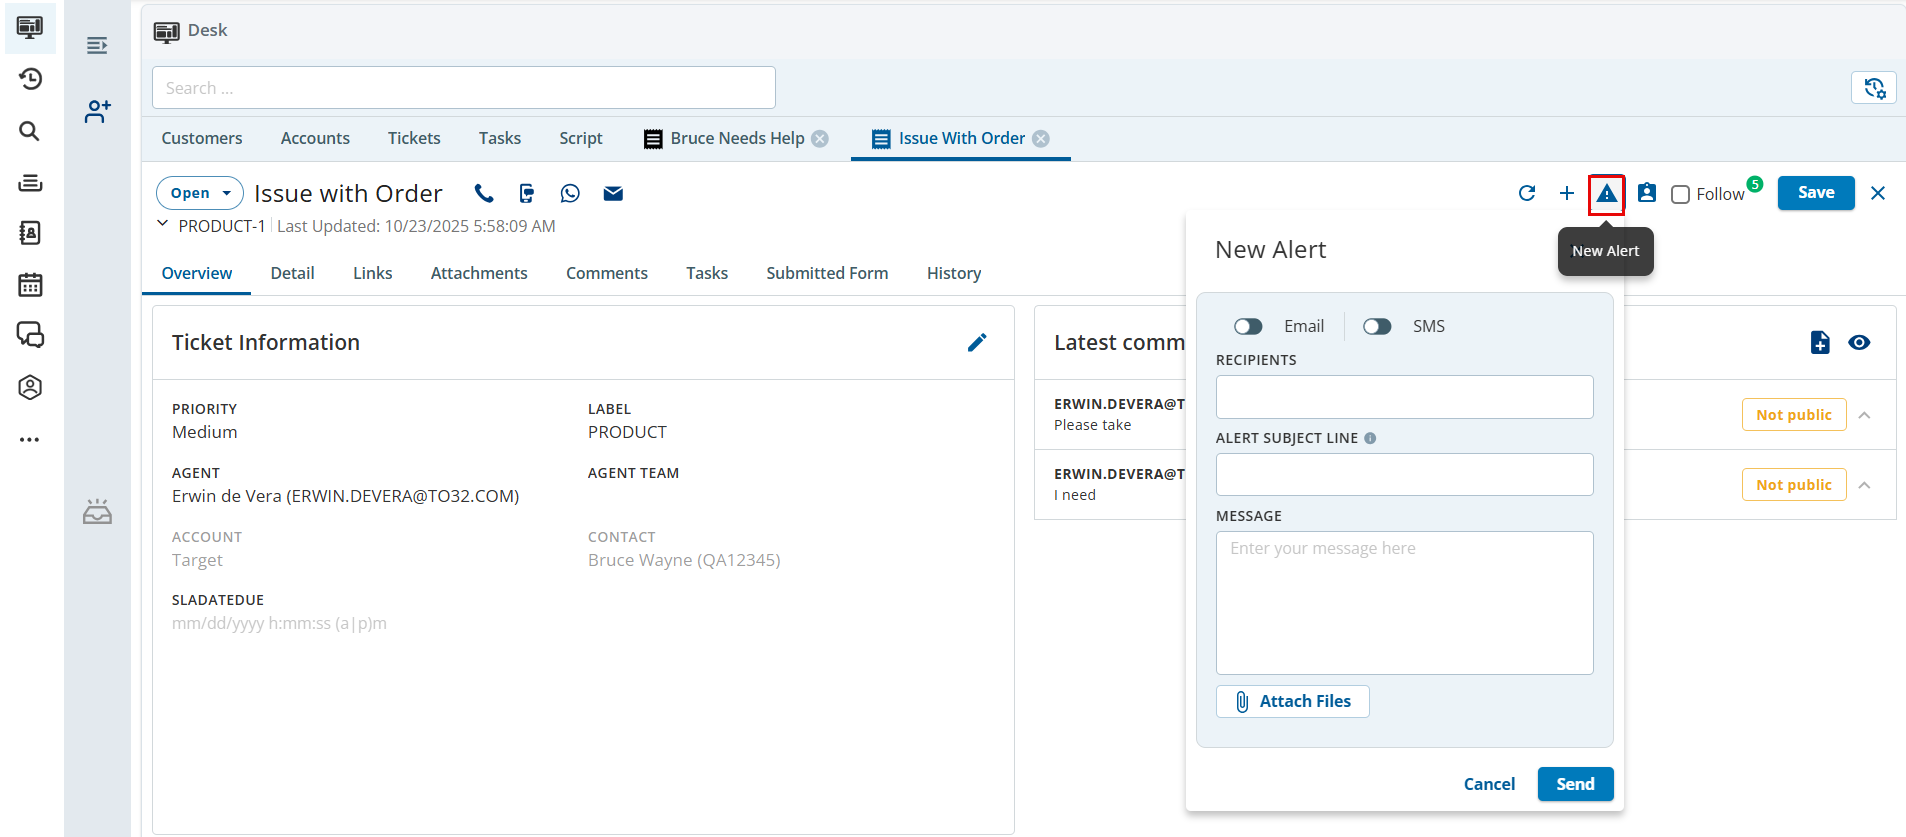
- Specify the values, as required.
The following are the field descriptions in the Create Alert window:
Field Descriptions Email The alerts are sent using email. Click Email to enable this option. SMS The alerts are sent using SMS. Click SMS to enable this option.

This is a Beta feature.
RECIPENTS Select the recipients for whom you want the alert to be triggered.
ALERT SUBJECT LINE Specify the subject for the alert.
MESSAGE Specify the required alert.
Attach Files Attach the file to the alert.
- Click Send and Save.
The alert is saved to the ticket.
- Click the Create Alert
- Assign to Me: To assign a Ticket to yourself, access the ticket and click the Assign to Me icon.
- Follow: The agent/user receives notifications for all updates by following a ticket. You can follow or unfollow a ticket; to follow a ticket, select/deselect the checkbox.

The Follow or Unfollow menu contains the names of all the followers of the ticket. These followers include those who have manually clicked Follow; those who are tagged in the Description field; those who are tagged in the comments on the Comments tab; and those whom your manager has added as Label Followers (that is, users who are automatically added as followers if the ticket has a specific label).
- Refresh: Refreshes the ticket screen. If you want to refresh a ticket to see if there are any new updates, click the Refresh
The Ticket record displays the following tabs.
- Overview: The Overview tab displays the following information:
- Ticket Information
Displays the following fields:
The Overview tab information will differ based on the Ticket Type configuration.
- PRIORITY: Priority of the ticket:
- Default Priority: The Medium priority is available by default in the ticketing section.
- Custom Priorities: These are available only if added in the Settings tab of the Tickets Config section. For example, High, Low, and so on.
- LABEL: Label of the ticket. For example, the CASE portion is the label name in the ticket CASE-1234.
- Default Label: The CASE label is available by default in the ticketing section.
- Custom Labels: These are available only if added in the Settings tab of the Tickets Config section. For example, LVP, ACD, ATG, and so on.
- AGENT: If an agent creates a ticket, their name appears in this field.
- AGENT TEAM: If an agent creates a ticket and the agent is assigned to an agent team, the name of the agent team appears in this field.
- ACCOUNT: Account associated with the ticket.
- CONTACT: Contact associated with the ticket.
- SLADATEDUE: Due date of the ticket.
- PRIORITY: Priority of the ticket:
To edit the ticket information, click the Edit (
 ) icon.
- Latest Comment
Displays all the Latest comments.
- To add notes, click the New Comment (
 ) icon.
- To view all comments, click the View All (
 ) icon. It takes you to the Comments tab. For More information about the Comments tab, see the Comment tab on this page.
- To add notes, click the New Comment (
- Ticket Summary and Resolution Summary
If this feature is enabled, an AI-generated summary and resolution summary are generated when the following conditions are met:
- There are 300 or more characters in ticket descriptions or comments.
- An automated AI task is defined to trigger based on a Close event.
- When a ticket status has been updated to Close.
- Ticket Information
- Detail: The Detail tab displays the following information about a ticket.
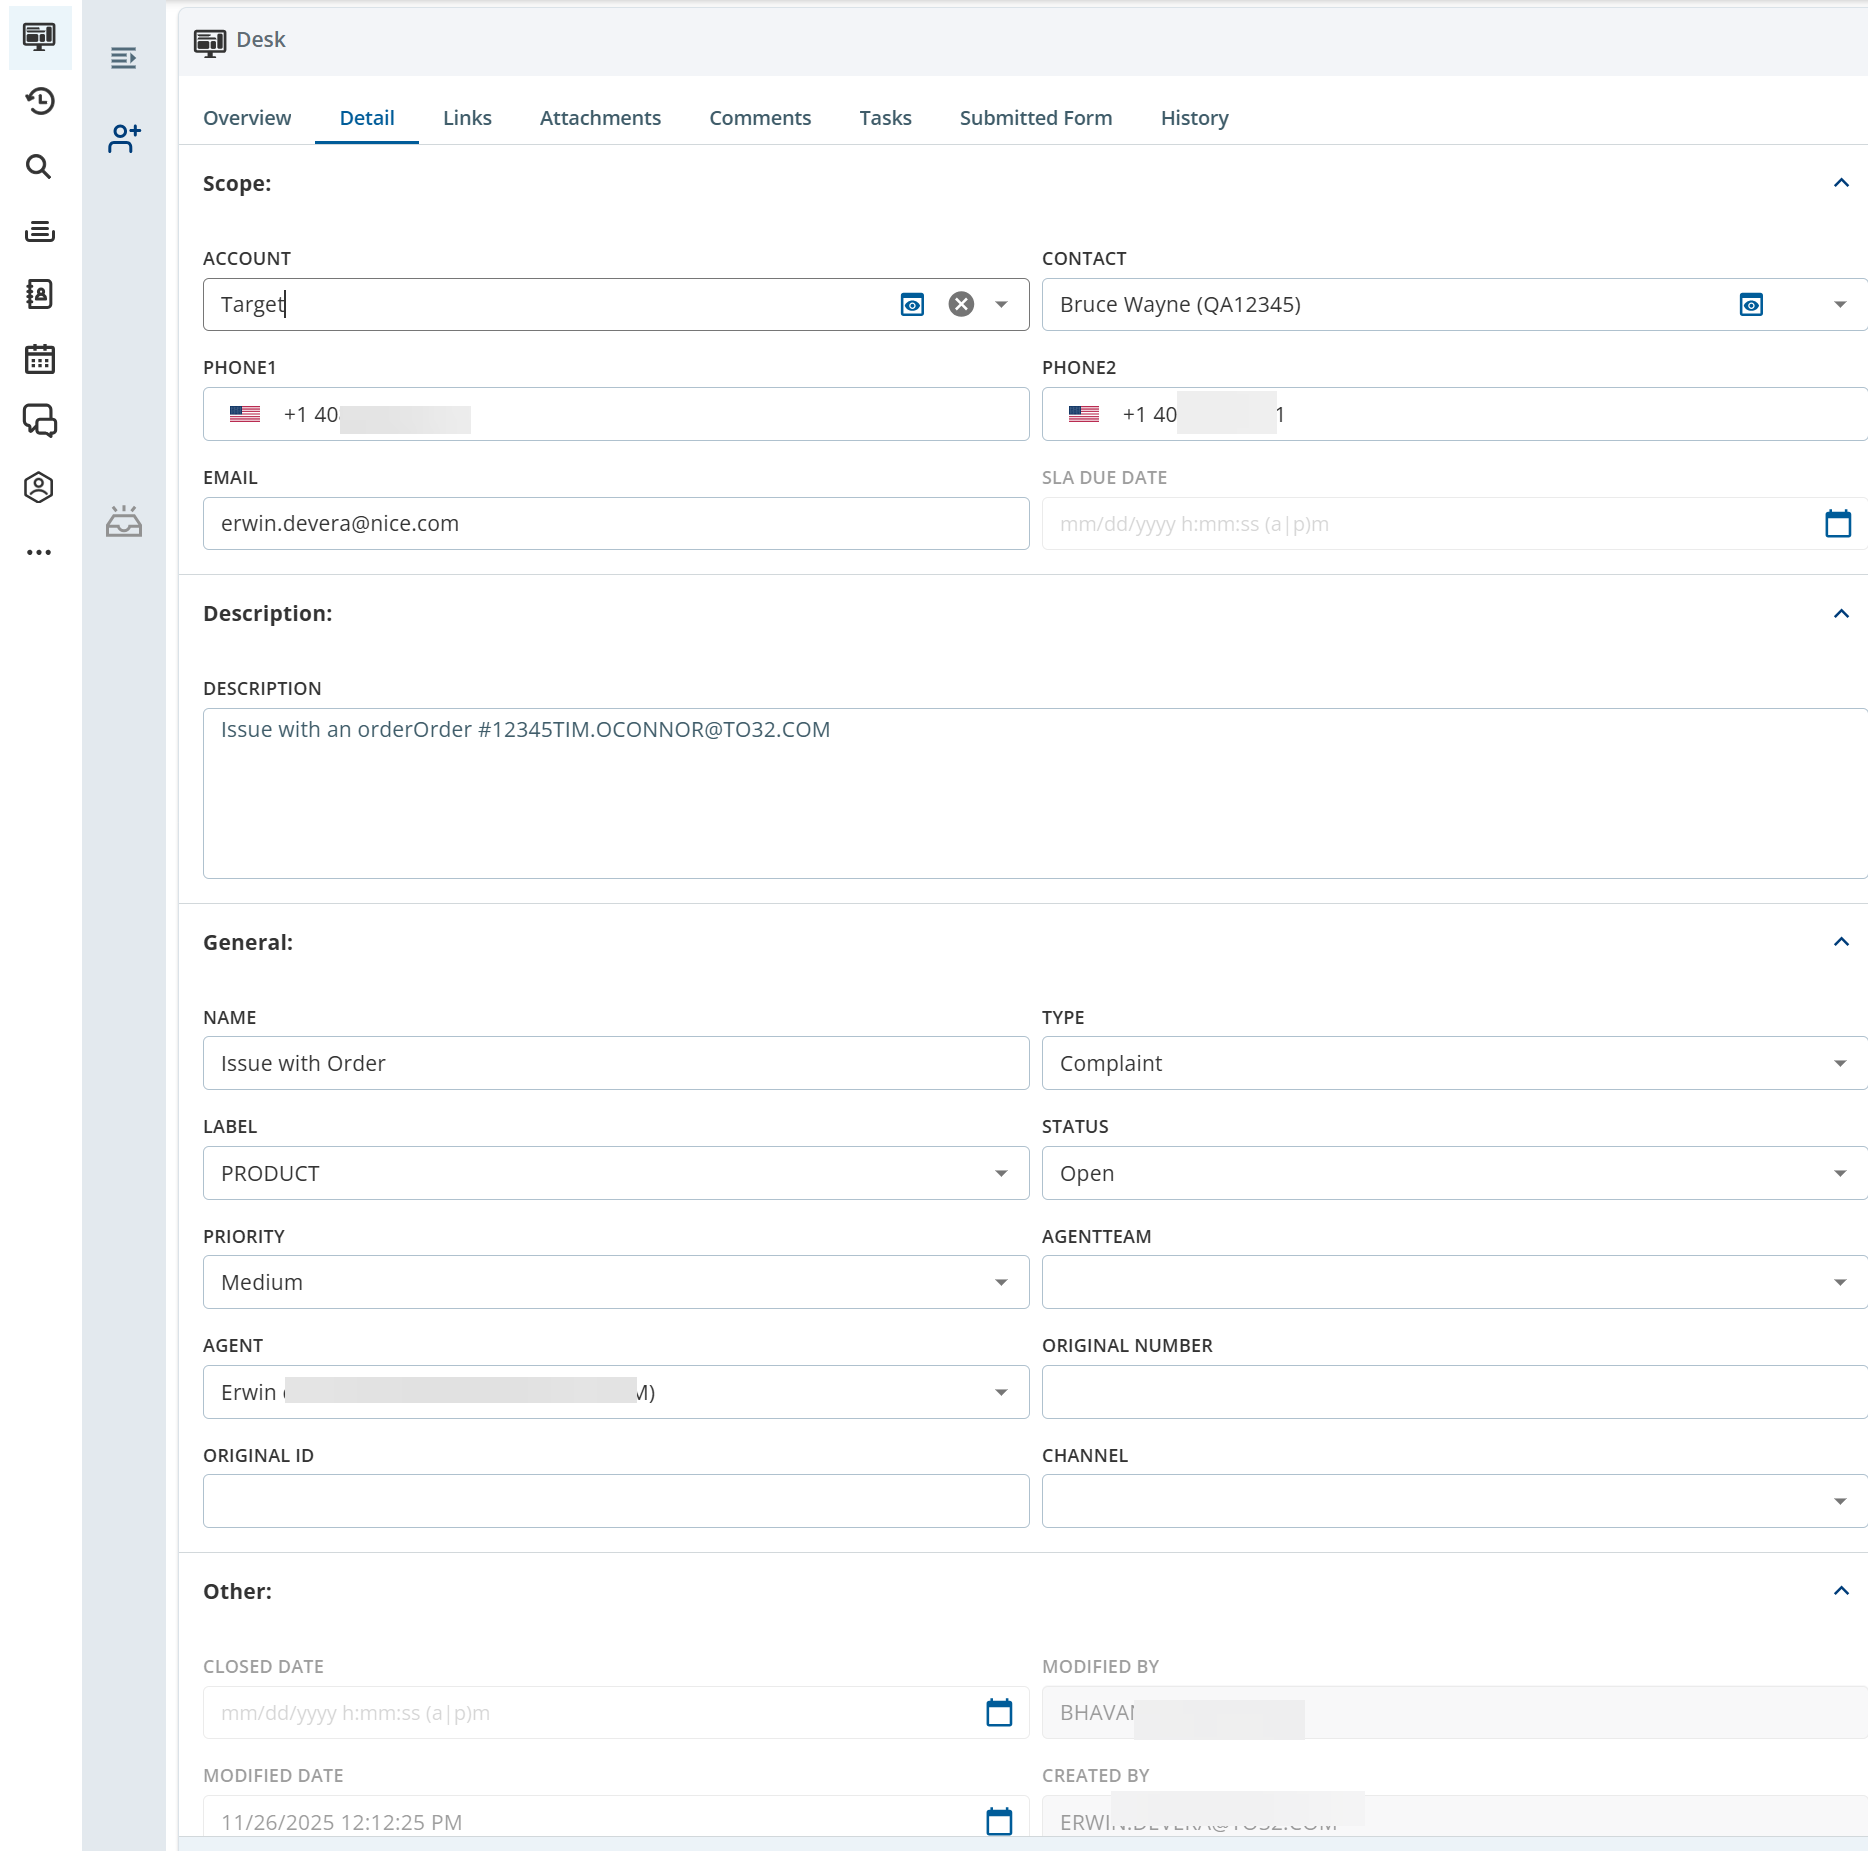
The Detail tab information will differ based on the Ticket Type configuration.
You can associate an account and a contact. Access the ticket and navigate to the Detail tab. Search for the required ACCOUNT and CONTACT. Save the updates.
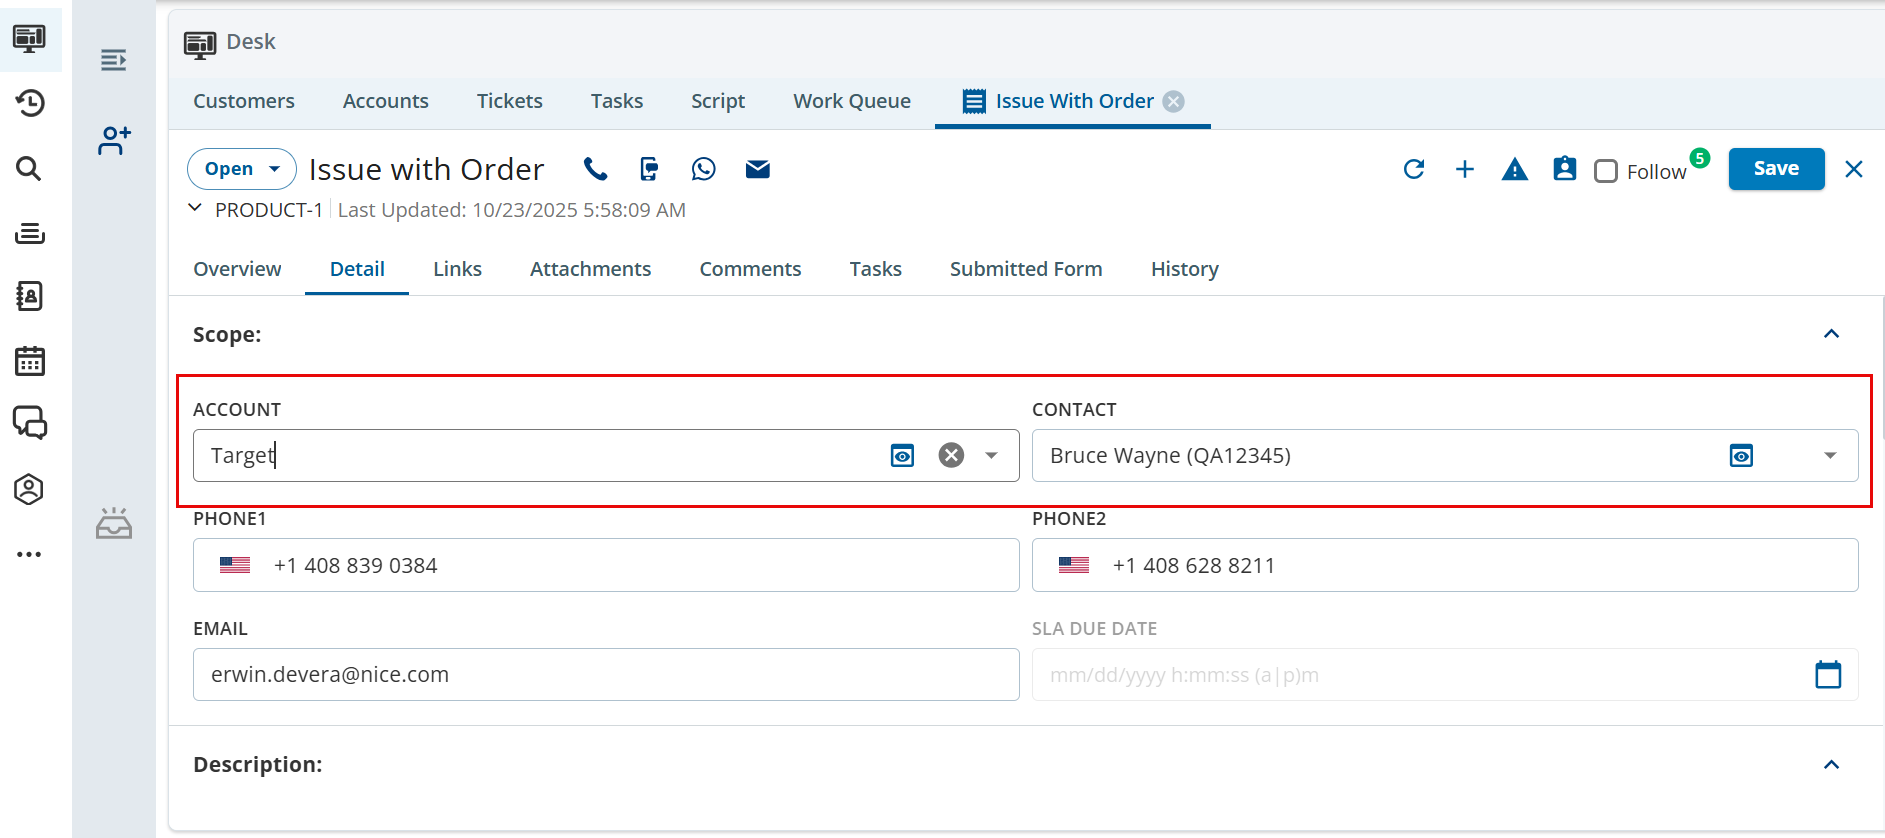
You can view an account or contact by using the Preview (
 ) icon
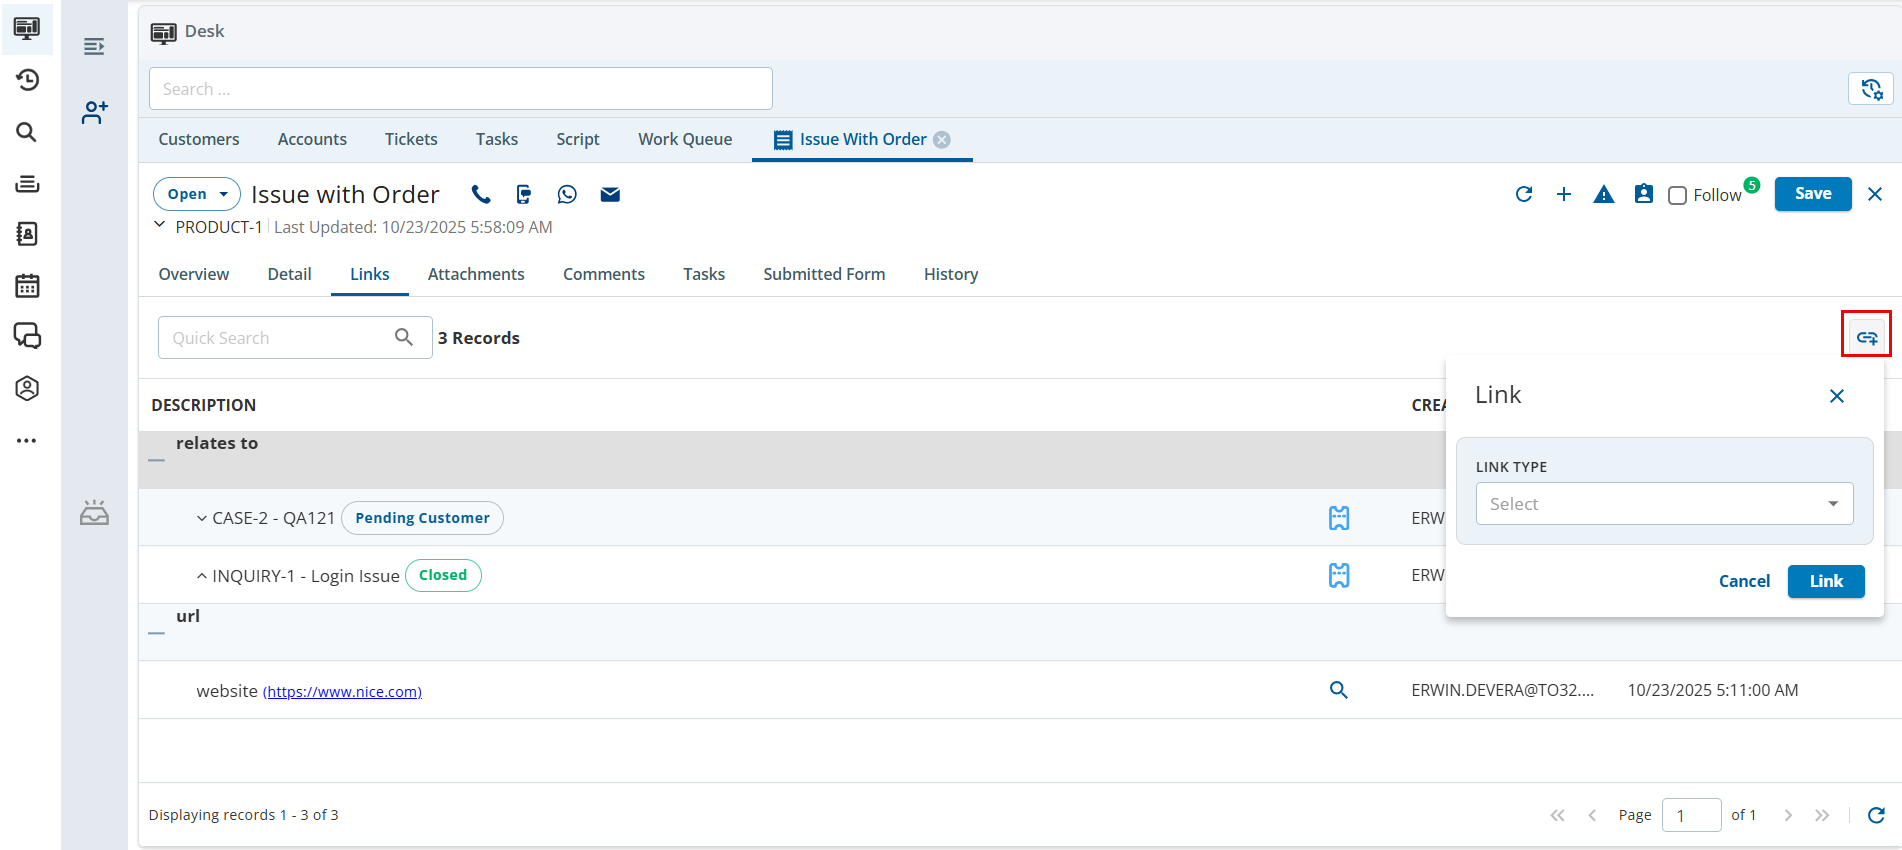
- Links: To link a ticket to another ticket or URL, navigate to the Links tab and click the link icon. The link menu displays; click the corresponding option.
When you link a ticket, the contents of the linked ticket are displayed in the Interaction history tab.
- Attachments: The Attachment tab displays attachments associated with the ticket.
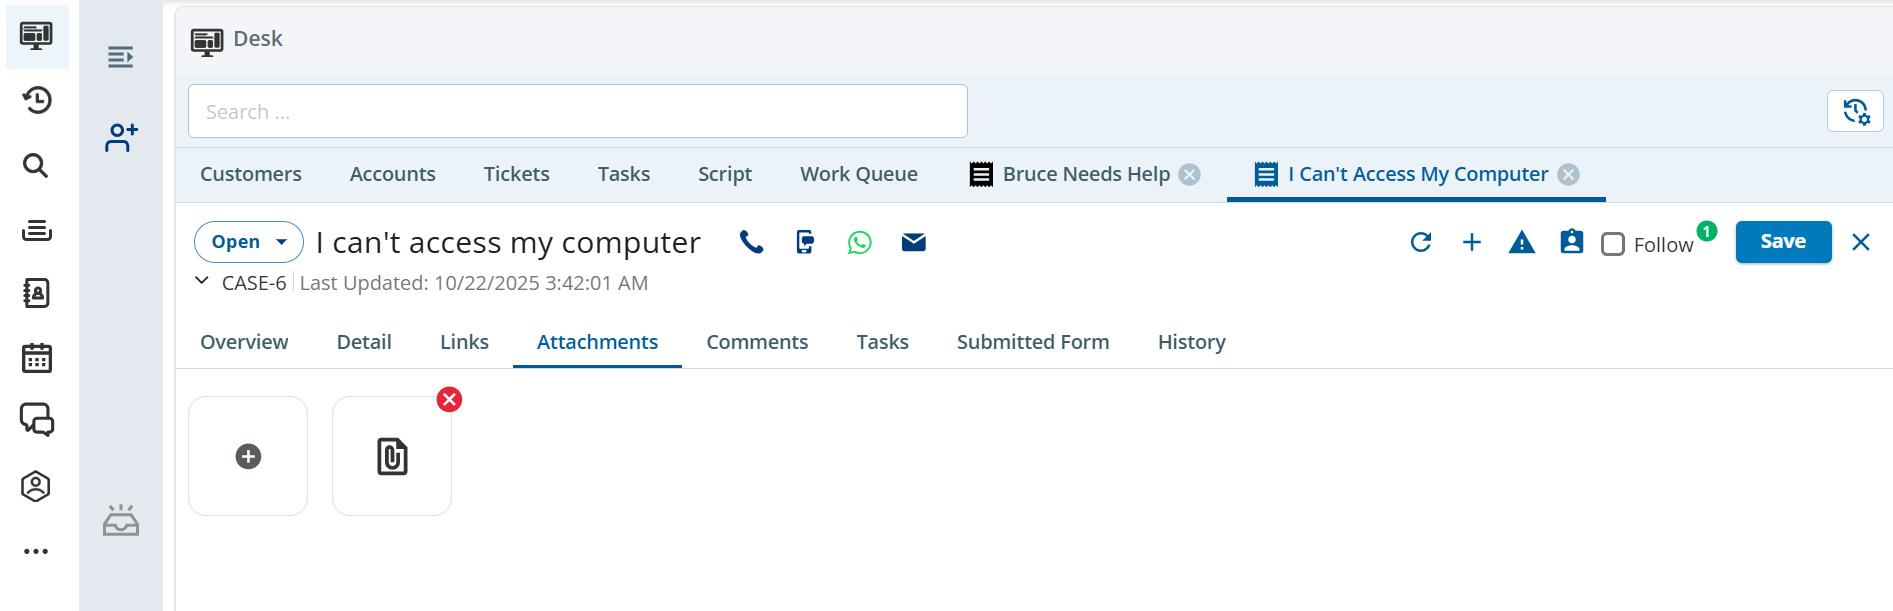
- You can add an attachment by using the Upload (
 ) button.
- You can download an attachment by clicking the attachment.
- You can delete an attachment by using
 next to the attachment.
- You can add an attachment by using the Upload (
- Comments: The Comments tab allows you to view all the comments on the ticket and add a comment to the ticket.
To filter the comments by date, use the Date Filter (
 )icon.
- To view all the comments, navigate to the Comments tab.
Public and Not Public feature is a Beat feature.
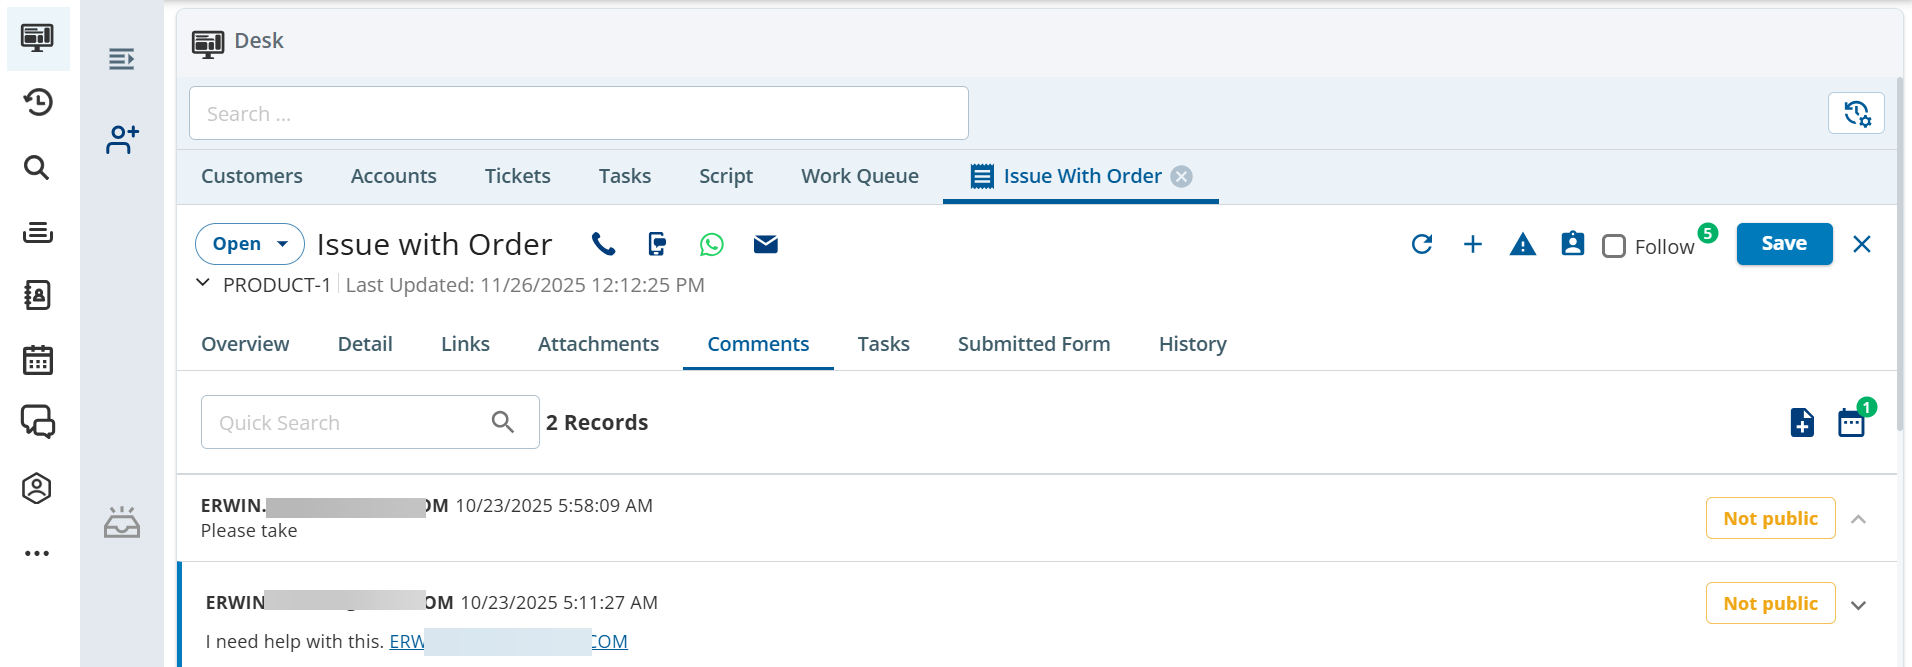
Click on the specific comment row to see the details about the comment.
- To add a comment to a ticket:
- Access the ticket.
- Navigate to Comments tab.
- Click the add comment New Comment icon.
The Create Comment window appears.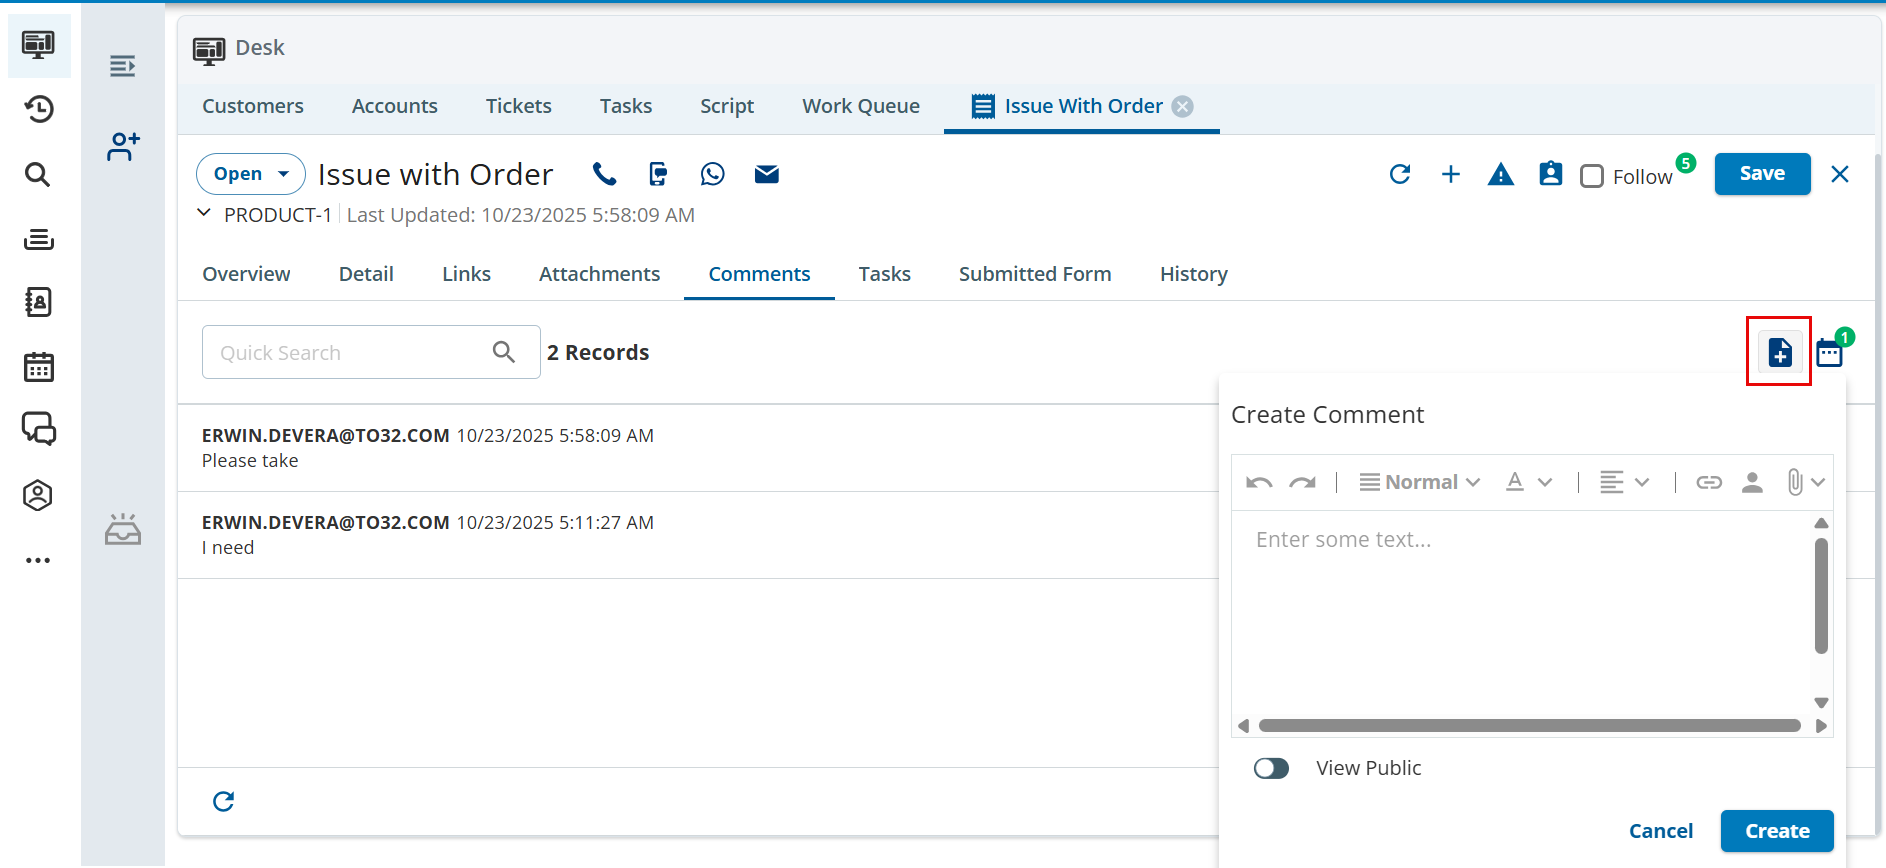
Enter your comment.

- To modify the appearance of your comment, use the formatting options (bold, italic, underline, numbered list, and bulleted list).
- To add a web address in the comment, click the link icon
 , and then enter the address.
- To tag an agent or a supervisor in the comment, click the Mention icon
 or type @ to display list of agents , and then select the required user or enter the user's first or last name. Tagged users are notified of the comment by email. In addition, depending on the ticket configuration, tagged users are added as ticket followers and notified of any further changes by email.
- To allow the customer to view the comment, select the View Public option in the Off state.
- Click Create.
The comment is created, and it appears in the Comments tab of the ticket.
- To modify a comment, on the Comments tab, click the Edit icon
 next to the comment.
- To delete a comment, on the Comments tab, click the Delete icon
 next to the comment.
- To view all the comments, navigate to the Comments tab.
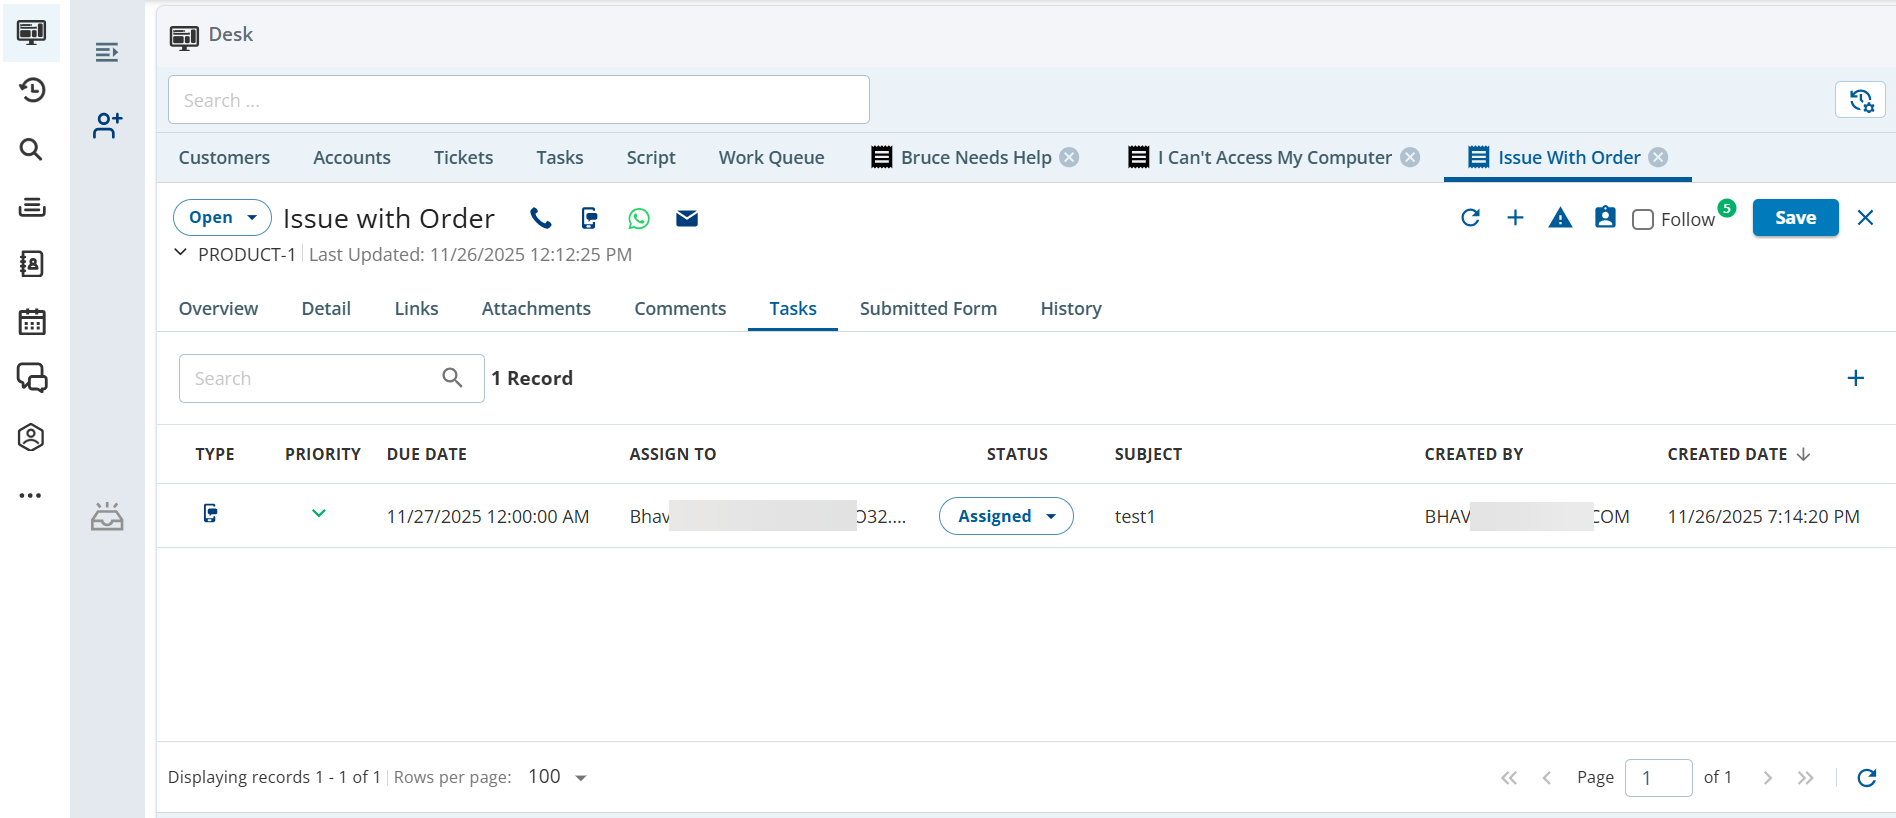
- Tasks: The Tasks tab displays all the tasks created for the ticket.
To add a new task:
- Click the New Task (
 ) button.
The New Task window appears.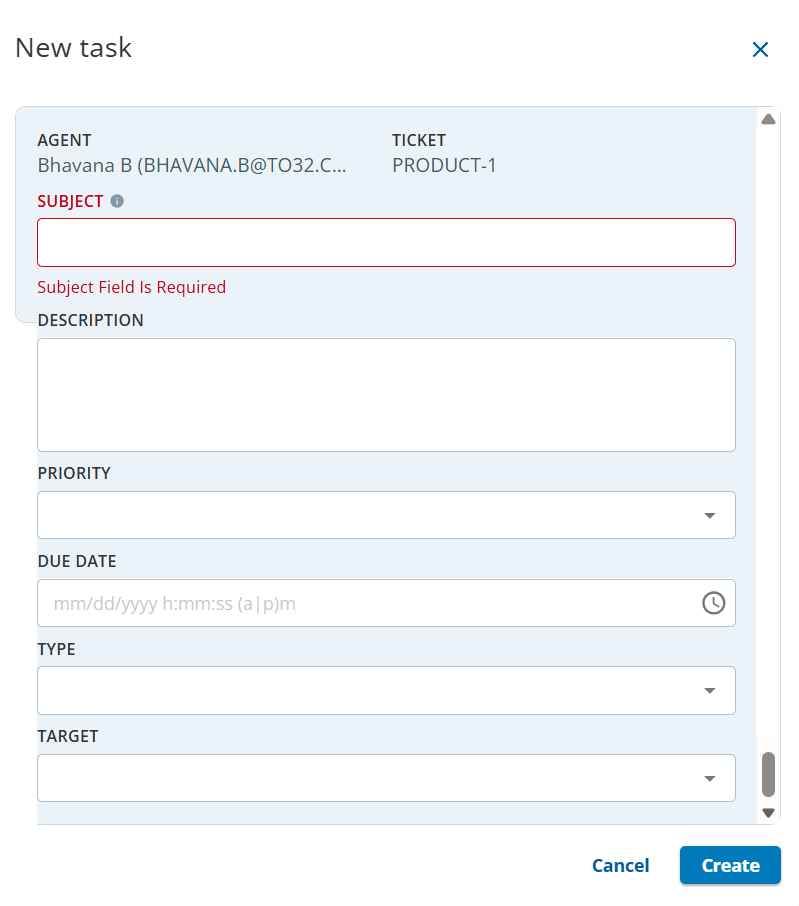
- Specify fields, and then click Create.
The task is added, and it appears on the Task tab.
- Click the New Task (
- Submitted Form: You can view the form information upon which the ticket is created.
- This tab will be displayed only when a ticket is created through a custom form.
- The fields displayed here are from the Form. These fields are view-only.
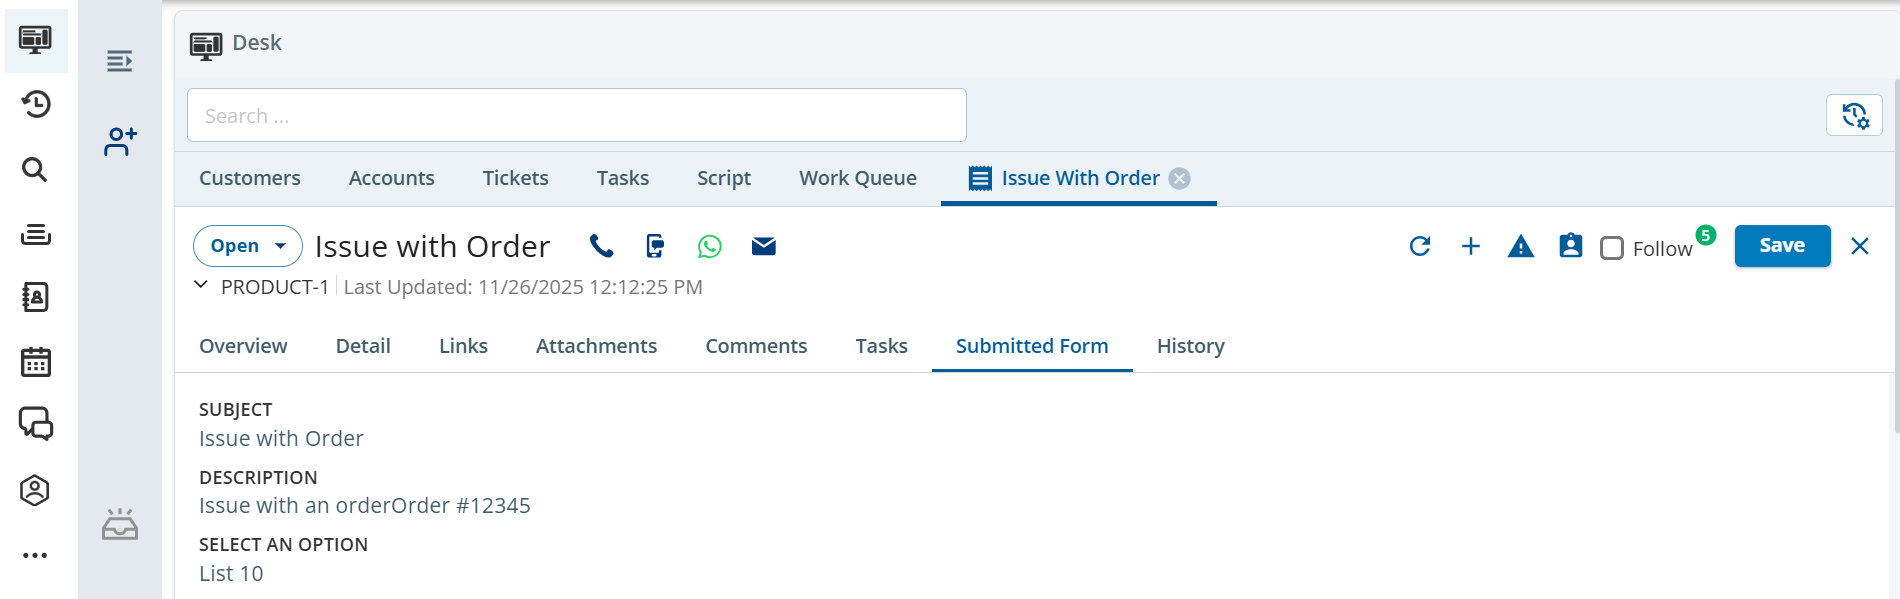
- History: The History tab contains a table with the history of all changes made to the ticket.
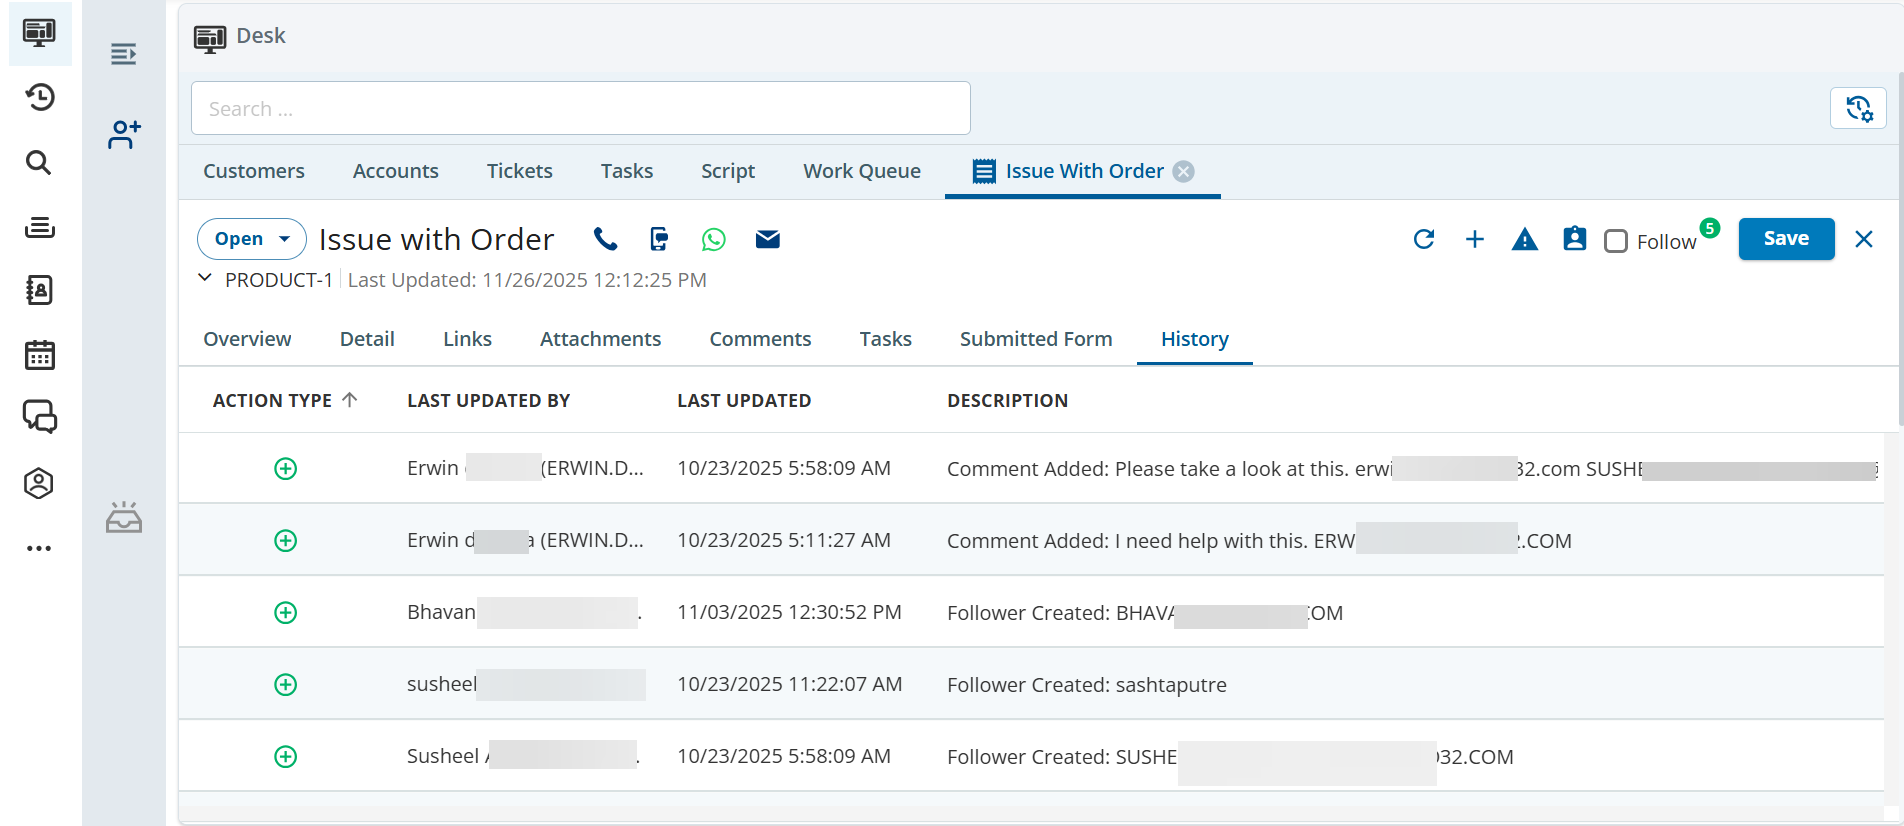
The table contains the following columns.
ACTION TYPE Type of the action, for example, Created. LAST UPDATED BY Name of the user who modified the form. LAST UPDATED Date and time when the user modified the form, represented in Eastern Time DESCRIPTION A short description of the modification done to the form