Download PDF
Download page Web Calling and Co-Browsing.
Web Calling and Co-Browsing
If you are a digital agent, you can establish a web call with the customer who is chatting with you through the web widget. A web call is a voice call that occurs over the customer's browser and data network, rather than over the public switched telephone network (PSTN). In addition, while you are on a web call, you can visually guide the customer to a solution through collaborative browsing (co-browsing). Co-browsing is a method of screen sharing that involves simultaneously browsing the web page that the customer is viewing (that is, the page on which the customer is using the web widget), in real-time. The web calling and co-browsing features allow a customer to spend less time explaining an issue while enabling you to quickly resolve the issue.
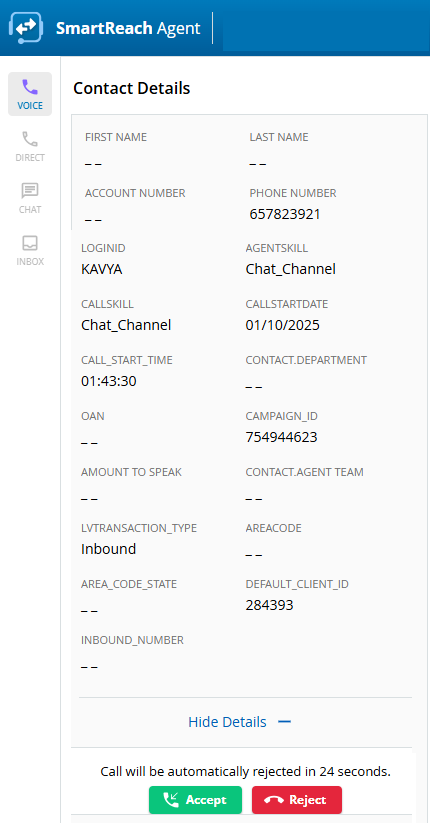
On the agent desktop, a web call is treated like any other inbound call, with options to accept or reject the incoming call, transfer the call to another agent, mute or unmute your sounds, and include features, such as call recording and screen recording.
- The web calling and co-browsing features are available on the agent desktop (for digital agents) only if your manager has enabled them when configuring the web widget on the LiveVox Portal (LVP).
- Customers do not need to download or install any software or plug-in for web calling or co-browsing. They can speak with you using their computer audio.
- Web calls are recorded in the call recording report and associated contact records. Agents can see the recording in the interaction tab on a CRM desktop.
- If the Screen Recording feature is enabled for the service in which you are logged in, the co-browsed window is recorded and included in the Call Recording Report.
Common Use Cases
- When chatting with a customer, if you decide that it would be easier for the customer to explain their request or for you to reach a resolution over a voice call, you can initiate a web call with the customer.
- If a customer is trying to locate something within your website, you can show them how to navigate the website by initiating co-browsing. Co-browsing provides you with a visual context to direct the customer to a specific area on your website.
- If a customer has encountered an error or an issue in a specific area on your website, the customer can directly show you the area through co-browsing.
Initiating a Web Call
The web calling feature is available on your desktop only if your manager has enabled it when configuring the web widget. You can invite the customer for a web call and when the customer accepts the call, you can talk through the browser.
When you are on a web call, your state changes to In Call, and additional calls or chats are not routed to you.
To initiate a web call:
When chatting with a customer on the agent desktop, in the chat window, click the Enable Web Call icon
 . A message stating that web call is enabled appears in your chat window.
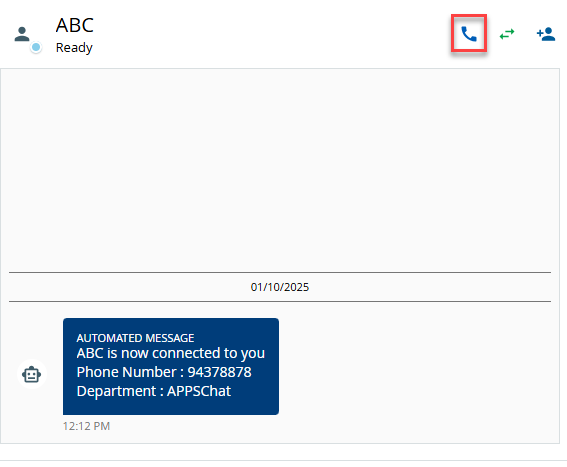

If your admin has enabled the web calling feature, the Enable Web Call
icon appears in your chat window to enable you to call the customers with whom you are chatting.
What the Customer Sees:
When the agent initiates a call, the customer can accept or reject the call by clicking the icon or
  on web widget.
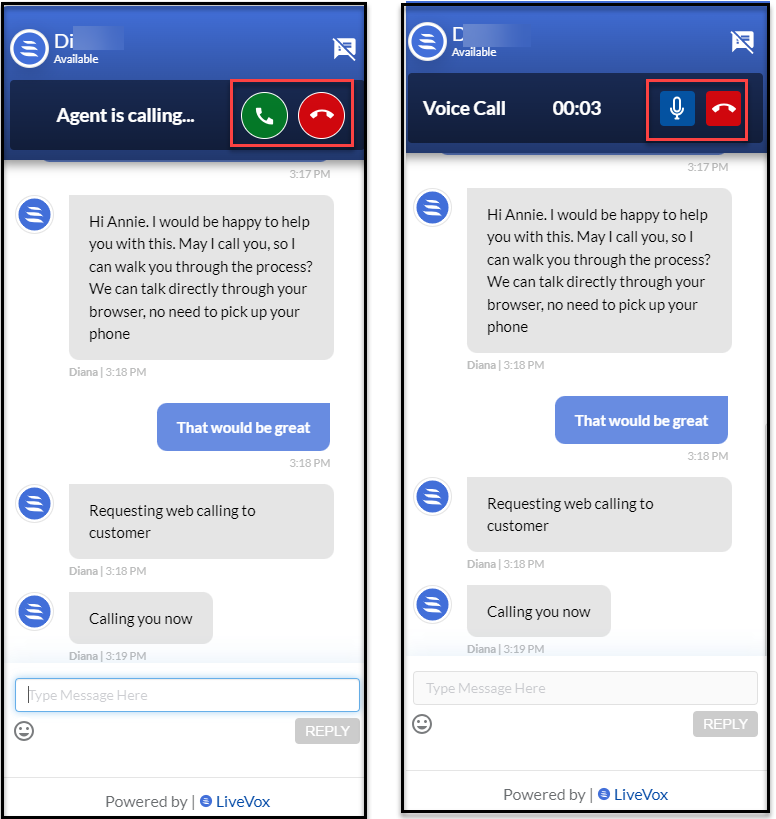
- When the web call is connected, you can talk to the customer.

The Accept and Reject buttons appears only if your supervisor has enabled Call Acceptance. Click Accept to speak with the customer. If your supervisor has enabled the call acceptance, you will need to click Accept to connect the web call.
During a web call, the customer can accept screen sharing, mute the call, control the volume, or end the call by clicking the respective icons on their web widget. ![]()
Ending a Web Call
A web call stays connected even if the customer navigates to a different browser tab or application. The customer can end the web call by clicking the phone icon![]() on the web widget or by closing the browser tab that displays the web widget. When the web call ends, the following message is displayed to the customer on their web widget: Call ended.
on the web widget or by closing the browser tab that displays the web widget. When the web call ends, the following message is displayed to the customer on their web widget: Call ended.
Initiating Co-Browsing
You can initiate co-browsing with a customer only when you are on a web call with a customer. While the customer can accept or decline the co-browsing request, consider obtaining the customer’s permission before initiating co-browsing.
When you are co-browsing, because your state is already In Call, additional calls or chats are not routed to you.
To initiate co-browsing, when you are on a web call with a customer, in the chat window, click the Init co-browsing icon![]() .
.
A message stating that the co-browsing request has been sent to the customer appears in the chat window. In addition, a co-browsing window opens in a new browser tab, displaying the message, Connecting.
What the Customer Sees
- When you click the Init co-browsing icon
 , a message appears to the customer on their web widget asking if the customer wants to allow or deny the co-browsing request.
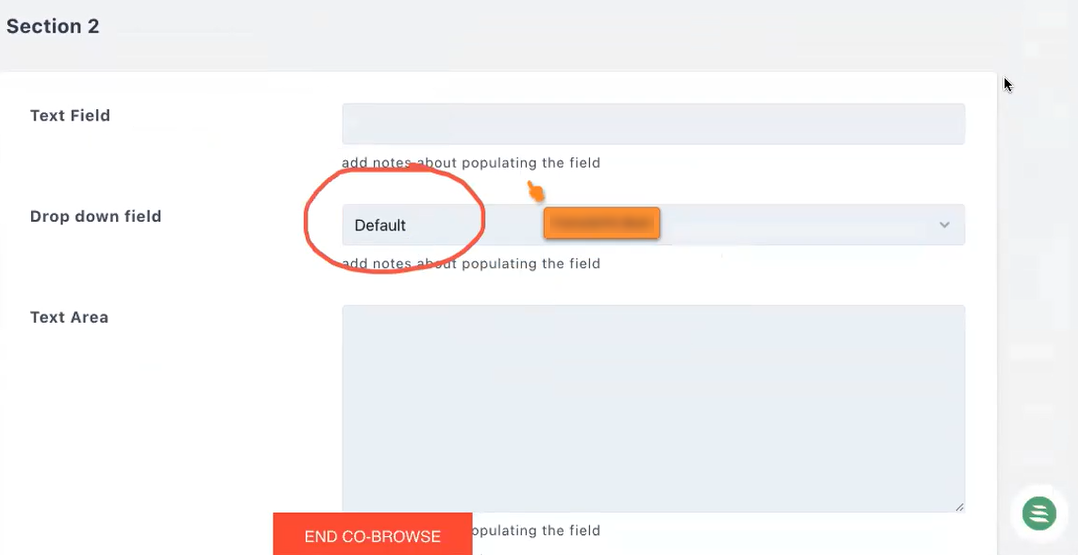
- To enable you to view the customer's web page (that is, to begin co-browsing), the customer must click Allow.
- Co-browsing begins when the customer clicks Allow.
When you are co-browsing (that is, when the customer accepts your co-browsing request):
- Your co-browsing window displays the page on which the customer has accessed the web widget. Other browser tabs or applications on the customer's screen are not displayed.
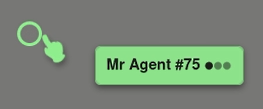
- You and the customer can see each other's mouse pointers on the respective pages. The cursors are labeled to distinguish your cursor from that of the customer.
- Your co-browsing window is updated whenever the customer moves their cursor on the page.
Ending Co-Browsing
The customer can end co-browsing at any time by clicking the END CO-BROWSE button. Co-browsing also ends if the customer ends the web call (that is if they click the phone icon ![]() on their web widget).
on their web widget).
You can end co-browsing by clicking the struck-through phone icon ![]() , which appears in your co-browsing window, or by closing the browser tab that contains the co-browsing window.
, which appears in your co-browsing window, or by closing the browser tab that contains the co-browsing window.
After co-browsing ends, you are returned to your previous state (that is, the state in which you were before co-browsing). However, if you are still on a web call, your state remains In Call.
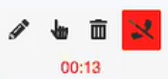
Co-Browsing Controls
The following table describes the icons that appear within a box in your co-browsing window.
| Icon | Description |
|---|---|
| Annotates the customer’s page (for example, draw on the customer's page) to guide the customer. |
| Enables you to switch to the pointer mode so you can interact with the content on the customer's page by clicking an element (image below), typing data, or scrolling on the page. This icon also clears the annotations (if there are any). |
| Clears the annotations. |
| Ends co-browsing. |
The box also displays a timer that indicates the time elapsed (in minutes and seconds) since the co-browsing session began.