Download PDF
Download page Secure Payment Capture.
Secure Payment Capture
The LiveVox Secure Payment Capture (SPC) feature allows agents to securely capture and process customer payments over the phone and protect sensitive customer information. This feature must be enabled by your manager. When using SPC, consumers are asked to enter their payment information through their telephone keypad.
Agents can use this feature from Agent Panel, Agent Panel with Extended Panel or Agent Panel with Designer.
Call and screen recordings are automatically paused with the initiation of the Basic Secure Payment Capture and resumed after the process of capturing the payment. There is no logging of Secure Payment Capture data. When an agent enters Advanced Secure Payment Capture, the call and screen recordings are no longer paused, because the agent only hears flat sounds in place of dual-tone multi-frequency signaling (DTMF) tones.
Secure Payment Capture (SPC) Widgets
Secure Payment Capture widgets allow agents to communicate the required instructions directly to the consumer and guide the consumer through the payment information gathering process.
To initiate Secure Payment Capture, one or more of the following widgets must be configured by your manager and available on your desktop:
- Credit Card Basic
- Credit Card Advanced
- Check Basic
- Check Advanced
Once configured, the credit card or check icons appear on the agent panel.
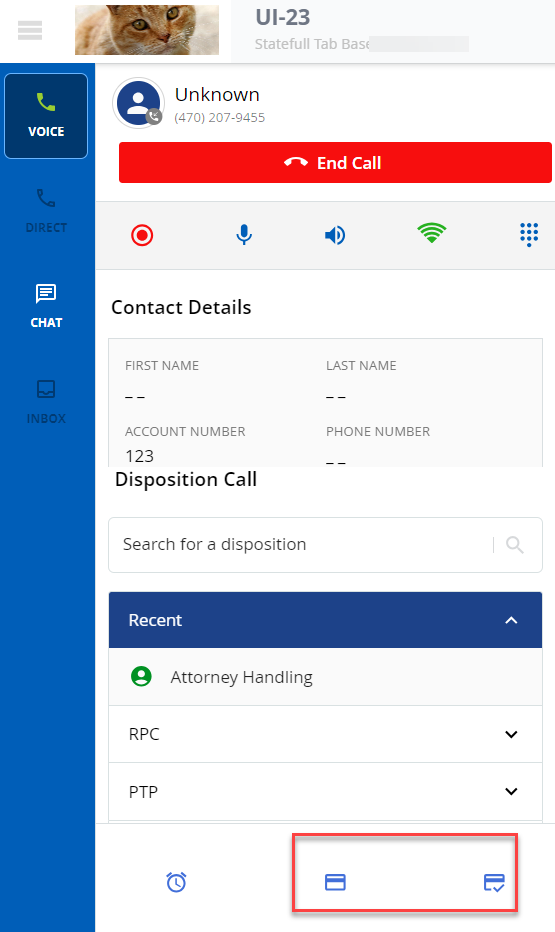
When you click the credit card (![]() ) or check (
) or check (![]() ) icons, their respective screens are displayed.
) icons, their respective screens are displayed.
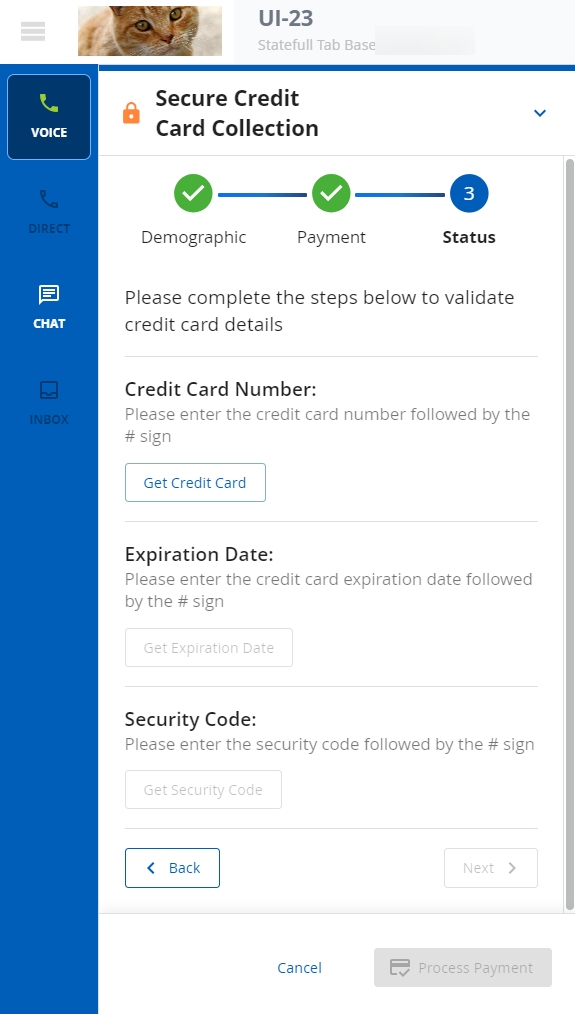
Using the Credit Card Basic Widget
After clicking the credit card (![]() ) icon, the configured Credit Card Basic widget appears on your screen, as shown below. Depending on the configuration, you can capture payments for Visa, Master Card, American Express, or Discover cards. Click the Cancel button to remove the Credit Card Basic payment information from your screen.
) icon, the configured Credit Card Basic widget appears on your screen, as shown below. Depending on the configuration, you can capture payments for Visa, Master Card, American Express, or Discover cards. Click the Cancel button to remove the Credit Card Basic payment information from your screen.
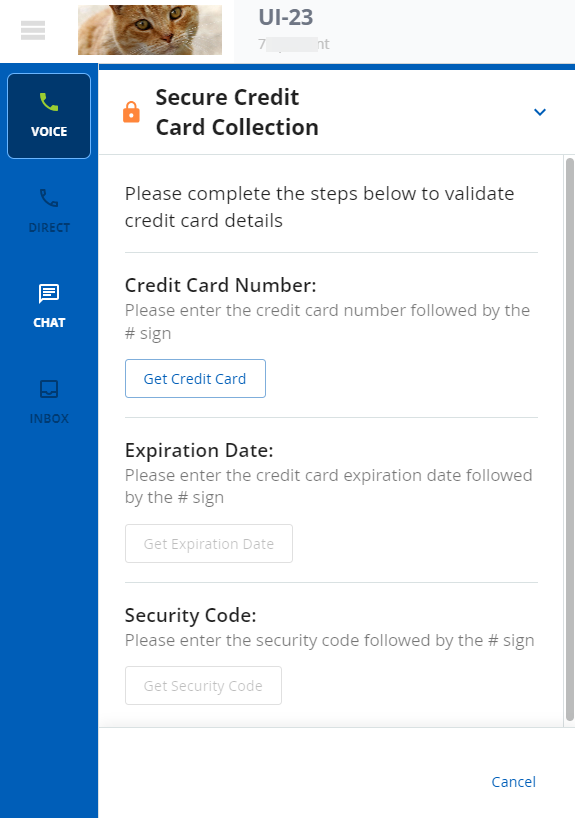
- Read the configured message associated with the Credit Card Number prompt to the customer. The customer enters their credit card number using the telephone keypad. When the customer enters a valid credit card number, the number is reflected on the screen.
- Read the configured message associated with the Expiration Date prompt to the customer. The customer enters their credit card expiration date using the telephone keypad. When the customer enters a valid credit card expiration date, the expiration date is reflected on the screen.
- Read the configured message associated with the Security Code prompt to the customer. The customer enters their credit card security code using the telephone keypad. When the customer enters a valid credit card security code, a confirmation message appears on the screen.
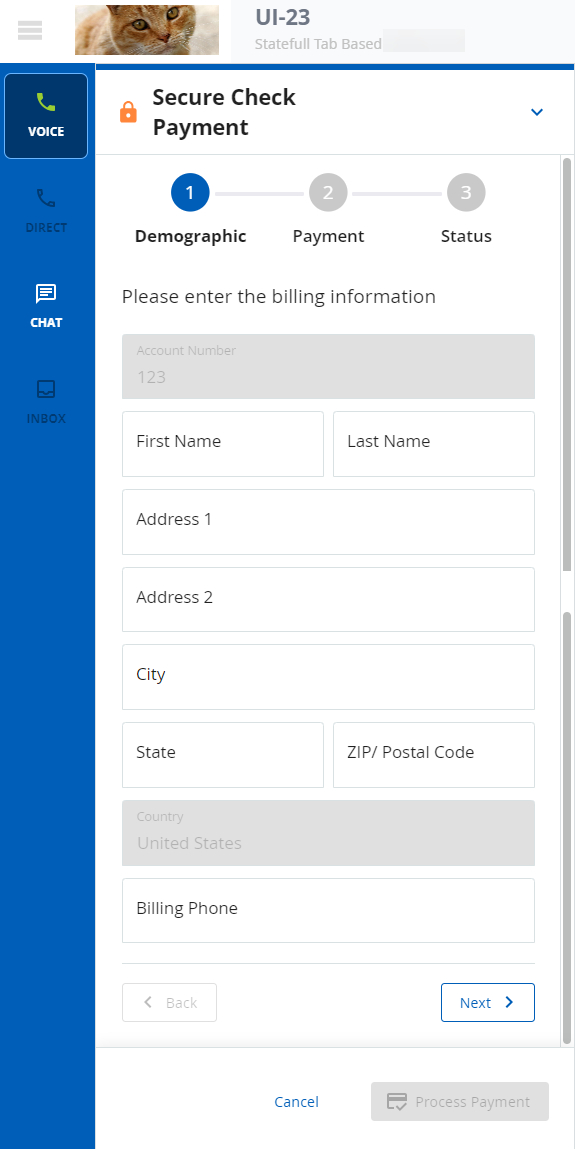
Using the Credit Card Advanced Widget
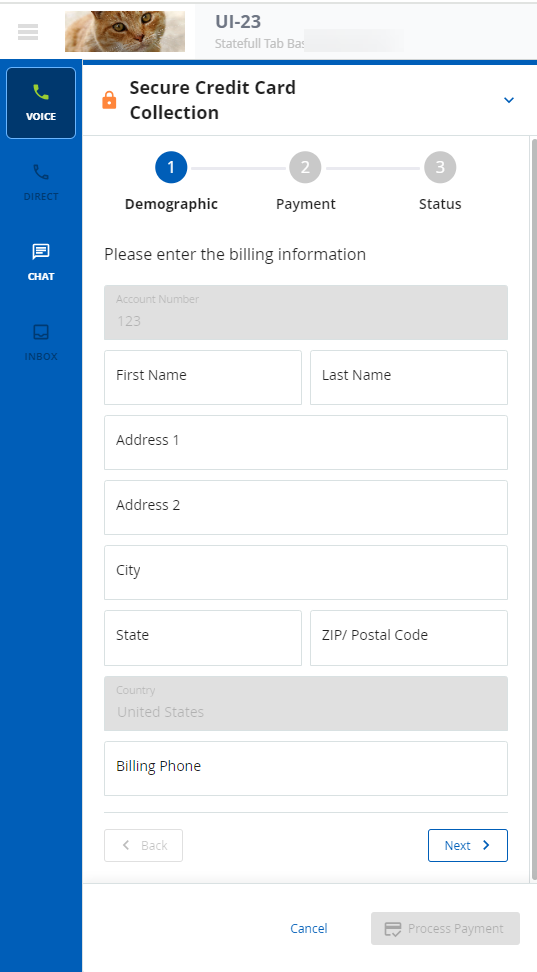
After clicking the credit card (![]() ) icon, the configured Credit Card Advanced widget appears on your screen, as shown below. Depending on the configuration, you can capture the payment for Visa, Master Card, American Express, or Discover credit cards. Click the Next or Back buttons to move to the next or previous tab. Click the Cancel button to remove the Credit Card Advanced payment information from your screen.
) icon, the configured Credit Card Advanced widget appears on your screen, as shown below. Depending on the configuration, you can capture the payment for Visa, Master Card, American Express, or Discover credit cards. Click the Next or Back buttons to move to the next or previous tab. Click the Cancel button to remove the Credit Card Advanced payment information from your screen.
- On the Demographic tab of the Credit Card Advanced widget, enter the billing information as it relates to the specific payment card.
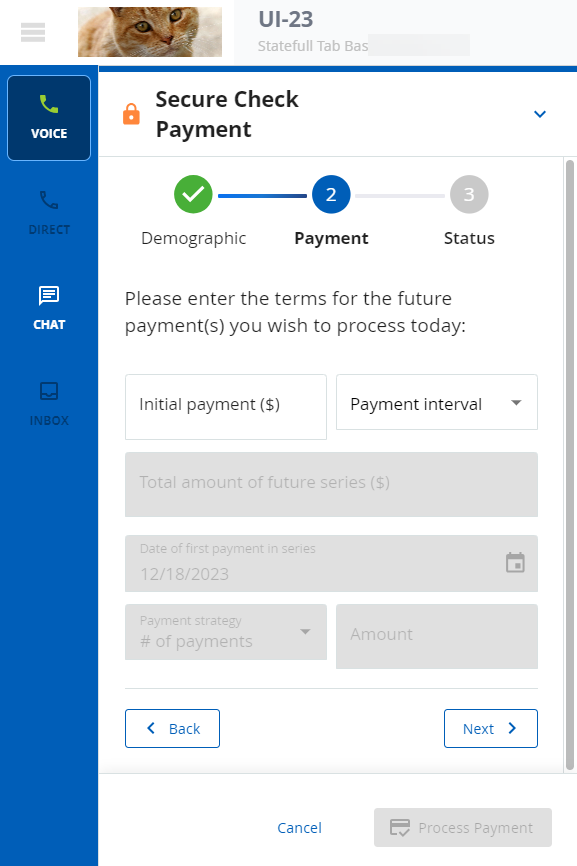
- On the Payment tab of the Credit Card Advanced widget, enter the customer payment information.
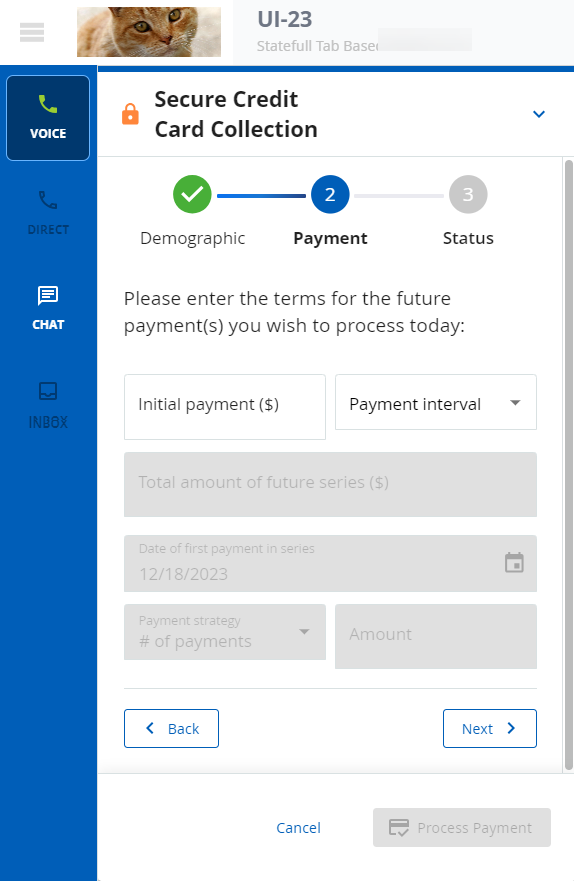
- On the Status tab of the Credit Card Advanced widget, follow Steps 1, 2, and 3 of the Using the Credit Card Basic Widget procedure. However, with the Credit Card Advanced widget, the payment information is masked and does not appear on the screen. Instead, you can see an 'Obtained' message on your screen once the customer successfully enters their information
- Click the Process Payment button to complete the transaction.
Using the Check Basic Widget
After clicking the check (![]() ) icon, the configured Check Basic widget appears on your screen, as shown below. Click the Cancel button to close the Check Basic payment screen.
) icon, the configured Check Basic widget appears on your screen, as shown below. Click the Cancel button to close the Check Basic payment screen.

- Read the configured message associated with the Routing Number to the customer. The customer enters their routing number using the telephone keypad. When the customer enters their routing number, it is reflected on the screen.
- Read the configured message associated with the Account Number to the customer. The customer enters their account using the telephone keypad. When the customer enters a valid account number, it is reflected on the screen.
Using the Check Advanced Widget
After clicking the check (![]() ) button, the configured Check Advanced widget appears, as shown below. Click the Next or Back buttons to move to the next or previous field. Click the Cancel button to remove the Check Basic payment information from your screen.
) button, the configured Check Advanced widget appears, as shown below. Click the Next or Back buttons to move to the next or previous field. Click the Cancel button to remove the Check Basic payment information from your screen.
- On the Demographic tab of the Check Advanced widget, enter the billing information as it relates to the specific check payment.
On the Payment tab of the Check Advanced widget, enter the customer payment information.
On the Status tab of the Check Advanced widget, complete Steps 1 and 2 from the Using the Check Basic Widget procedure above. However, with the Check Advanced widget, the payment information is masked and does not appear on the screen. Instead, you can see an 'Obtained' message on your screen once the customer successfully enters their information.
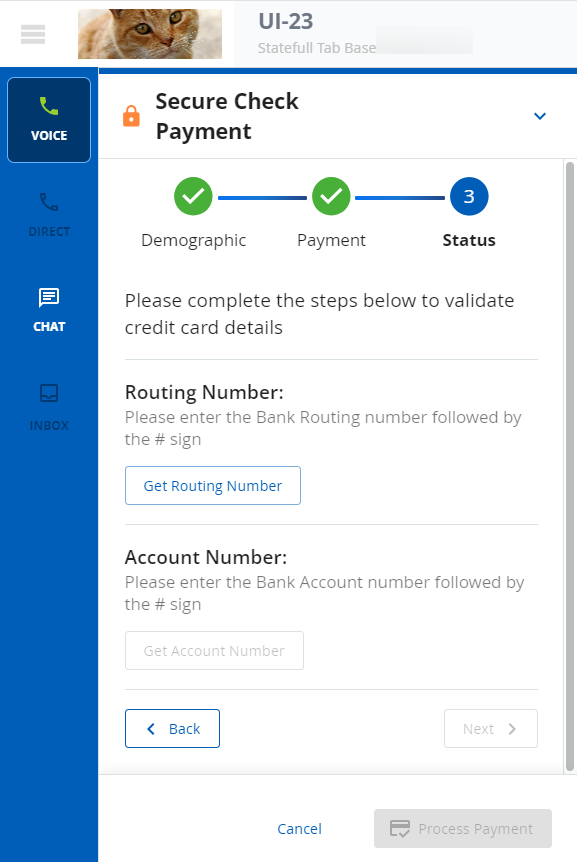
- Click the Process Payment button to complete the transaction.