Download PDF
Download page Contact List.
Contact List
Contact List is a feature of Contact Center CRM that enables you to create, modify, and list your contacts. Depending on the configuration of the Contact List component, you can additionally:
- View the accounts and tickets linked to a contact through the Accounts tab and the Tickets tab of the contact, respectively.
- Play the audio recording associated with a contact through the Interactions tab of the contact.
- Call a function through a function button.
- Delete contacts.
Depending on the web widget configuration, a contact can be created automatically when a customer using the web widget submits a ticket.

- The Contact List component also appears in the Ticketing section as the Contacts tab. For more information, see Ticketing.
- The Contact List component also appears on LVP Mobile.
- For information about how to filter contacts, see Filtering Accounts, Contacts, and Tickets.
- For information about how to customize the Contact table, see Customizing Account, Contact, and Ticket Tables.
Creating a Contact
To create a contact:
In the Contacts List section, click the add
 icon.
icon.
The New Contact window appears.
If the Select Form window appears instead of the New Contact window, select the web form that is applicable to the contact you want to create.
Specify values in the fields.

For information about the fields, see Contact Fields.
Click Save.
A message stating that the contact has been created appears. The contact information is displayed.
- If the web form contains fields associated with the Account and Ticket entities, an account and a ticket are also created.
- If you modify the values in the fields and want to revert all changes, click Reset.
- To create another contact, click New.
- To view a table of contacts, click the Close icon
 .
.
Accessing a Contact
To access a contact from the table in the Account List section:
- In the Account List section, double-click the row displaying the account.
The account opens in a new tab.
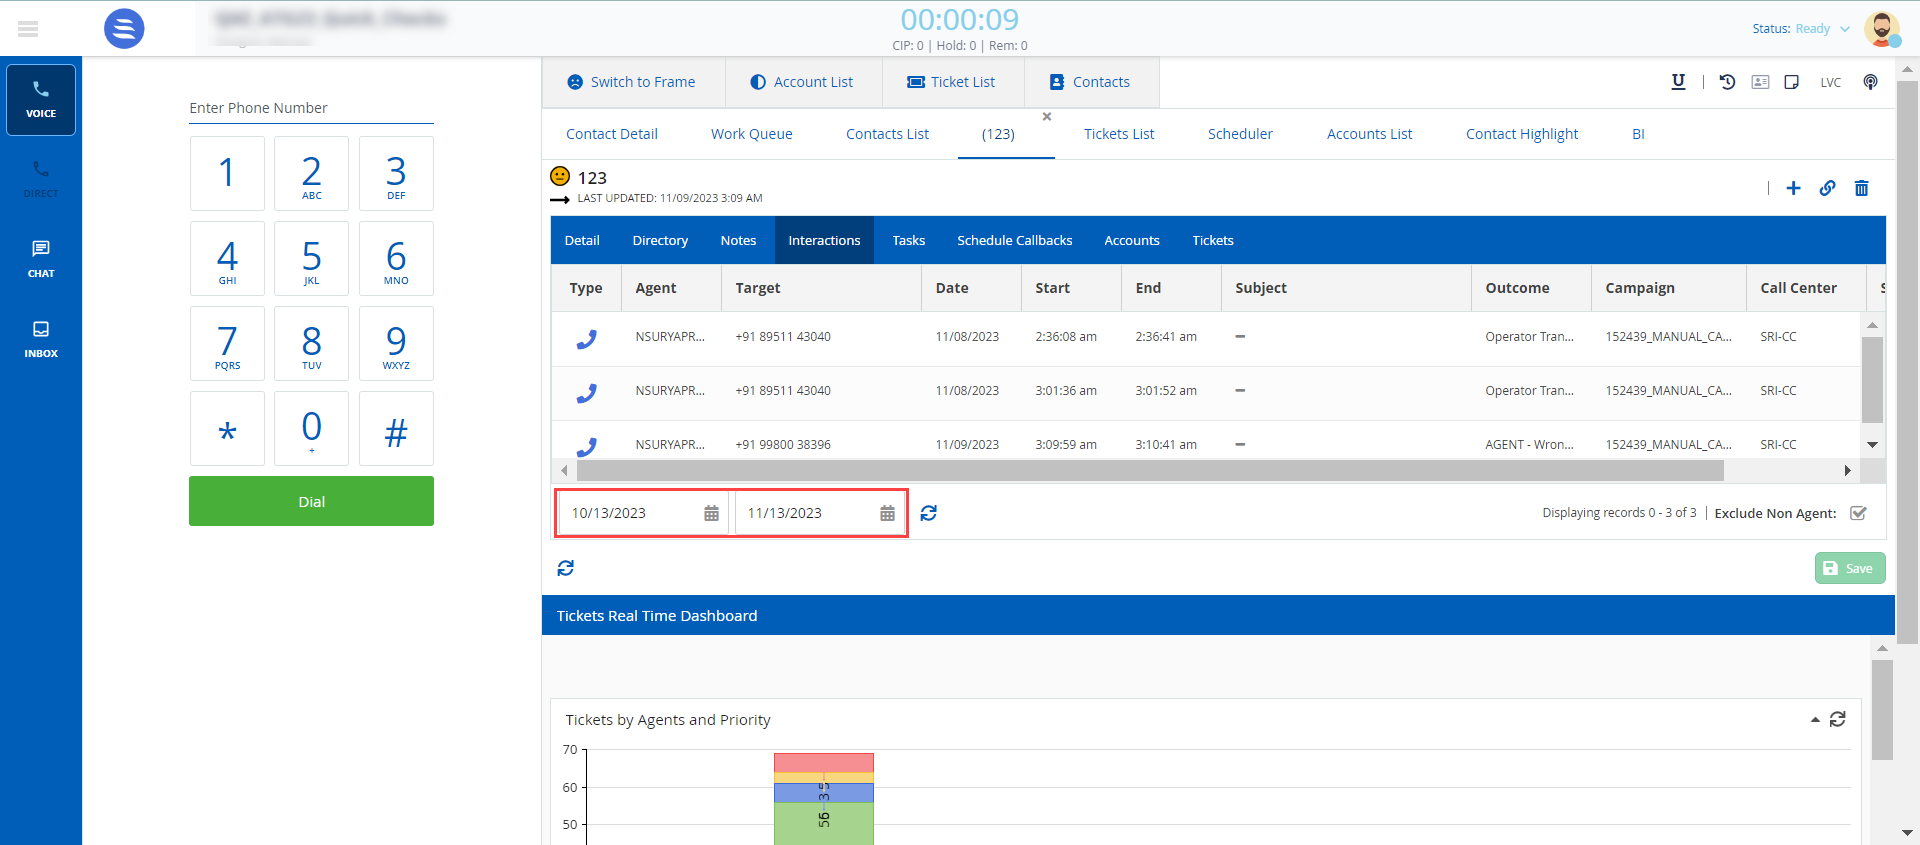
By default, the Interactions tab of a contact displays only the interactions that are connected to an agent. To view the interactions that are not connected to an agent, clear the Exclude Non Agent checkbox on the tab.
Creating an Associated Entity for a Contact
To create an account, note, task, or ticket for a contact:
- Double-click the contact.
The contact appears in a new tab. - In the contacts section, click the add icon.
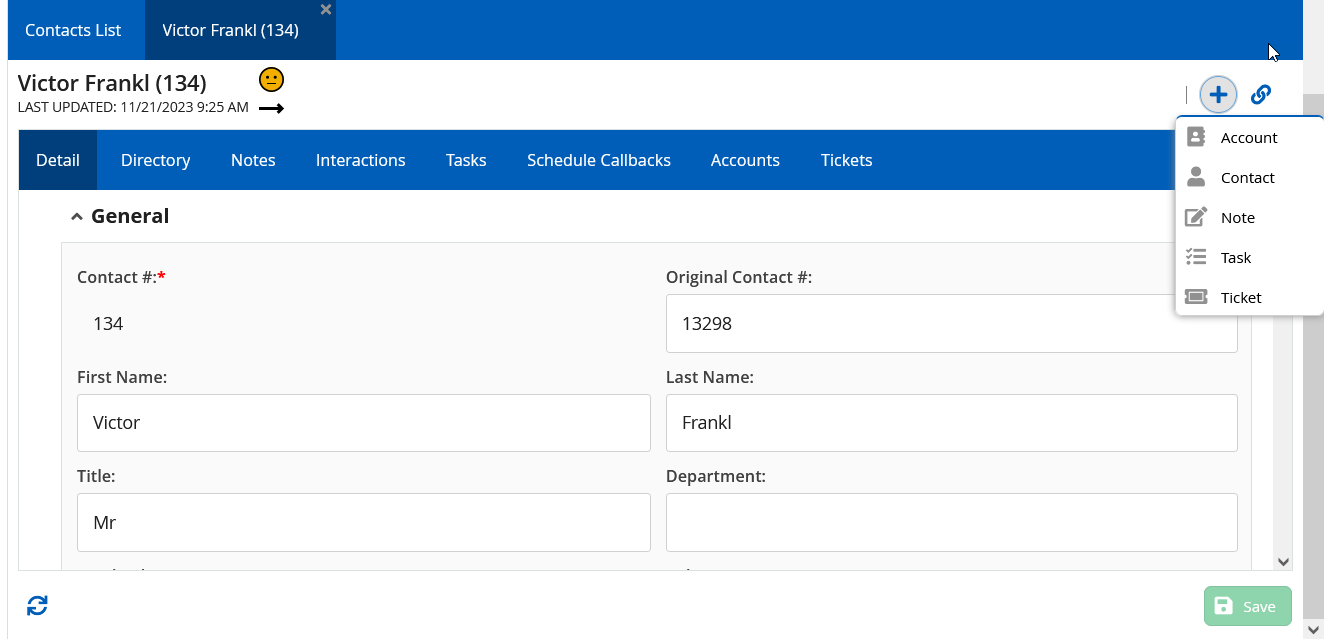
- Select the entity you want to create and then enter the details.
The account, note, task, and ticket you create for a contact appear on the Accounts, Notes, Task, and Tickets tabs of the account, respectively.
Linking a Contact to an Entity
To link a contact to an existing account or ticket:
- Double-click the contact.
The contact appears in a new tab. - In the contacts section, click the link
 icon.
icon. 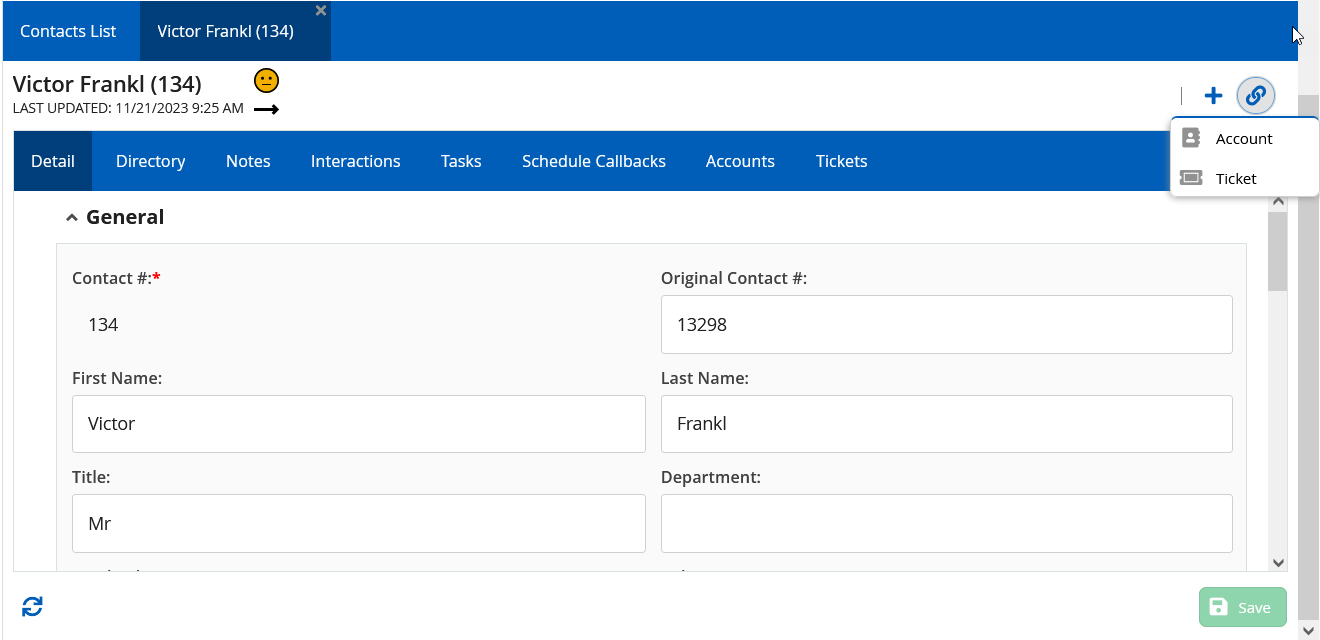
- Select the entity to which you want to link the contact.
The account and ticket you link to a contact appear on the Accounts and Tickets tabs of the contact, respectively.
Viewing the Happiness Index
Starting from LV19, view the Happiness Index that shows customer satisfaction and trend snapshot of a Contact based on weighted sentiments of past interactions. You can identify how a customer is currently feeling about a specific interaction by looking at the emoticon and trend line.
To view the Happiness Index, go to the Contacts List section.

The Happiness Index is available only when SpeechIQ, sentiment analysis, and Contact Center CRM are enabled.
Deleting a Contact
To delete a contact, double-click on the contact, and then click the Delete button.
Sorting Fields
You can quickly sort and search all enabled fields from Ascending to Descending or vice versa.
To sort fields in a Contact List:
- In the Contact List section, select any fields you want to sort and click the arrow.
- Click the Sort Ascending or Sort Descending options.
The fields are sorted based on the selected option.
Optimizing Contact History
Previously, by default you could view six months of data for a contact. Currently, one month of data is automatically loaded to increase system performance. To view the historical data, specify the required date range, and the data is loaded.