Using the Basic Inbound Service
The Basic service is a blended multi-channel service that supports inbound and outbound voice calls. You can configure the Basic Inbound Service with procured inbound phone numbers for inbound voice interactions.
The following describes the overall actions required when setting up and receiving an inbound call using the Basic Inbound service.
- Create/copy the Basic Inbound Service.
- Set up Inbound hours.
- Associate the message with the Basic Inbound service.
- Associate the inbound phone number.
- Configure the routing type.
- Assign the agent desktop to the agent.
- Configure termination/disposition code.
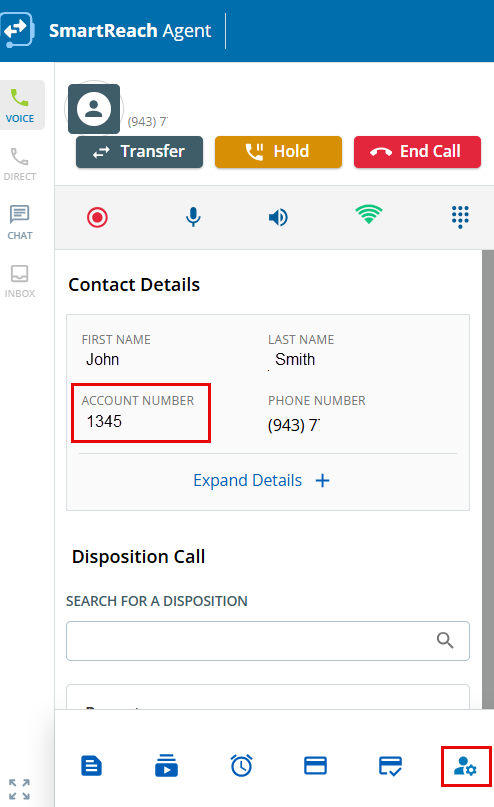
- Connect to the customer through the agent desktop.

SmartReach sets up the services you intend to use when it creates your client portal. However, you can modify these settings or add a new service by copying an existing service, as required.
Below are the details for each step:
Create/copy the Basic Inbound Service.
- Navigate to Configure > Services > Services.
- To create a new Basic inbound service, copy an inbound or existing Basic Inbound service. Hover on the required service and click the Copy icon.
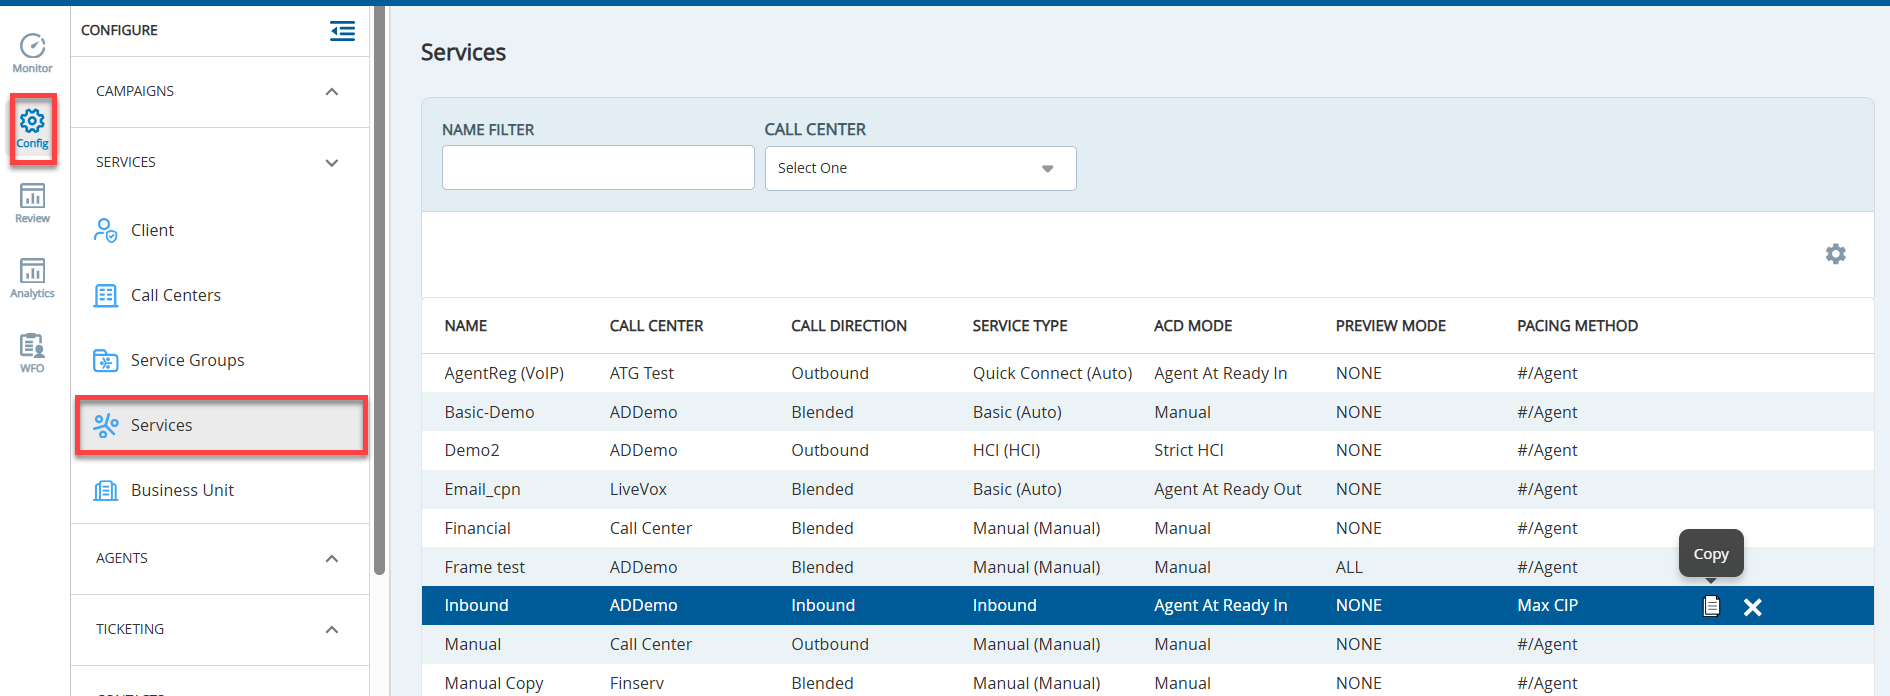
- The Copy Services pop-up appears.
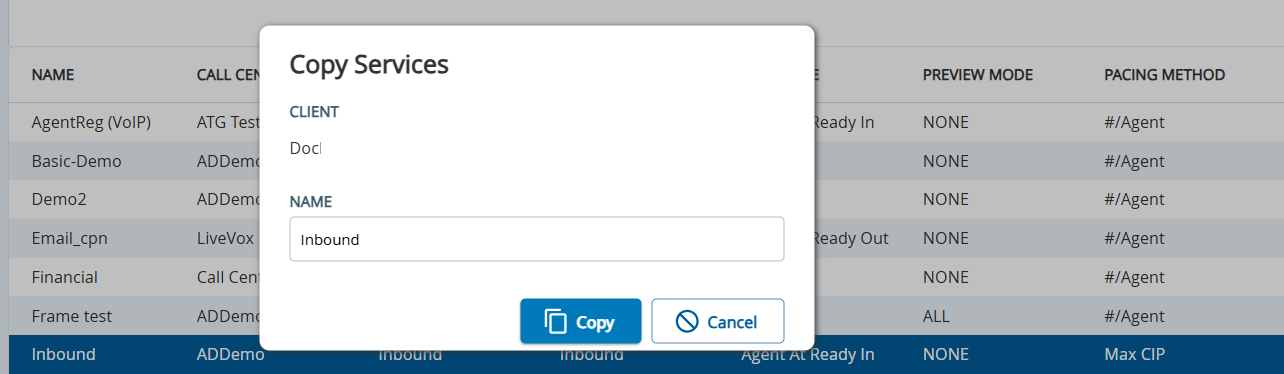
- Specify the Name of the new service.
- Click Copy.
- After the service is copied, double click the copied service. The Edit Service window appears.
- On the General tab, configure the following fields:
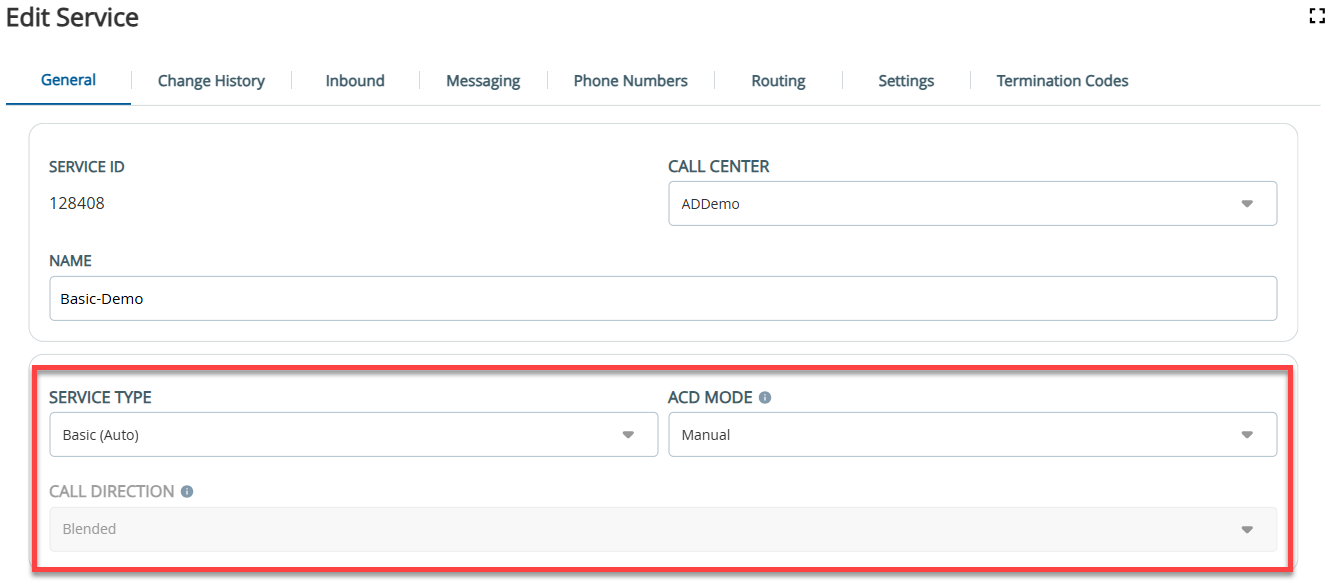
- Select the Service Type as Basic (Auto) from the drop-down list.
- Select the Call Direction as Blended (Outbound and Inbound) from the drop-down list.
The value in the Call Direction field on the General tab is Blended and this field is disabled when you select Basic as the service type.
- Select the ACD mode as Manual from the drop-down list.
This is the agent desktop setting. The value in this field determines the direction and type of the audio connection to adjust the audio path and/or the dialing behavior for the agents logged into the service. For ACD manual mode, the system determines whether the service functions as the Agent at Ready In mode if the agent call-in number is populated, or as the Agent At Ready Out mode if the agent call-in number is not populated.
Set up Inbound hours.
The Inbound Hours setting on the Inbound tab is required only for the voice channel. Here, you set the hours of operation for the call center to receive customer calls.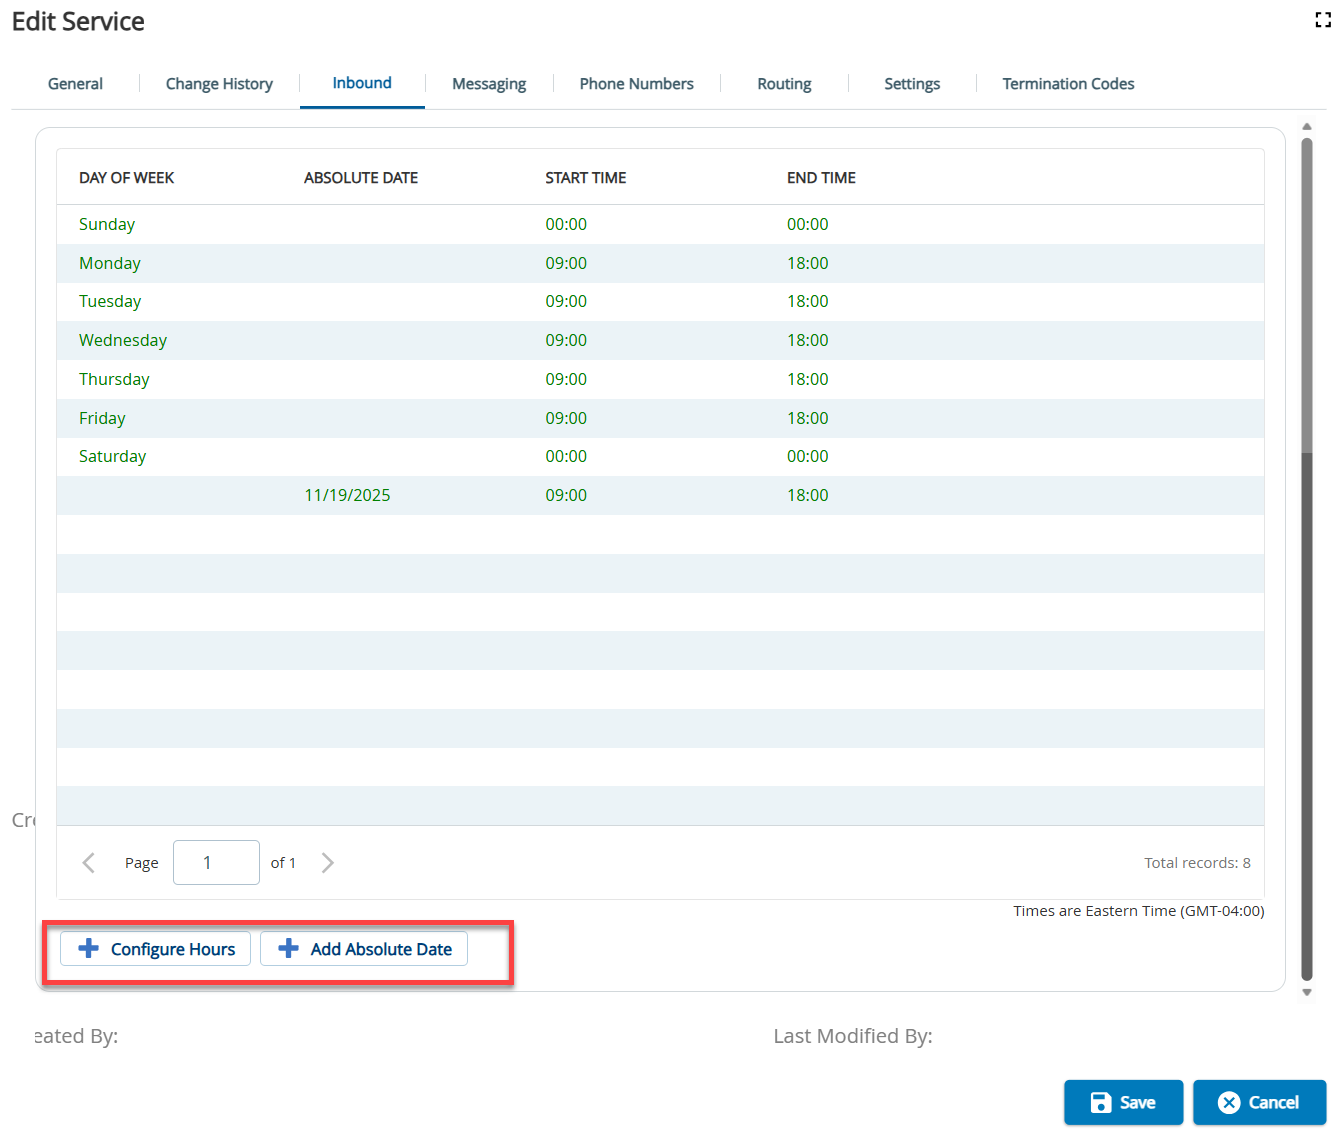
- Click Configure Hours, the Edit Inbound Hours pop-up appears.
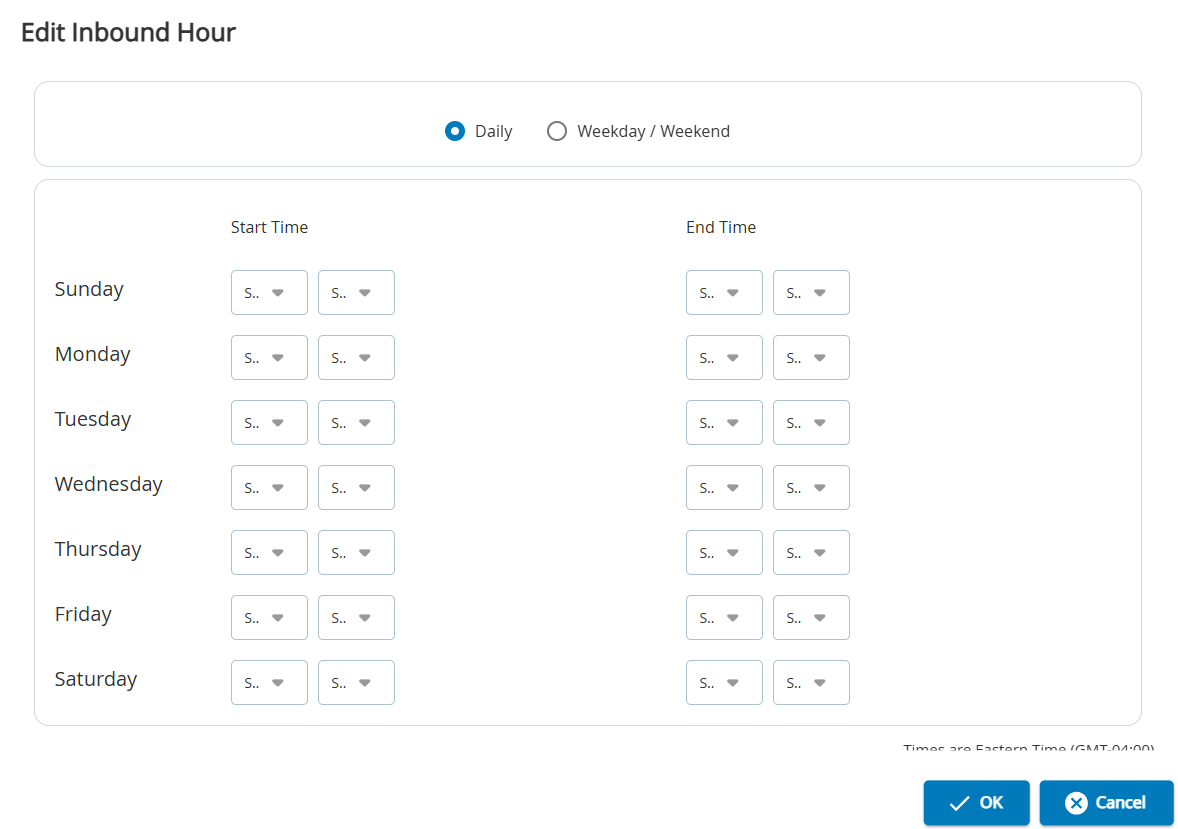
- Specify the Daily or Weekday / Weekend.
- Enter Start Time and End Time.
- Click Absolute Date to close the call center operation time for a specific day of the month.
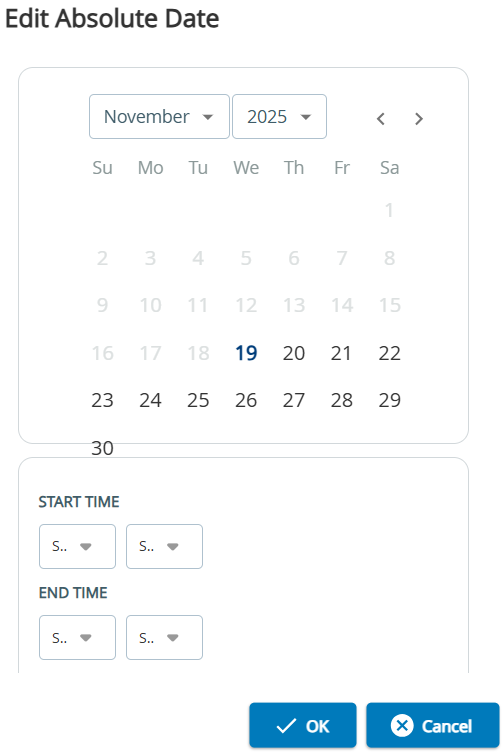
- Click Configure Hours, the Edit Inbound Hours pop-up appears.
Associate the message with the Basic Inbound service.
After you create a message, you must then associate that message to an inbound service. To associate the message to the service, navigate to the Configure > Services > Phone Numbers tab and select the required Inbound message from the drop-down.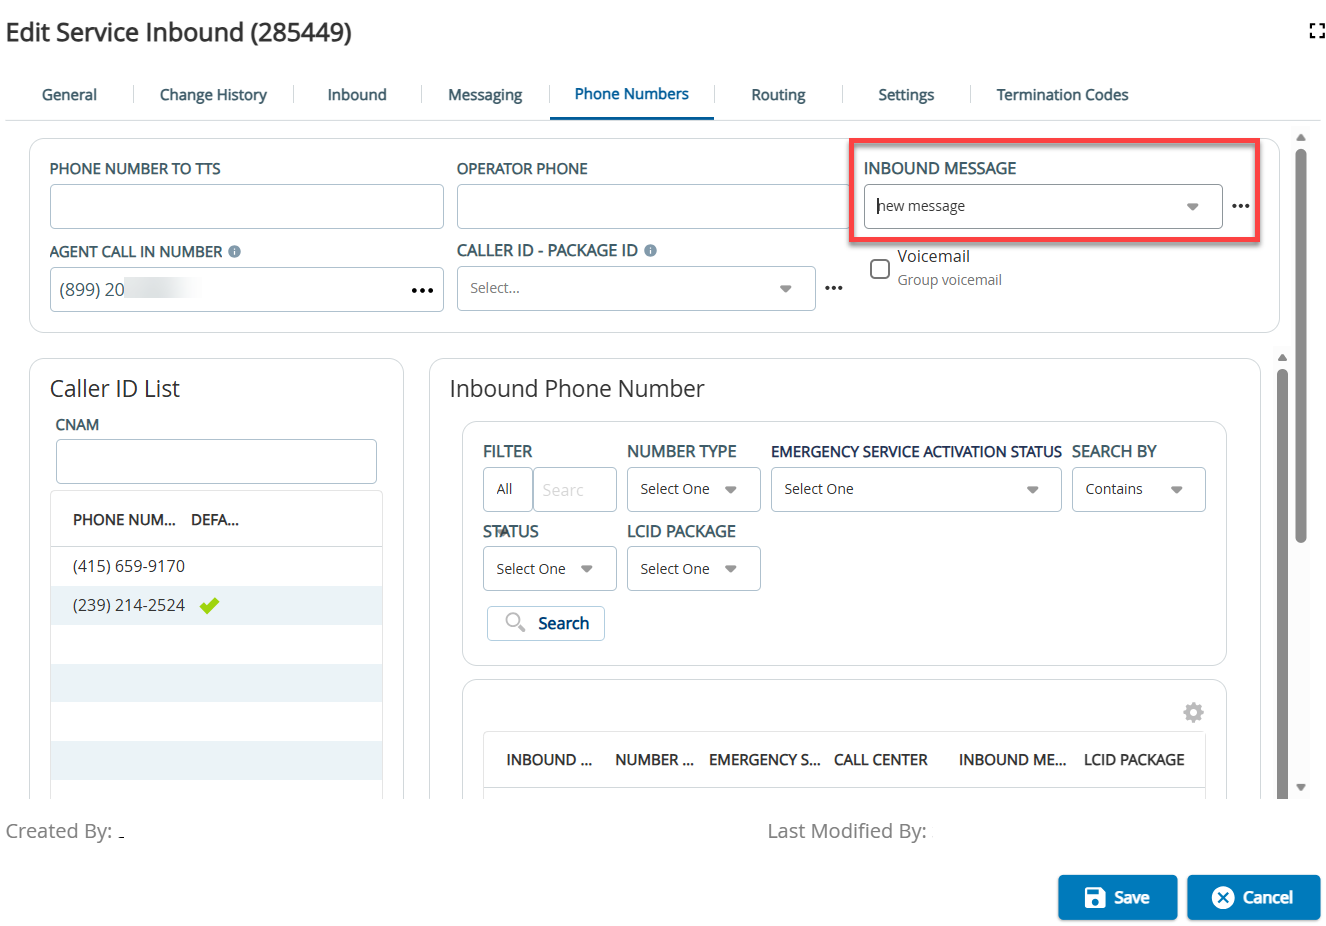
Associate the inbound phone number or the callback phone number.
The Phone Numbers tab displays all phone numbers within the client portal and allows you to identify, assign, modify, and disassociate phone numbers from one service to another. This tab compiles all assigned phone numbers (Agent Dial-In numbers, Extensions, Agent Direct Lines, LCID, Inbound numbers, and caller ID numbers) in a single view for easier management.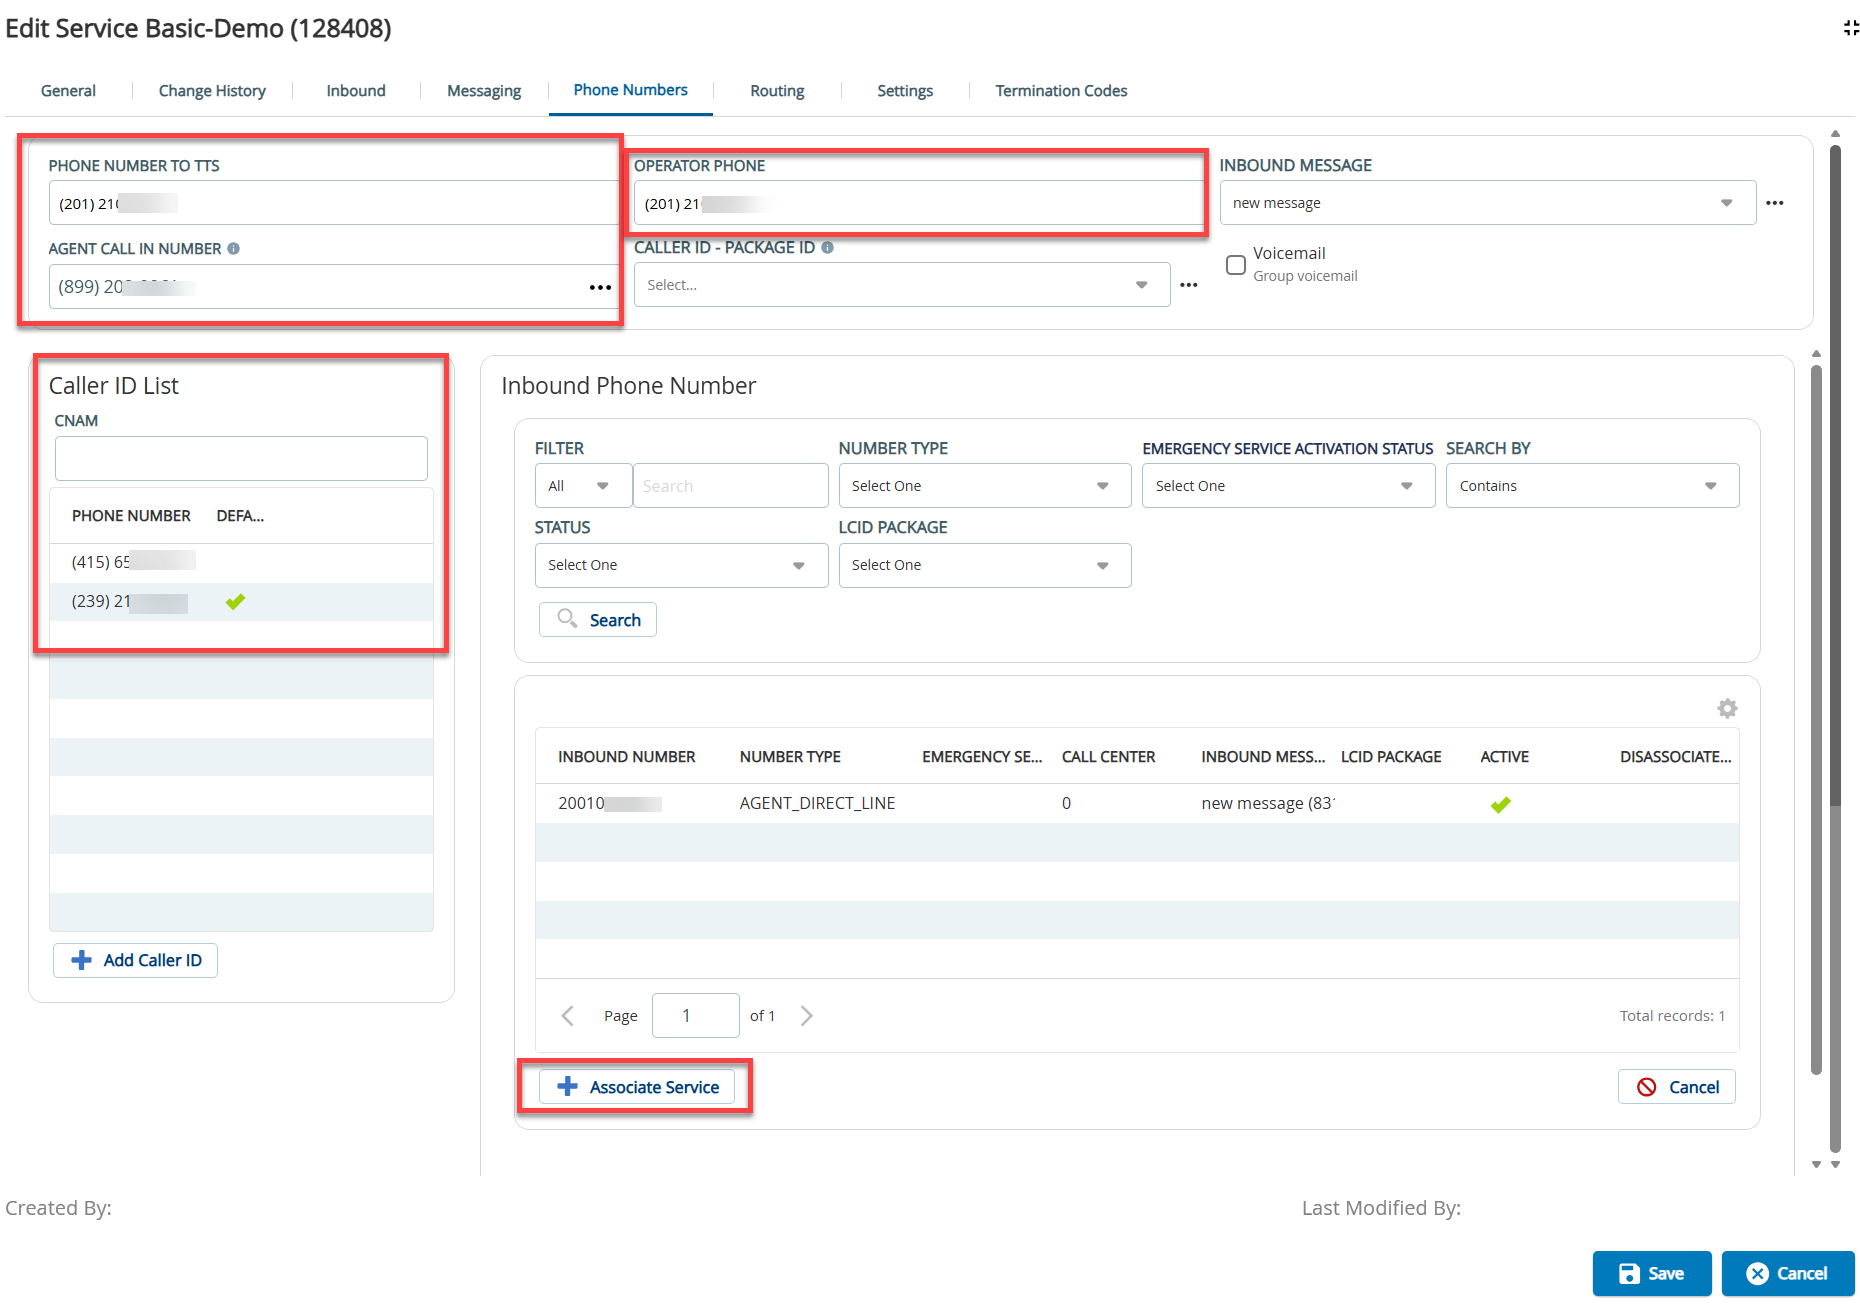
- Specify the Phone Number to TTS. This number is used in answering machine messages for text-to-speech (TTS).
- Specify the Operator Phone. This number is used when dialing using extensions rather than Direct Inward Dialing (DID).
- Enter the Agent Call In Number. This is the number that agents are prompted to dial when using Agent at Ready In ACD mode to establish their audio pathway to SmartReach.
- Add the Caller ID to the Caller ID List. This is the list of phone numbers that can be set (default option) to appear on the call recipient's caller ID display.
Inbound Phone Number editor allows you to associate/disassociate the inbound phone number to the service.
- Click the Associate Service button. This opens the Associate Service screen.
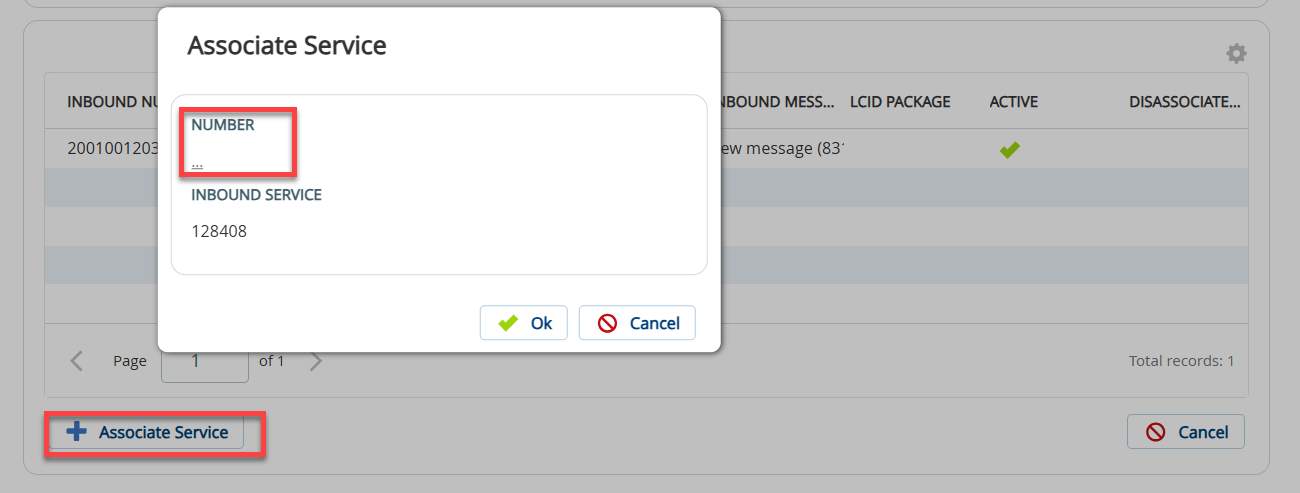
- Click the link next to the Number field from the Associate Service pop-up (screenshot above). The Select Numbers window appears.
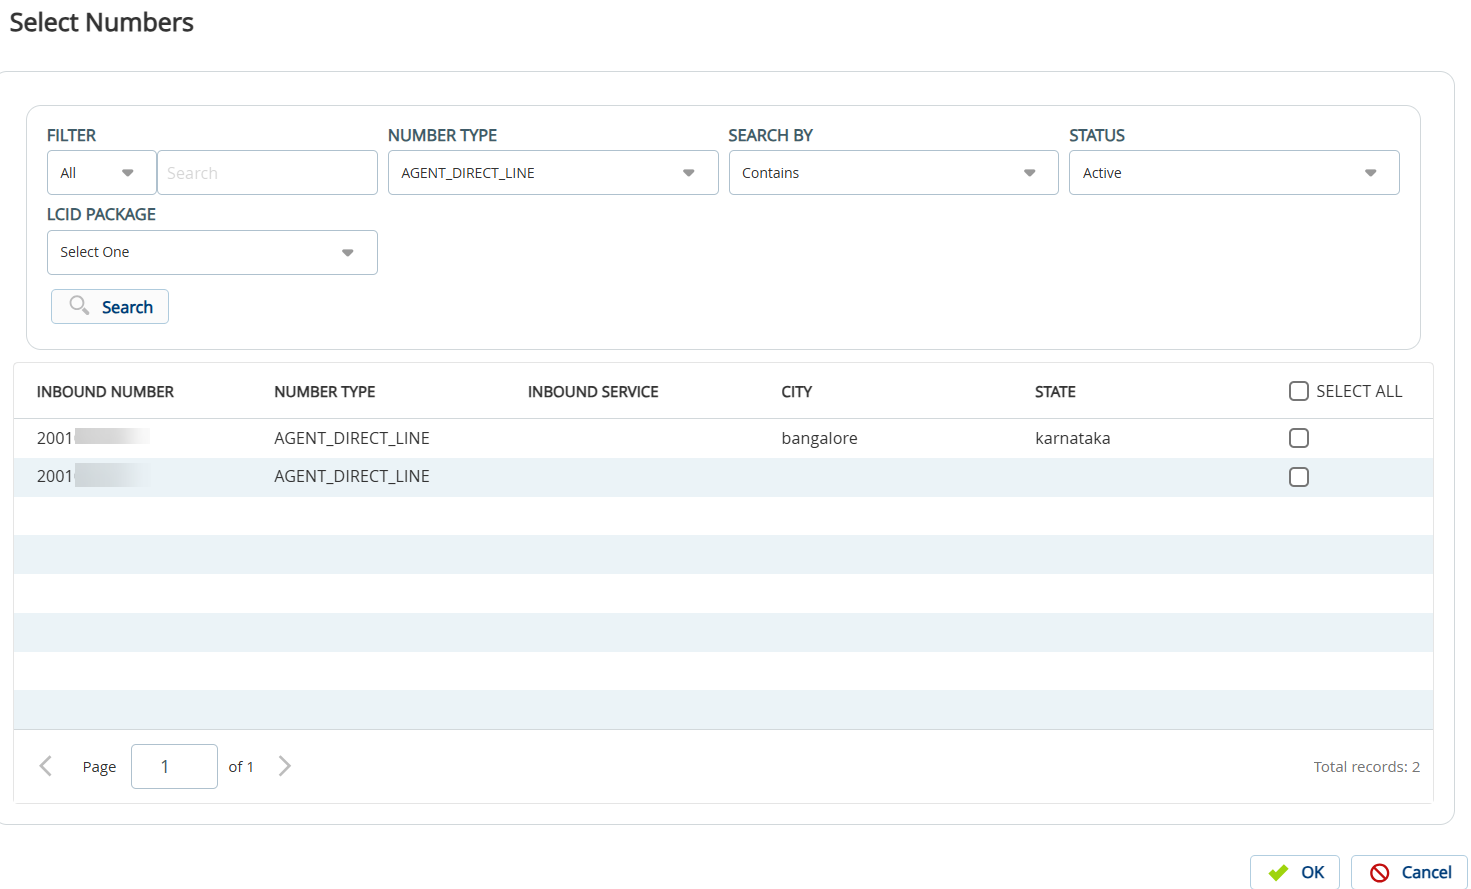
- Select the number to be assigned and click OK.
- Click the Associate Service button. This opens the Associate Service screen.
Configure the routing type.
The Routing tab enables you to view and select the preferred routing method: Service, Service Group, or Agent Teams.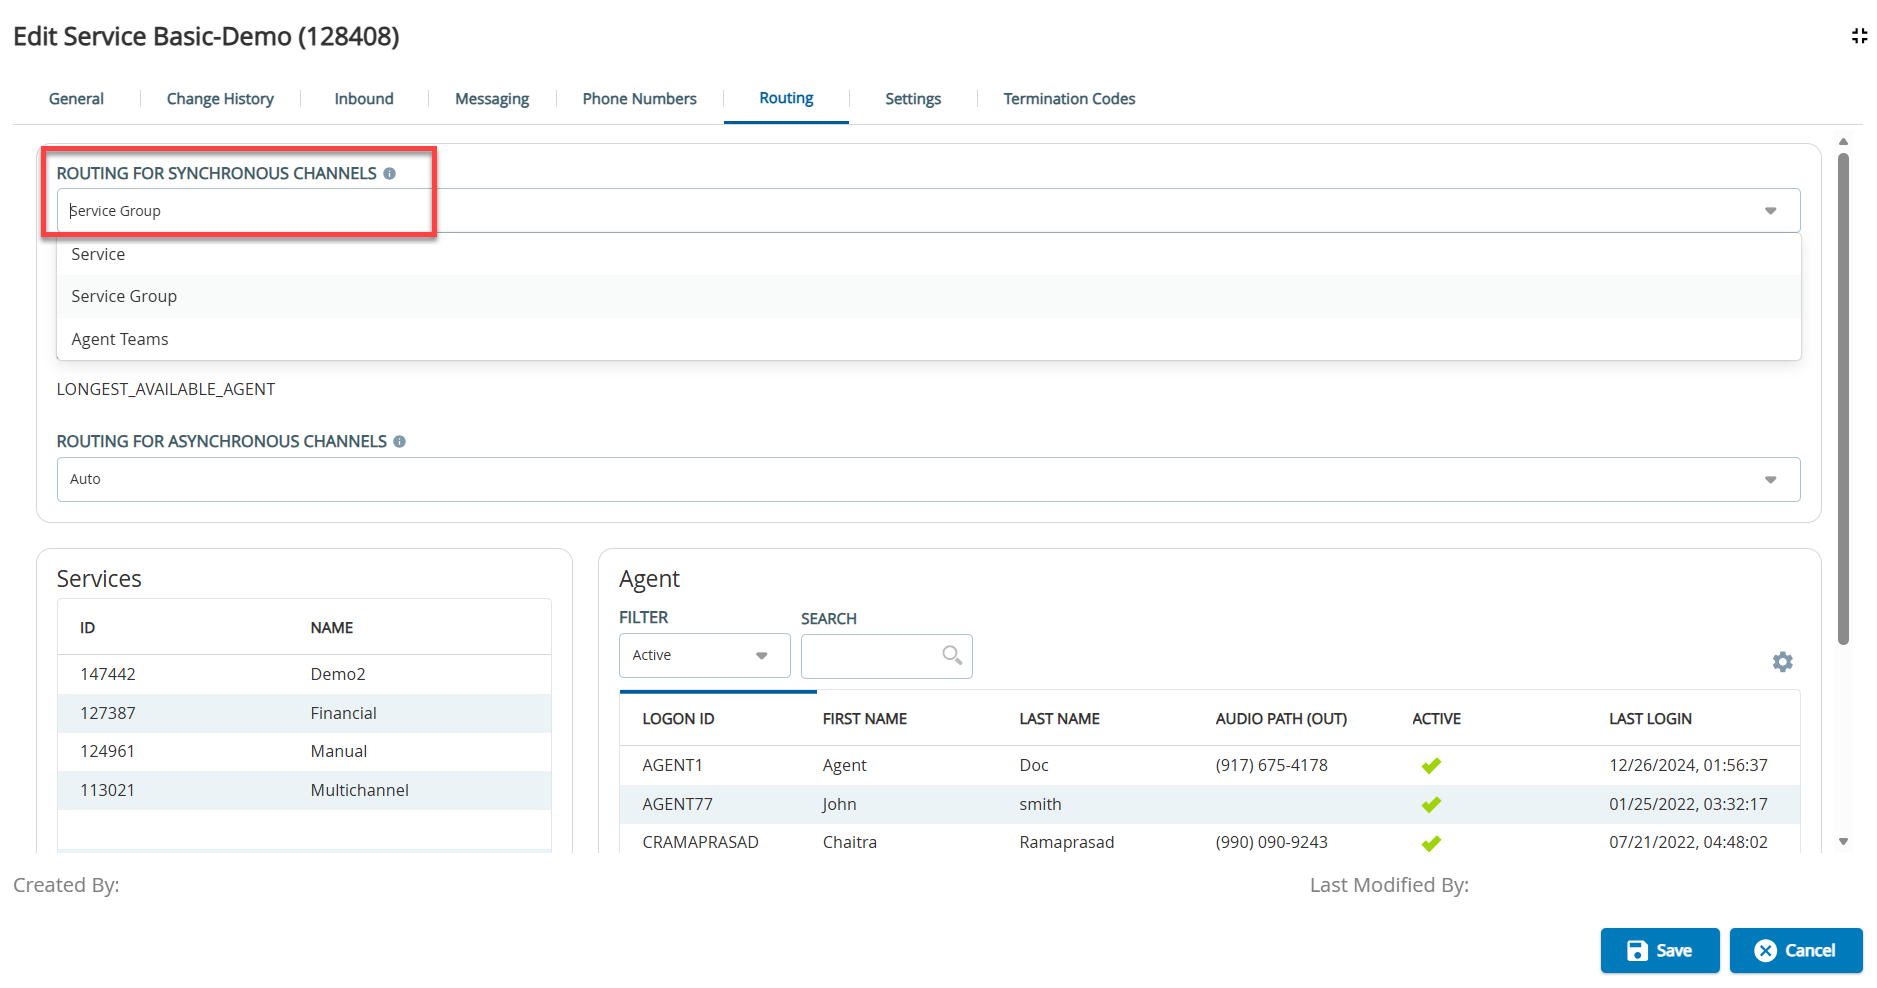
- Service: Routes calls to agents logged into the service.
- Service Group: Routes calls to agents who are assigned to service groups, and this service is part of the service group.
- Agent Teams: Assigns the service to all agents assigned to the required team.
Assign the agent desktop to the agent.
In the Settings tab, select the required Agent Desktop from the drop-down list.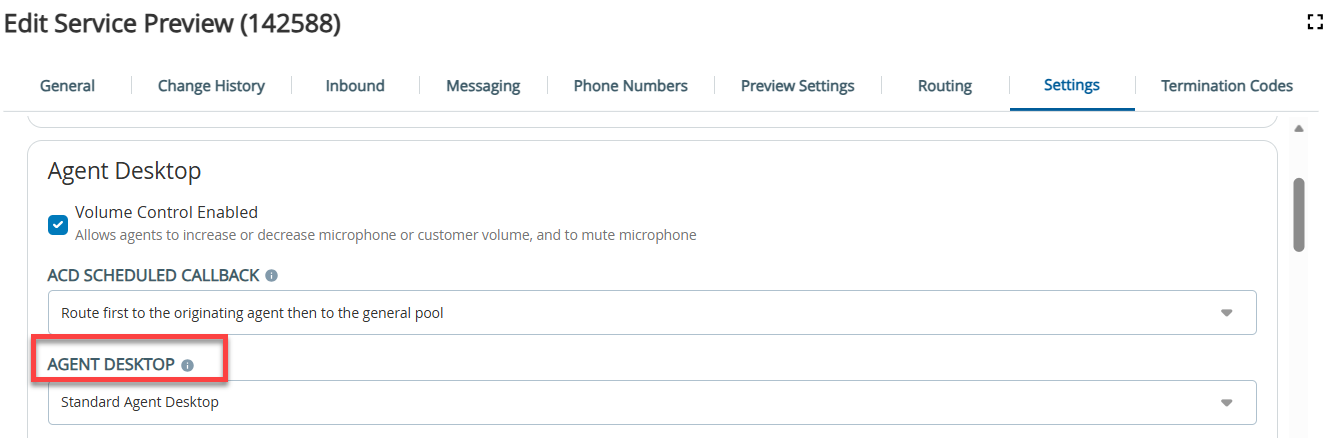
Configure termination/disposition code.
- On the Termination tab, select the Termcode Enabled checkbox to make term codes visible to agents.
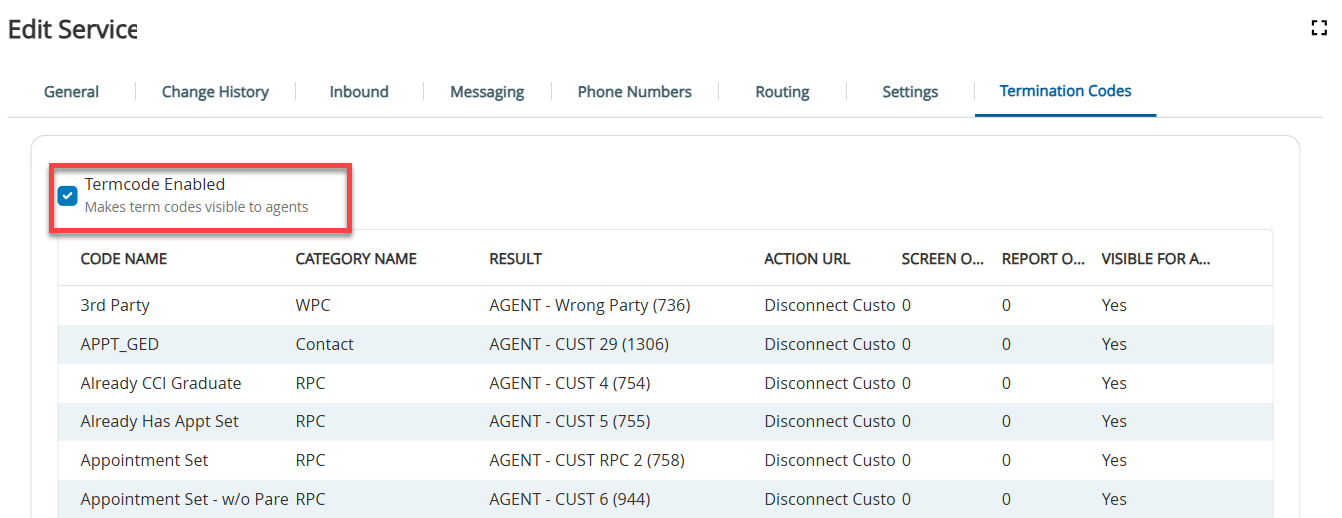
- Click Save.
- On the Termination tab, select the Termcode Enabled checkbox to make term codes visible to agents.
Connect to the customer through the agent desktop.
You can accept calls and service the customers.