Managing Intents
The Intent Management feature allows you to efficiently oversee and customize Intent Lists. Leveraging AI, the system analyzes interactions to generate preliminary Intent Lists. These AI-generated lists provide a starting point, which you can then tailor to fit your organization's specific needs. You can review the details of these lists, including the phrases and sentences they contain, and modify them by adding or updating content as necessary. Once refined, you can publish the Intent Lists can be published and use the published Intent Lists within your organization for evaluation purposes and to streamline various processes.
Additionally, the Intent Management window gives you the flexibility to create new Intent Lists if the AI-generated ones do not meet your criteria. You can also merge, copy, or delete Intent Lists directly from this window to better manage your intents.
Accessing Intent Management
To access the Intent Management feature, on the WFO tab, click Interactions Intents > AI Driven Intents > Intent Management. The Intents List window displays all the AI- generated intent lists.
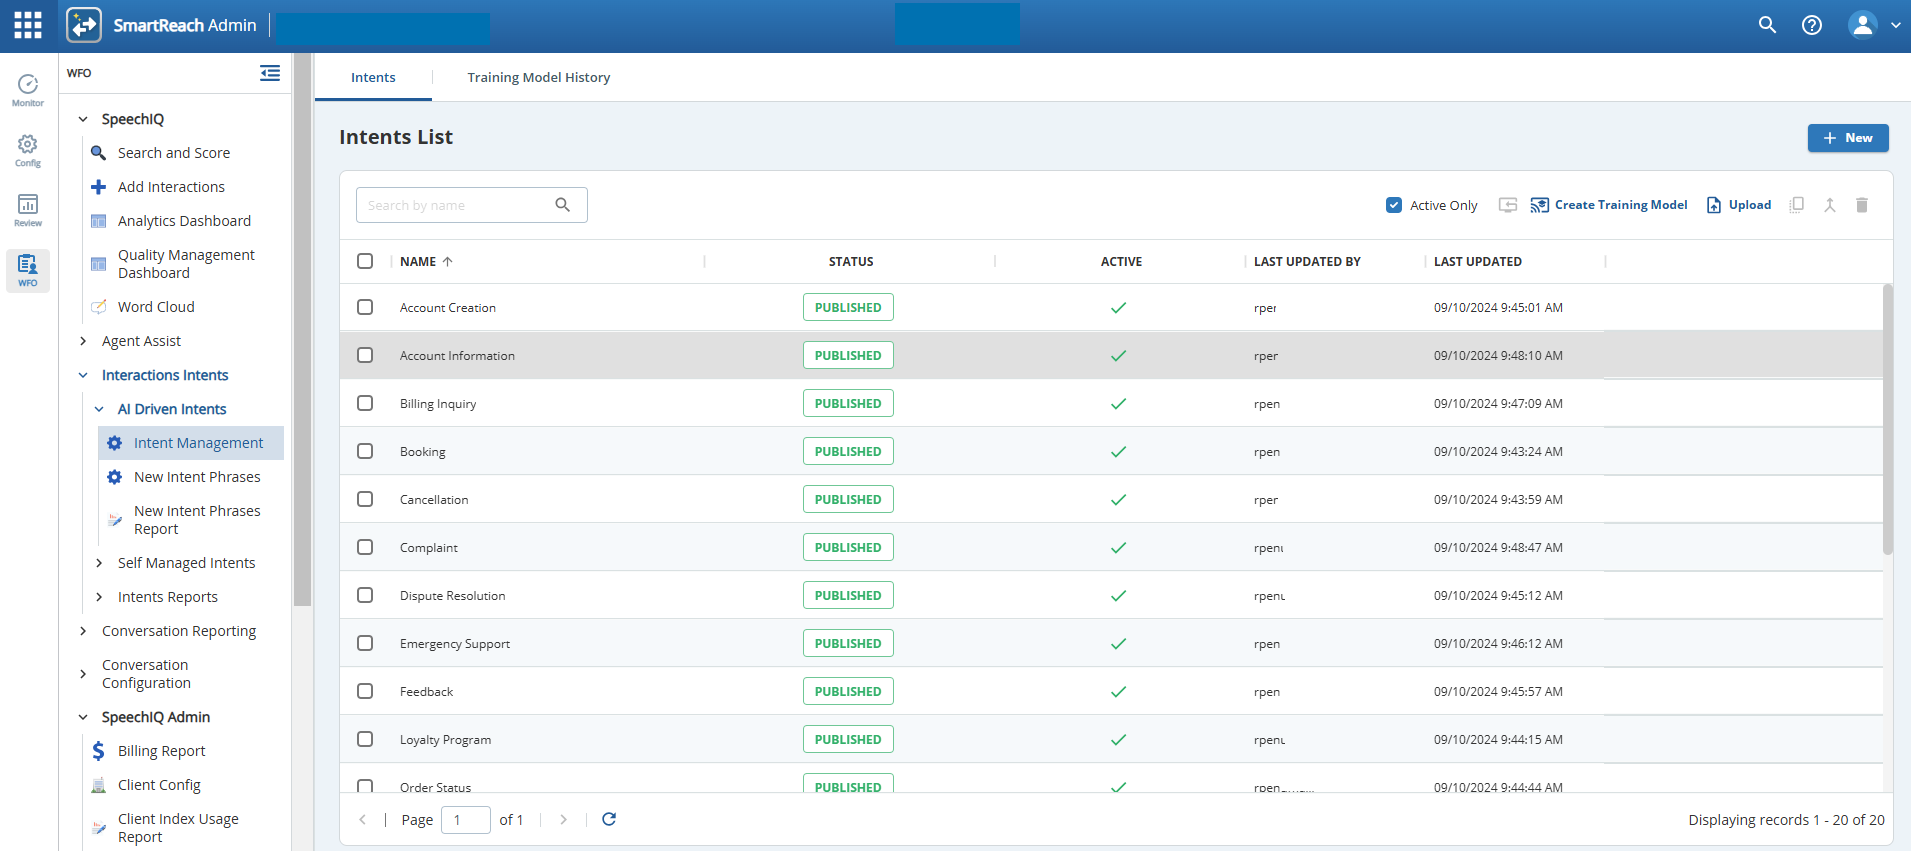

- Click
 to search for specific Intents.
- Enable the Active Only check box to list only the active Intents.
Creating an Intent List
To create a new intent list:
- On the Intent List window, click
 . The following window is displayed:
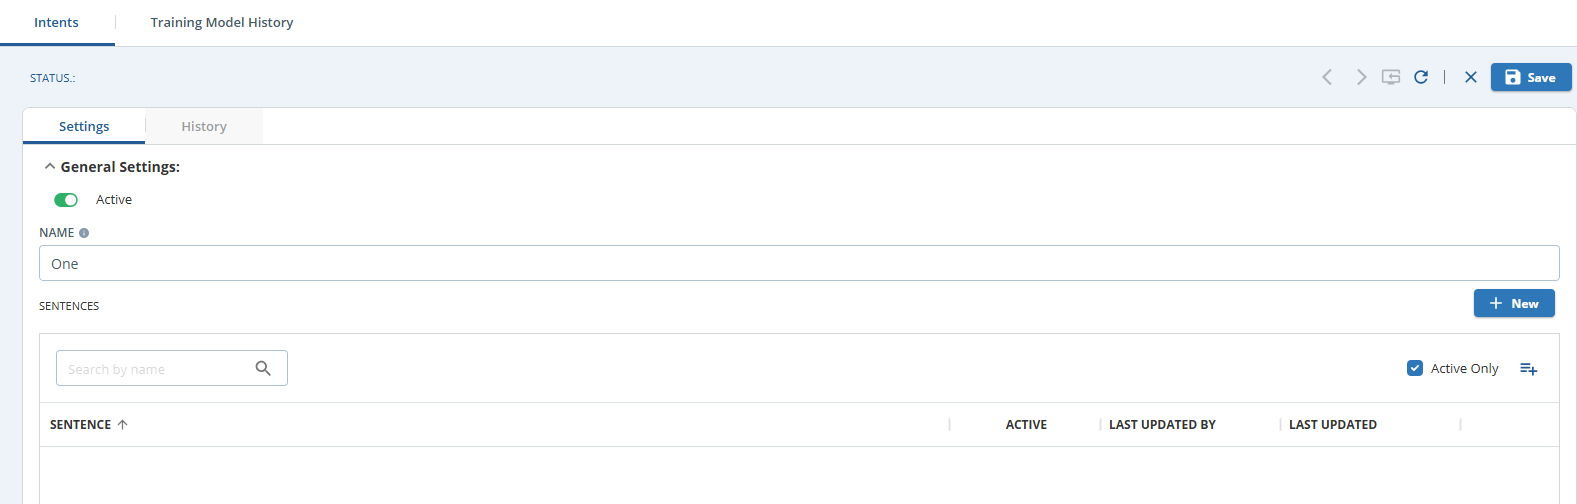
- In the Settings tab, under General Settings, enter a name for the intent in the Name field.
- Use the
 to search for specific sentences or phrases.
Click the Active Only check box to list only the active sentences or phrases.
- You must now add sentences to the intent. Under the Sentences section, click
 to add sentences.
- Enter a sentence in the space under the Sentence column.
- Add as many sentences as required.
- Click
 to add phrases to the intent. The Add Phrases window is displayed.
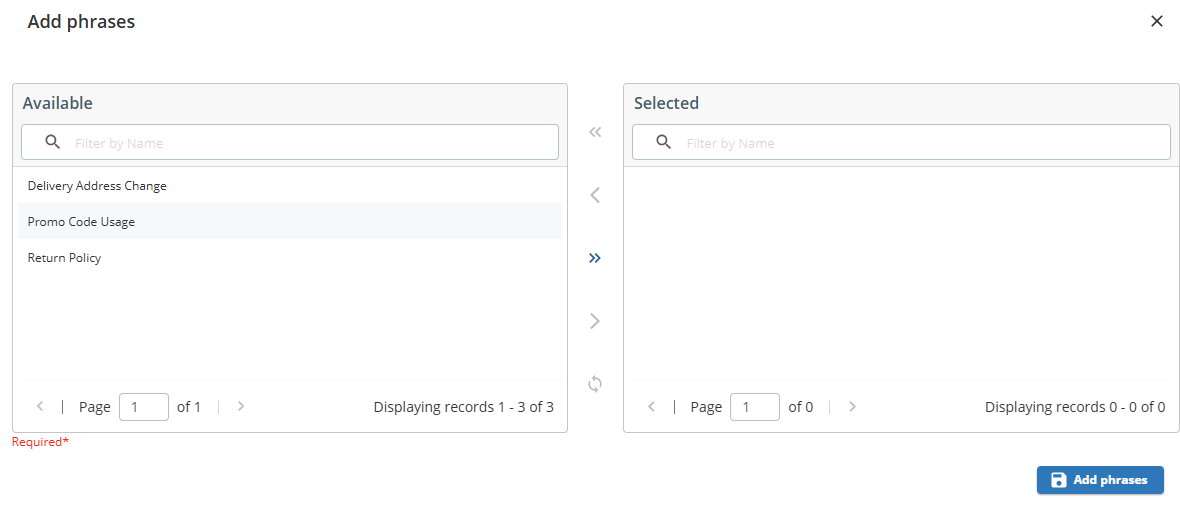
- Select the required phrases from the Available list and move the phrases to the Selected list. Click Add Phrases to add the phrases listed in the Selected list.
- To make the intent active, enable the Active button.
- Click Save to save the intent.
Viewing Details of an Intent
To view the details of an Intent:
- On the Intents List window, double-click on the intent you want to view. The window for the intent is displayed.
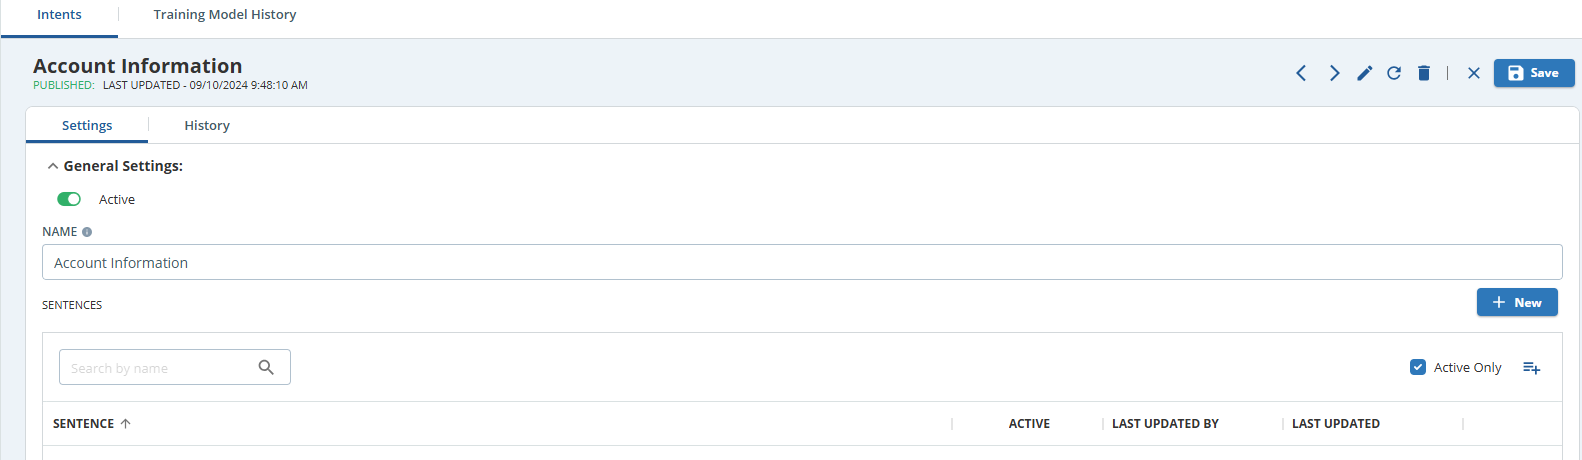
- In the Settings tab, the Sentences section has all the sentences for the intent listed. Information, such as Active, Last Updated By, and Last Updated Date are displayed in this section. You can edit the information to make any changes necessary. See the Editing an Intent section documented below.
- The History tab provides information about all the changes made to the intent. The Name, Created By, Created Date, and Description of each intent are displayed.
Editing an Intent
To edit an existing intent:
- On the Intent List window, double-click on the intent you want to edit. The window for the intent is displayed.
In the Settings tab, under General Settings, modify the name for the Keyword Topic in the Name field. - You can add or delete a sentence or a phrase in the Sentence section.
- To add a new sentence, click
 and enter a sentence in the space under the Sentence column.
Double-click a sentence to edit the sentence.
- Click
 to add phrases to the intent. The Add Phrases window is displayed.
- Select the required phrases from the Available list and move the phrases to the Selected list. Click Add Phrases to add the phrases listed in the Selected list.
- Use to search for a specific sentence.
- Click
 to refresh the sentences listed for the intents.
- Click Switch to draft to change a published intent to draft state.
- Click Publish to publish an intent that is in draft state.
- Use
- To add a new sentence, click
To delete a sentence, select the sentence and click
 .
Publishing an Intent
You can use the intents to create Interaction Intents. Use a single intent or select multiple Intents to create an Interaction Intent.
To create Interaction Intents, you must publish the intent.
To publish intent(s):
- On the Intent List window, select the intent(s) using the check box.
Click
 to publish the intent.
You can also double-click the intent and then click Publish from the details page.
The Publish Intents window appears.- Enter a name for the interaction intent in the Interaction Intent Name field.
- Click Save.
The interaction intent is saved. You can navigate to SpeechIQ > Configuration > Interaction Intent to view the interaction intent.
Merging Multiple Intents
You can merge multiple intents into a single intent. To merge intents:
- On the Intents List window, select multiple intents using the check box.
- Click
 to merge the intents.
A Confirm screen is displayed giving you the merge details and asking you to confirm. - Click OK.
Copying an Intent
To copy an intent:
- On the Intents List window, select the intent you want to copy using the check box.
- Click
 to copy the intent.
A Confirm screen is displayed asking you to confirm. - Click OK.
Deleting an Intent
To delete an intent:
- On the Intents List window, select the intent you want to delete using the check box.
Click
 to delete the intent.
A Confirm screen is displayed asking you to confirm.You can also double-click the intent and then click Delete from the details page.
- Click OK.
Viewing Training Model History
To view the Training Model History:
- Click the Training Model History tab. The History List is displayed with information, such as Action Type, Last Updated By, Last Updated, and Description.
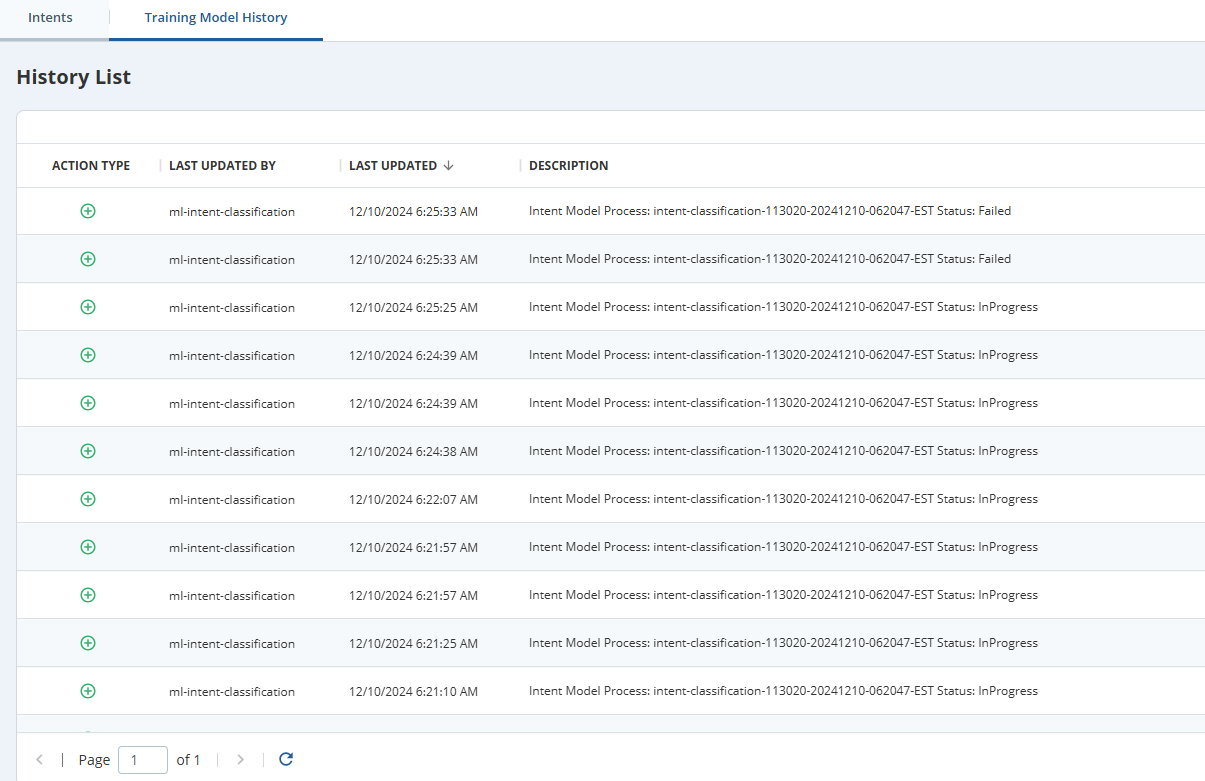
- Click to refresh the data.