Download PDF
Download page Agent Desktop Native (ADN).
Agent Desktop Native (ADN)
This document provides a summary of the changes across the different releases of the Agent Desktop Native (ADN) application, and instructions on how to download, install, configure, and use the Agent Desktop Native (ADN) application. This document is intended for individuals responsible for the setup and training of contact center agents, and individuals with access to agent desktop configurations.

To benefit from our most up-to-date and robust security updates, we recommend that you upgrade all machines using ADN to Version 11.0.1. By upgrading to ADN 11.0.1, you are also set for a marked improvement in reliability, functionality, security, and your agents' experience. To begin the easy upgrade process, we invite you to reach out to our Customer Care Team or your dedicated Account Team at your earliest convenience.
ADN is an application that is designed to enhance the agent experience. It offers the following features:
- Enables browser-independent access to the agent desktop
- Uses integrated voice through Web Real-Time Communication (WebRTC)
- Provides access to a screen recording feature
- Enables the use of Desktop Native commands

- The ADN 8.0 application is the last version that supports Windows 8.1.
- The ADN 9.0 and later versions support Windows 10, Windows 11, Mac OS, Ubuntu 20.04 (Debian 10), Ubuntu 22.04 (Debian 11), and Citrix (Windows 10). This document provides instructions for installation on Windows, Mac, and Linux systems.
Summary of Changes
The following table summarizes the changes to the ADN application across different releases.
| ADN Version | Platform Release | Changes | Release Date |
|---|---|---|---|
| 11.0.1 | Fall 24 |
| July 24, 2026 |
| 10.0 | Fall 24 |
| September 18, 2024 |
| 9.0 | Fall 23 |
| November 27, 2023 |
| 8.0 | LV19 |
| February 28, 2022 |
ADN Platform Compatibility
Platform Release | ADN Version |
|---|---|
| Fall 24 | ADN 10.0, ADN 11.0.1 |
| Fall 23 | ADN 9.0, ADN 10.0, ADN 11.0.1 |
| LV19 | ADN 8.0, ADN 9.0, ADN 10.0, ADN 11.0.1 |
Downloading the ADN Application
You can download the ADN 11.0.1 application to the agent’s desktop either through the LiveVox/SmartReach portal, Agent Sign-In page, or by contacting the Customer Care Team.
Downloading ADN through the SmartReach Portal
To download the ADN application through the SmartReach portal:
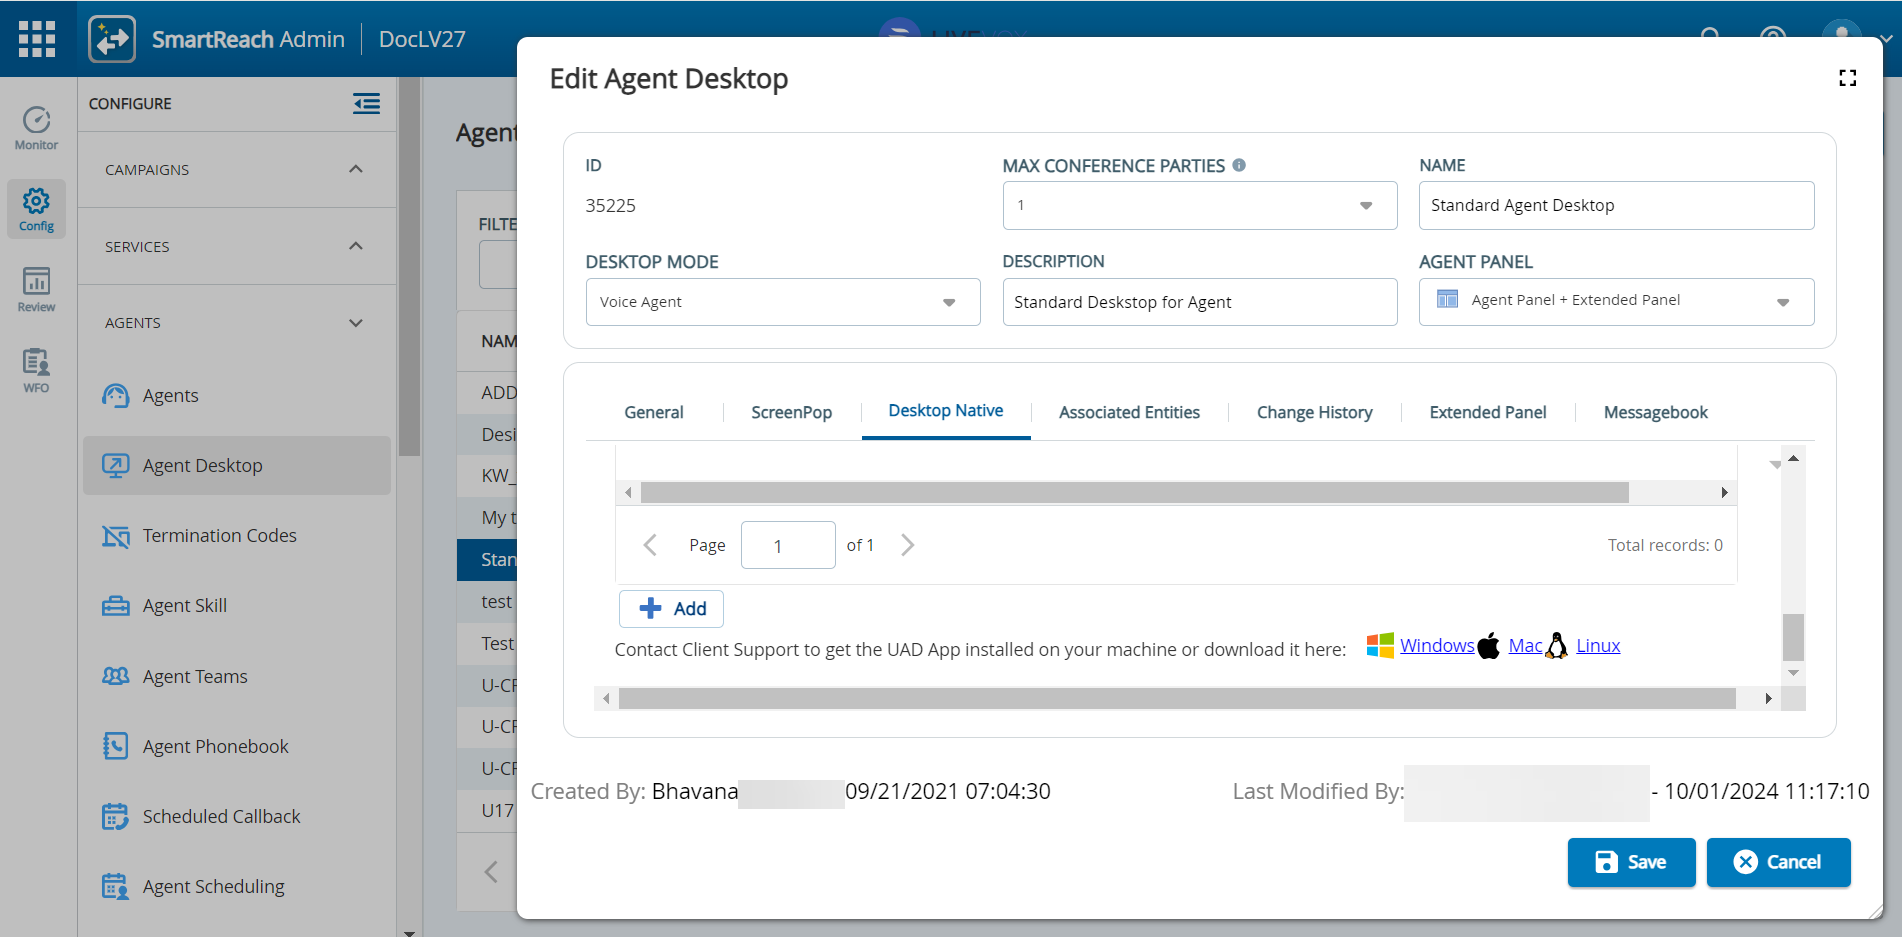
- Log in to the SmartReach portal with an account that has administrator privileges and navigate to Configure > Agents > Agent Desktop. Double-click the required agent desktop row. Select the Desktop Native tab from the Edit Agent Desktop window. The Desktop Native tab is available by default in the Edit Agent Desktop window of the SmartReach admin portal.
- Scroll down to the Desktop Native Commands section and click the platform (Windows, Mac, or Linux) on which you want to download the ADN application.
Downloading ADN through the Agent Sign-In Page
To download the ADN application through the Agent Sign-In page, navigate to the Agent Sign-In page, sign in with your credentials, and then click the Get The App link.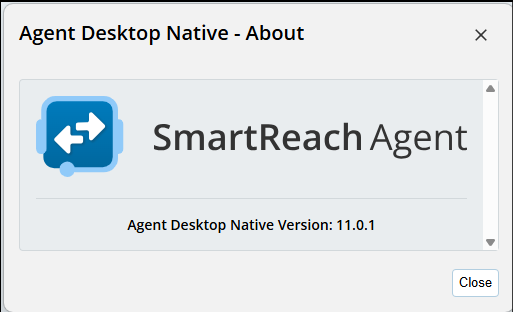
Installing the ADN Application
After downloading ADN, follow the procedure below to install the application.
Installing ADN on Windows
- Run the agent-desktop-native-<version>.exe file to launch the installer. The following message appears.
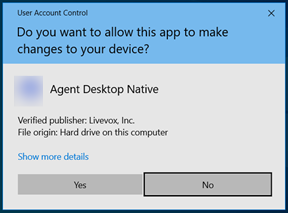
- Click Yes to begin the installation process. An Agent Desktop Native Setup window appears.
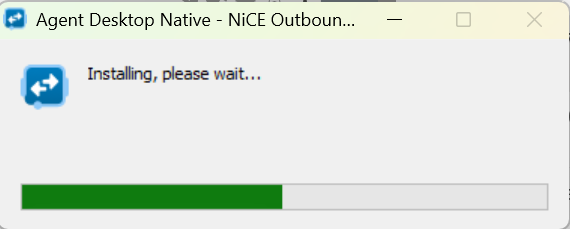
- The application is installed on the local machine. You can launch the ADN application from the applications folder, or the icon placed on the desktop.

Installing ADN Using the Microsoft Software Installer (MSI) Package
If the Windows administrator prefers to manage bulk installations and upgrades rather than allowing agents to self-service, an MSI package is available for use with typical administration and automation tools. Additionally, by using an MSI Transform (MST) file, you can customize this package to pre-populate the client code and other configuration information. The following is an example of using the MSI with an MST and a custom config.json file, to perform a preconfigured administrator installation of ADN.
- This applies only to the Windows platform.
- Contact the Customer Care Team for the MSI installer package and the MST overlay.
- Copy the Microsoft installer package ADN 11.0.1.msi and config.mst file to the specific folder. For example, C:\temp\ADNInstall\
- Create the config.json file using Notepad. Save the file in the same folder and add {"clientCode":"Value"} to the file. Update the Value field with your appropriate Client code. For example, {"clientCode":"DocFall23"}.
If you are using SSO, please see the Using ADN with SSO Enabled topic below.
- Open the Windows command prompt and go to the MSI package directory. For example, cd C:\temp\ADNInstall\
- Execute the following command:
msiexec /i agent-desktop-native-11.0.msi TRANSFORMS=config.mst
After successful installation, you should find the custom preconfigured config.json file in C:\Program Files\Agent Desktop Native.
- The file in this location provides the default settings for ADN, and is in addition to any user-level config adjustments that are saved to C:\Users\username\AppData\Roaming\Agent Desktop Native on a per-user basis.
When upgrading the ADN version, the installation works as follows:
- The EXE installer removes the previous EXE installation.
- The MSI installer removes any previous installation.
- The MSI installer requires administrator privileges to run, so agents might be unable to upgrade their ADN installation if an MSI installation is used.
- The EXE installer does not remove the previous MSI installation. If you try to use an EXE installer to upgrade an ADN version installed using an MSI installer, the following message appears:

Installing ADN on a Mac
- After downloading the ADN application, run the .pkg file to launch the installer.
- Follow the installation on-screen instructions to complete the installation process.
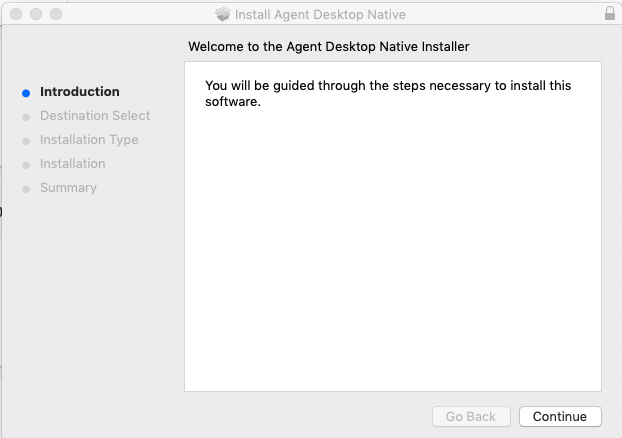
After the installation process is complete, launch the ADN application from the applications folder.
Using ADN on Linux
The ADN application for the Linux operating system is released as an AppImage. You do not need to install the ADN application. You can run ADN from the command line or by double-clicking on the AppImage file.
After downloading the AppImage file, locate the file at your desired location and provide the permissions according to your requirements.
For example, $ chmod 700 agent-desktop-native-11.0.1.AppImage
The AppImage requires libfuse 2 to run correctly. In cases like Ubuntu 22, which comes with libfuse 3 by default, you must manually install libfuse 2; otherwise, the error message is displayed.
Using ADN with SSO Enabled
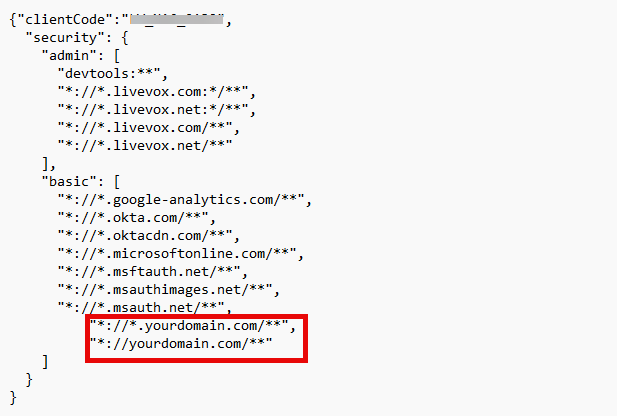
To avoid a whitelisting error when logging in to Agent Desktop Native (ADN) using Single Sign-On (SSO), you must include your authentication domains in the config.json file.
If you have already installed ADN, you must replace the existing config.json file in the installation folder. If this is a new installation, you must ensure that the correct domains are included in this file to avoid any future issues when logging in.
- Go to the ADN installation folder (C:\Program Files\Agent Desktop Native - NiCE Outbound Engagement)
- Create or update the config.json file using Notepad.
- Add the authentication domains required for your SSO environment. Save the file when you are finished.
The following is an example of a config.json file required for SSO users:
Configuring the ADN Application
You can configure the Agent Desktop Native settings on the Configure tab of the SmartReach portal. Log in to the SmartReach portal with an account that has administrator privileges and navigate to Configure > Agents > Agent Desktop. Double-click the required agent desktop row. Select the Desktop Native tab from the Edit Agent Desktop window. The Desktop Native tab is available by default in the Edit Agent Desktop window of the SmartReach admin portal.
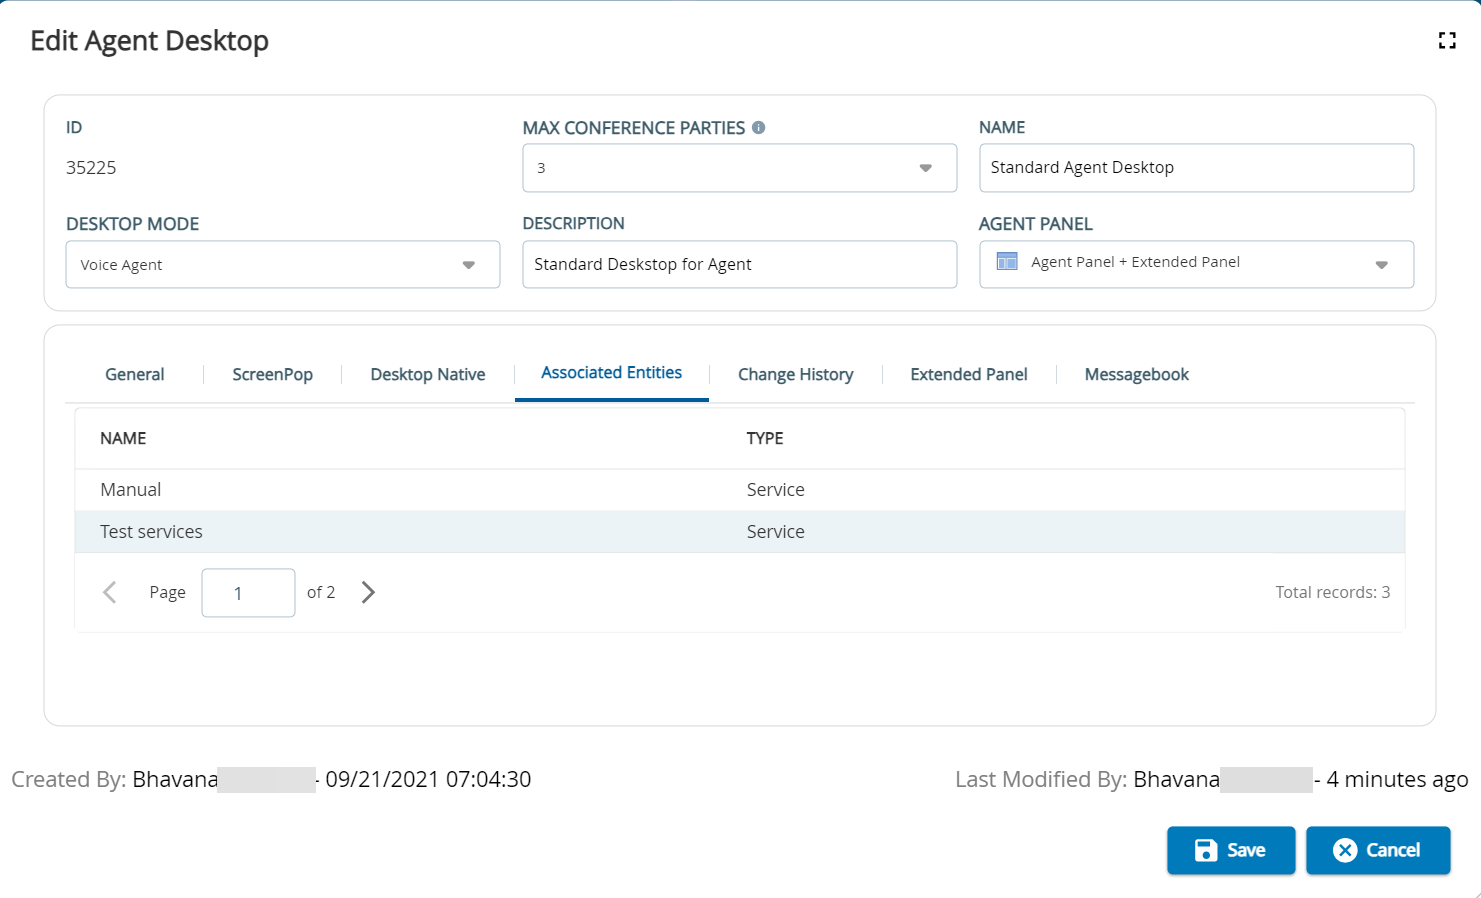
- Click the Associated Entities tab and ensure that the selected desktop is associated with the service to which the agent must log in. You can configure the association in the Client or Service editor.
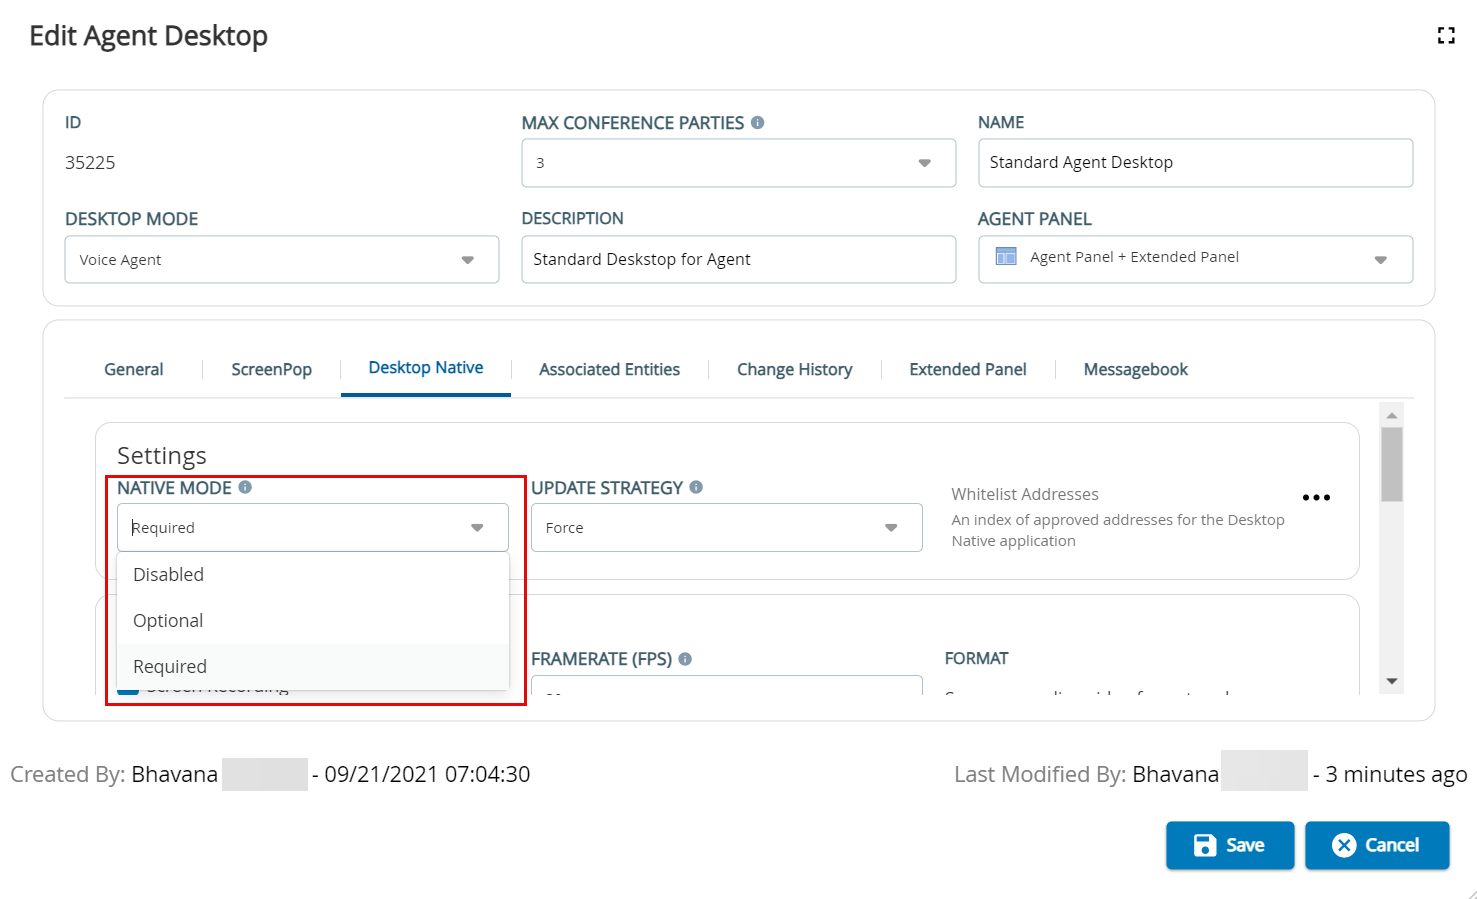
- On the Desktop Native tab, ensure that the Native Mode is set to Optional or Required. The Native Mode drop-down menu has the following options:
- Disabled: Agent cannot log in using ADN.
- Optional: Agent can use the browser or ADN to log in.
- Required: Agent can log in only using ADN.
- Choose an Update Strategy to define the version of the Agent Desktop Native application:
- Ok: No restriction to use any version of ADN.
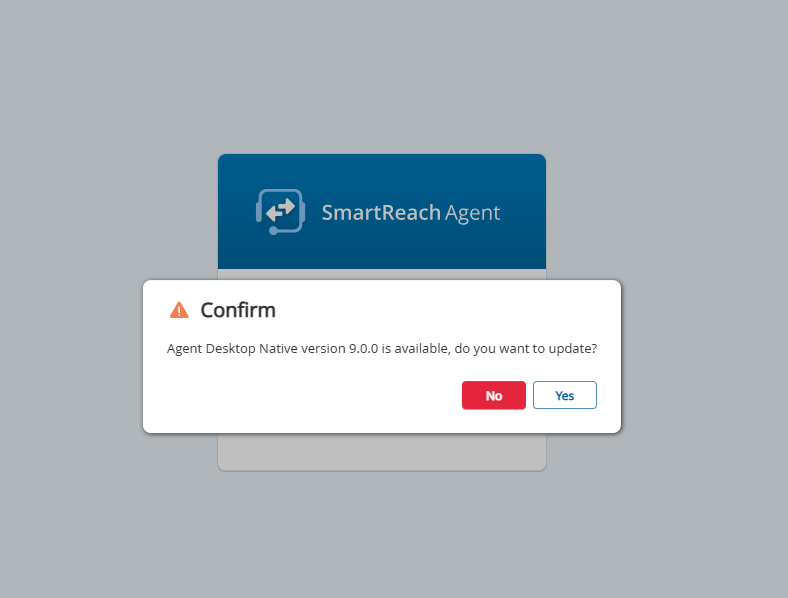
- Ask: If an agent has a different version installed than the one configured for the site, a pop-up window prompting an update appears. An update notification appears after the agent logs in to the Agent Desktop Native application and selects a service.
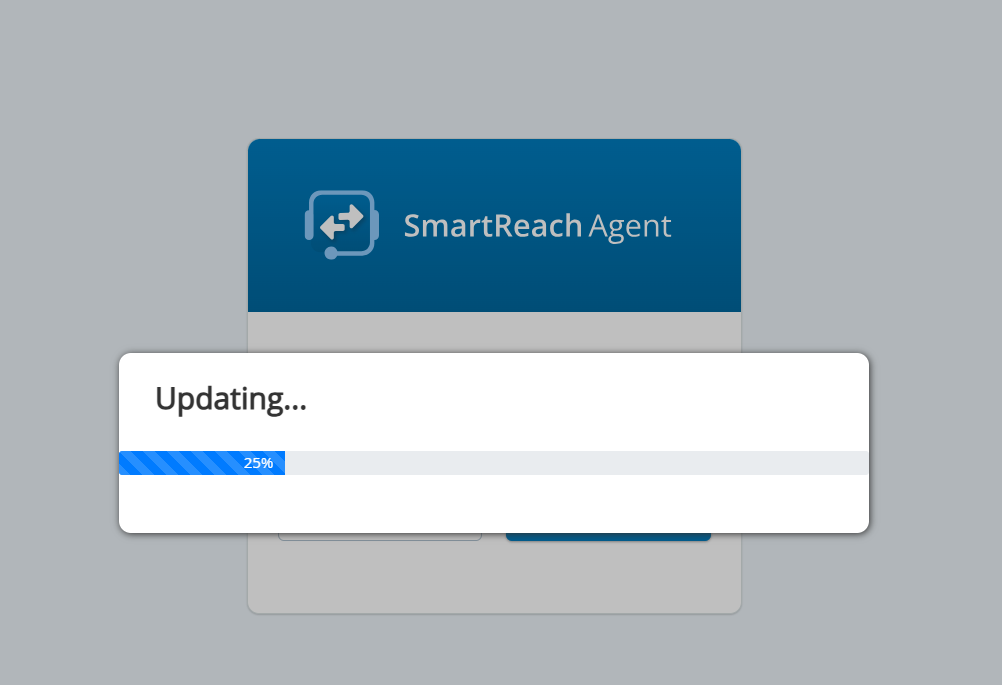
- Force: After login, the update process installs and starts the new version without intervention. The update automatically launches when an agent logs in to the ADN application and selects a service.
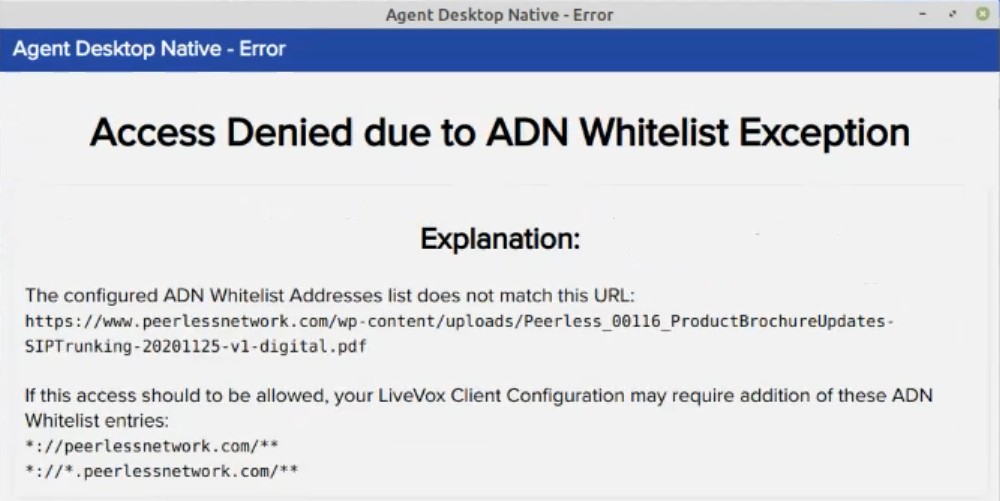
- Set Whitelist Addresses to define trusted domains. If the domain is not added in the Whitelist address list, the agent desktop displays an error message.
- By default, only the trusted SmartReach domains are listed. This mechanism blocks the loading of resources that do not match the information contained on the whitelists. Click the ellipsis next to the Whitelist Addresses to open the Whitelist Addresses pop-up window that allows you to view and manage the list of all the approved addresses for the Desktop Native application.
- Add: Adds a new entry. Enter the address to be added as a whitelisted address in the Address field.
The whitelist address should be in the Uniform Resource Locator (URL) format. You can specify the whitelist address to allow multiple domain addresses with single whitelist entry by using the following conventions.- * matches any character besides /
- ** matches any character including /
- If the address does not contain * or **, then all characters match literally.
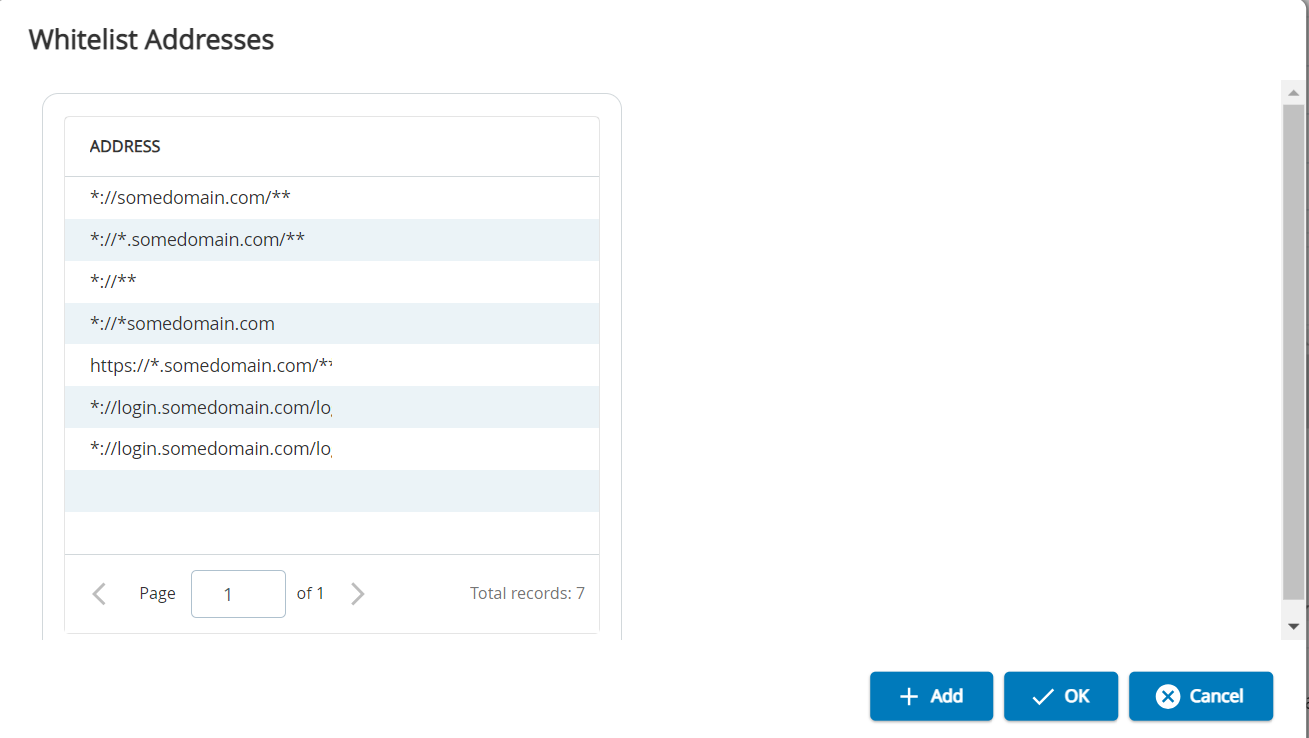
Examples:
- *://somedomain.com/** – Matches any page at somedomain.com.
For example, https://somedomain.com/foo/index.html - *://*.somedomain.com/** – Matches any page at a subdomain of somedomain.com.
For example, https://www.foo.somedomain.com/foo/index.html - *://** – Matches any page at all (usually not recommended except for debugging, but possibly useful for knowledge-workers)
- *://*somedomain.com – Matches any domain ending in somedomain.com
This is not recommended since it will match items, such as https://evilattackersomedomain.com/evil.html - https://*.somedomain.com/** – Matches any subdomain of somedomain.com, but only if it is https.
- *://login.somedomain.com/login/* – Matches pages in the /login/ path on login.somedomain.com, but it does not match https://login.somedomain.com/login/images/logo.png because that's in a subdirectory.
- *://login.somedomain.com/login/** – Matches pages in the /login/ path and all subdirectories on login.somedomain.com and it does match https://login.somedomain.com/login/images/logo.png
- Delete: Deletes an entry. Select the address and click the Delete button to delete an entry.
- OK: Click OK to save the changes.
- Close: Click Close to discard the changes.
- Add: Adds a new entry. Enter the address to be added as a whitelisted address in the Address field.
- If you have a single-sign-on provider, you must allow access to the provider. For example, *://yourcorp.okta.com/**
- To discover what URLs need to be whitelisted, check the information in any of the BLOCKED errors that appear in the application window or the ADN logs. For more information about the ADN logs, go to the ADN Logs section of this document.
Configuring ADN on an Agent Workstation
Launch the ADN application.
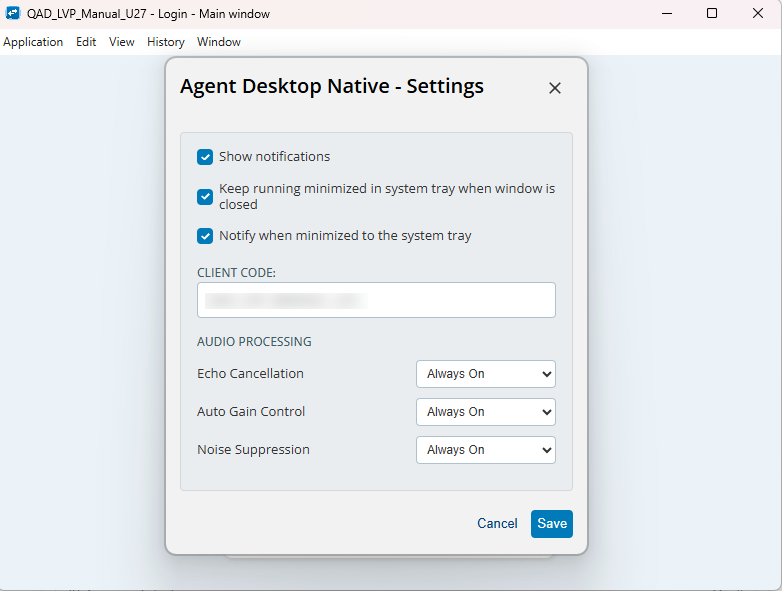
You are prompted to configure your client code by the following message.
- Show notification: When selected, chat notifications appear on the screen through the minimized ADN application from the system tray.
- Keep running minimized in system tray when window is closed: When selected, the ADN application runs in the background even if the ADN application window is closed by using the cross (X) button. You can open it again using the ADN icon from the system tray. If this option is not selected, clicking on the cross (X) button exits the ADN application.
- Notify when minimized to system tray: When selected, the following notification appears if you minimize the ADN application window to the system tray by closing the ADN application.

Client Code: Specify your client code. If you do not know your client code go to Step 2; otherwise, go to Step 3.
Alternatively, you can set the Client Code from the Settings options.- On a Windows system, go to Application > Settings.
- On a Mac system, go to Agent Desktop Native > Settings.
- Audio Processing: The Audio Processing settings allow you to control how your browser processes microphone audio from Agent Desktop Native - Settings. These options can be configured to match your environment and audio requirements.
Option Behavior Default Uses the browser's default behavior. No changes are applied. Always On Always enables this audio feature. Always Off Always disables this audio feature. - Echo Cancellation: Controls the browser's Echo Cancellation feature, which reduces echo when sound from speakers is picked up by the microphone. Turning this on helps make voice calls clearer. You can adjust audio processing settings at any time through the application's Settings menu Always On, Always Off, or Browser Default Default.
- Auto Gain Control: Controls whether the browser automatically adjusts the microphone volume. You can adjust audio processing settings at any time through the application's Settings menu Always On, Always Off, or Browser Default Default.
- Noise Suppression: Controls whether the browser reduces background noise in microphone audio. You can adjust audio processing settings at any time through the application's Settings menu Always On, Always Off, or Browser Default Default.
Note
Changes to these settings do not affect an ongoing call. The new settings will be applied only to calls started after the changes have been saved.
- To copy your Client Code, go to the General tab of the Client editor.
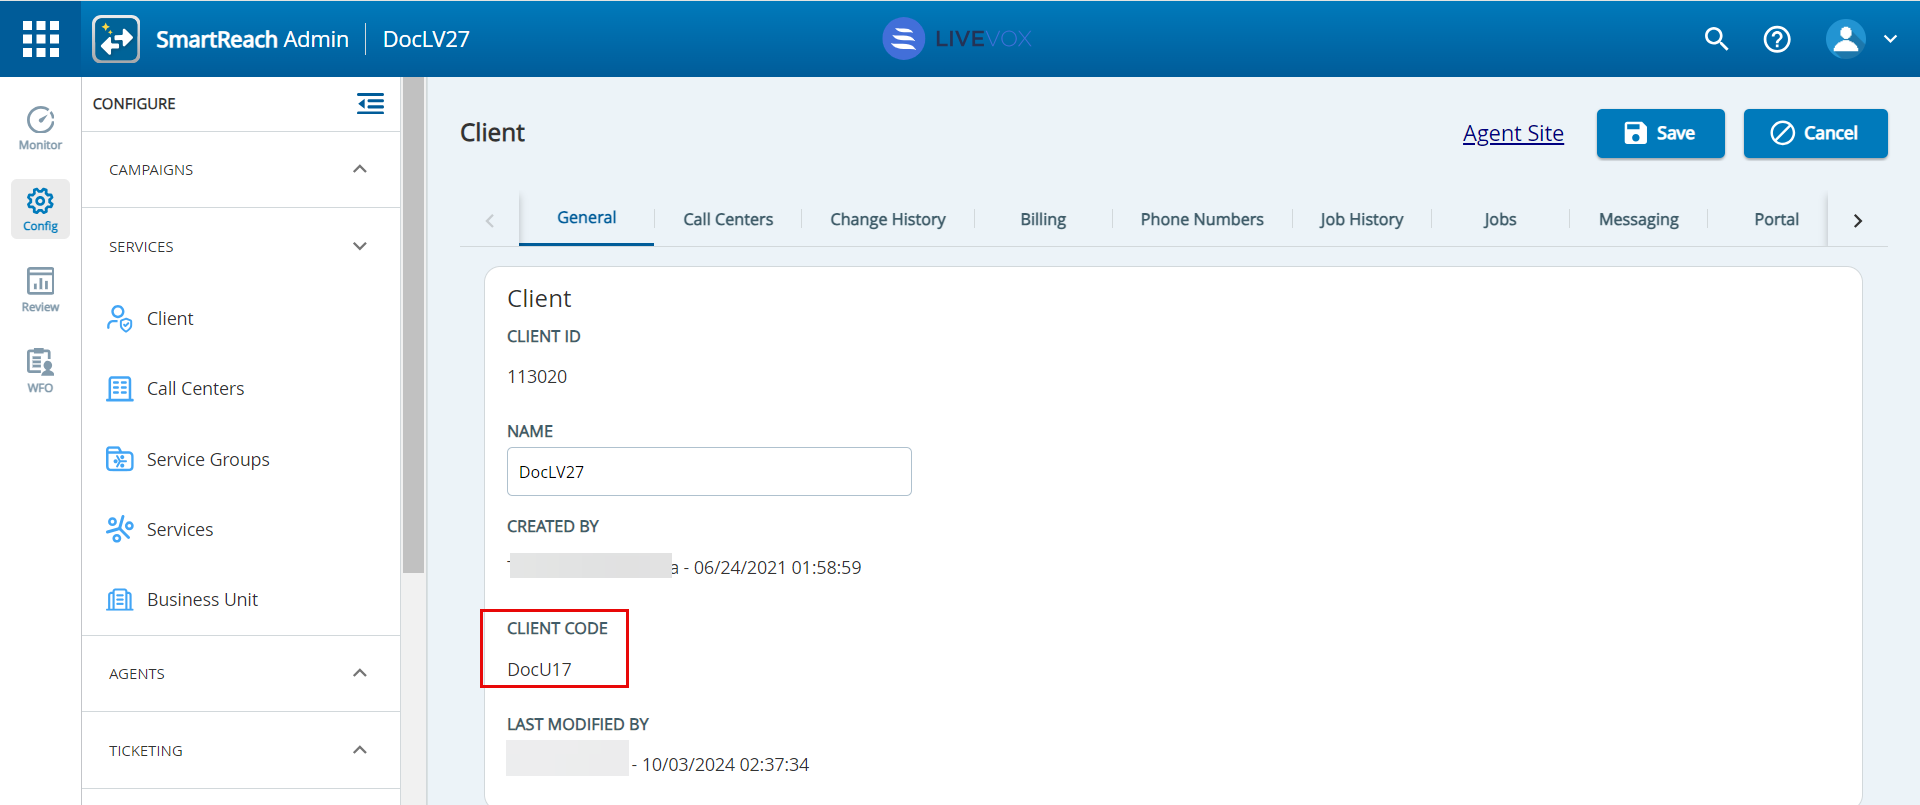
Enter or paste your Client Code in the Agent Desktop Native-Settings window and click the Save button.
Specify your login credentials and click Next.
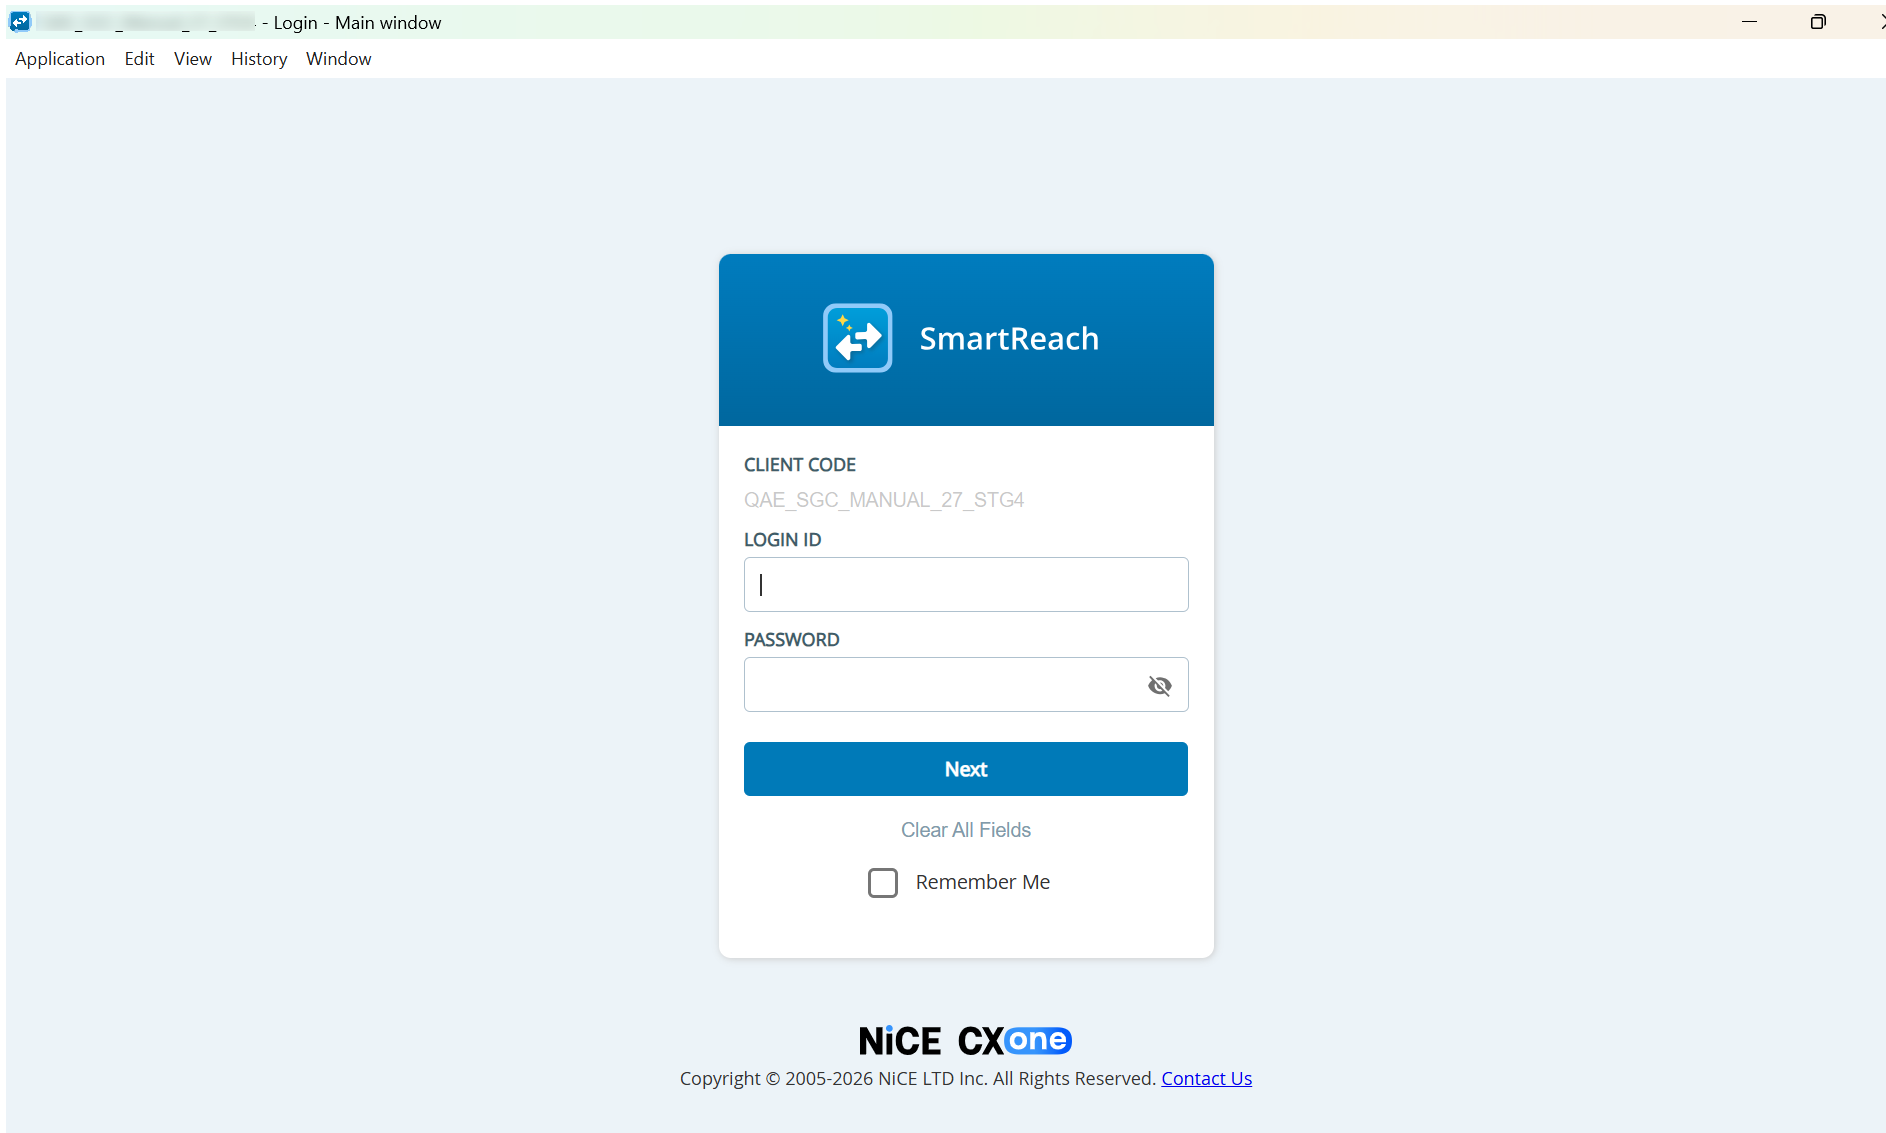
- You can select the Remember Me checkbox to save your Login ID for the next logins. Your password is not saved.
- You can use the Clear option to remove your entered credentials.
If you are logging in through SSO, the below screen (sample screens for Okta) appears:
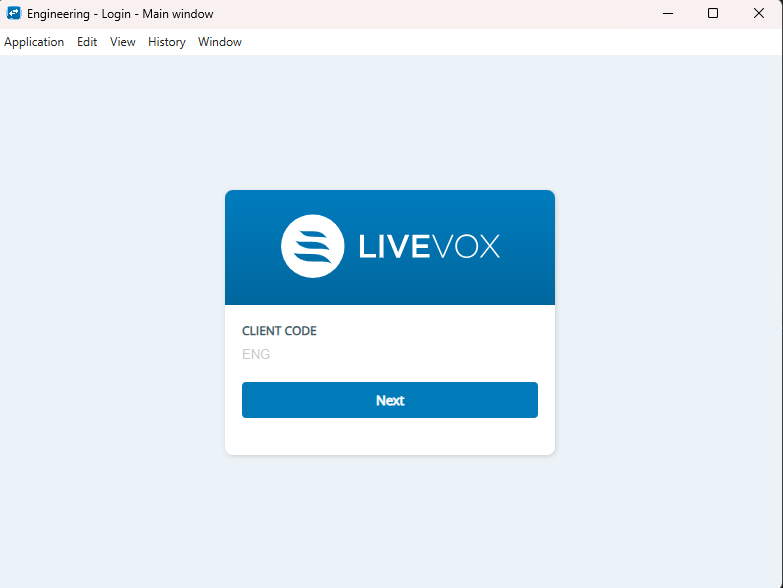
- Click Next. The identify provider (IdP) credential screen appears.
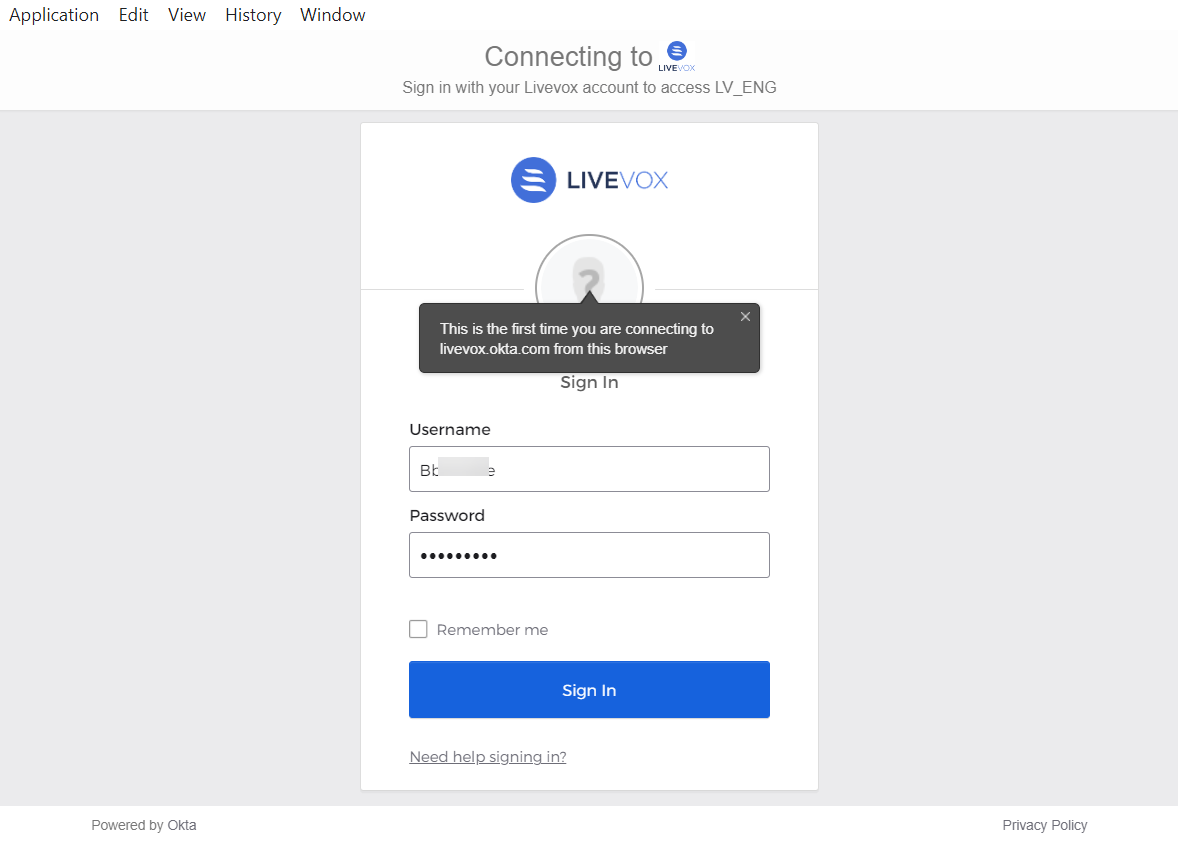
- Enter your credentials.
- Click Sign In. The second authentication screen appears.
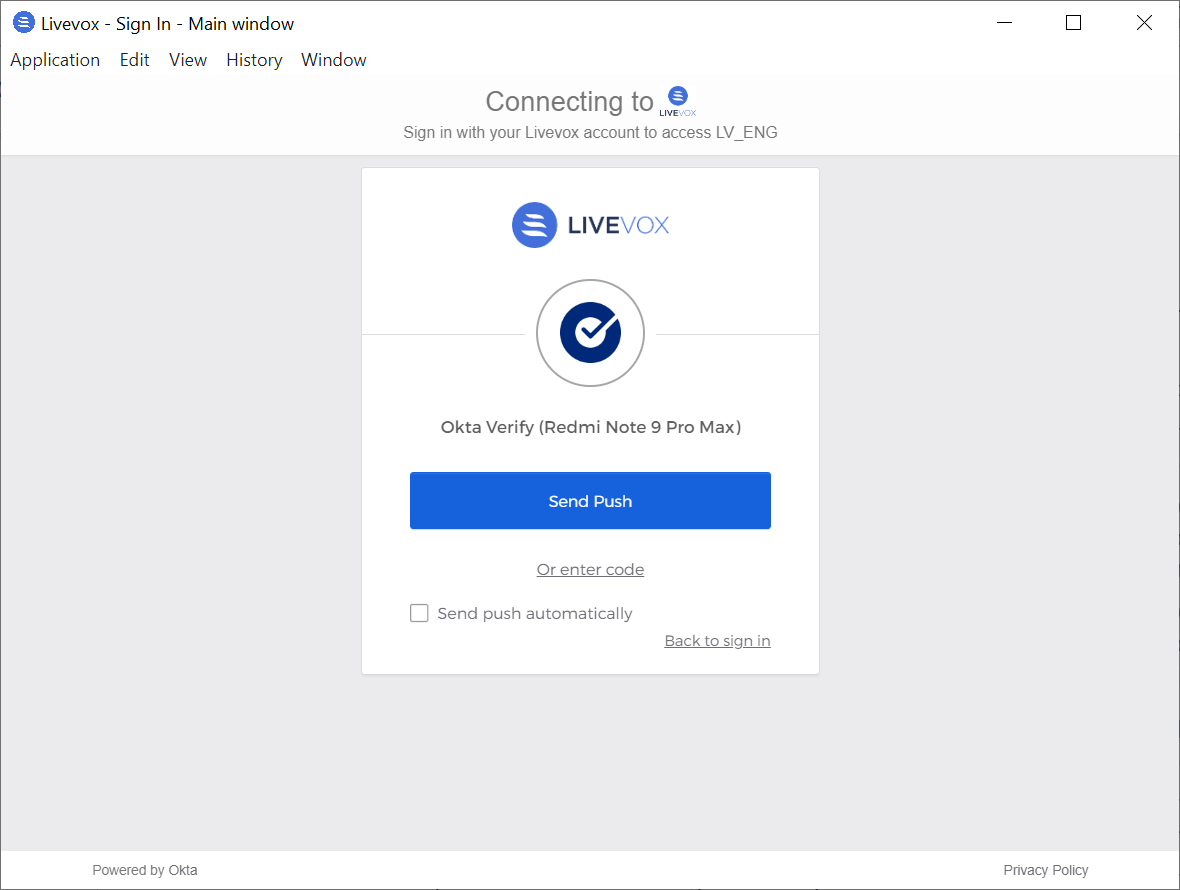
- Send a Push notification to your device or enter the code for verification.
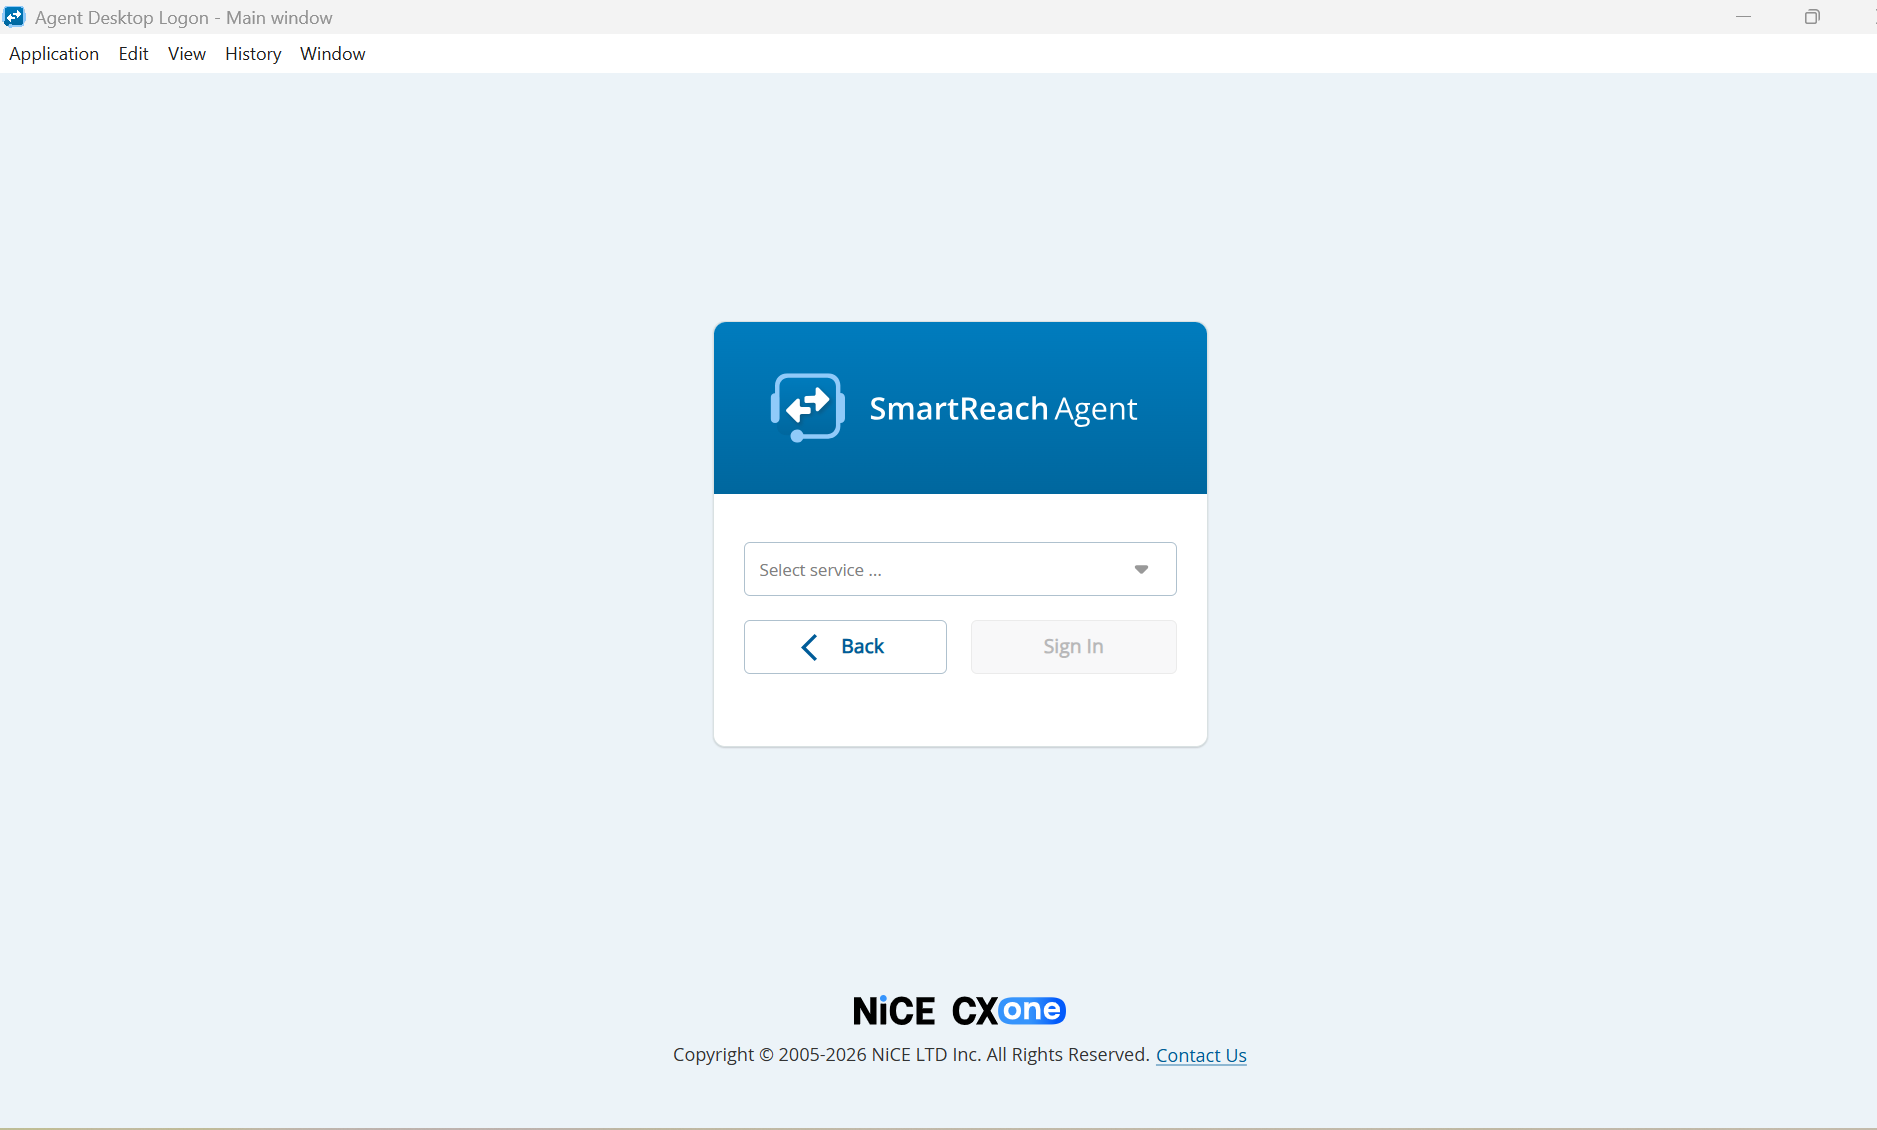
- In the Service drop-down menu, select a service to which you want to log in, and then click Sign In.
Now, you are logged into the agent desktop. Depending on the selected service, you are prompted to either dial in or connect by using your computer audio using WebRTC.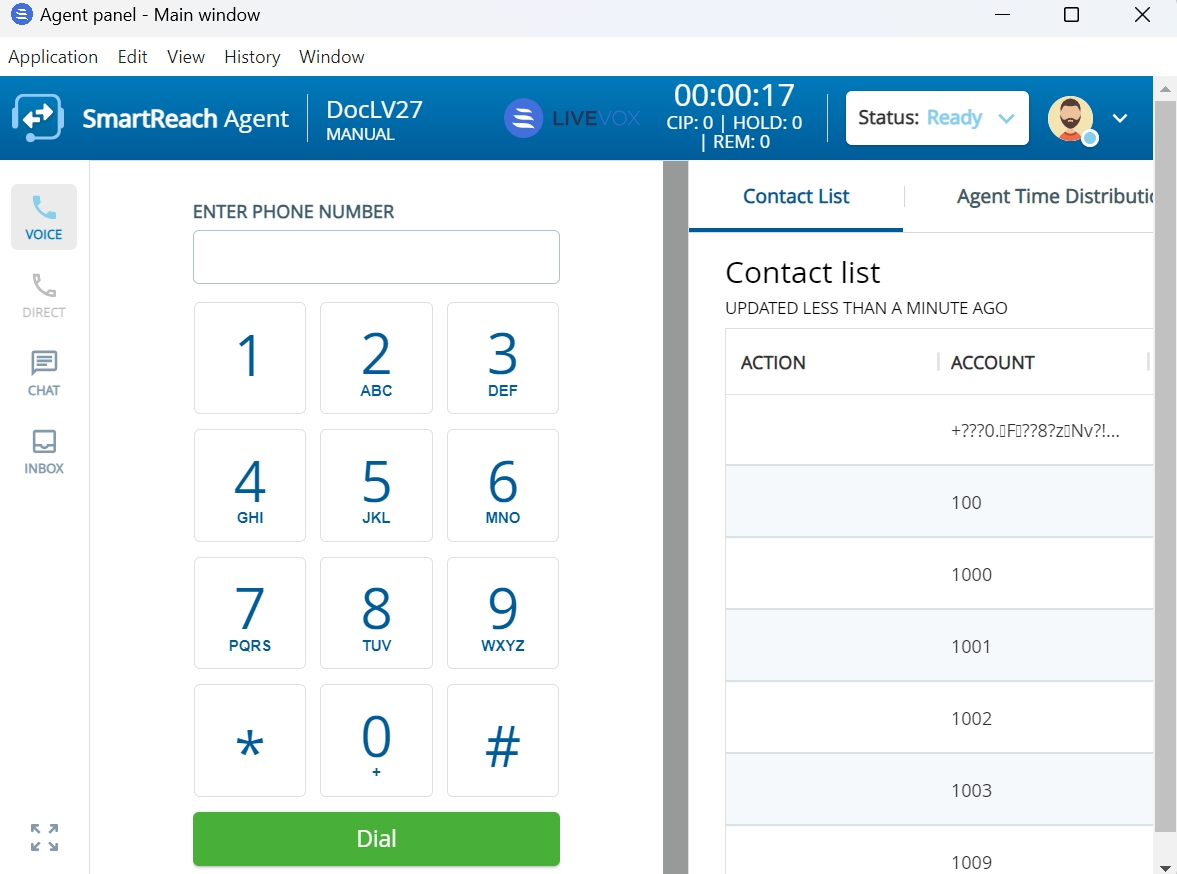
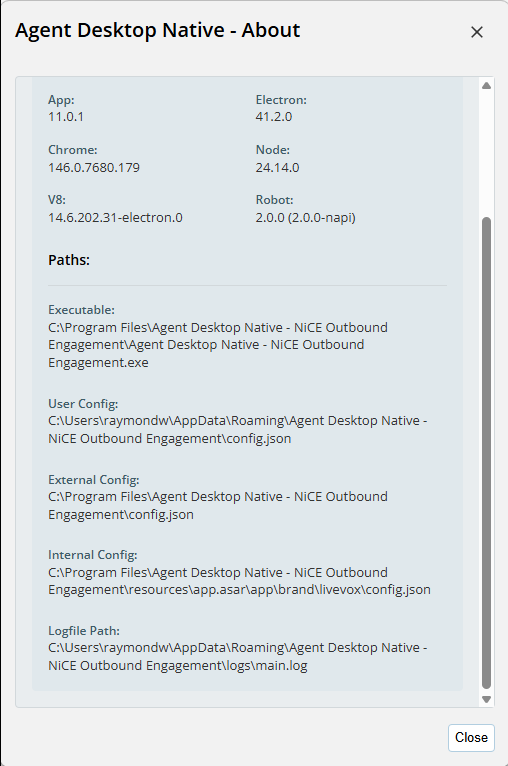
To get the detailed versions and the paths information that ADN is using for configurations and logs:
- Go to Application > About Agent Desktop Native.
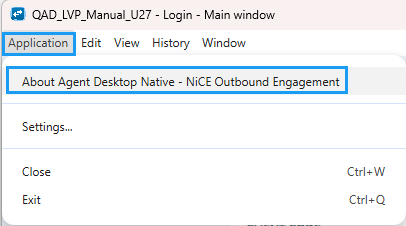
- The Agent Desktop Native - About window appears.
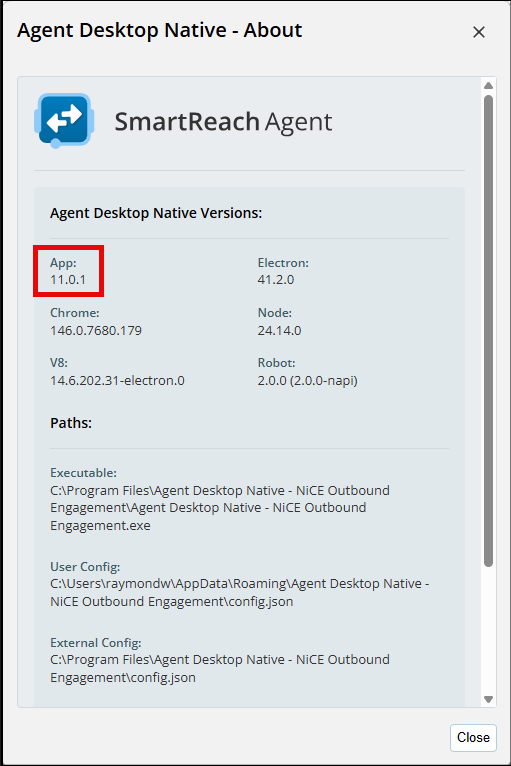
- The Versions and Paths detailed information appears on same page.
The ADN System Tray Icon
Once the ADN application is installed, you can see the ADN icon in the system tray. The tray icon allows agents to do certain tasks even when the application is closed.
When an agent clicks the close (X) button in the upper right corner of the ADN application, the ADN application does not completely quit. This action minimizes the application into the lower right corner (system tray), but retains the logon status of the agent and allows the agent to accept phone calls.
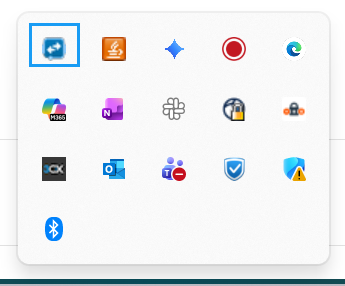
The icon color changes depending on the agent's state. The following table shows the icons for an agent's state.
| Icon | Description |
|---|---|
| Default |
| Agent is in Ready state. |
| Agent is in Not Ready state. |
| Agent is in call. |
| Agent is in Hold state. |
| Agent is in Preview Dial. |
| Agent is getting an inbound call. |
| Agent is in Wrap Up state. |
| Agent is online. |


In addition, an icon with a red dot is displayed in an agent's tray when there is a new chat notification.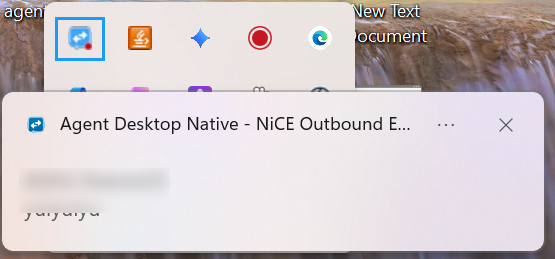
For example, if an agent receives a message from another agent, then a red dot appears on the Ready state icon to indicate that there is a message waiting.
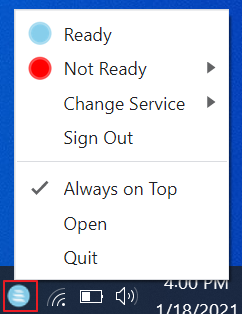
When agents right-click on the tray icon, they are provided with the following options:
- Ready: Allows an agent to change the state to Ready.
- Not Ready: Allows an agent to change the state to Not Ready with the specific break code.
- Change Service: Allows an agent to change from one service to another available service without having to sign out or re-establish the audio path.
- Sign Out: Allows an agent to sign out.
Always on Top: When configured, the ADN application is kept in the foreground of all desktop applications at all times.
When configured with version U17 and above, ADN displays a pop-up when minimized for new incoming voice interactions.- Open: Allows an agent to bring the application to the foreground.
- Quit: Allows an agent to close the application permanently. The tray icon also closes.
ADN Functionality
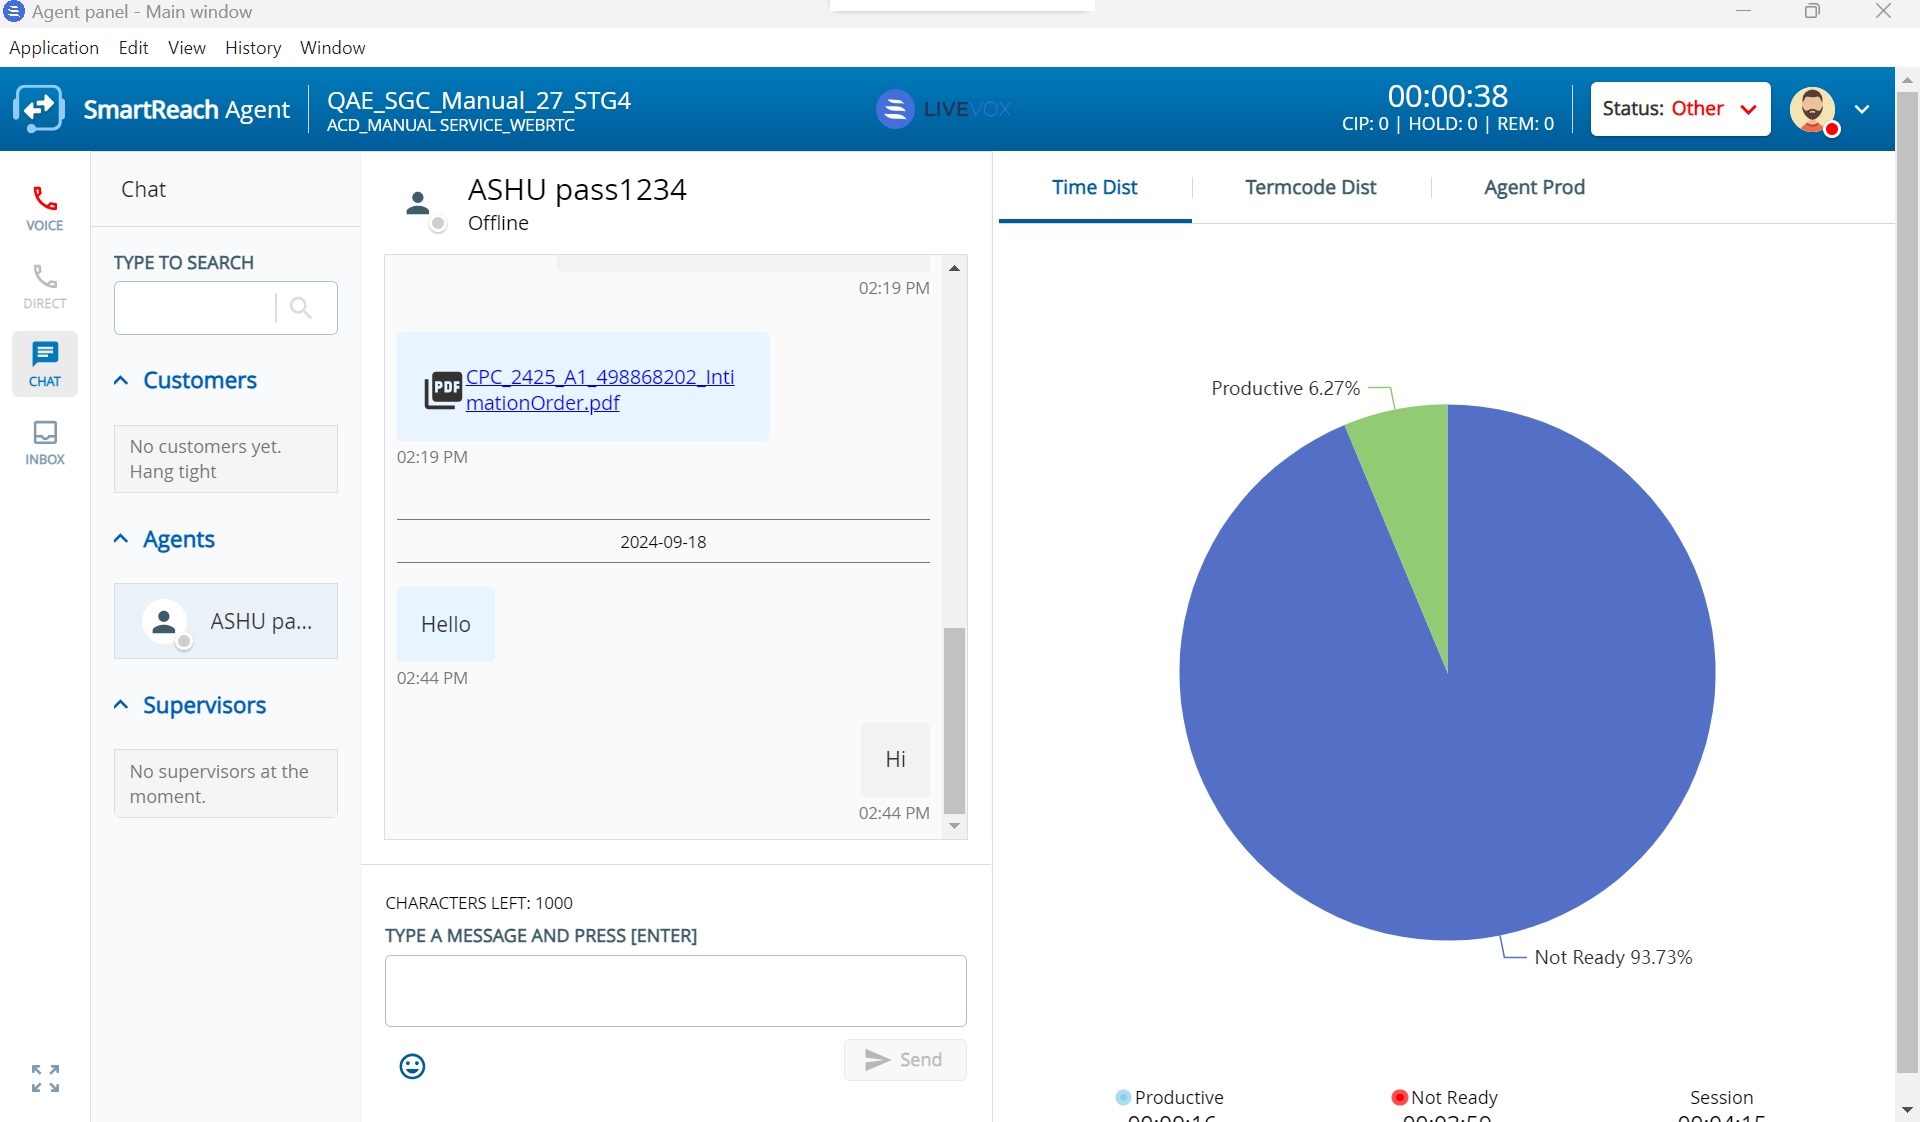
The ADN application contains the same functionality as the Agent Desktop application on the browser. For more information, see the Outbound Engagement (SmartReach) Agent Guide in the Product Documentation Library.
During a call in Knowledge Worker desktop mode, if the agent clicks the share icon ( ) for screen sharing and then clicks the Cancel button, the following message appears and the screen is not shared:
ADN Logs
You can view errors reported when performing the ADN operations at the following locations on the respective OS versions:
- Windows: %USERPROFILE%\AppData\Roaming\Agent Desktop Native\logs\
- macOS: ~/Library/Logs/Agent Desktop Native/
- Linux: ~/.config/Agent Desktop Native/logs/
ADN Security
Most of the ADN functionality is based on Chrome and the SmartReach ADN tries to adopt the latest Chrome version as early as possible. In addition to the security features of ADN because of the adopted Chrome version and any backported bug fixes, ADN has additional layers of security as below.
- At the network-access layer, ADN filters the request based on a domain whitelist. By default, this allows only secure SmartReach pages to load into the ADN. At clients' discretion, this configuration can be expanded to include client-internal domains as well. By limiting network access in this way, it becomes much harder to attack the ADN with a drive-by exploit.
- For client-configured allowed domains, ADN severely restricts the available features, such as media access, and ADN advanced APIs are disabled for all the domains except the SmartReach Agent Panel.
- ADN uses only the Chrome core features and does not use features, such as the Google Search bar, the Chrome: settings pages, the ability to install plugins/extensions, bookmark functionality, and so on. So any exploits that target these features are ineffective.
SmartReach Customer Care Contacts
24-Hour Customer Care Line: (888) 477-3448
To submit a ticket, please reach out through our Community platform at https://community.niceincontact.com/s/.