To view existing agents, navigate to the Agents section by selecting Configure > Agents > Agents from the navigation panel.
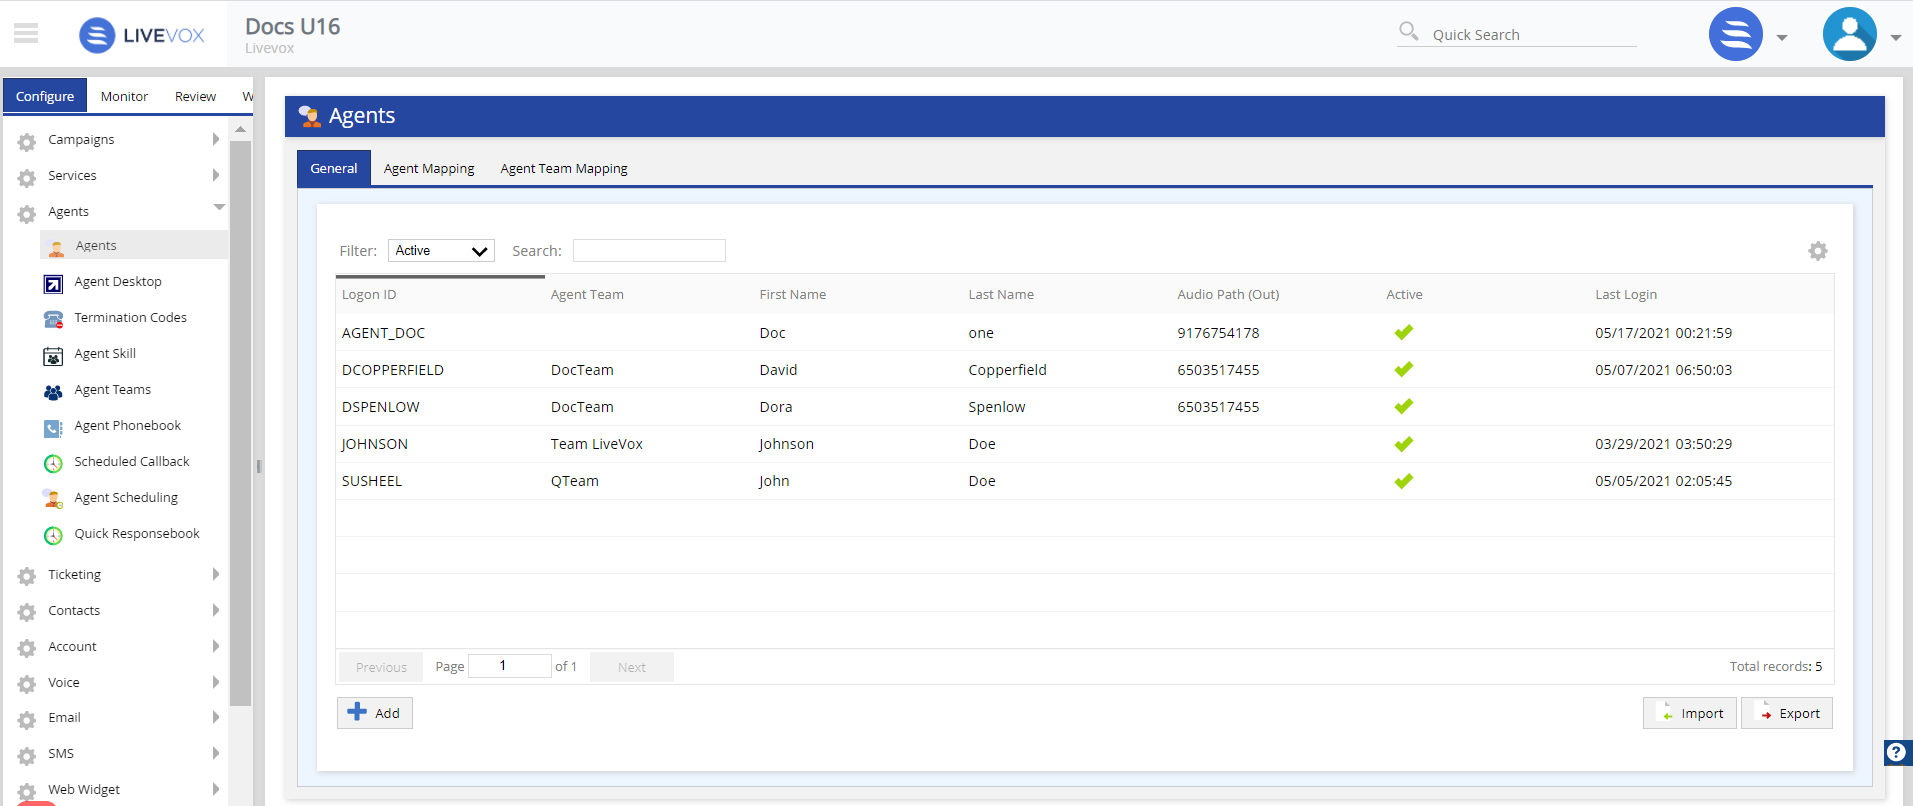
Agent characteristics are listed in the General tab while assignment to dialing services is available in the Agent Mapping tab. Agent characteristics include:
You can sort the displayed data by criteria in ascending or descending order by clicking on the criteria name.
You can include only wanted data using a text entry in the Search tool or by using the Filter menu. Options available under Filter:
- Active: Agents with a check in the Active box (may sign in).
- All: Every agent regardless of active/inactive/locked status.
- Inactive: Agents without a check in the Active box (may NOT sign in).
- Locked: Agents that entered an incorrect password in excess (5 is the default) of the site's configured limit (may NOT sign in).
- Agent Team: Agents assigned to a specific agent team.

To update the agent information, double-click the required agent row in the General tab. The Agent Details window appears that allows you to modify agent information.
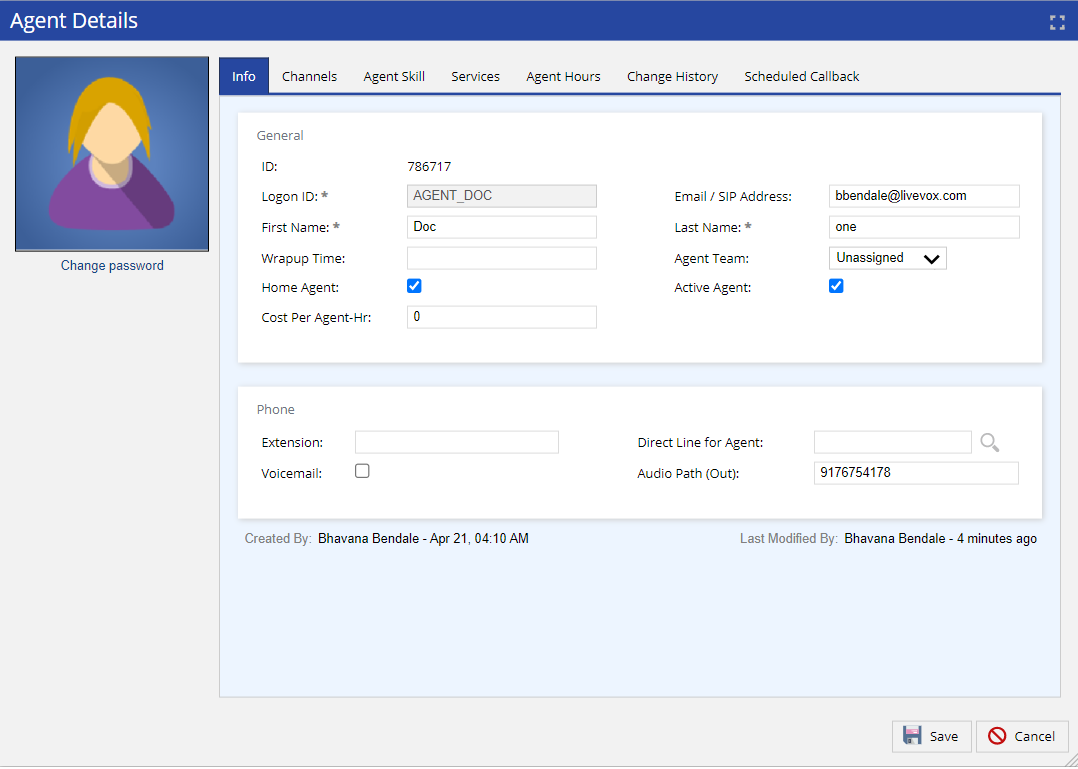
If you have associated the custom fields to the Agent entity from the Fields editor, you can view custom fields under the Details tab of the Agent Details screen.
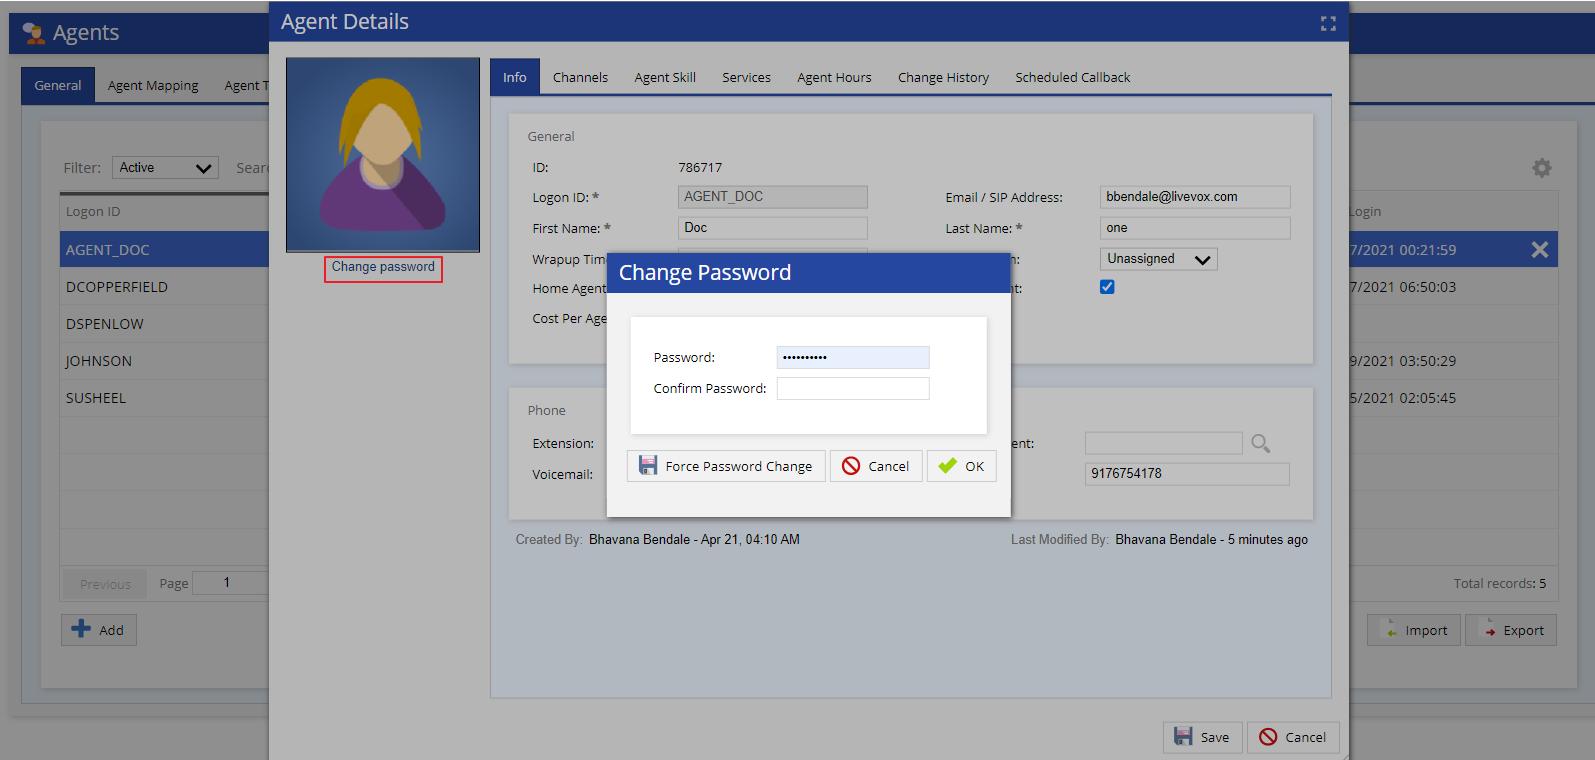
To change the password, click the Change Password option (below the profile picture). You are presented with the below screen. Enter the Password and Confirm Password fields with your new password. Click the OK button.
Please see Creating Agent Profile section for detailed information about adding a profile picture, Info, Agent Skill, Service, Change History, and Scheduled Callback tabs.