Download PDF
Download page Tasks.
Tasks
The Tasks screen enables you to route calls to an evaluator's (assessor or arbitrator) queue and provide targeted interactions for scoring. You can create new tasks or utilize a saved task, define type and priority, set recurring schedules (daily, weekly, or specific days of the week) to execute the task, and allocate them to an assessors' queue.
Accessing the Tasks Window
To access the Tag window, on the WFO tab, click SpeechIQ > Configuration > Tasks.
The Tasks window with all configured tasks is displayed.
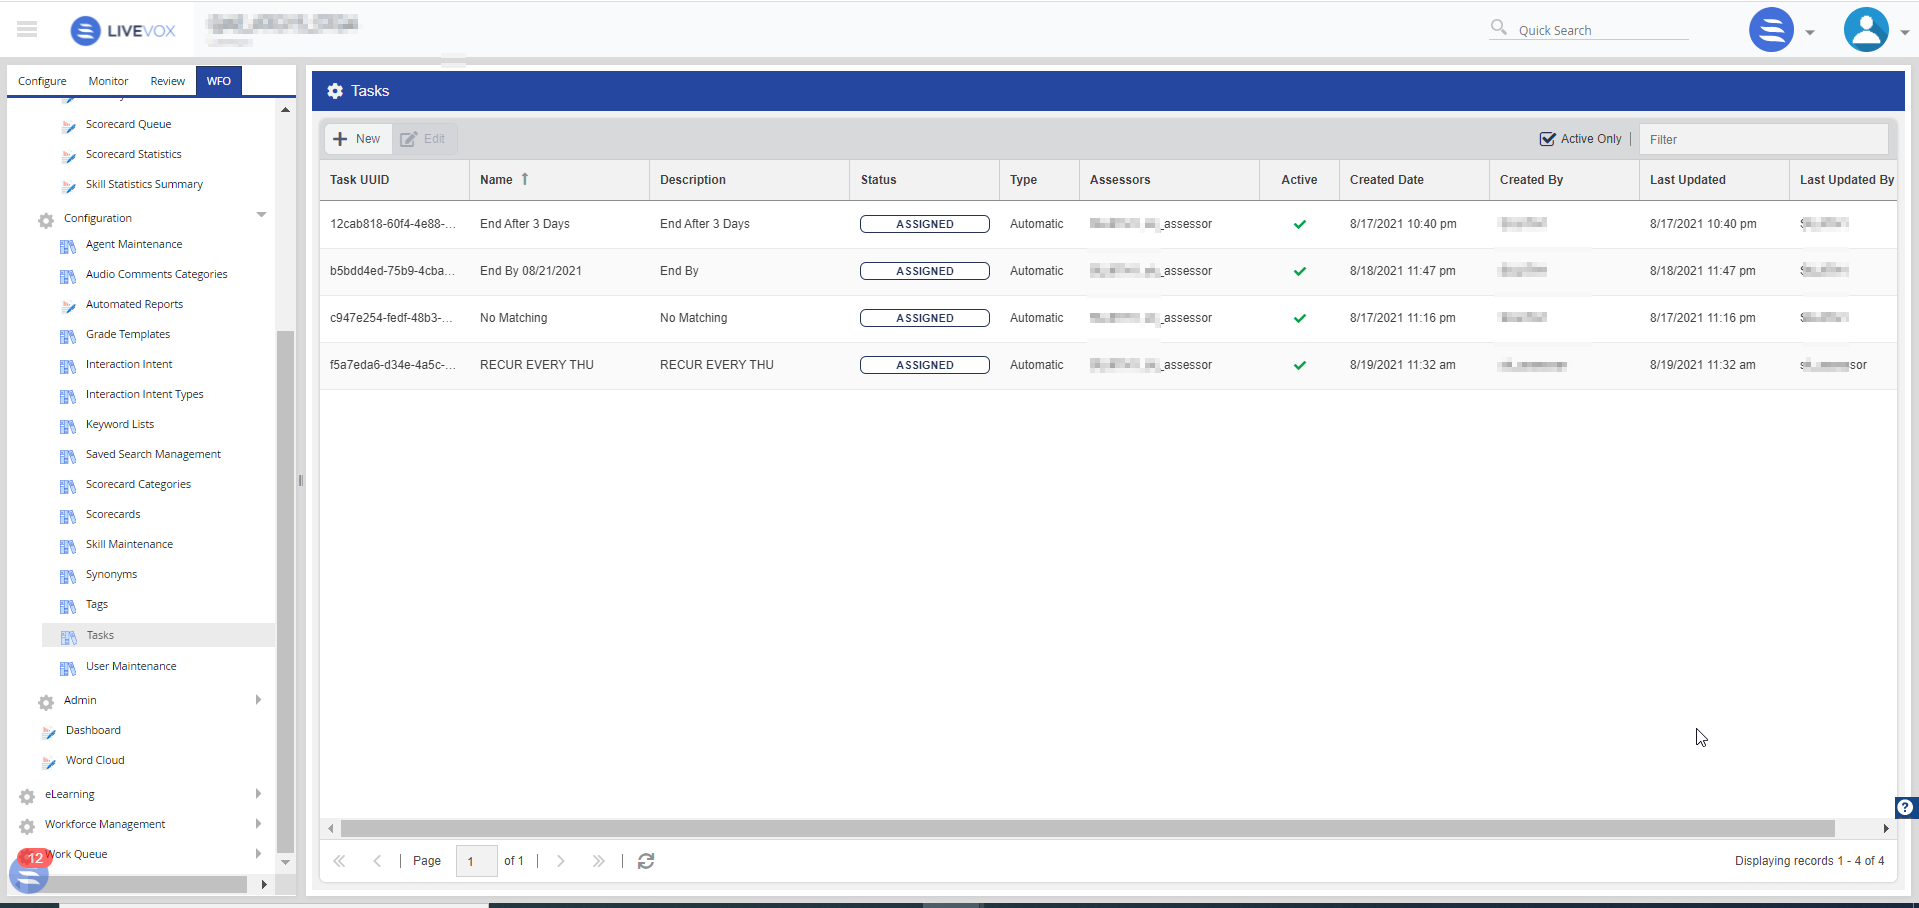
- To search for a specific task, use the Filter field.
- To view information about active tasks, select the Active Only checkbox.
- To customize the table columns view, see the instructions in the Customizing a Table section in Reporting.
- To refresh the list, click the Refresh icon (
 ).
).
Adding a New Task
To create a new task:
- In Tasks window, click New.
The Settings tab appears.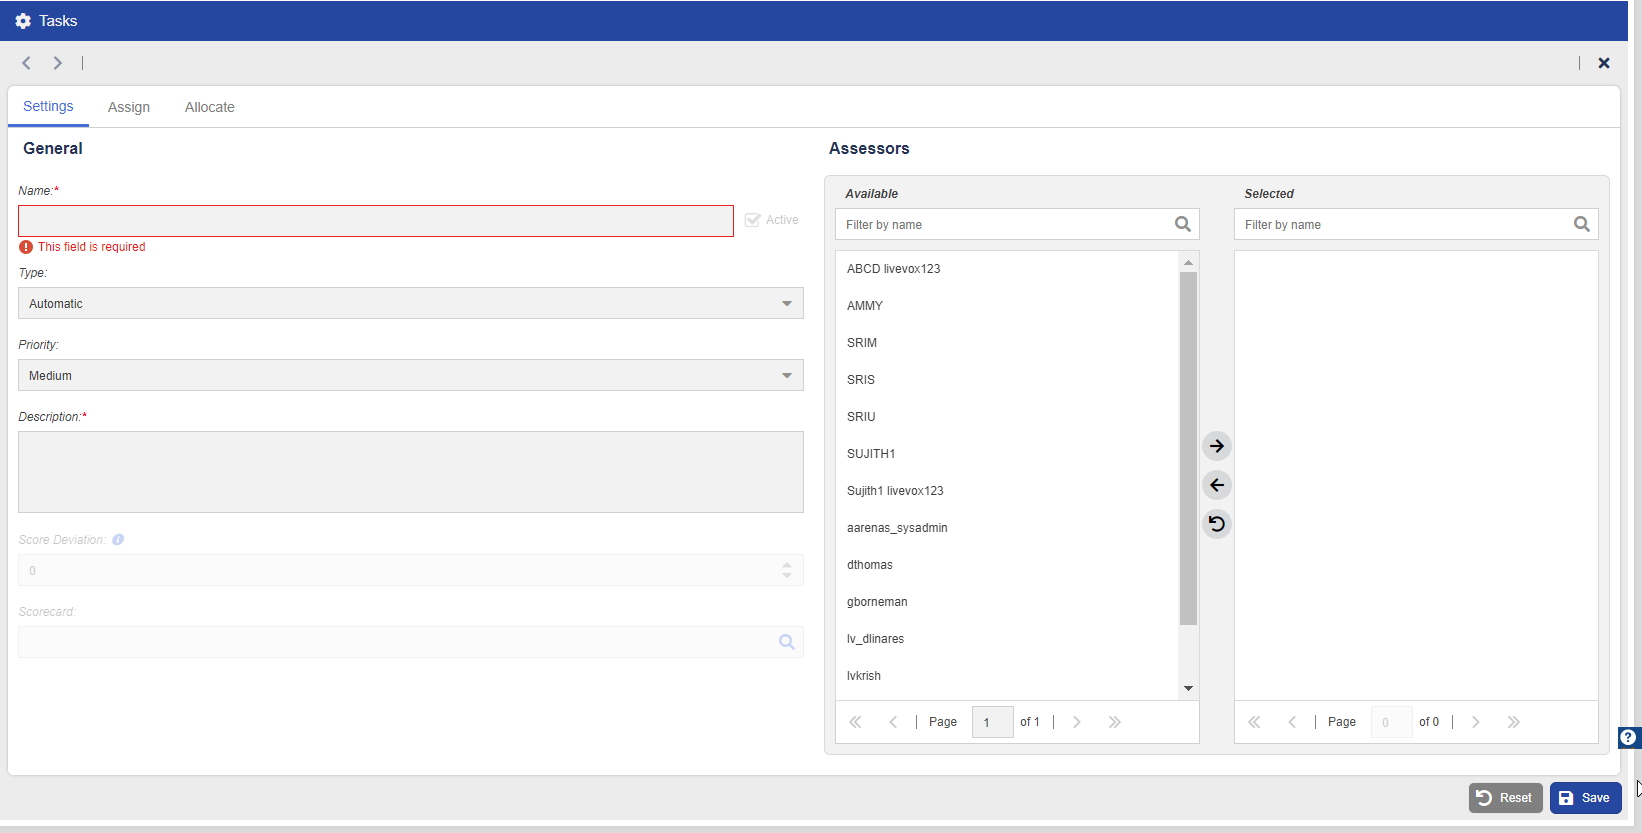
Specify values in the following fields.
Field Description Name Specify a name for the task. Active Select the checkbox, if the task status should be active. Type Select one of the following options:
- Automatic: Automatic scoring of interactions.
Calibration: Calibration task.

You must select a Scorecard and set the Score Deviation for Calibration task type.
- Manual: Manual scoring of interactions.
Priority Select the priority of the task. You can select High, Medium, or Low. Description Describe the scorecard. Score Deviation Select the allowable points deviation in the score. This is used to determine if the assessor is outside of the company guidelines. This field appears when you select the Calibration task type. Scorecard Select a scorecard. This field appears when you select the Calibration and Manual task types. Assessors Select the assessors from the Available column and move them to the Selected column using the right arrow.
- You can remove an assessor from the selected list by selecting the assessor and moving it into the Available column using the left arrow.
- You can reset the list by clicking the reset arrow.
For an Automatic or Calibration task type, you can select multiple assessors. If the task is a Manual task type, you can select only one assessor.
- Click the Assign tab.
- Click the calendar icon and select the start time for the task.
- Click the corresponding button to select the end time for the task. You have the following options:
- No end date.
- End after the selected occurrences.
- End by the selected date.
- Click the corresponding button to select the recurrence settings. You have the following options:
- Every day
- Every weekday
- Every Monday, Tuesday, Wednesday, Thursday, Friday, Saturday, or Sunday.
Select the filters. As required, specify values in the following sections.
Section
Description
Duration Minimum and maximum duration of calls (in seconds) for the report or recordings. Phone Numbers Phone numbers of the inbound or outbound interaction.
You can specify multiple numbers by pressing Enter after entering each number in the text box.
Agents Agents who performed the interaction.
- To add agents, in the Available section, select their names, and then click
 . To remove agents, in the Selected section, select their names, and then click
.
- You can filter the names in the sections by using the Filter by name box.
- You can revert your changes by clicking
 .
.
Agent Teams Agent teams to which the interaction belongs.
For information about how to add or remove agent teams, see the Agents row of this table.
Keywords Keywords used by agents or customers.
- To add a keyword, in the Keyword List field, select the keyword. To specify your own keyword, in the Keyword field, enter the keyword, and then press Enter or click
 .
. - If you want the order of the keywords in the report to match the order of the keywords in the table, select the Exact Order checkbox.
- To customize the table, use the arrow next to a column heading. To customize the table columns view, see the instructions in the Customizing a Table section in SpeechIQ Reporting.
- You can delete a keyword by hovering over it in the table and then clicking
 .
.
Interaction UUIDs Interaction UUIDs (identifiers for recordings) that are applicable for the interactions.
You can specify multiple interaction UUIDs by pressing Enter after entering each UUID in the text box.
Interaction Intent UUIDs Interaction intent UUIDs that are applicable for the interactions.
You can specify multiple interaction intent UUIDs by pressing Enter after entering each UUID in the text box.
Interaction Intent Types Interaction intent types that are applicable for the interactions.
For information about how to add or remove interaction intent types, see the Agents row of this table.
Skills Skills assigned to the agents.
For information about how to add or remove skills, see the Agents row of this table.
Call Centers Call centers that are applicable for the interactions.
For information about how to add or remove call centers, see the Agents row of this table.
Services Services that are applicable for the interactions.
For information about how to add or remove interaction intent types, see the Agents row of this table.
Scorecards Scorecards that are applicable for the interactions.
For information about how to add or remove scorecards, see the Agents row of this table.
Scorecard Grades Scorecard grades that are applicable for the interactions.
For information about how to add or remove scorecard grades, see the Agents row of this table.
Metadata Metadata that are available for the interactions.
- You can add metadata, in the Select Metadata field, by selecting the metadata, and then, in the Possible Values cell, enter a value for the metadata.
- You can customize the table by using the arrow next to a column heading. To customize the table columns view, see instructions in the Customizing a Table section in SpeechIQ Reporting.
- You can delete a keyword by hovering over it in the table and then clicking .
- To add agents, in the Available section, select their names, and then click
Click the Allocate tab.
The Allocate tab is available only for an Automatic task type and is disabled for Manual or Calibration task types.
Select a task to allocate.
For an Automatic task type, you must allocate a workload to each assessor. Define the Default Quota for a task using the Edit icon. The Default Quota is the number of interactions that is selected for an evaluation. You can then assign a record to each assessor to be evaluated. The total number of all of the individual allocations must be equal to the total quota.
- Click Save.