Download PDF
Download page Quick Responsebook.
Quick Responsebook
You can reduce the time that agents take to respond to chat messages by storing common chat messages as quick responses (predefined responses). These types of responses ensure that the messages sent by agents are consistent and adhere to your business standards. A Quick Responsebook is a group of standard responses (messages).
Agents can modify quick responses to personalize conversations.
Association
You can associate a client or an Agent Desktop with a Quick Responsebook. The messages from a Quick Responsebook associated with a client are available to all agents. The messages from a Quick Responsebook associated with an Agent Desktop are available to only the agents using that Agent Desktop.
The following example describes the difference between a client-level Quick Responsebook and an Agent Desktop-level Quick Responsebook. This example could help you decide which entity (client or Agent Desktop) you should associate with a Quick Responsebook.
Suppose that a company named LV is located in Portland and Seattle, and the agents based in Seattle use an Agent Desktop named Seattle. Then:
- You must associate the client with the Quick Responsebook whose messages are applicable to all agents of LV (for example, Welcome to LV).
- You must associate the Seattle Agent Desktop with the Quick Responsebook whose messages are applicable to only the agents based in Seattle (for example, Did you know that our Seattle store is having a sale this weekend?).
Creating a Quick Responsebook
To create a Quick Responsebook:
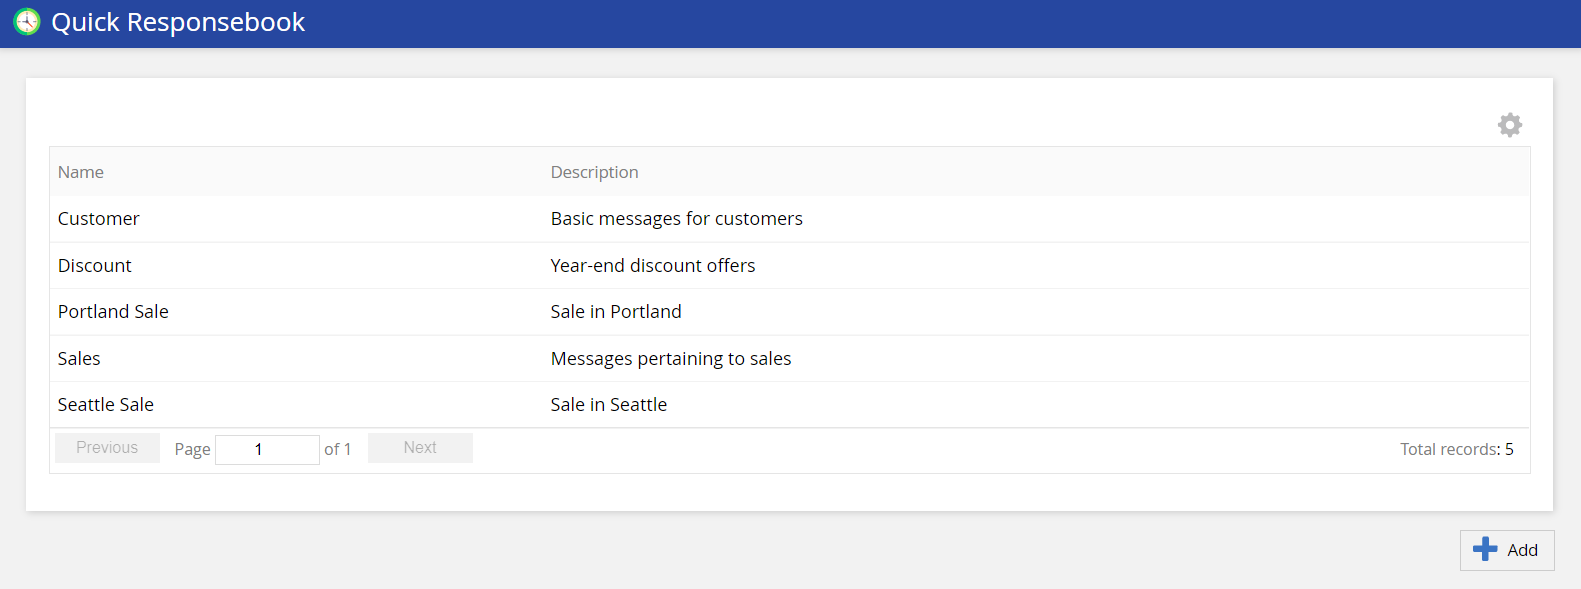
- On the Configure tab of the LiveVox Portal (LVP), click Agents > Quick Responsebook.
The Quick Responsebook window appears. - Click Add.
The Add Quick Responsebook window appears. - In the Name field, enter a name to identify the Quick Responsebook throughout LVP.
- Optional: In the Description field, enter a description of the Quick Responsebook.
- Click Save.
The Quick Responsebook is created, and it appears in the Quick Responsebook window.
Next Step
Add messages to the Quick Responsebook.
Adding a Message to a Quick Responsebook
You can add multiple messages (quick responses) to a Quick Responsebook.
To add a message to a Quick Responsebook:
- On the Configure tab of LVP, click Agents > Quick Responsebook.
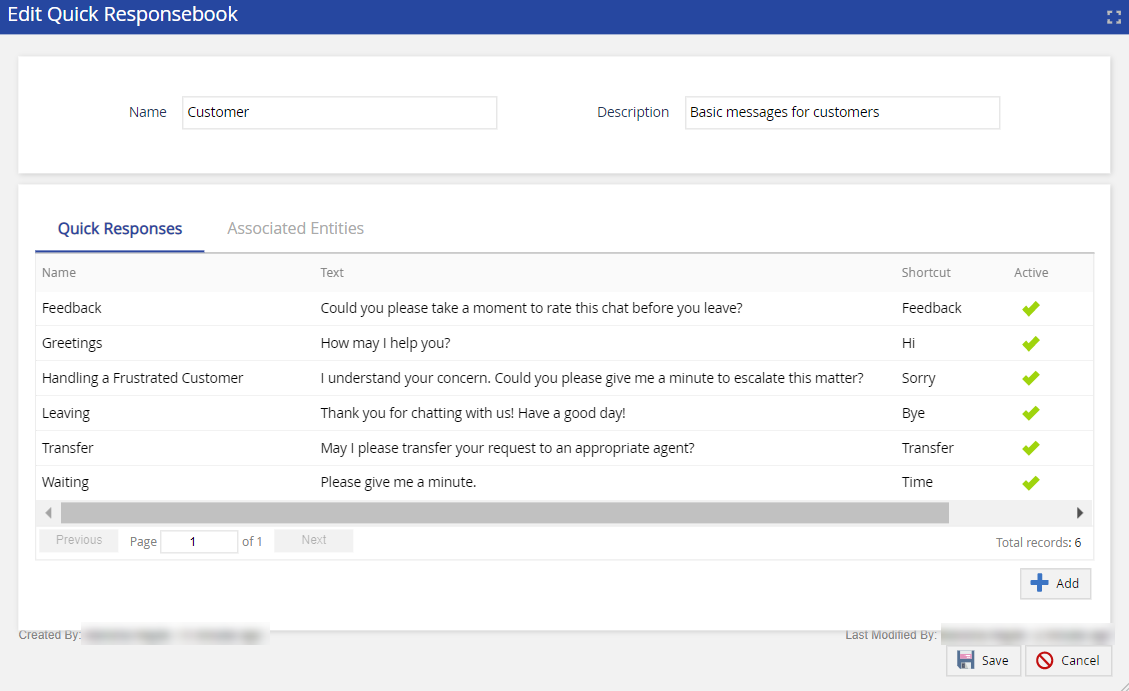
The Quick Responsebook window appears. - Double-click the row displaying the Quick Responsebook.
The Edit Quick Responsebook window appears. - On the Quick Responses tab, click Add.
The Edit Response window appears. Specify values in the fields.
- Name: A name to identify the quick response on LVP (for example, Greeting). Only LVP users see the name. Agents do not see the name.
- Text: The phrase that will be added within the agent's message to the customer (for example, How may I help you?). You can also include a web address or an email address in the message. This address appears as a hyperlink to customers.
Shortcut: The keyword associated with the quick response (for example, hello). Agents use the Shortcut to identify which quick response they want to insert within their message to the customer. Using a Shortcut does not automatically send the message to the customer. The agent can modify the message content before they send the message to the customer.

Agents use the Shortcut field to identify, sort, and search for quick responses on the Agent Desktop. The Shortcut field is mandatory. You must populate the Shortcut field for every quick response to ensure that agents use the Quick Response feature.
- Is the message active: The status of the message. If you want the message to be available on an Agent Desktop, select the Is the message active checkbox.
- Click Save.
The message is added to the Quick Responsebook, and it appears on the Quick Responses tab.
An agent can use the Quick Responsebook messages only if the Quick Responsebook is associated with an entity (Client or Agent Desktop).
Next Step
Associate a Client or an Agent Desktop with the Quick Responsebook.
Associating a Client with a Quick Responsebook
You can associate a client with only one Quick Responsebook.
To associate a client with a Quick Responsebook:
- On the Configure tab of LVP, click Services > Client.
The Client window appears. - On the Settings tab, in the Quick Responsebook field, select the Quick Responsebook, and then click Save.
The Client is associated with the Quick Responsebook.
Associating an Agent Desktop with a Quick Responsebook
You can associate an Agent Desktop with only one Quick Responsebook.
To associate an Agent Desktop with a Quick Responsebook:
- On the Configure tab of LVP, click Agents > Agent Desktop.
The Agent Desktop window appears. - On the General tab, in the Quick Responsebook field, select the Quick Responsebook, and then click Save Agent Desktop.
The Agent Desktop is associated with the Quick Responsebook.
Viewing the Associated Entities of a Quick Responsebook
To view the entities associated with a Quick Responsebook, access the Quick Responsebook, and then, in the Edit Quick Responsebook window, click the Associated Entities tab.
The entities associated with the Quick Responsebook appear in the table. You can identify the type of an entity (Client or Agent Desktop) by the value in the Type column.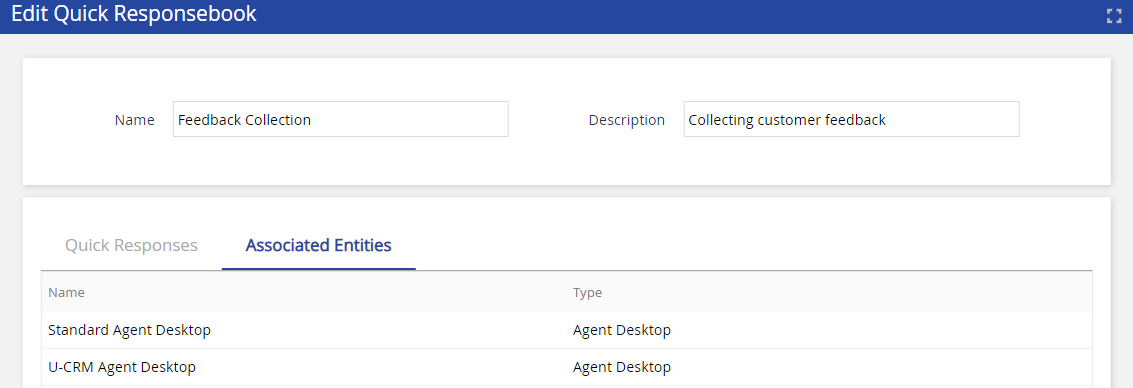
Managing a Quick Responsebook
You can manage a Quick Responsebook by modifying, copying, or deleting the Quick Responsebook or its messages.
You cannot delete a Quick Responsebook that is associated with an entity.
- Accessing a Quick Responsebook: On the Configure tab of LVP, click Agents > Quick Responsebook, and then, in the Quick Responsebook window, double-click the row displaying the Quick Responsebook.
- Modifying a Quick Responsebook: Access the Quick Responsebook, modify the values in the Edit Quick Responsebook window, and then click Save.
- Modifying a Quick Responsebook Message:
- Access the Quick Responsebook containing the message.
The Edit Quick Responsebook window appears. - On the Quick Responses tab, double-click the row displaying the message, modify the values in the Edit Response window, and then click Save.
- Access the Quick Responsebook containing the message.
- Copying a Quick Responsebook: In the Quick Responsebook window, hover over the row displaying the Quick Responsebook, and then click the Copy icon
 .
. - Deleting a Quick Responsebook: In the Quick Responsebook window, hover over the row displaying the Quick Responsebook, and then click the Delete icon
 .
. - Deleting a Quick Responsebook Message: Access the Quick Responsebook containing the message, and then, on the Quick Responses tab, hover over the row displaying the message, and then click the Delete icon .
Customizing the Quick Responsebook Table
You can display or hide specific columns in the table that appears in the Quick Responsebook window, in addition to defining the order of the columns and the sorting order of the data displayed in the table.
To customize the table that appears in the Quick Responsebook window:
- On the Configure tab of LVP, click Agents > Quick Responsebook.
The Quick Responsebook window appears. - Click the Customize Columns icon
 .
.
The Customize Columns window appears.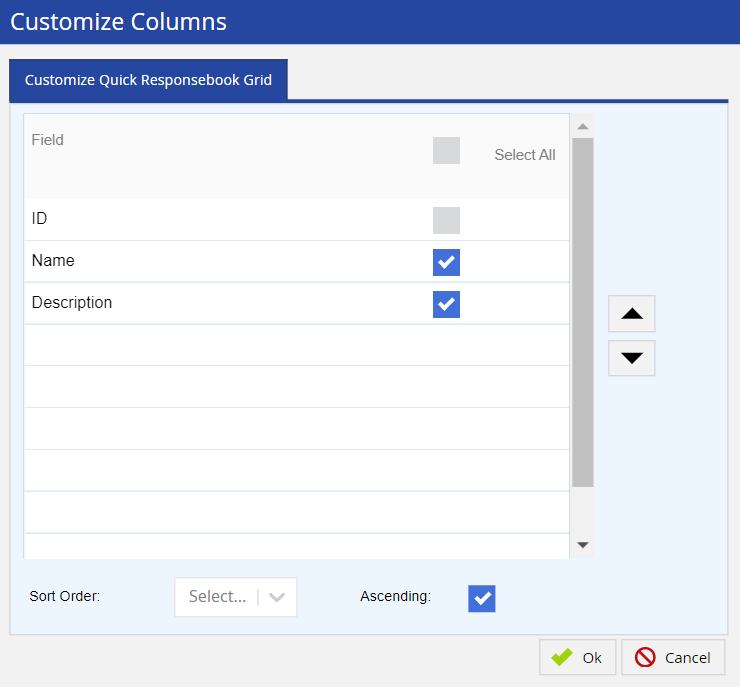
To display a column in the table, select the checkbox next to the name of the column. Otherwise, clear the checkbox next to the name.
You can select or clear all checkboxes together by using the Select All checkbox.
To define the position of a column in the table, click the row displaying the name of that column, and then click
 (moves the column up in the table) or
  (moves the column down in the table).
The order in which the column names appear in the Customize Columns window represents the order in which they appear as columns in the table in the Quick Responsebook window (that is, in the user interface).
- In the Sort Order field, select the column for whose values you want to define the order of sorting (ascending or descending).
- To sort the values in ascending order, select the Ascending checkbox. Otherwise, clear the checkbox.
- Click Ok.
The customized table appears in the Quick Responsebook window.