Download PDF
Download page Filtering Contacts.
Filtering Contacts
Performing a Basic Search
You can filter the contacts in Contact Manager based on all system and custom fields of a contact record. To do so:
- On the Configure tab of the LiveVox Portal (LVP), click Contacts > Contacts.
The Contacts window appears. - On the Contacts tab, in the Search field, select the field by which you want to filter the contacts.
In the second box next to the Search field, select the search condition.
If applicable, in the remaining boxes next to the Search field, specify the search condition or value.
For certain search conditions (for example, Agent Not In), the ellipsis icon
 appears next to the box to enable you to specify the criteria.
Press Enter or click the magnifying glass icon
 .
.
The contacts that meet the specified filter criteria appear on the Contacts tab.
You can see all contacts by selecting All in the first box next to the Search option and then clicking the magnifying glass icon ![]() .
.
Demo
For more information, see the Search for a Contact in Contact Manager demo:
Advanced Search
You can filter the contacts in Contact Manager by creating an advanced filter that uses conditions and logical operators to develop the filter criteria. An advanced filter can be used to fetch the contacts that you want to export or the contacts that you want to include in a campaign.
Example
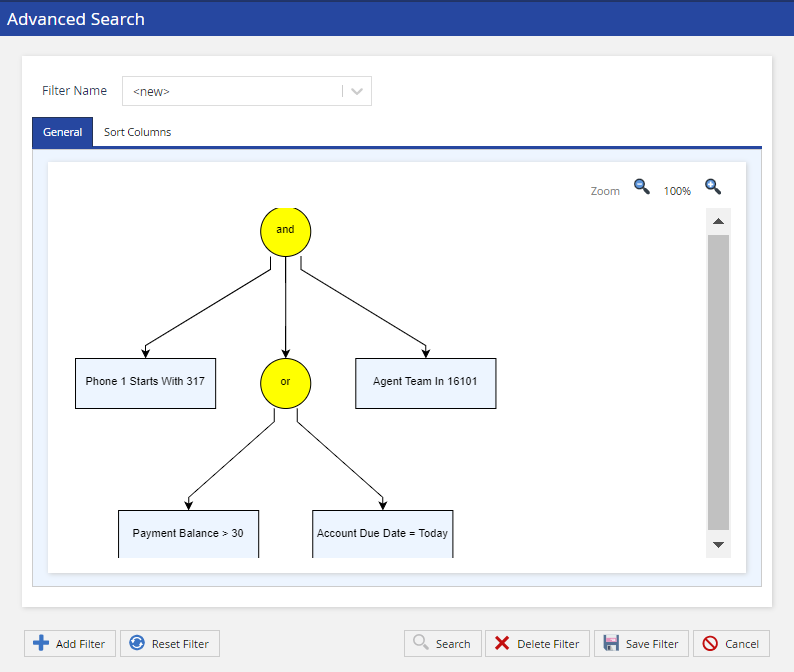
Suppose that you want a list of contacts that meet the following conditions:
- The primary phone number of the contacts starts with 317,
and - The agent team assigned to the contacts has the ID 16101,
and - Either the payment balance of the contacts is more than $30 or the account due date of the contacts is today.
You can create an advanced filter with these conditions and run the filter to obtain the list of contacts that meet the conditions.
Creating a Filter
To create a filter for an advanced search:
- On the Configure tab of LVP, click Contacts > Contacts.
The Contacts window appears. - On the Contacts tab, click the Advanced Search option.
The Advanced Search window displaying the General and Sort Columns tabs appears. Click Add Filter.
On the General tab, a circle representing the and logical operator appears.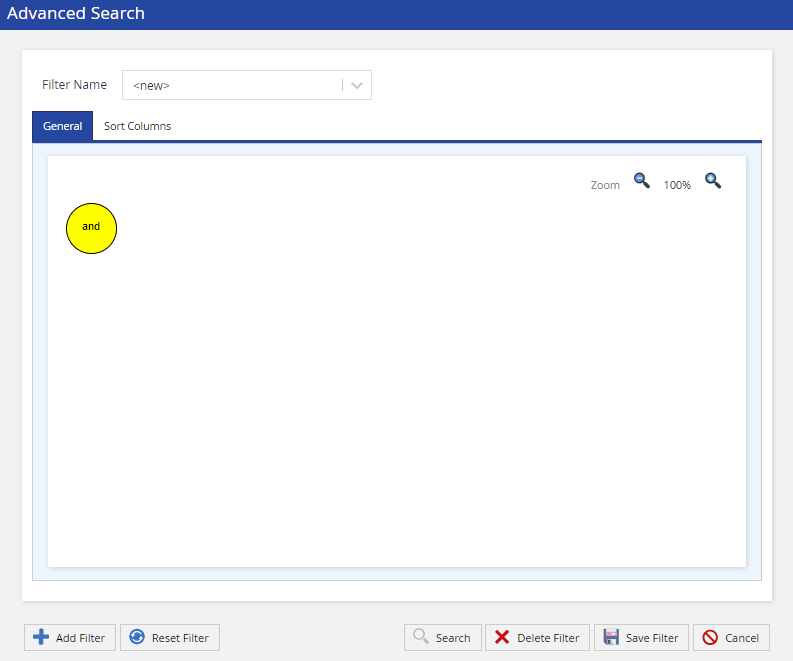

A logical operator connects two or more expressions by defining the relationship between the expressions. The following logical operators are available for selection: and, or, not and, not or.
- If you want to change the logical operator:
- Double-click the circle.
The Edit Rule window appears. - If you want the or logical operator, in the Logical Operator field, select or.
- If you want to negate the logical operator, select the Not option.
- Click Ok.
- Double-click the circle.
- On the General tab, hover over the circle.
An arrow appears inside the circle.
- Drag the arrow to where you want it on the General tab.
The Add Rule window appears.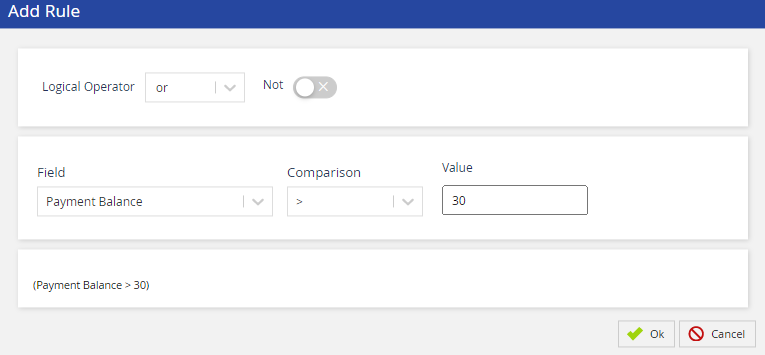
- Specify a condition for the filter:
- If required, in the Logical Operator field, select an operator for the condition.
- In the Field field, select a field for the condition.
In the Comparison field, select a relational operator for the condition.
Depending on the field you selected for the condition, the Comparison field contains the Regex operator, which you can use to specify a regular expression. A regular expression finds information by searching for a match of a specific pattern.
If applicable, in the Value field, enter a value for the condition.
For certain search conditions, the ellipsis icon appears (in place of the Value field) to enable you to specify the criteria.
Click Ok.
The filter appears as a graph on the General tab.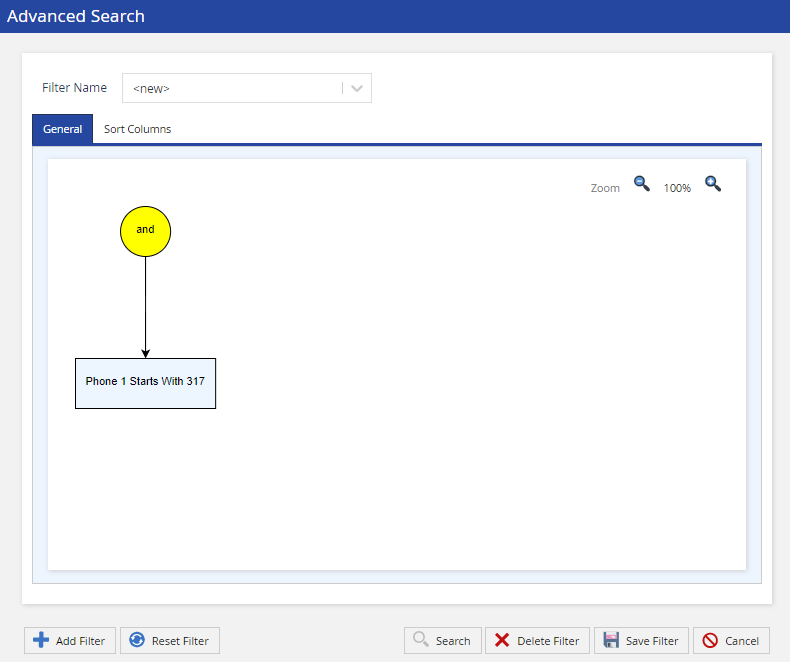
On the General tab, logical operators are represented by a circle, and conditions are represented by a rectangle.
Hover over the circle, drag the arrow to where you want it on the General tab, and then specify another condition for the filter as described earlier.
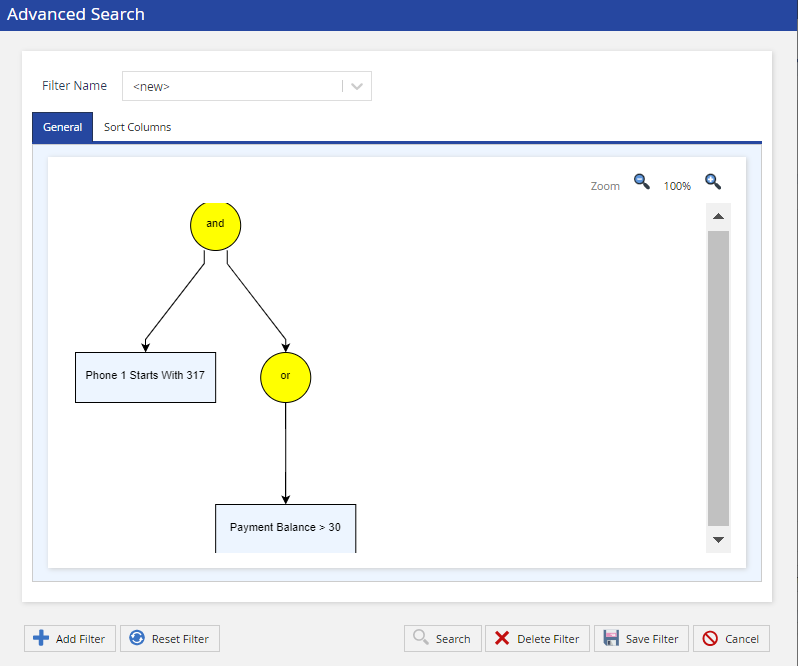
- You can specify more conditions for the filter.
- You can modify an operator or a condition by double-clicking the respective circle or rectangle.
- You can minimize or maximize the graph by clicking the magnifying glass icons (
 or
or  ).
). - You can delete an operator or a condition by hovering over the respective circle or rectangle and clicking the close icon
 .
. - You can revert all your changes by clicking Reset Filter.
- You can specify more conditions for the filter.
If you want to define the sorting of the column values for the filter:
Ensure that the Filter Name field displays the name of the filter for which you want to define the sorting.
- On the Sort Columns tab, click Add.
The Add Field window appears. - In the Field field, select the name of the column for whose values you want to define the sorting.
- Select one of the following options:
- ASC: Sorts the values in the column in ascending order
- DESC: Sorts the values in the column in descending order
Click OK.
The name of the column appears in the Sort By column on the Sort Columns tab. The sorting order of its values appears in the Sort Order column as (ascending) or
  (descending).
You can define the sorting for more columns by using Add.
To modify the order of a column, select the row displaying the name of the column, and then, as required, click the up arrow icon
 or the down arrow icon
  .
. - You can modify a row by double-clicking the row.
- You can delete a row by using the close icon
 , which appears when you hover over the row.
- On the Sort Columns tab, click Add.
- After you have specified the required number of conditions, click Save Filter.
The Add Filter window appears. In the Name field, enter a name to identify the filter, and then click Save Filter.
The advanced filter is created. It appears as an option in the Filter Name field in the Advanced Search window.
Advanced filters are stored in your browser and are available only until you clear your browser cache.
Performing an Advanced Search
Before performing an advanced search, ensure that you have created and saved a filter.
To perform an advanced search on the Contacts tab:
- On the Contacts tab, click the Advanced Search option.
The Advanced Search window appears. In the Filter Name field, select the filter based on which you want to perform an advanced search.
Click Search.
The contacts that meet the filter criteria appear on the Contacts tab.
You can see all contacts by clicking the close icon![]() next to the filter that appears above the table.
next to the filter that appears above the table.
Deleting a Filter
To delete a filter:
- On the Configure tab, click Contacts > Contacts.
The Contacts window appears. - On the Contacts tab, click the Advanced Search option.
The Advanced Search window displaying the General and Sort Columns tabs appears. In the Filter Name field, select the filter that you want to delete.
The next step deletes the filter without prompting for your confirmation.
Click Delete Filter.
The filter is deleted.