On theConfiguretab of the LiveVox Portal (LVP), click Input / Output>Input Filter. TheInputwindow appears.
In theInput Filter(s)field, select the input filter. The input filter appears.
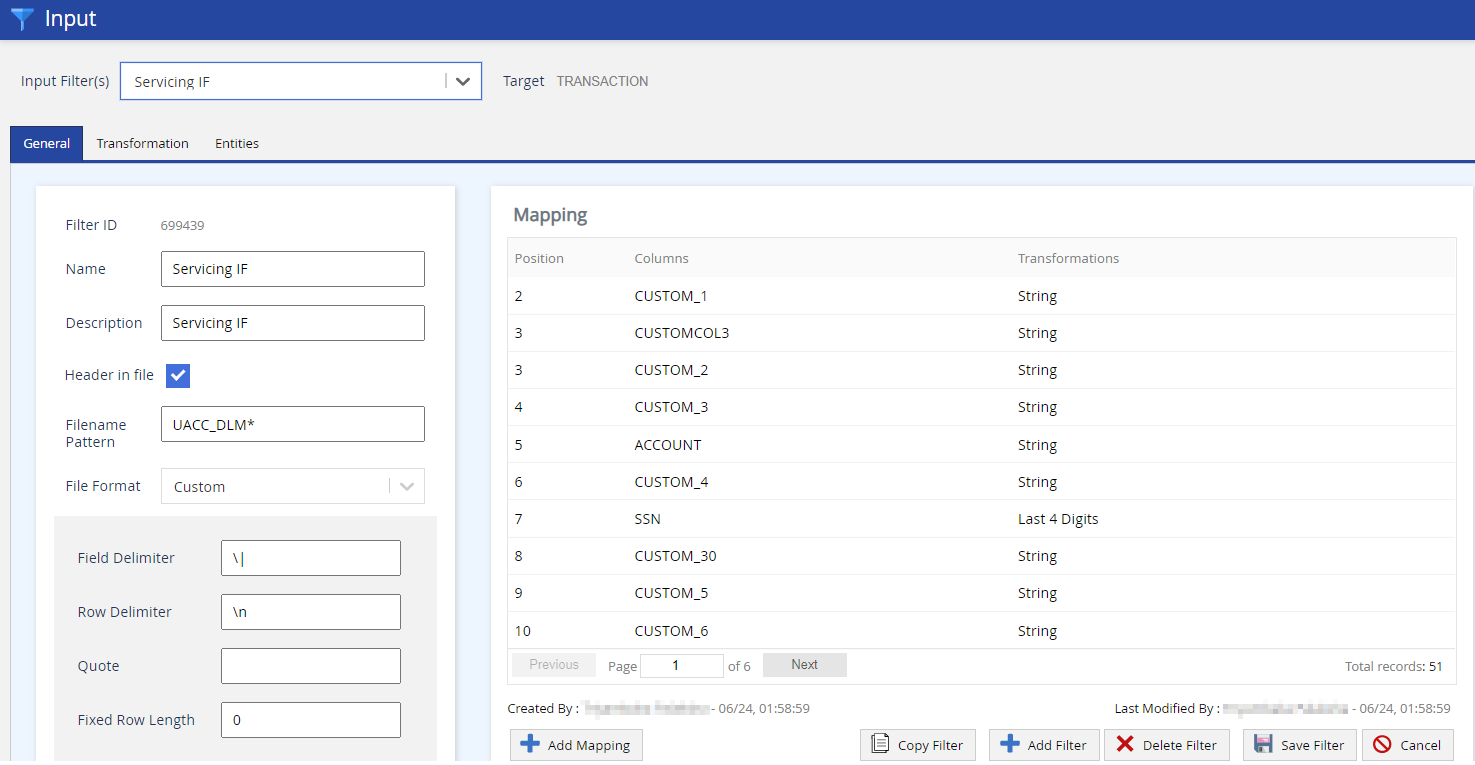
The Input window contains the following tabs:
Tab
Description
General
Displays the general information and settings on the selected input filter.
The Transformation and Entities tabs display when the Input Filter Target is anything other than Contact.
Transformation
Displays a list of transformations associated with the selected input filter. For details on how to create transformation, see Creating Transformations.
Add Transformation: Adds a new transformation to the selected input filter.
Delete Transformation: Deletes the selected transformation.
Save Transformation(s): Saves all updates for the transformations.
Entities
Displays which entities (Client, Call Centers, or Services) have the selected input filter assigned.
Type: Displays the object type the input filter is associated with, whether a Service or a Client.
ID: Displays the unique ID for the Client or Service.
Name: The descriptive name of the Service or Client.
To associate the entities with the filter, go to Configure > Client/Services > Messaging > Default Input Filter/Input Filter.