Managing Users and SIP Credentials
In the PBX Admin Portal, the Accounts section lets you manage users and define SIP credentials.
Manage Users
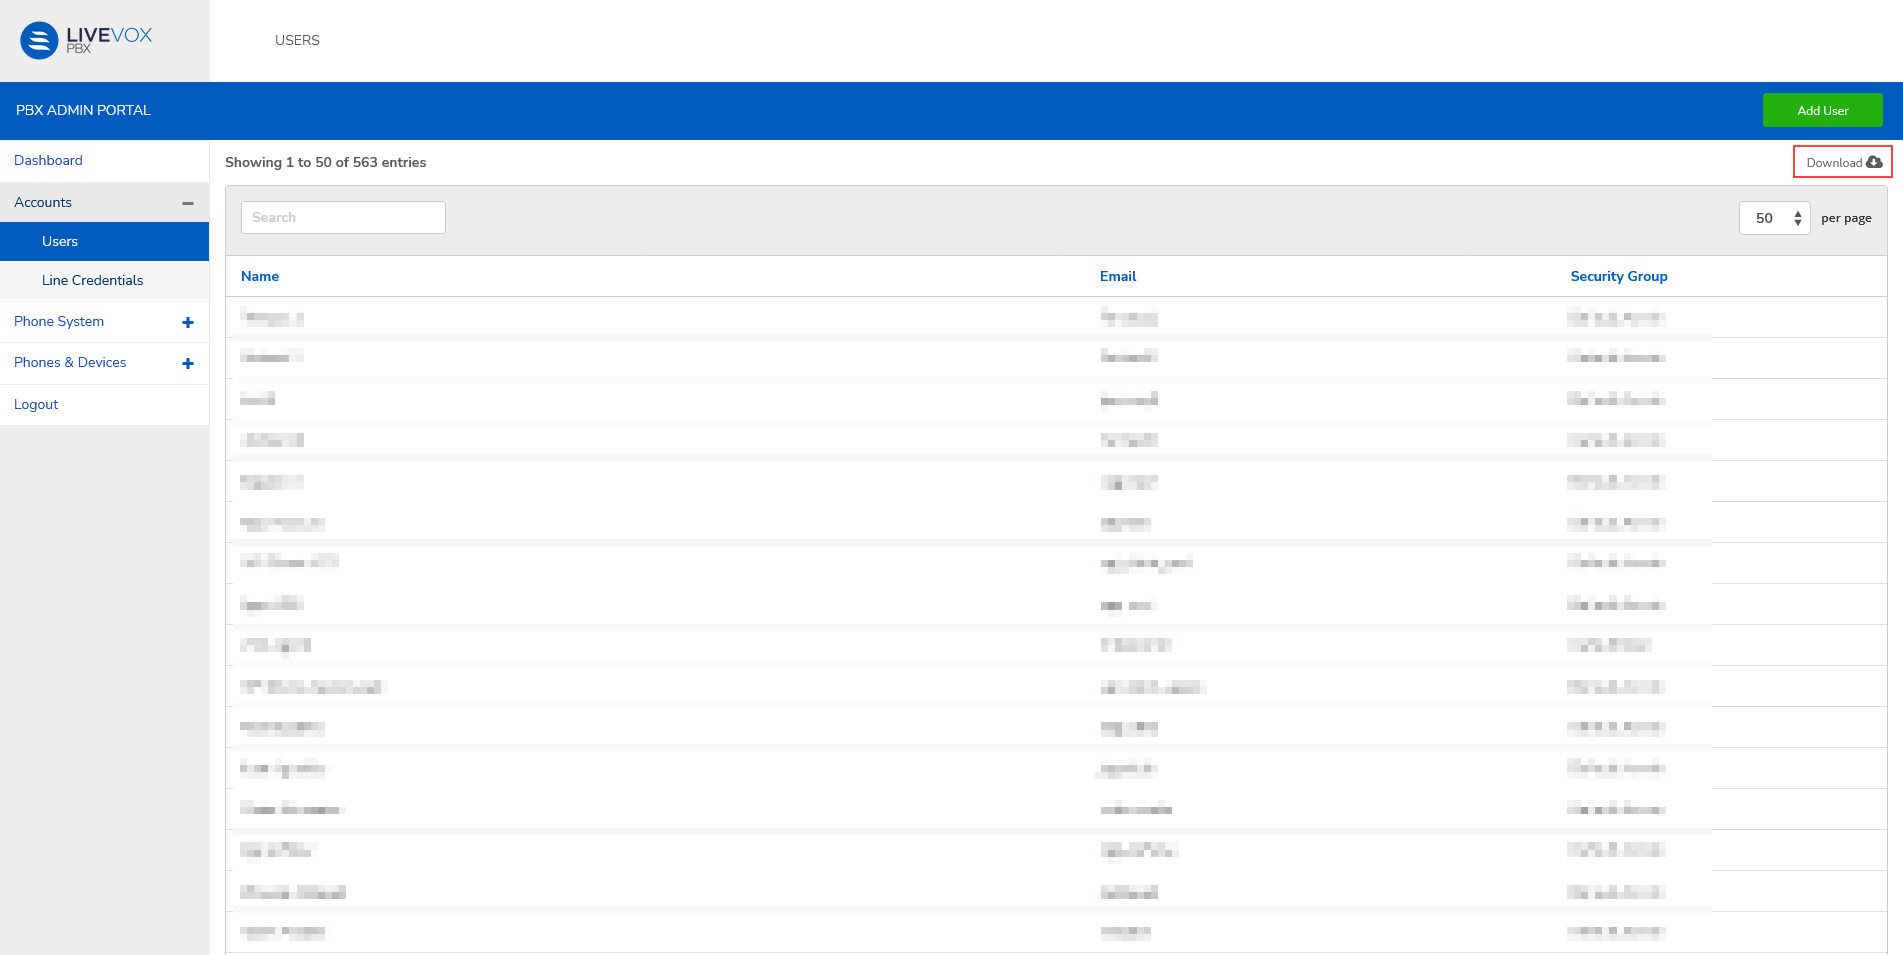
Navigate to Accounts > Users. The Users screen tabulates the details of all the users currently in the system.
Click Download to save the user database on your local computer in .csv format.
Add a user
- Click Add User. The ADD USER screen appears.
Enter the required details in each of the tabs.
General tab
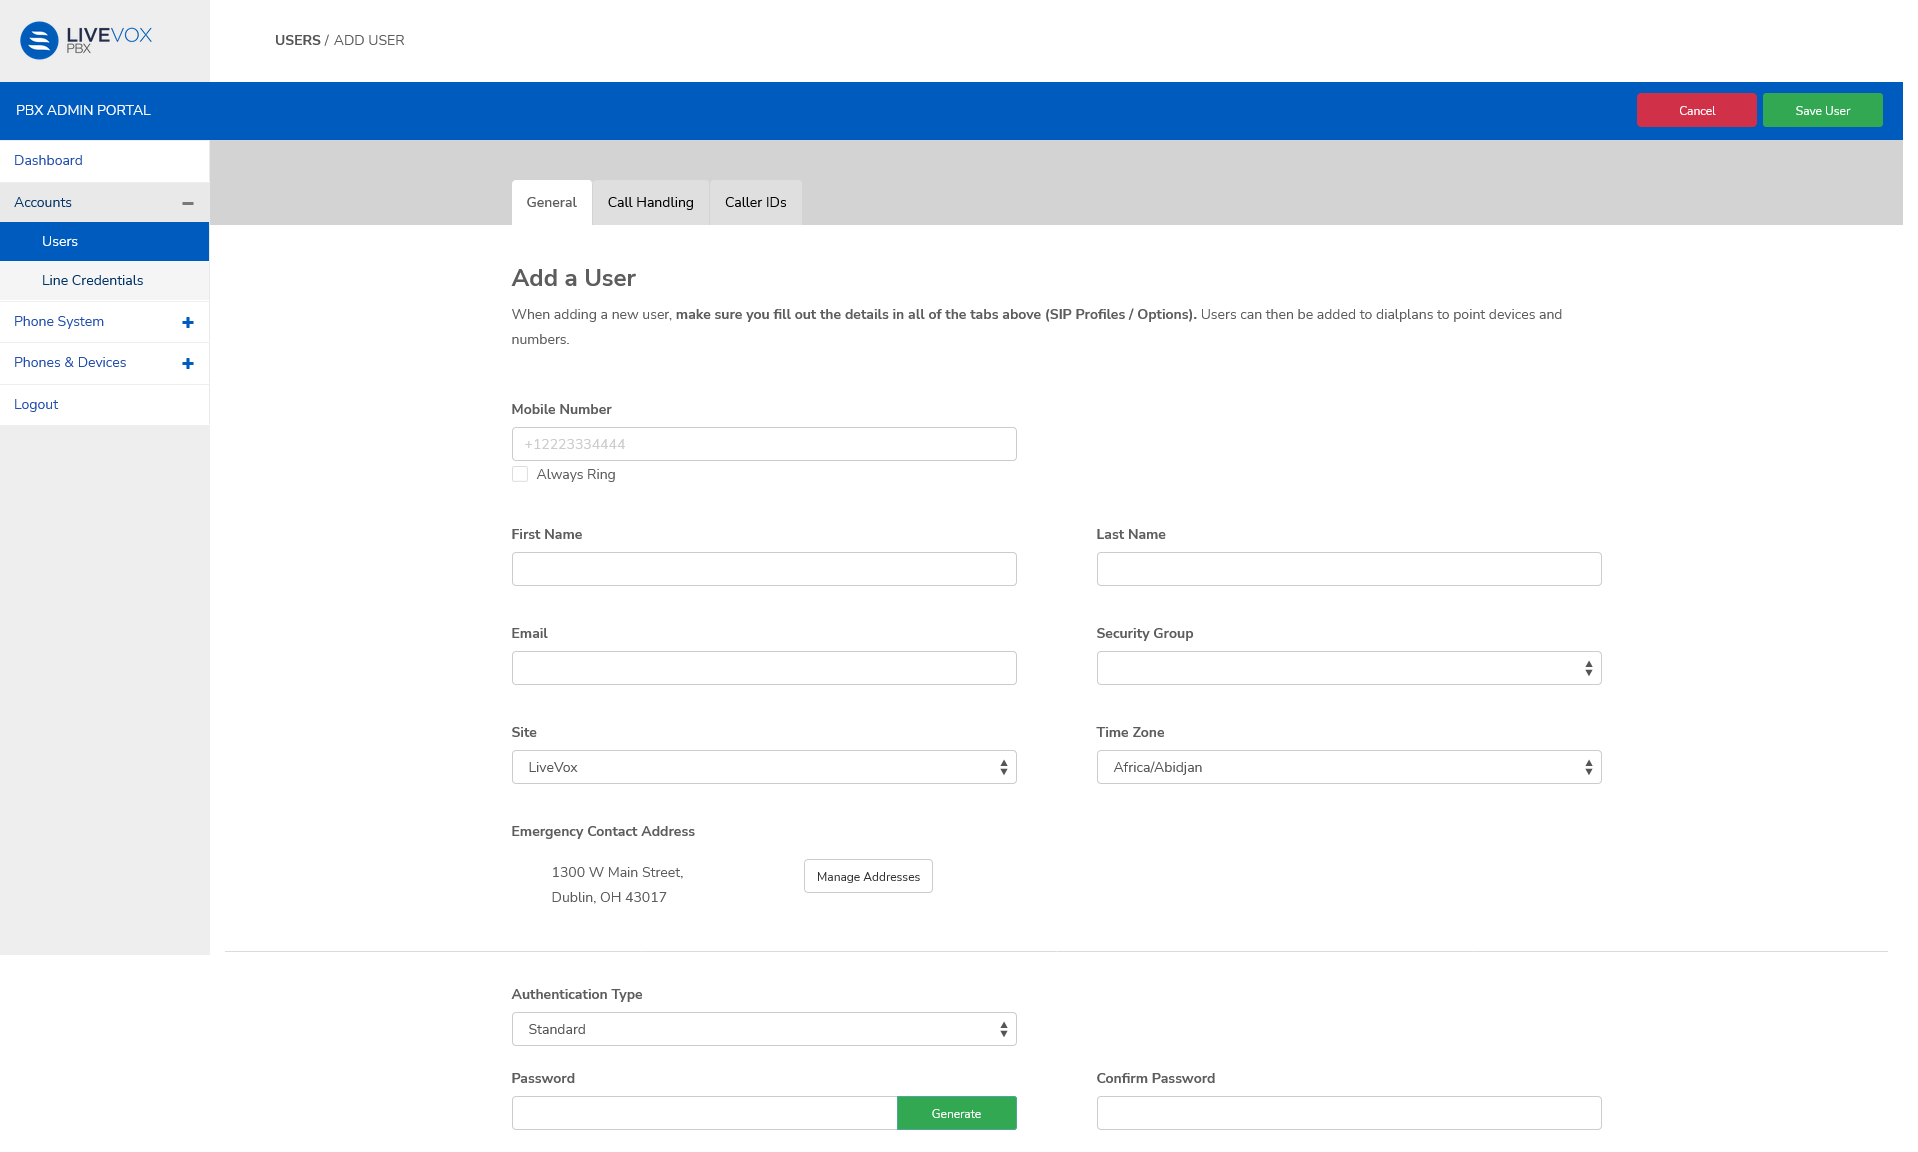
Field Description Mobile Number Enter the contact number of the user. First Name Enter the user's name. These fields are mandatory. Last Name Email Enter the user's email ID. This field is mandatory because this is where the welcome credentials will be sent. Security Group Select the security and permissions group based on the user's role. For example, admin or user. Site Use the dropdown menu to assign the user to a site. Time Zone Time zone of the user Emergency Contact Address The default address is: 1300 W Main Street, Dublin, OH 43017 Manage Addresses Click to edit the emergency contact address.
Authentication Type Select the authentication method to be enforced when the user signs in.
- Standard
- SSO
Password Enter a password or click Generate to use a system-generated password.
The password should contain 8 digits with at least one uppercase letter, one lowercase letter, a special character, and a number.
Confirm Password This value must match the value in the Password field. Call Handling tab
The Call Handling tab defines how an incoming call is handled. The fields establish the call flow.
For example, if the agent is active, the call should ring for 20 secs or a maximum of 4 rings. If the call is unattended, then it is transferred to the number provided in the Number field.
(What is the use of order here? What sequence does it establish?)
Set the Click Add Row and enter the required details in each field.
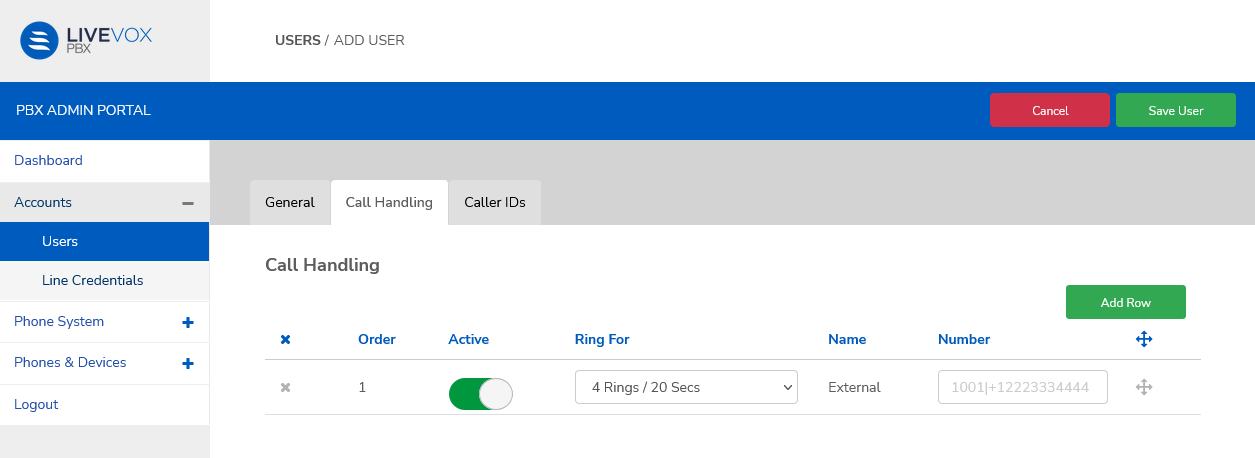
Field Description Order Use the multidirectional arrow to move rows up or down. This determines the sequence in which the call will be answered. Active Use the slider to set the status. Ring For Select a value from the dropdown menu. Name External Number Specify the number the call should be transferred to, if the call is unattended within the specified rings/time. Caller IDs tab
Set the user's caller ID on internal calls, outbound calls, and to emergency numbers.
Enter the extension number or the Caller ID Number of for the agent.
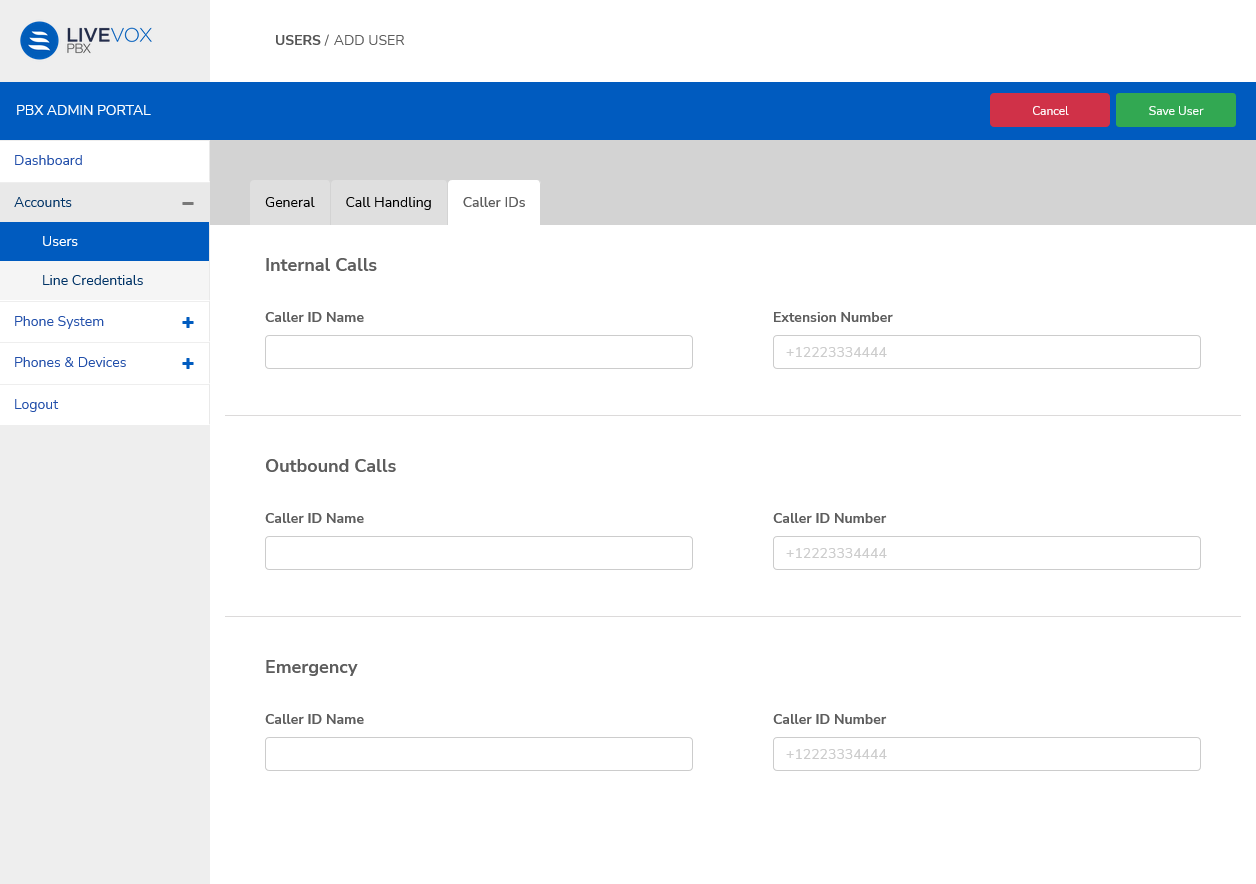
Field Description Internal Calls Caller ID Name Enter the Caller ID Name for the agent. Extension Number Enter the extension number. Outbound Calls Caller ID Name Enter the Caller ID Name for the agent. Caller ID Number Enter the Caller ID number. Emergency Caller ID Name Enter the Caller ID Name for the agent. Caller ID Number Enter the Caller ID number. - Click Save User to complete the process and return to the Users screen. The user appears as a new row in the table.
Edit or Delete a User
- Click the required row in the table on the Users screen. The Edit User screen appears.
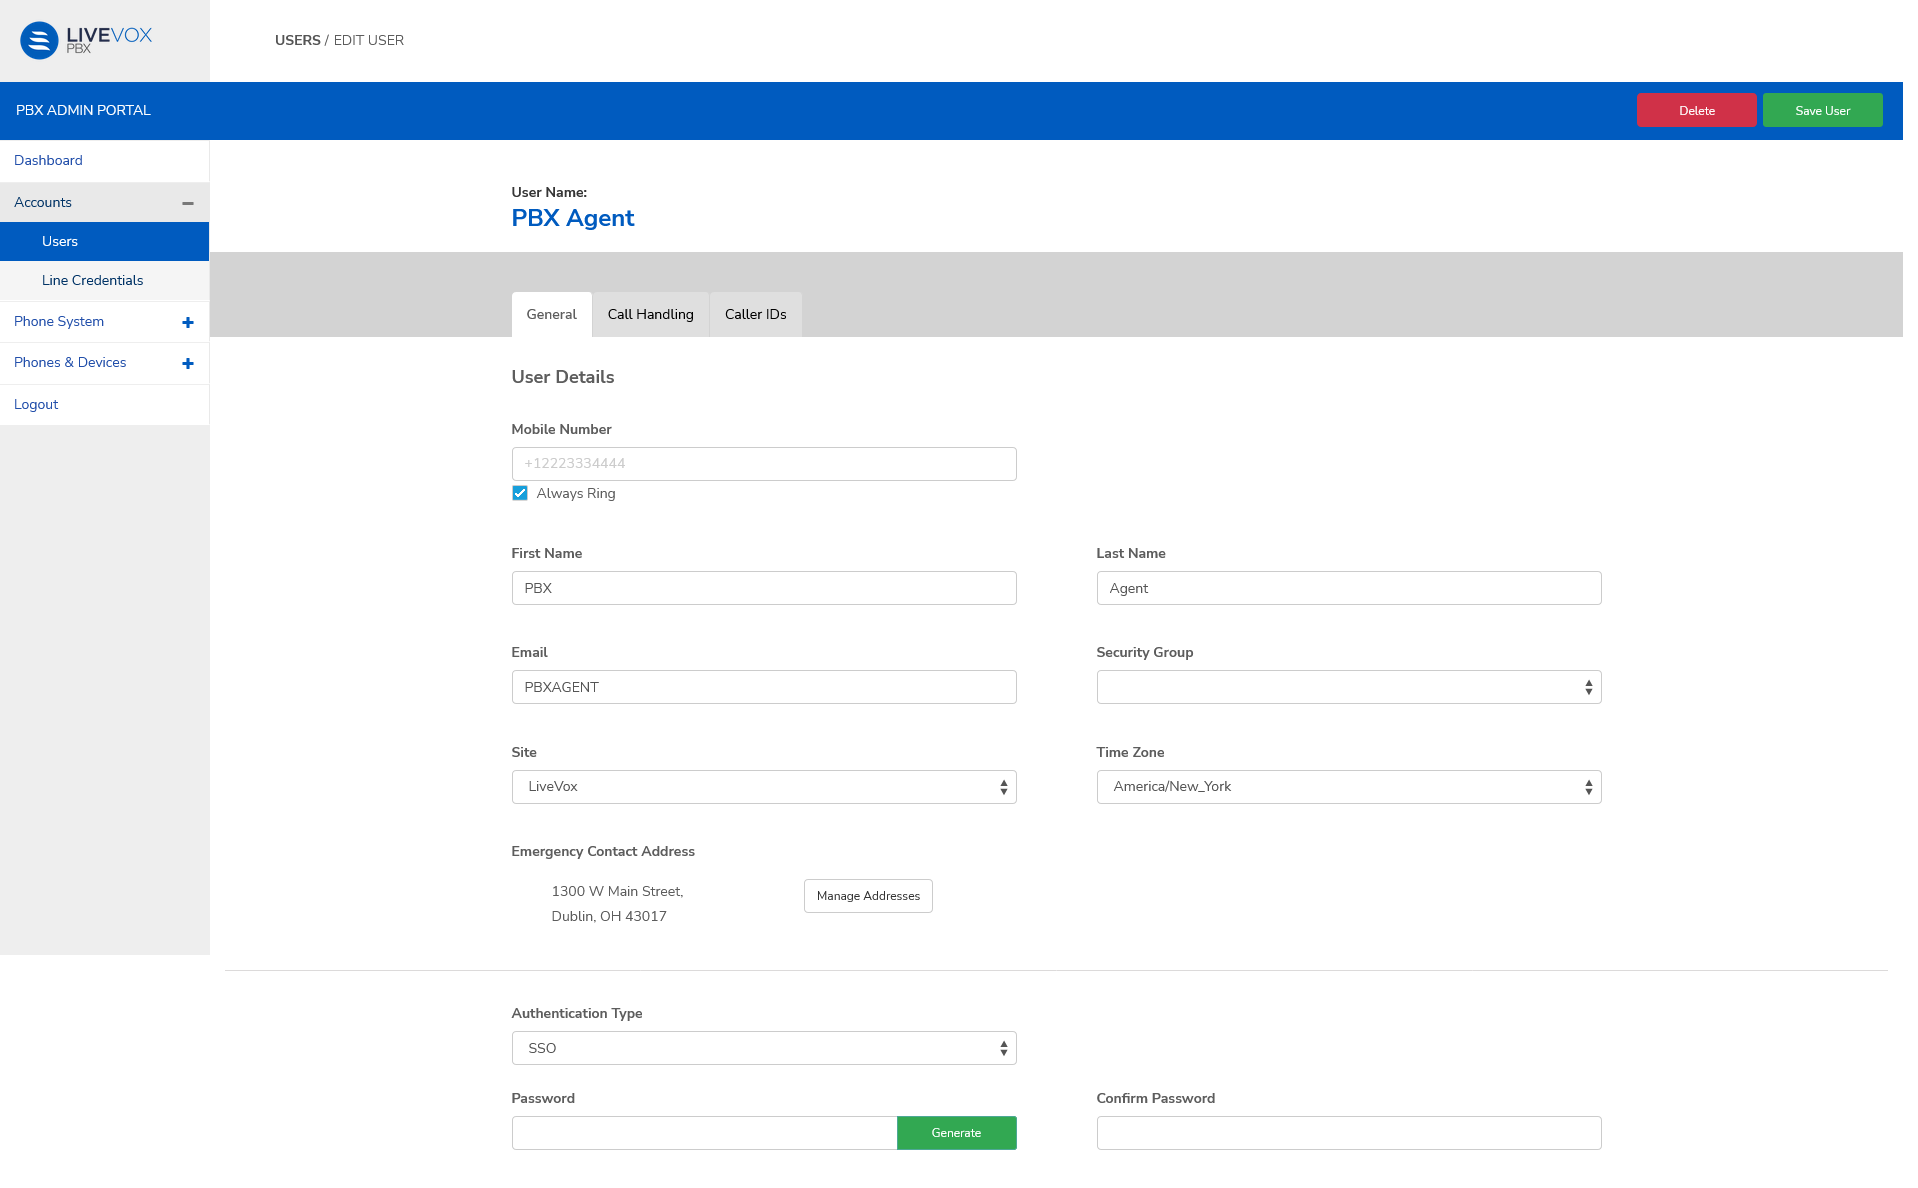
Edit the fields if required. See Add User for field descriptions.
The next actions you may take on this page are:
UI element
Description
Delete Click to delete the user. In the confirmation popup window, click Yes, Delete!
On deletion, the page redirects to the Users screen.
Save User Click to save your edits and return to the Users screen.
Manage SIP Credentials
Navigate to Accounts > Line Credentials.
Session Initiation Protocol (SIP) credentials allow users to make and receive phone calls from SIP phones. The SIP Credentials page contains SIP user account details including configuration data for the LV PBX service.
Click Download to save the SIP credentials database on your local computer in .csv format.
Add an SIP Credential
Click Add SIP Credentials.
Enter the required details in each of the tabs.
Basic Details tab
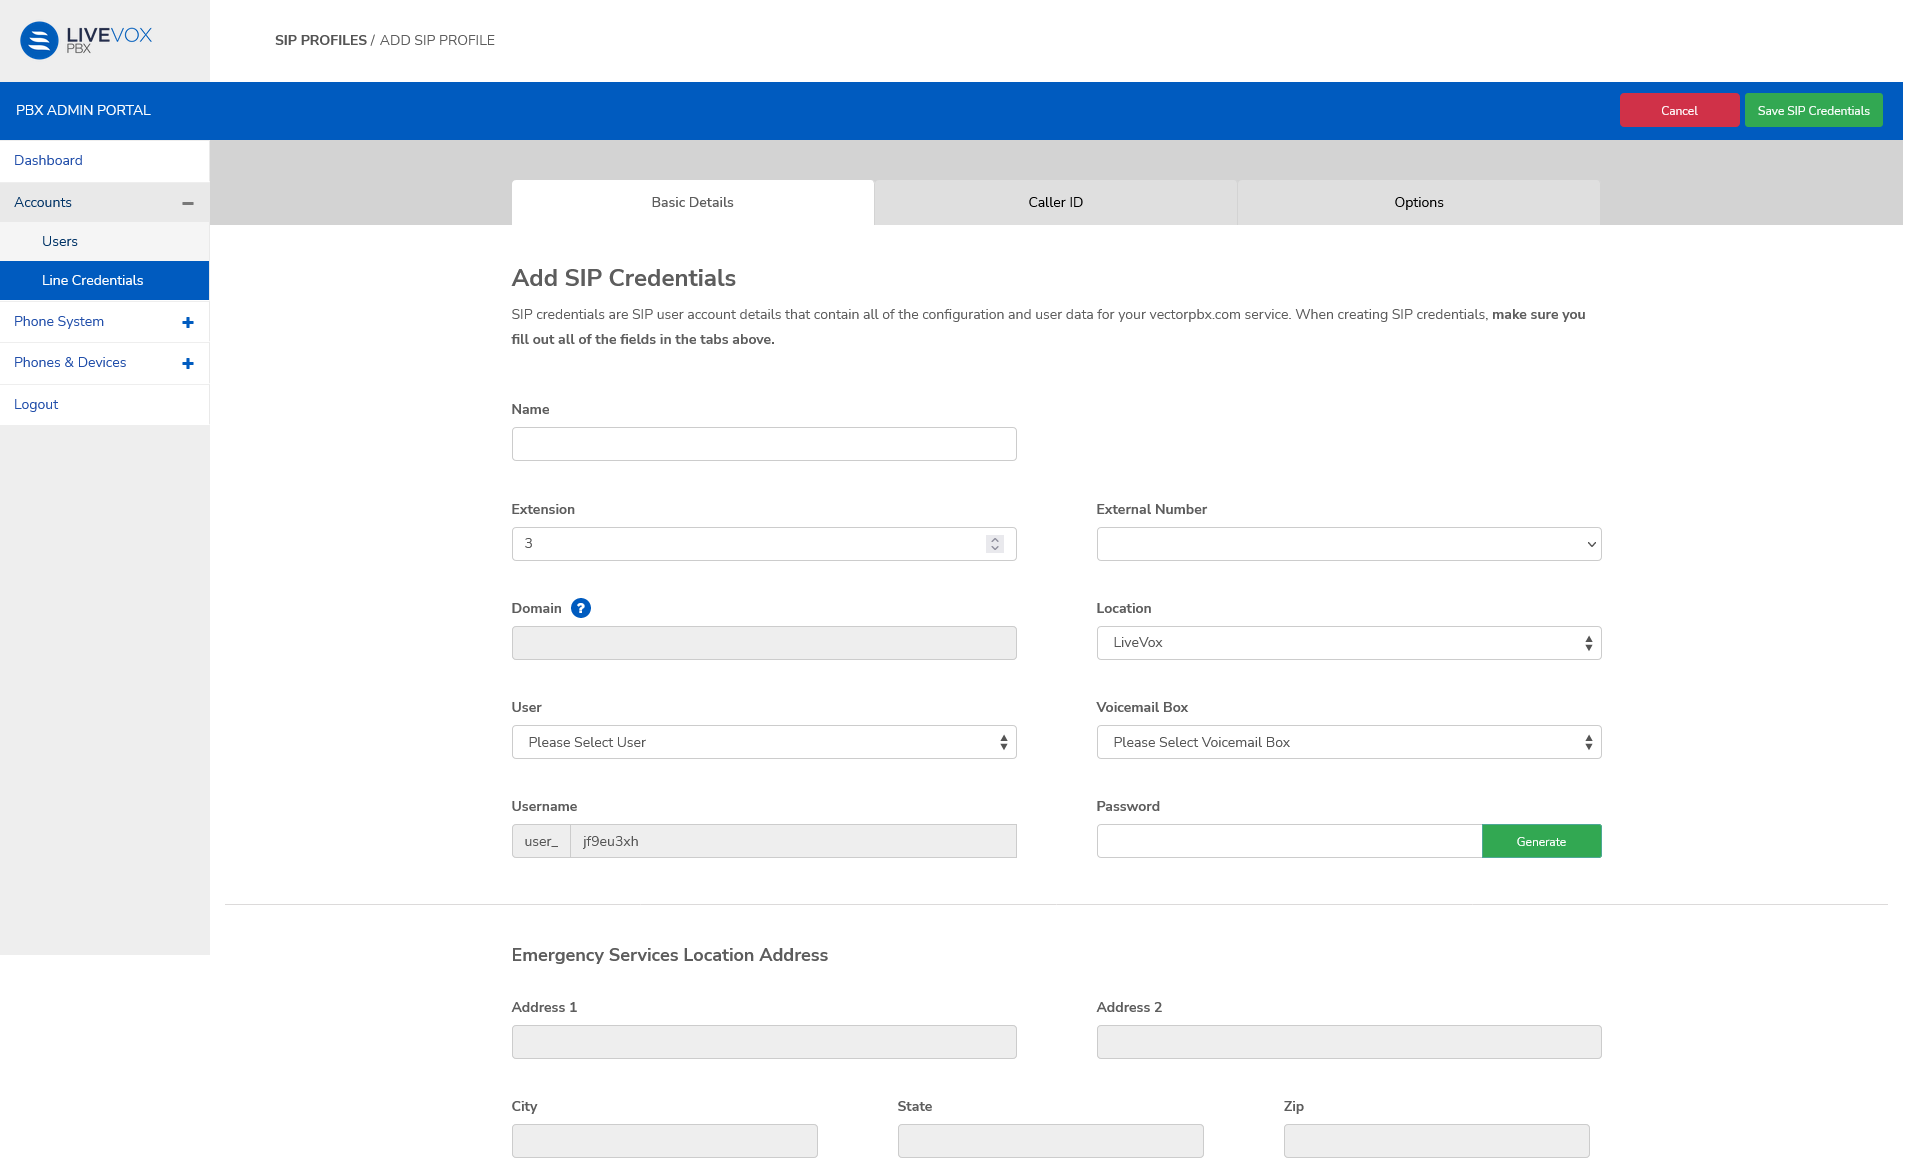
Use the dropdown menus to select values.
Field Description Name Enter the SIP user name Extension Enter the number that the SIP user can be reached at, using an SIP phone or deskphone. External Number Enter the number that the SIP user can be reached at, can be a number provided by the company. Domain This field is greyed out and cannot be set by the client. Location Select the site location that this SIP credential is associated with. User Select the LVP user that this SIP credential is associated with. Voicemail Box Select a voicemail box to associate with this credential. For information on adding a voicemail box, see Adding a Voicemail Box. Username This field is auto-populated. Password Use the default password or enter a password manually or click Generate to use a system-generated password.

Changing the password disables any device currently using these credentials. You will have to reconfigure your device accordingly.
Emergency Services Location Address Address 1 Enter a valid, physical address that emergency service personnel may reach the user at. Address 2 City State Zip Caller ID tab
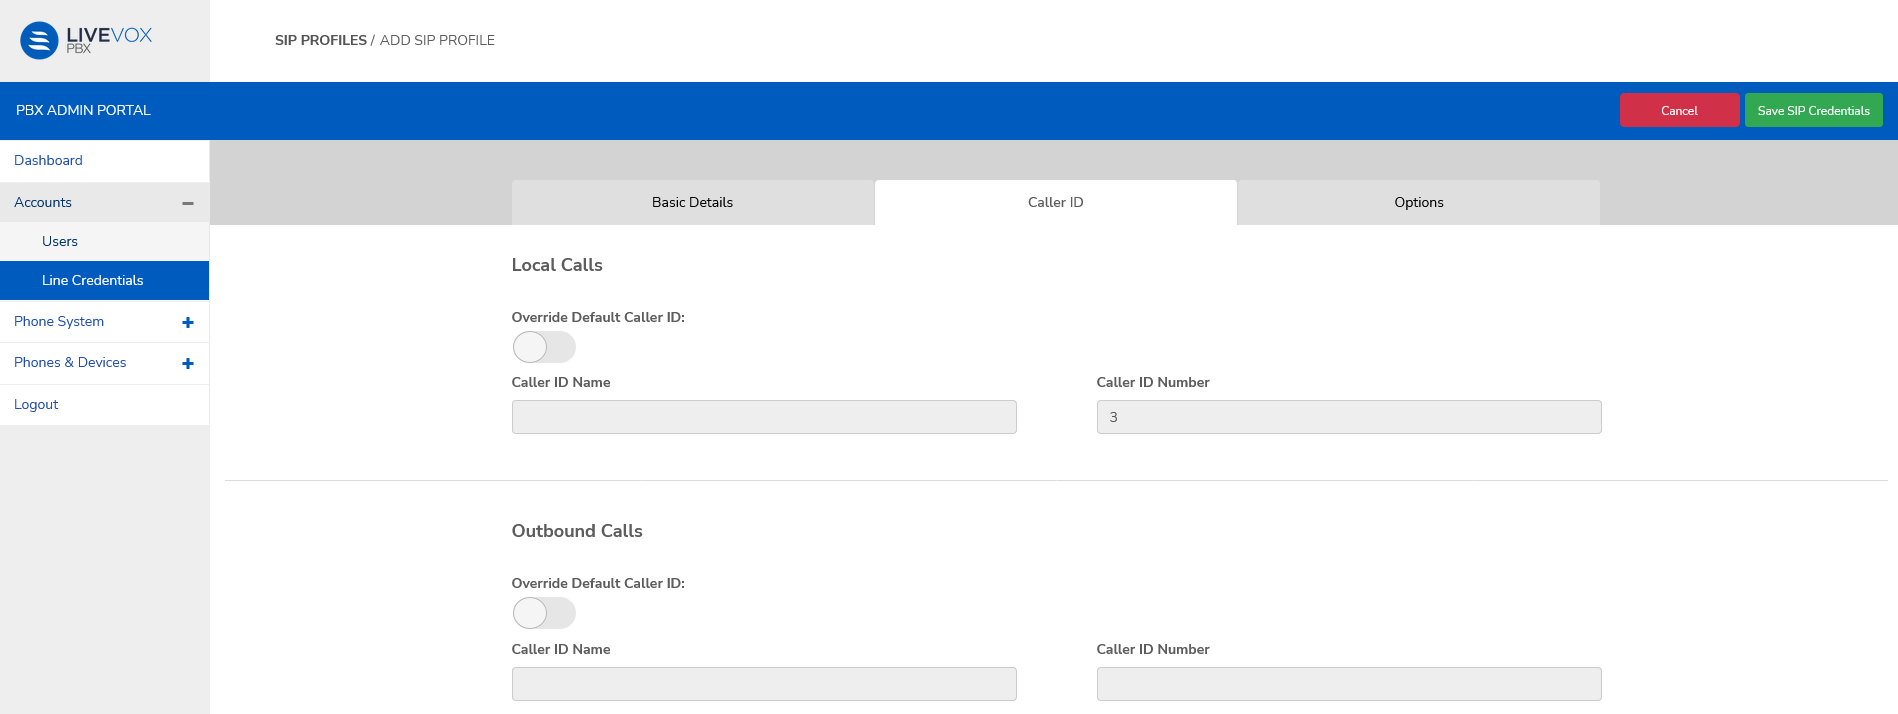
Field Description Local Calls and Outbound Calls Override Default Caller ID Use the slider to determine the visibility of the default caller ID. Caller ID Name Enter the Caller ID Name for the agent. Caller ID Number Enter the Caller ID number. Options tab
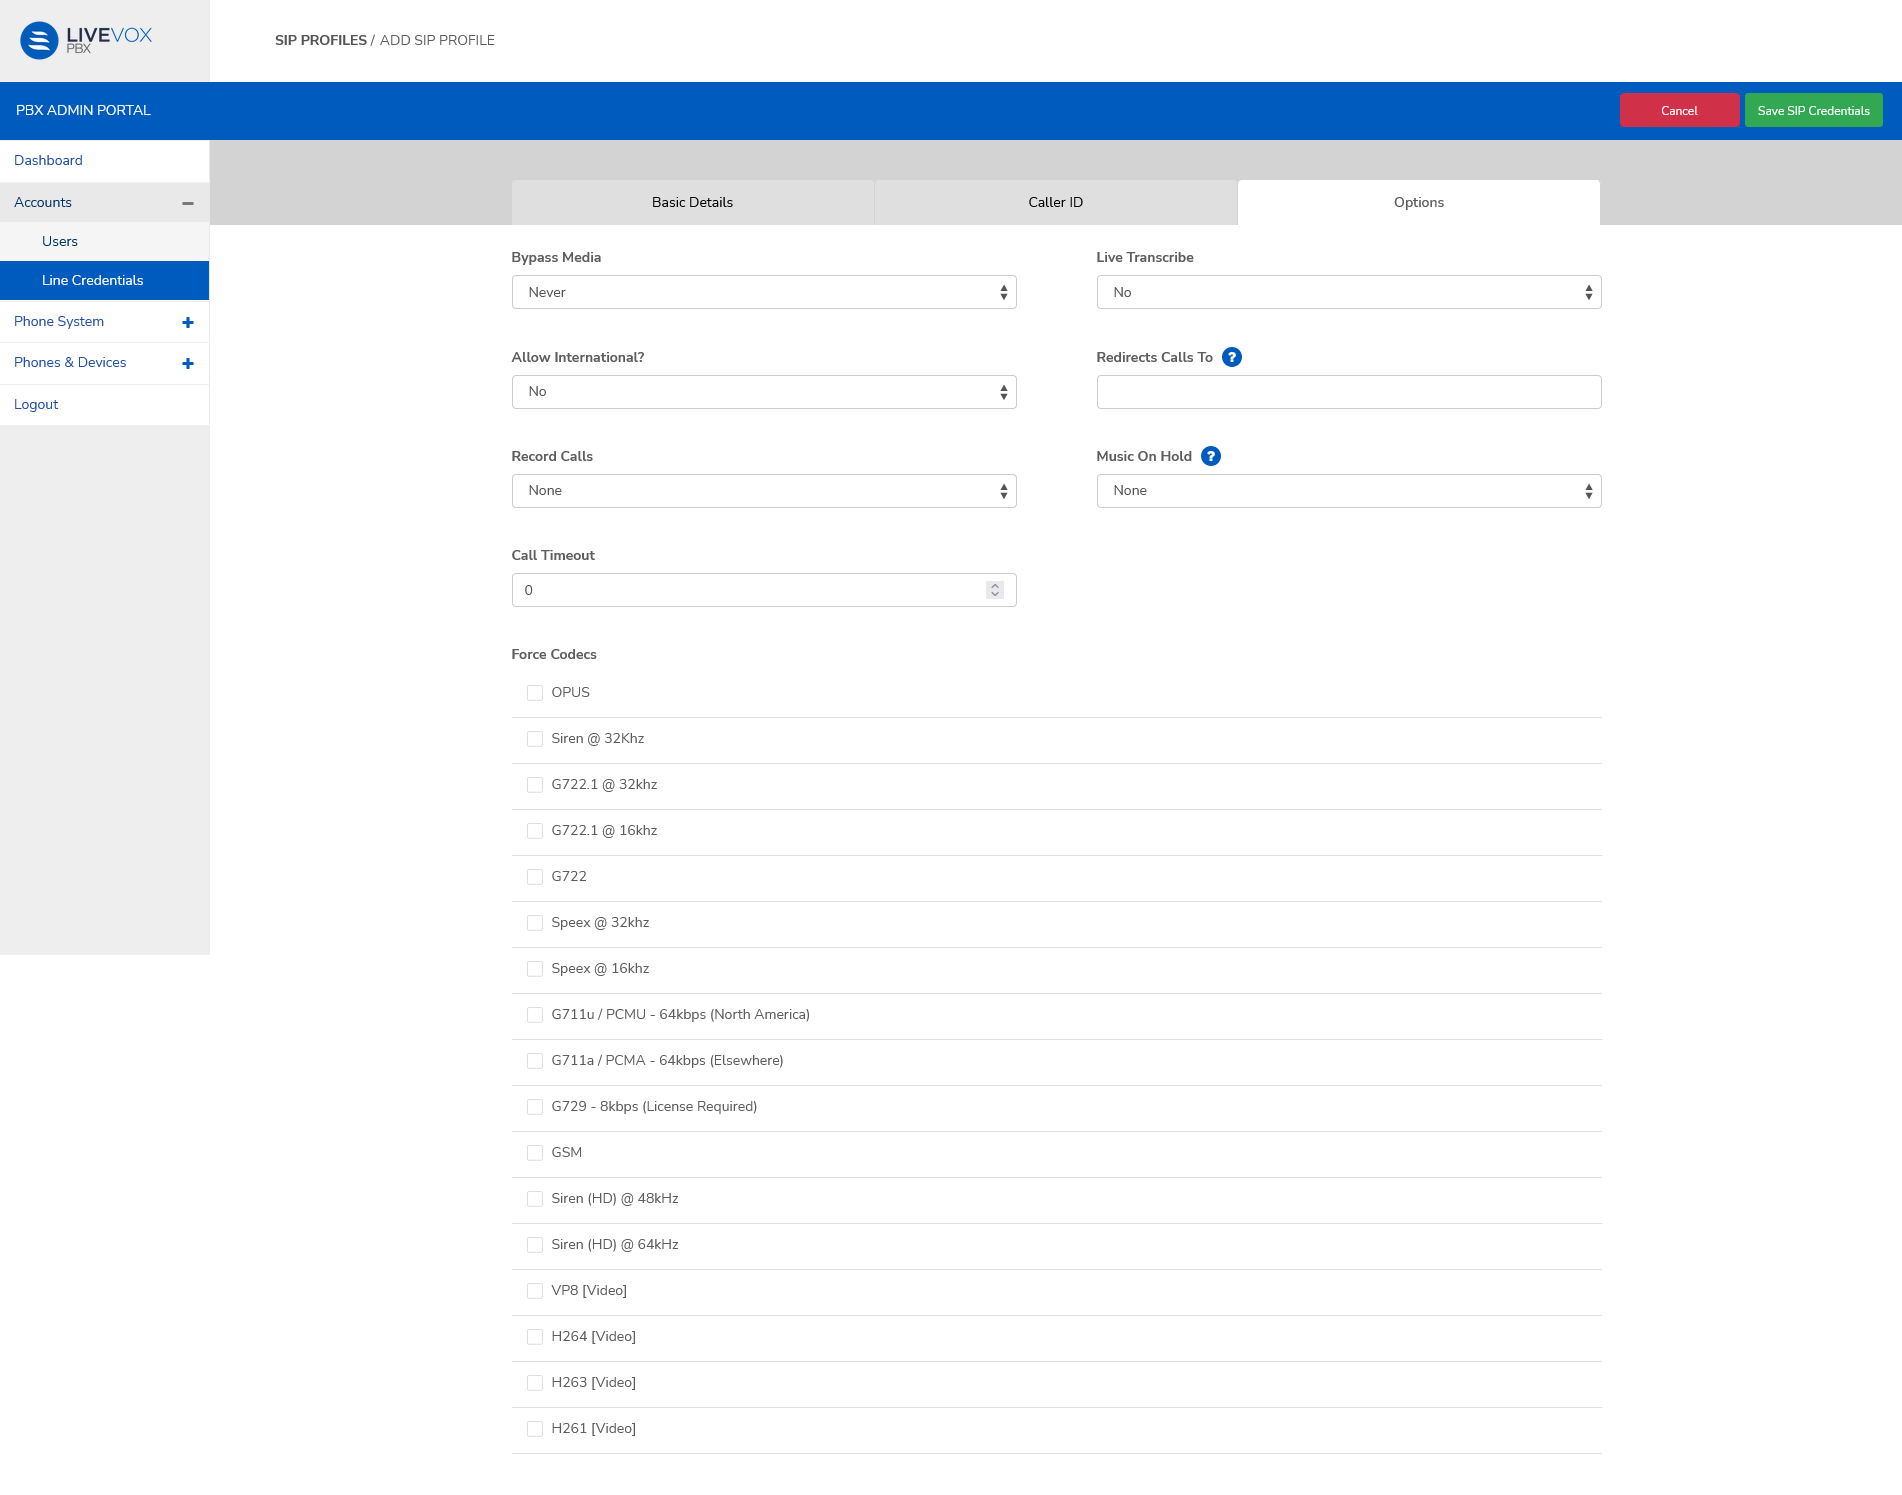
Field Description Bypass Media Never
Always
Live Transcribe No
Yes
Allow International? No
Yes
Redirects Calls To Enter a valid telephone number Record Calls None
All
Inbound
Outbound
Local

An agent can record their calls only according to the option configured here.
Music On Hold For information on managing files that can be used here, see Adding Hold Music. Call Timeout Duration in seconds that unanswered inbound calls will ring for before being disconnected. Force Codecs OPUS
Siren @ 32Khz
G722.1 @ 32khz
G722.1 @ 16khz
G722
Speex @ 32khz
Speex @ 16khz
G711u / PCMU - 64kbps (North America)
G711a / PCMA - 64kbps (Elsewhere)
G729 - 8kbps (License Required)
GSM
Siren (HD) @ 48kHz
Siren (HD) @ 64kHz
VP8 [Video]
H264 [Video]
H263 [Video]
H261 [Video]
Edit or delete a SIP credential
- Click the required row in the table on the SIP Credentials screen. The Edit SIP Profile screen appears.
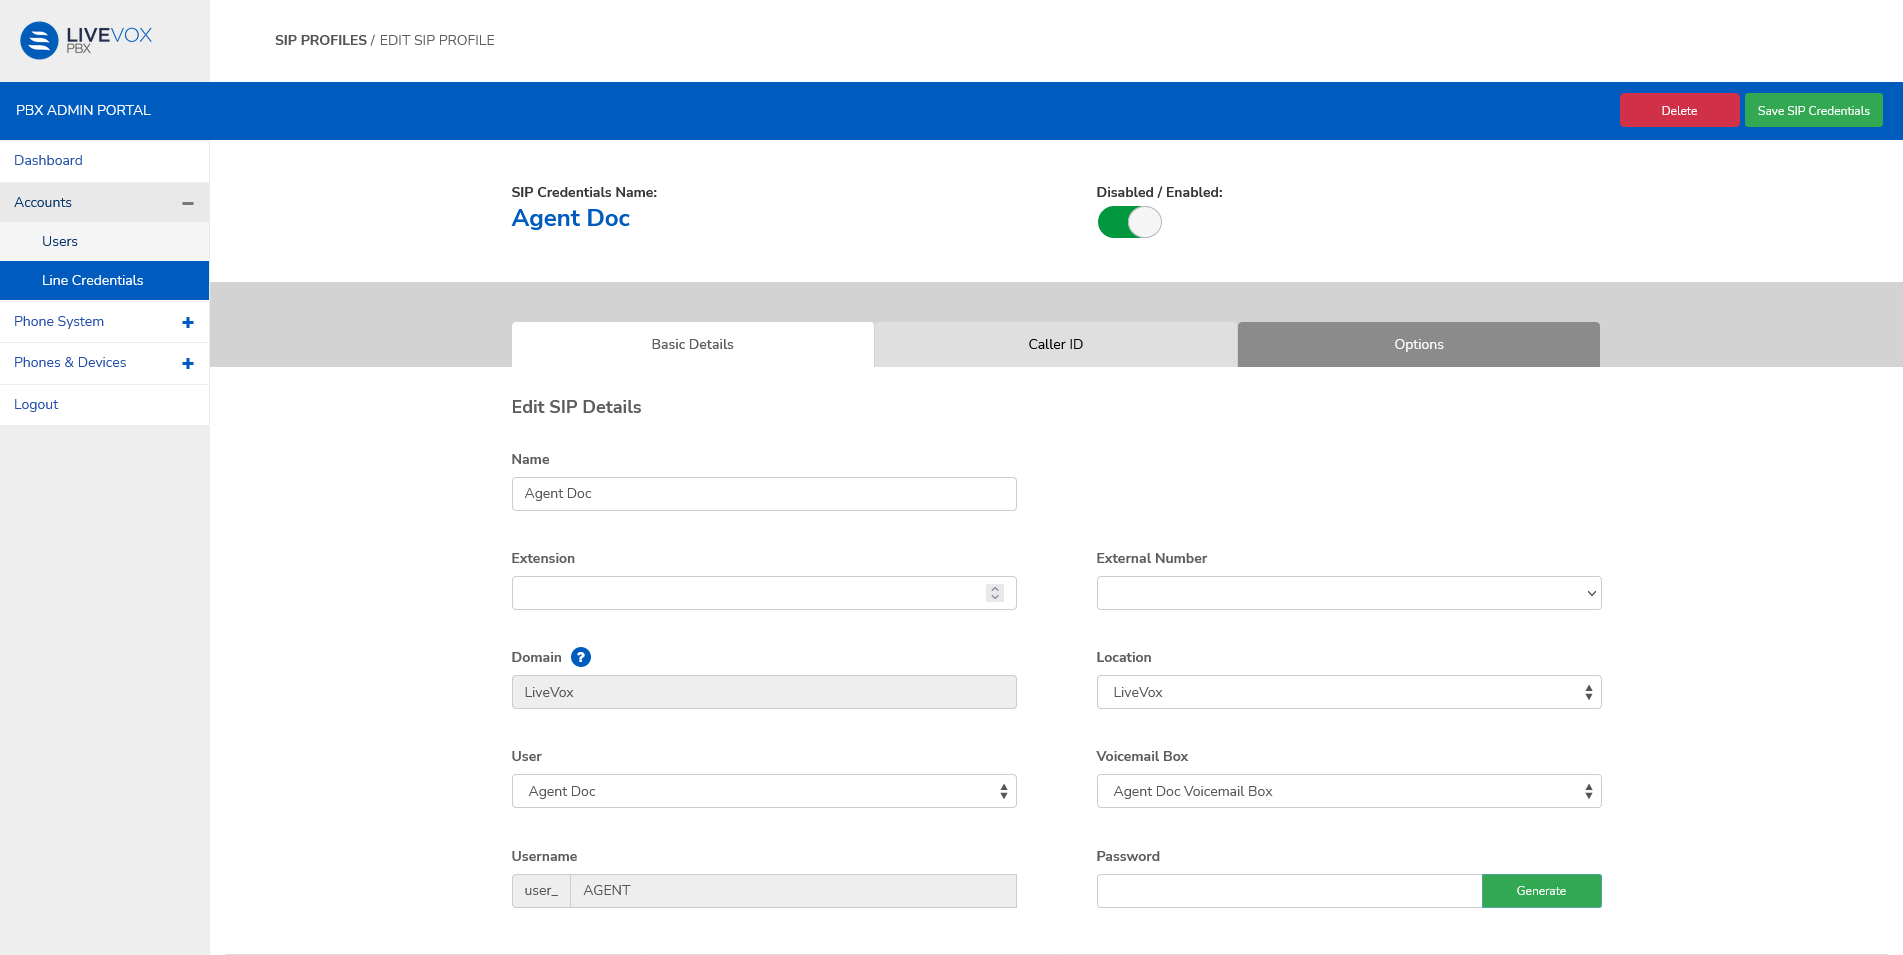
Edit the fields if required. See Add a SIP Credential for field descriptions.
The next actions you may take on this page are:
UI element
Description
Delete Click to delete the SIP profile. In the confirmation popup window, click Yes, Delete!
On deletion, the page redirects to the SIP Credentials screen.
Save SIP Credentials Click to save your edits and return to the SIP Credentials screen.